ZBrushCentral

diaplacement and normal maps in maya

Can anyone help me out and give me some pointers on how to properly get my displacement and/or normals maps from zbrush to display properly in Maya? I’m using zbrush 3.5r3 and maya 2010. My maps look like they are good but I can’t seem to get the right settings in maya or something. I have attached several images of settings and other things to possibly help you get an idea of what I’m doing and what steps I need to correct it.

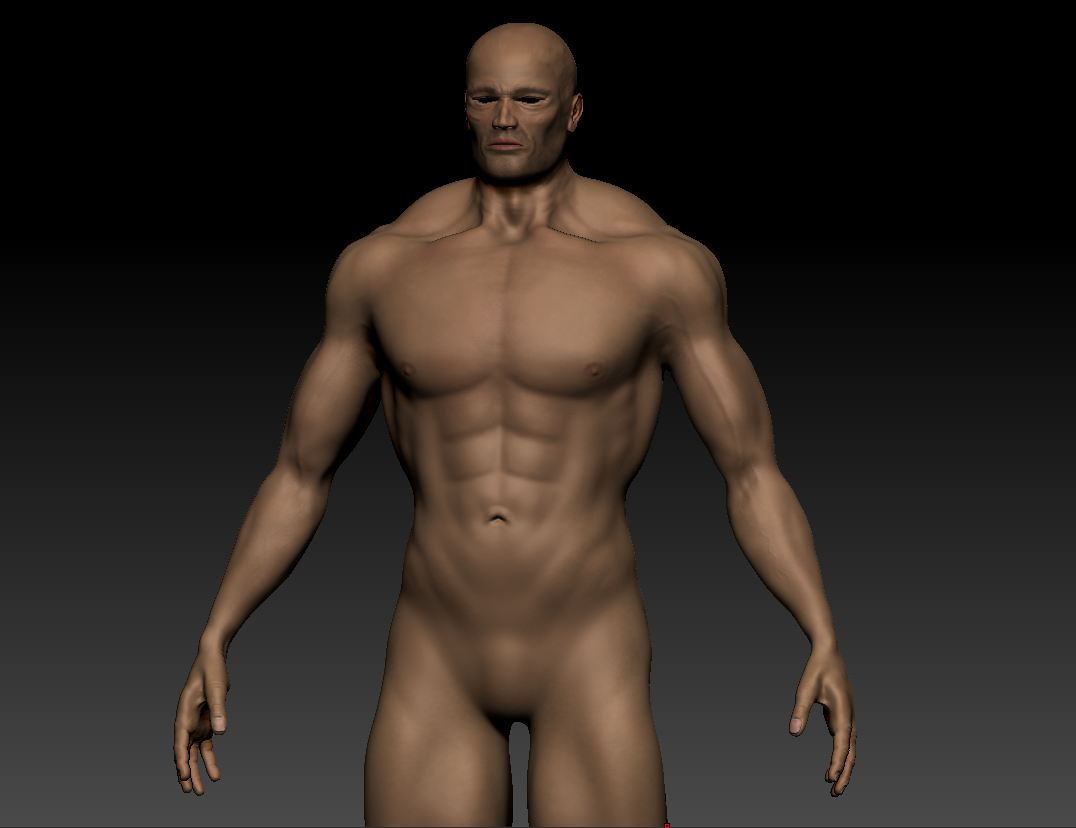
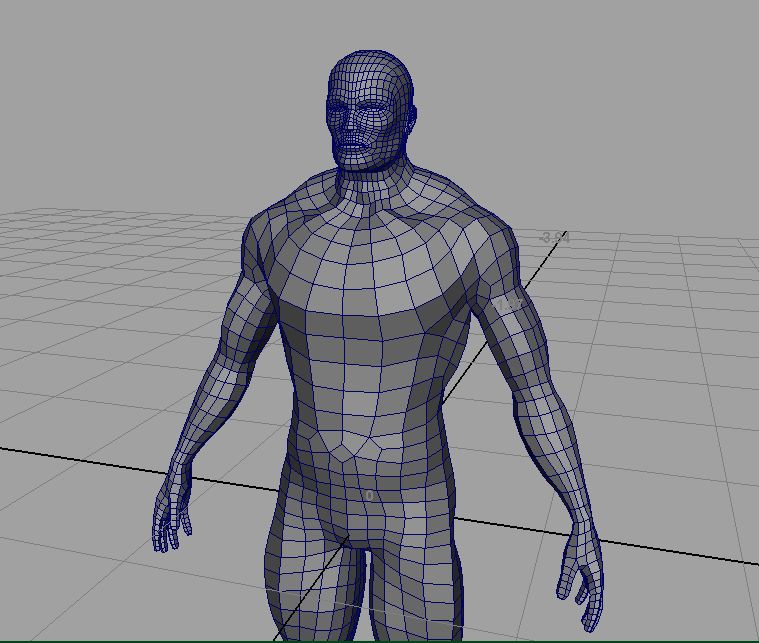
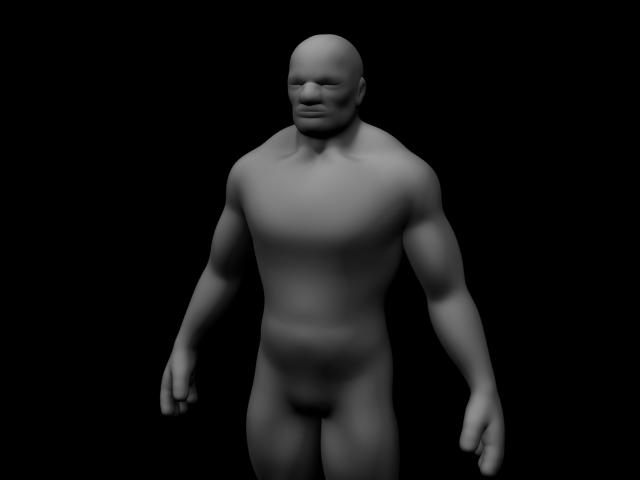
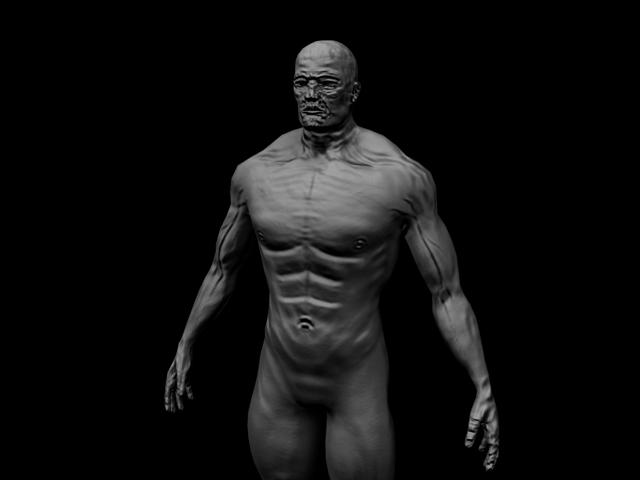
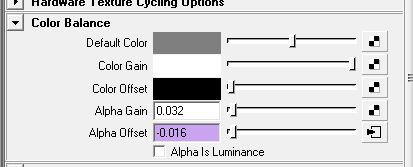
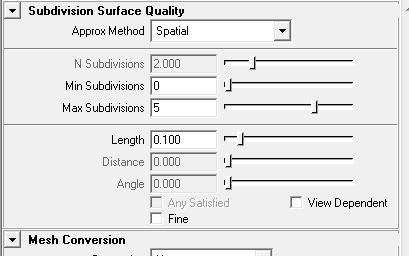
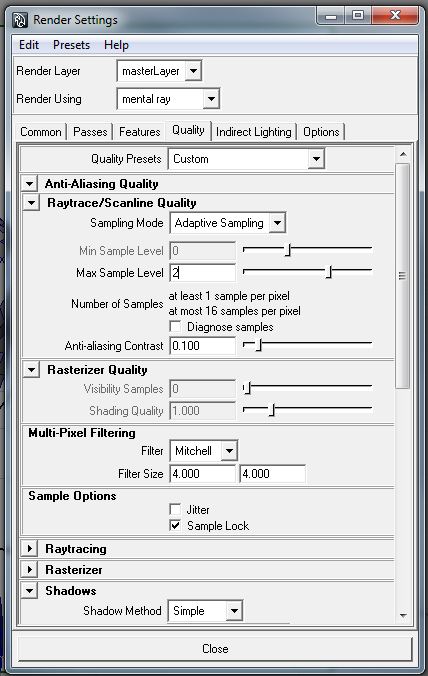
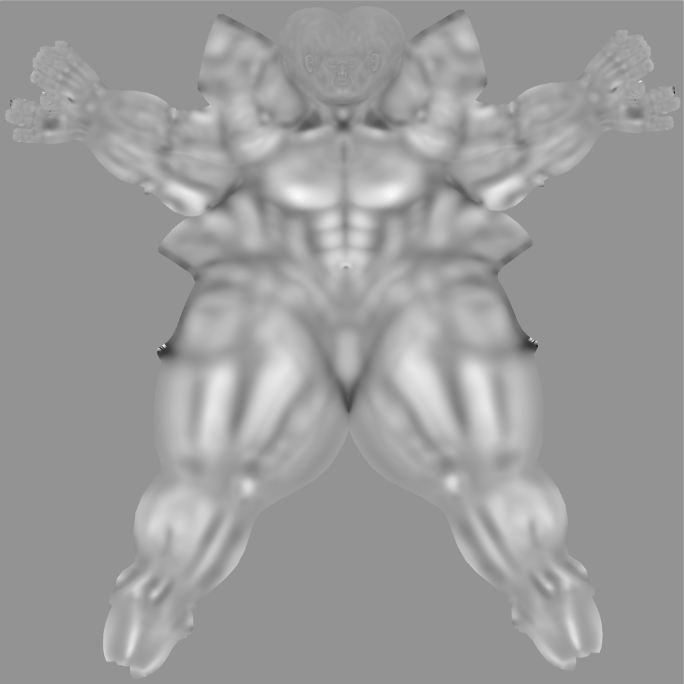
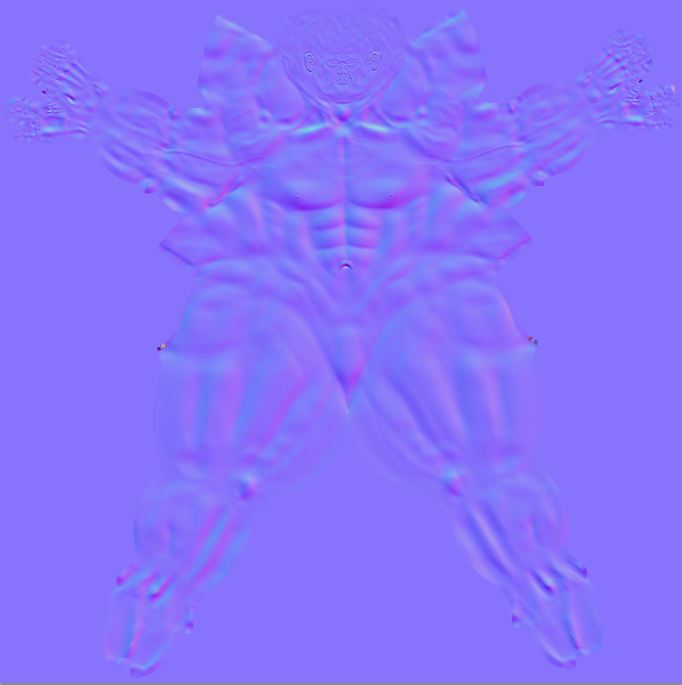
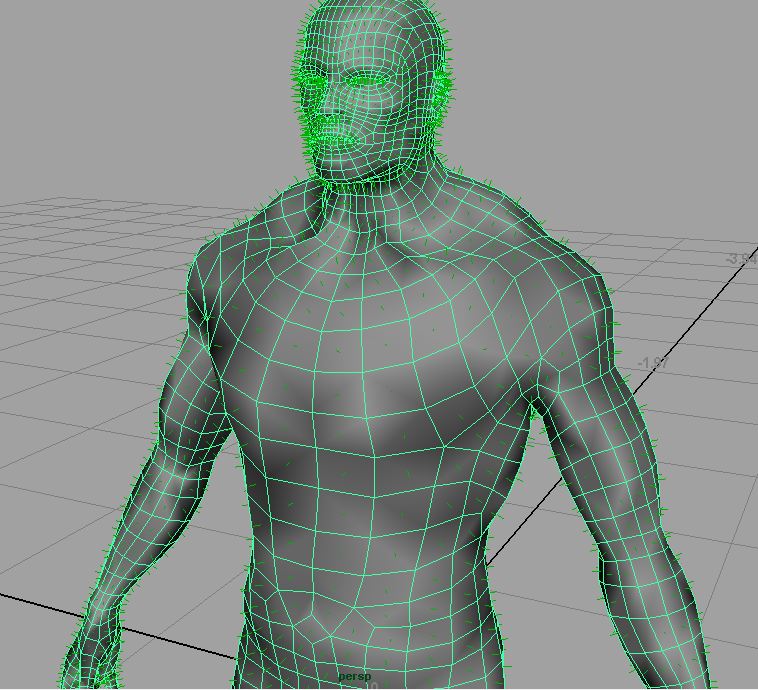
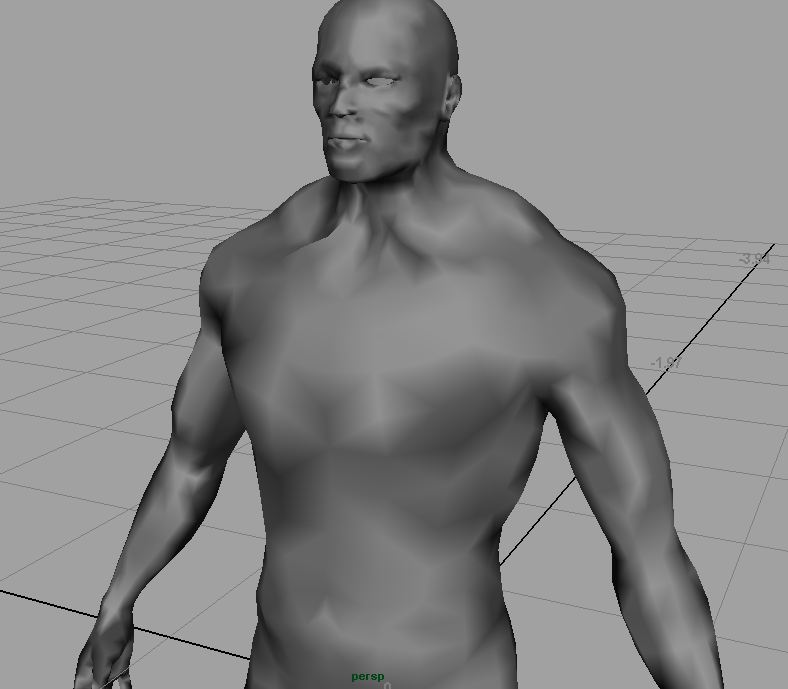
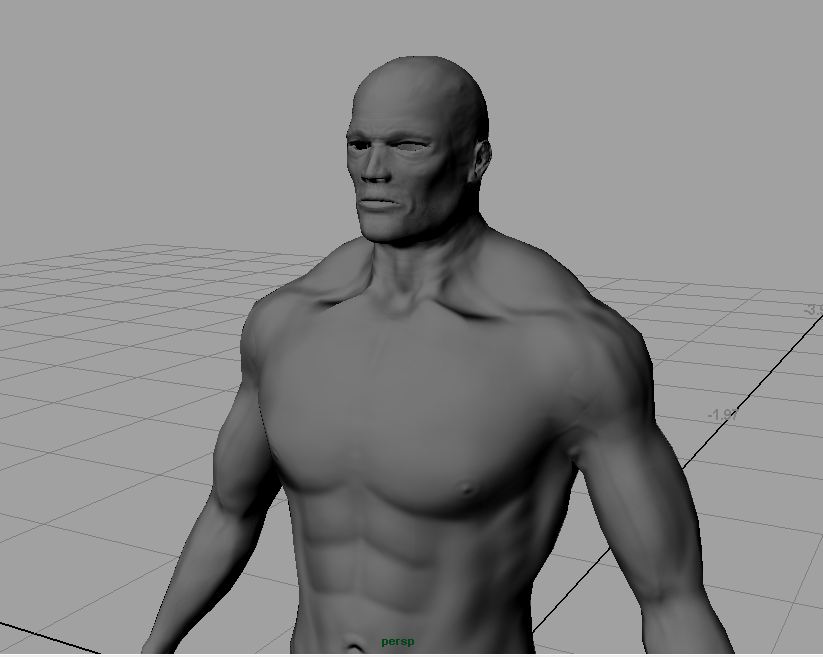
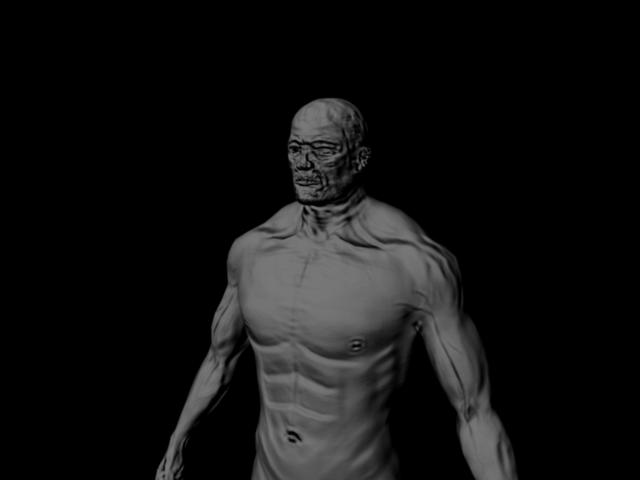
I’ve included the images of it in zbrush of what it should look like as well as the base wireframe mesh inside of maya, normal map, displacement map, render settings, approximation settings, color balance settings (alpha offset) and renders of both the normal map and displacement map.

You can see from the renders that the displacement map render, the model is really bloated with no definition. I don’t even know what to say about the normal map render. I checked to make sure my normals are facing the right direction and they are. I even flipped them just to make sure and the render was equally as bad.

I have also used mudbox 2010 in the past and the normal and displacements from it as 32bit .exr files seem to work great. If anyone here is familiar with it, I have even tried doing a “sculpt using displacement map” in mudbox from the zbrush displacement in order to generate the maps from mudbox instead. But even the displacement from zbrush really screws up the model in mudbox making it useless to extract my maps from it (if that makes sense to anyone).

Can anyone please help!?

Attachments

zbrush.JPG

wireframe_maya.JPG

maya_disp_render.jpg

maya_normal_render.jpg

alpha_offset.JPG

approximation_settings.JPG

render_settings.JPG

disp.JPG

normal.JPG

I don’t know if my mesh is messed up or what. I’ve attached a couple more images. One is of the normals showing they are facing the right direction, the other is after I have turned on Normals > Soften Edge. I’m not sure what is causing all of the weird shading after doing this. I have never seen this before. Has anyone ever experienced this and know what to do to correct it. I really don’t want to have to start it all over.

Thanks!

Attachments

normals.JPG

soften_edge.JPG

well it appears that somehow all of my maps are actually being inverted inside of zbrush. Even though my normals are facing the proper way in maya and in zbrush, the maps are being generated with the normals facing the wrong direction. What should be pushing out is being pulled in and vice versa.

I tried to use the “Flip” under display properties in zbrush so I could see if the maps would be generated properly even though the normals would be backwards in zbrush, but every time I click it zbrush crashes even at the lowest sub divison level.

Has anyone experienced this before and know how to correct it? I desperately need help.

okay, now I’m even more confused. Attached are a couple more images, one is how the normal map looks in the viewport in maya and the other is a render of that normal map (bump set to “Tangent Space Normals”). Once again the normals are facing the correct direction.

Why is the render so messed up?

Attachments

normal_preview.JPG

normal_render.jpg

okay, not sure if anyone has experienced this before or not, but what it actually seems like was happening is that maya just doesn’t like .psd files for normal and displacement maps. After exporting them from zbrush as a .tif and then converting it to either .exr or .map, they work fine.

Unlock Normals > Soften Edge

Check “Alpha is Luminance”

You have the material, and in the hypershadem you have the SG of the material

Where is “Displacement mat.” add a displacement node, under the Displacement tab. On the displacement, add the displacement map.

If this doesnt work, i might think your uvs aren’t good. Your UV’s where made in zbrush right? Looks like it! If you are doing your uvs in zbrush, make sure you use polygroups, so the uvs, are separate!

Good luck!