ZBrushCentral

Creating Seamless Alphas and Painting Bump Maps

Thanks for sharing this tutorial! I really appreciate it.

However, I do have a Question relating to creating seamless alpha.
Currently, my mesh can not be subdivided more than 5 times( at 2,2 mil.) And at that amount of tris, I cant get enough detail of the deformation from the projection master. So I decided to go with creating bump using alpha.

Im using Aaron sim’s alpha to create my detail. However, after I made the texture 50% ( for the background) , I can get the detail I want.

Problem is, the white part bumps up, which works like regular bump map. But I want the white part to actually goes inside( recess in.) I tried to invert the alpha, it creates a border.

Can anyone please help me with this?

Thanks in advance.

HB

You can see the border as well in the ‘positive’ sample. Your Alpha is not 100% Black on the border. As I can see, you use it WAY to large. And with WAY to much intensity. And th Alpha is fuzzy. So you will NOT see the detail you might expect. I recommend an experiment: Make a 512x512 0,0,0 BLACK pic in PS or whtever you use, then draw lines with different edge blur. Import that and seeeeeeeee what happens. When you Alpha is not 100% Black/white around the edges you WILL end up having a step. However, if you use a radial fade (ALPHA TAB) settings, then this line will vanish as the alpha is rather integrated than slapped on… Had no coffee yet so I hope my confuse words help…
Cheers
Lemo

Of all the things in the world, this is one sweet post any way we can get a zscript of it?? i tried to follow but the part that gets me is trying to place the 3d objects without having em rotate and move all over the place

I am not 100% sure that this will help you in solving what your asking, but just thought that you should be aware of it, if you aren’t already.

I noticed your bump alpha, after being drawn on the canvas has lines through it, and that is it because the texture you have selected has lines through it. That is the default texture that is selected when you select the directional brush, if you change your texture to off , before you draw it out, the lines wont be there

You can see in the image you posted what I am talking about.

I’m trying out this tutorial and I can’t seem to get the ~ and scroll to work as in the example. It just scrolls like normal as if the ~ doesn’t do anything. I’m using Zbrush 3.1. What am I missing here?

You probably have a different keyboard layout… try the key to the left of the “L” key, ò in italy, o with two dots on top for germany & so on…

DanasArt
Please note the date Aurick created the tutorial 11-10-05
This tells me the tutorial applies to a earlier version of Zbrush than 3.1
Myself I was able the other day to scroll my work space so it wrapped around horizontally.
How I did it does mystify my cg brain
Needless to say I’ve been unable to reproduce the scroll horizontal wrap around. :confused:
Note:
There is alternative tool in Zbrush that you can grab a alpha and texture from your work area.
----> MRGBZGrabber <----
You will find the know how to use it in the Pixologic :small_orange_diamond:ZClassroom
Try viewing the Creating custom alpha (Zipper) video.
:slight_smile:

DanasArt

I solved our dilema You can scroll wrap around using the tilda key ~ I find it odd that the tilda key doesn't let you scroll past the edge when I click and drag on the scroll button. Just drag on the work space while holding the tilda key ~ That does allow you to scroll wrap around :D

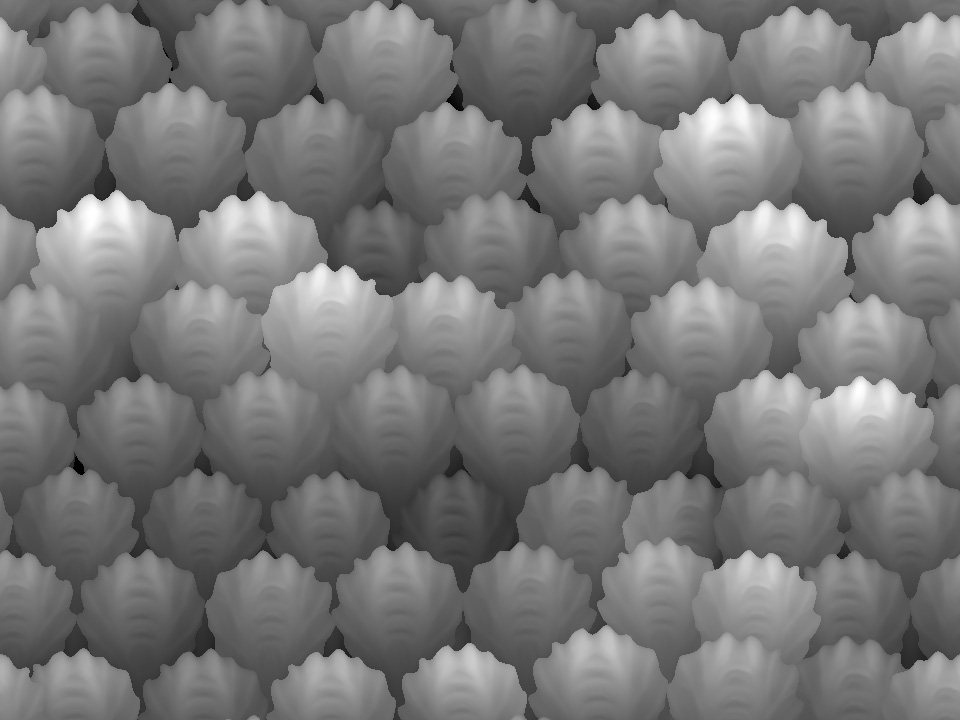
Here is my first attempt at seamless alpha creation using the aurick technique!
Enjoy

Attachments

scales01.jpg

Thank you, I tried it and now it works like you said. :slight_smile:

ok now 1 more question and i’ll have it. In the directions is says to use projection master and have the " TileTexture modifier active". Where is the " TileTexture modifier"? I am new and I can’t seem to find it under the texture area. I’m using Zbrush 3.1

Thanks.

DanasArt

There are two places you can adjust your textures.


  1. Check the Texture drop down from the top panel
  2. Tool menus have a Texture rollout as per any tool selected
In the Tool menu Texture rollout there is tile uvs options.
They give you the controls as to how the texture tiles on the active Tool
:wink: