ZBrushCentral

CNC Challenge

I would like to challenge ArtCAM from www.artcam.com Please follow the link onto Jewelsmith at http://www.artcam.com/artcam.htm?http://www.artcam.com/face_wizard.asp

My trouble is I’m new to Zbrush and I have a learning curve to deal with but I know the same thing can be done in Zbrush using a flat 3D plane and projecting an image onto it to displace the polygons. Cropping with a black and white alpha channel can be done too, I just don’t know how. Once the 3D model is complete I would like to import it into EdgeCAM to generate tool paths and to create molds for later investment castings in silver or bronze.

Can someone develope a zscript and show me the steps I should take? Please go slow and step by step for this beginner.

By the way, Jewelsmith cost $7,500 and two day training cost $2,000. I know Zbrush can do the same thing but for much less. I teach at a community college so your efforts will be greatly appreciated by me and the students in my CNC programming class. It will make cutting chips much more fun that the usual industrial projects we do.

Thanks,

Mark

[email protected]

I don’t know exactly how to do this in Zbrush without manual tracing, but if you check out Blender, www.blender3d.org, it can do the grunt work very easily.

The problem is that the relief you get straight from the picture and the kind that you want for a machined cut-out are not the same things.

Here are the steps in blender:

Subdivide a plane about 7 or 8 times, and assign it a texture of whatever jpg image you have.

Press “noise” a couple times… what that does is take the grayscale values of your image and displace the verticies.

In zbrush, you could probably do this by assigning the JPG as a “displacement map” and converting it to “real” verticies.

The problem is that while it will look great from a 3d standpoint, it won’t have the gradual gradient of getting higher from left to right, and also the hair will usually be recessed instead of “out”.

So once you do the displacement map, you’ll have to manually put in a gradiant or find another solution to smooth out out the overall relief.

With about 20 minutes work in photoshop you can probably come up with a good grayscale map to displace from.

You can take an alpha image and import it to zb and in the alpha palette is a make3d button…you will have to play with various settings to get the results you want…check out 50’skid’s post in the main forum called dinty moore…I believe he posted a little about this in a how to on his pic.

I think there is also info on it in the zb help files under scripts but am not positive.

Hi Mark,

What you are looking to do can be done several ways very quickly in ZBrush. Aminuts has described one method that would work by making it into a 3D object directly from an alpha. Another method you could also use is to make a simple plane and convert it to a polymesh, sub-divide it several times (as much as possible) until you have a very high resolution mesh. Next go into “Projection Master” and make sure “Deformation” and “Normalize” are turned on and then drop the mesh to the canvas. Now use the “SimpleBrush” with 100% intensity and an alpha of the image you want and use the “DragRect” stroke to apply the alpha onto the plane. Use the move tool to position it just where you want. Go back into “Projection Master” and pick the canvas, now the deformation will be assigned to you mesh and you should see that the result now looks like a relief.

Another method would be to make the same plane as before and again converting it to a polymesh, then sub-dividing it as much as possible to get the highest resolution. Now take the same alpha (make sure that the image of your alpha is square so that it does not squish or stretch the image when you apply it) and go to the “Masking” option in “Tool”. Select the “Alp” option to apply the selected alpha to your plane. Now open the “Deformation” option also in “Tool” and select “Offset” on “Z”. Play with the slider until you are happy with the results.

As you can see there are many different methods in ZBrush that will allow you to get your desired result. The problem comes with the alpha. You will need to have an alpha that displays the correct height information. If you look at the images that they showed on the site you will see that the color information does not provide the correct height information for an alpha. This is through self shadowing, lighting, and normal color variation (i.e. hair, eyebrows, etc.). To get an alpha that provides the correct depth information you will need to fix it in a traditional 2D application. This will take the most time by far, the process in ZBrush once you have a good alpha is minutes work.

Matt :slight_smile:

I have been playing around with this some more… yes the bottle-neck is in photoshop.

Right now I am manually creating a height(displacement) map from an image, using some of photoshop’s internal highlight/shadow/border selection algorithms…

Its taking quiet some work to try and get right… heh there definatly isn’t a one click solution to this.

I just woke up to get the kids off to school…and stopped by the forum for a quick smoke before returning to bed…but this thread caught my attention.

I went to the link…they look like they offer a good little somewhat unique service for producing tangible models. The photo offered up to them would have to be pretty clean for sure. From the best I can tell the artcam thing uses all the photo depth etc info like Zbrush does to make an alpha map from a texture (or words to that effect).

I tend to agree with the above statements from the others, that getting a good clean alpha map and a high res object to use it on would be the best way to go. I would say that it would also depend what you are going to use the final piece to do. You can take an alpha and make a stencil and sculpt onto a high res object and emboss a head right onto the object. Or like was said, playing with the alpha and making3d is another avenue.

There are or were some threads on the forum over the past years for doing similar projects… If you are making the project in zbrush…as in the whole image, if that is the project you are wanting to do, then using the alpha planes would be somewhat easy to do and then take the Eraser tool to eat the “seam” / unwanted edge away from the “raised” modeled portion of the plane…

Well good luck and post your results on the method you choose. I would like to see your WIP of this if you are able to.

Regards,
Ron

Well you got my sleepy mind to thinking about all the different ways to do this…and I went ot google and got a somewhat simple black and white image to save me some work. I chose a profile pic of and indian with a head dress for the script…I imported it into the texture pallette in Z and then made my alpha from it. I recorded the script to give you an idea of what easily can be done and quickly…when the script asks to import the image…just find the file you save the indian pic I am posting…and put show actions on…I havent tested the script yet but lemme know if it helps, doesnt work or whatever…thnx

Ron
IndianTesting1J.jpg

and this is the link to the pic I used …just save it as a bmp for use with the script…
http://www.worldkidmag.com/wk4web/WK4editorial_web/daughter%20of%20bad%20horses%20profile.jpg

Hey everyone, thanks for the replies. Ron, I too just took the kids to school and grabbed a smoke before checking in. Thanks for the work you have done. I think you’ve done it.

MMbenya, Thanks for the step by step. That’s exacly what I thought I should do but It’s been so long since I’ve been in Zbrush I didn’t know what to do. I played with weights maps in Lightwave but I couldn’t get the same results as Ron is showing us because of the high resolution mesh required. I knew projection master was going to be one answer but couldn’t figure out why it kept asking me to convert back to a 3D model. Your description help me understand that process and remember how Zbrush works with Zspheres. I’ve done models and exported them. I just have to go back through those steps I guess. Give me some time to relearn how Zbrush thinks.

So I need to get an image into the background by filling the area, then create a 3D plane, subdevide it many times, Convert the 3D model into a tool, then use projection master and the tools you sugested? Ok, I’ll give it a try today sometime.

But first I need to look at Ron’s script and see how he did it because so far he’s pulled it off and he has a good suggestion for stensiling away the unwanted poly’s by erasing them. I’ll be happy to upload screen shots of EdgeCAM’s tool paths once I’ve moved over to that system. Later I’ll mill some blanks for tests. We have a HAAS VF-1 machining center. We just wired it up a few weeks ago and now we are up and running.

keep the replies comming, this is good stuff.

Thanks guys,

Mark

Ron, the script cuts short as soon as you click on the stensil button. So it never got a chance to finish. I’ll try it a few more times but maybe it’s me. I want to see this because I’ve never seen or used the stensil option. You’re work look like what I need. From here I’ll probably go into several other software’s like Lightwave, Max and most likely AutoCAD to scale the final mesh. I have a very nice medalean ready to go in Autodesk Inventor but Inventor won’t have anything to do with the Zbrush file (I mean for boolean cuts and things like that, its just a different system). So the Inventor file will be moved into EdgeCAM for a mill operation then I’ll import the properly scaled Zbrush mesh separately into EdgeCAM for a second milling operation. I really only need the embossed portion, all the surrounding poly’s would be a waste of tool paths and this is why I’m interested what the stensil option may be able to perform.

By the way, do you guys know why I can only bring in PhotoShop files instead of Jpg’s and bmp’s? I’m in Zbrush 2 and PhotoShop files are the only thing that show up in the preveiw when I load textures. For some reason the other file types aren’t supported.

Mark

you guys aren’t working on some new way of bump mapping video game characters are you?

I might have missed where this was mentioned but zbrush does a pretty good job of creating alphas from textures…or pics…

you can either take the texture…or imported pic and using the drag stroke …draw it on the screen then use mzgrabber tool to grab it up…it creates both an alpha and a new texture…or

the quick way…in textures click on create alpha…there is a max button if the alpha is not quite sharp enuf too…this is the technique i use to turn various skin textures (easier to see in color first…pores wrinkles etc) into alphas for deforming mesh in projection master…it works great. Then all you have to do is play with the intensity in PM to get the desired effects on the mesh.

Assuming you are using Zbrush 2 you should be able to import jpgs, psd or bmps in the texture menu. If you are using 1.55b then I forget but it might only be psd or bmp or both only and not jpg. Sorry but it’s been awhile since I toyed with 1.55b to say for sure.

Hi Mark,

I made the switch to ZBrush from ArtCam a few years back for the purpose of producing reliefs from photos. I have a method for generating a very high resolution mesh by creating a flat plane with as many subdivisions as I need in another application. Then I import it as an OBJ file into ZBrush. I have not played much with the new tools in v2.0, so using another app to generate the mesh may not be necessary. I have created meshes prior to v2.0 with about 2-1/2 million polys, and used ZBrush’s INFLAT function with an alpha image to put the relief detail in the mesh.

I have found that editing the images either in Photoshop or ZBrush to consistently produce good looking reliefs is time consuming. Even directly sculpting the reliefs in ArtCam did not produce consistently faster or better looking results. If your intent is to sell the relief images that are cut on the CNC machine, I think you will soon find that the editing time will eat into your profits.

I believe that ZBush and its scripting ability may provide other methods superior to photo editing to produce better results in less time. I can’t say too much more relating to the specifics of our process as I have signed a non-disclosure agreement. However, I can give you the information about how to get higher resolution meshes into ZBrush, and how to control the height of the relief, if you find that the subdivision tools won’t give you as much resolution as you want.

Regards,
Chris

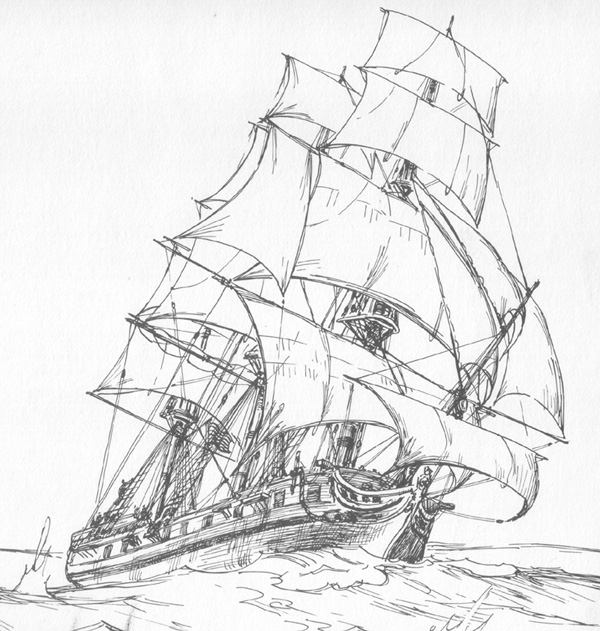
We’re getting close. I thank all of you for helping me on this. mmbenya, I took your step by step and applied it. So far that’s working the way I expected. From here I can edit the mesh by pushing and pulling. I agree with all of you that this will take some practice and each picture you decide to work with will present it’s own challenges. As you can see a picture such as a ship will take lots of editing as opposed to a picture of a human or animal.

Ok, so what sparked my interest in this? A student who wanted to use artcam for his business. I got to thinking about some coins I received from grandparents that came from the Franklin Mint. I have tons of bronze, silver and gold plated coins with presidents, animals and historical events all embossed and they are polished to perfection.

I just enharited a foundry at the college and I have a full machine shop at my disposal. Putting the two together will help increase our enrollment since we are a new college. However, the state of Texas cut our budgets and new software is out of the question, I’m refering to artcam costing so much.

Anyways, I’ll keep you updated with the progress. CG art is a big love of mine but you seldom ever get to bring it to life. Now I have the chance and the time. I left industry in January for this full time teaching position so I may as well take advantage of it. I don’t plan on making money doing this. For now I’m just learning. The best teachers are their own best students, otherwise your ego will not get you very far.

The pics are of the Autodesk Inventor parametric model that will go into Edgecam and Lightwave. I use Lightwave because it helps me orientate my mind. Zbrush and I have some work to do with navigation, of all the 3D software’s I own and use, Zbrush is the oddest. It just takes some time and practice but I knew Zbrush would be the right answer for this project.

What’s left is figuring out how Ron got the Alpha to elliminate unwanted polygons. In his image you can see in the lower left corner, missing polys. That is if it’s a 3D mesh or just a 2D paint job with an alpha transparency.

Ron, could you explain that image in the lower left corner? Is it 3D and if so, how did you do that?

Again, thanks everyone. I’ll show off what you’ve done for me tonight in class. I know they will be checking out Zbrush soon.

Mark
[attach=1640]INV.jpg[/attach]

Attachments

INV.jpg

Sorry the Lightwave image was too large for the last post. Here it is.

Attachments

LW.jpg

the bottom left image was the alpha, drag stroke and paint with zadd on…

ron

I’ve seen some amazing work by artist using Zbrush. If anyone would care to give this ship image a try, you are welcome to it. Keep in mind that so far all we have done is create an emboss of an image. That’s a start, however a really good embrodery would be to enhance the sails to different elevations and make the bow section elevated more than the stern. The perspective of the illustration takes care of most of the illustion but I think we can do better than just a flat emboss. That’s where the artist in you comes in. From the work I’ve seen in just character modeling on this site, if you guys aren’t working in industry, I don’t know why.

Don’t worry, I’m not interested in finding someone to do this for me. I just thought it would be a small change from the usual character modeling we see here.

Later, I’ll have to see how much of a good gradient scale of an image converted to greyscale, would do with this technique. My initial thoughts are, it won’t have much effect and I’ll have to push and pull vertices. That shouldn’t be too dificult with Zbrush’s tools. I’m glad I have it becuase the same thing in Max or Lightwave would take forever.

Mark

[attach=1642]Ship.jpg[/attach]

Attachments

Ship.jpg