ZBrushCentral

Centaur - Questions

Hello,

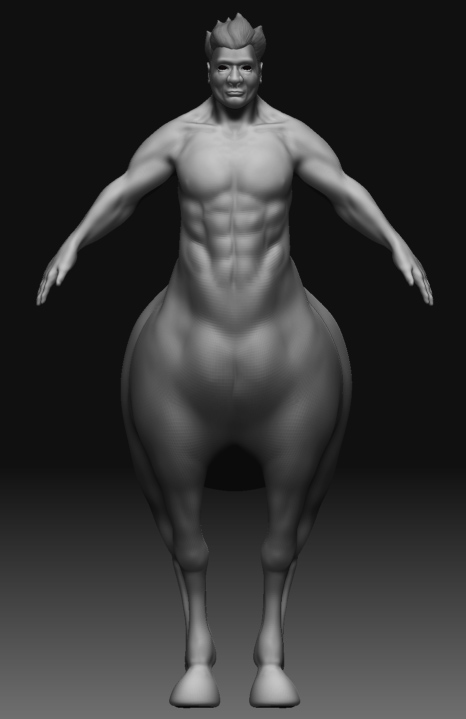
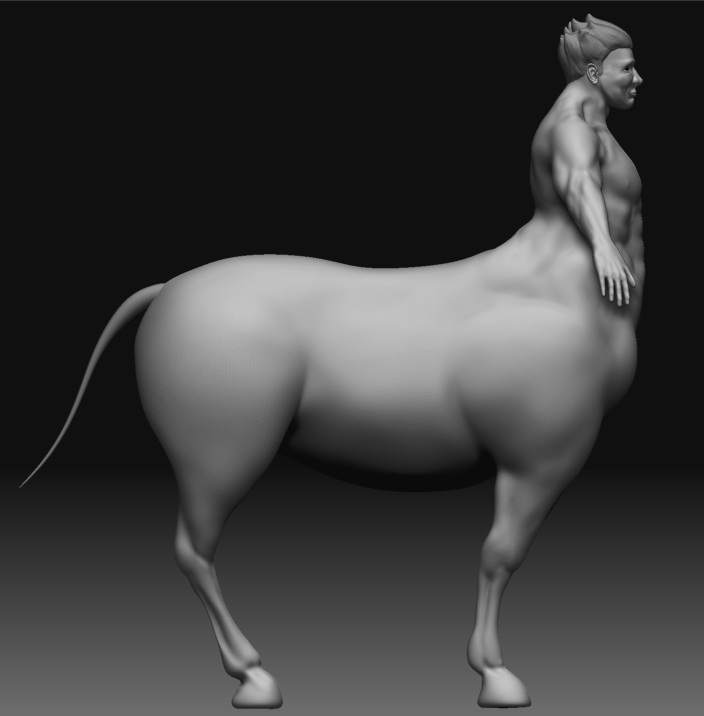
This is the first large Zbrush project that I’ve started working on. I’m new to Zbrush and have some questions that I hope the community can help me out with. Obviously, I have a lot of work to go on the sculpt, but comments and critiques are welcome.

I’ve been trying to address the character’s arms and am having some process issues. What is the best way of detaching the arms so I can work on one as a subtool and then mirror it?

I ended up subdividing the mesh unequally (the head is dense for example) and lost my lower base low poly mesh along the way. To set the character up for animation (Maya 7), will it be best to make a new base mesh and use adaptive skin from the current mesh to the new one? Or will it work to just keep my current dense mesh and use a Zsphere base mesh as an influence object for animating? There are probably other threads about this so if anyone can point me to some good solutions, I would love the help. I’m just hoping that I’ll be able to use my current sculpt.

And one last question: I noticed that I have a pucker spot on my arm from some early bad topology flow. What is the best way of reworking this spot in zbrush? Can I delete a patch of poly’s and rebuild them?

Any help would be fantastic. Thanks much.

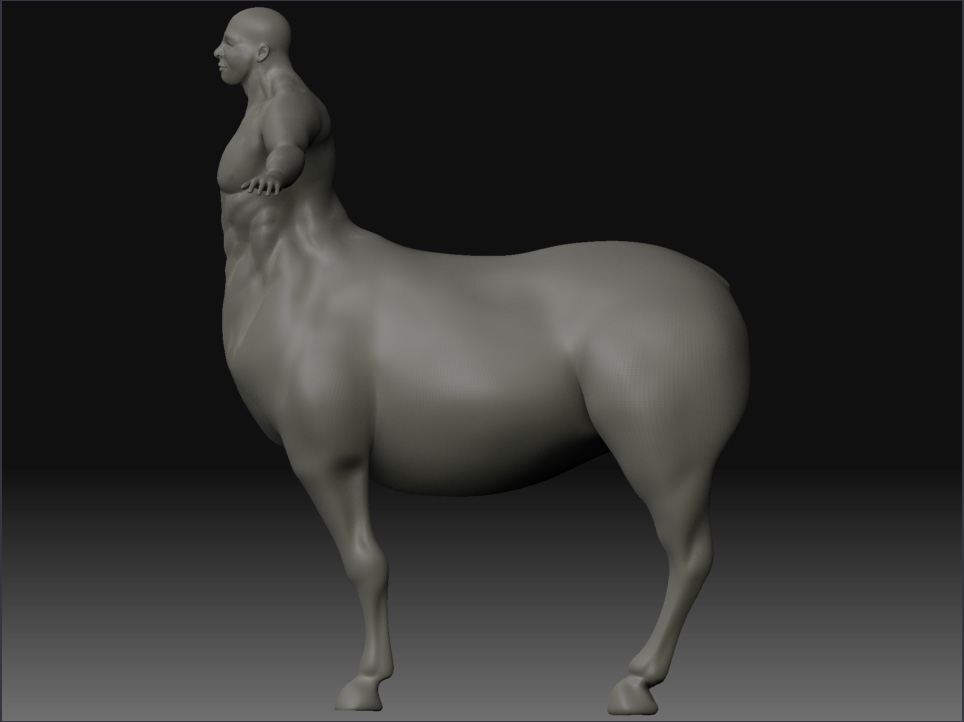
[attach=138452]centaursmc1.jpg[/attach]

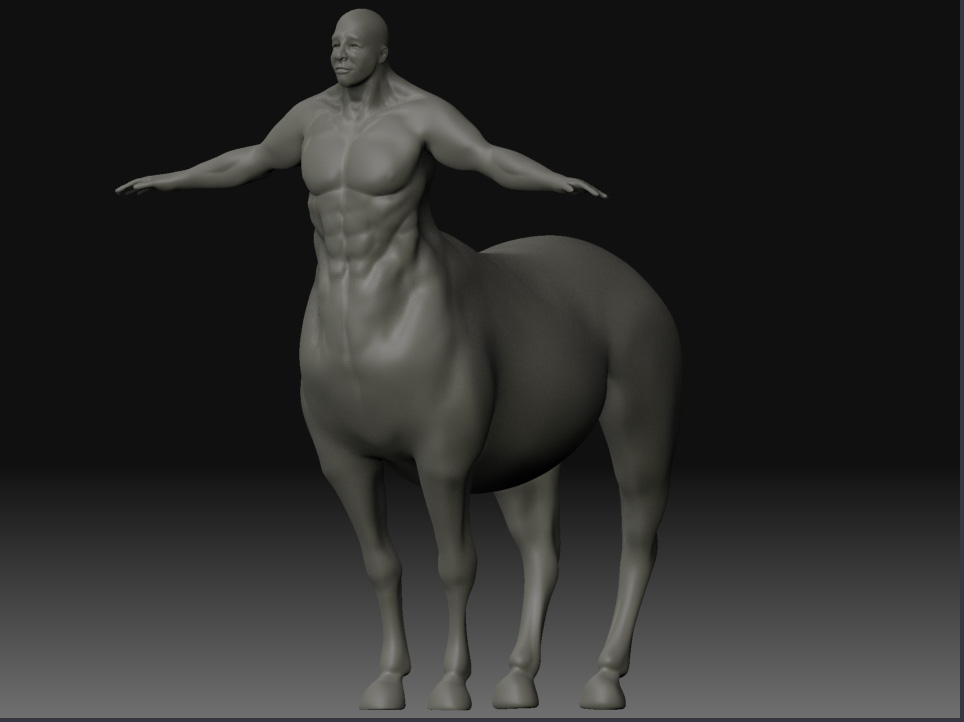
[attach=138453]centaursmc2.jpg[/attach]

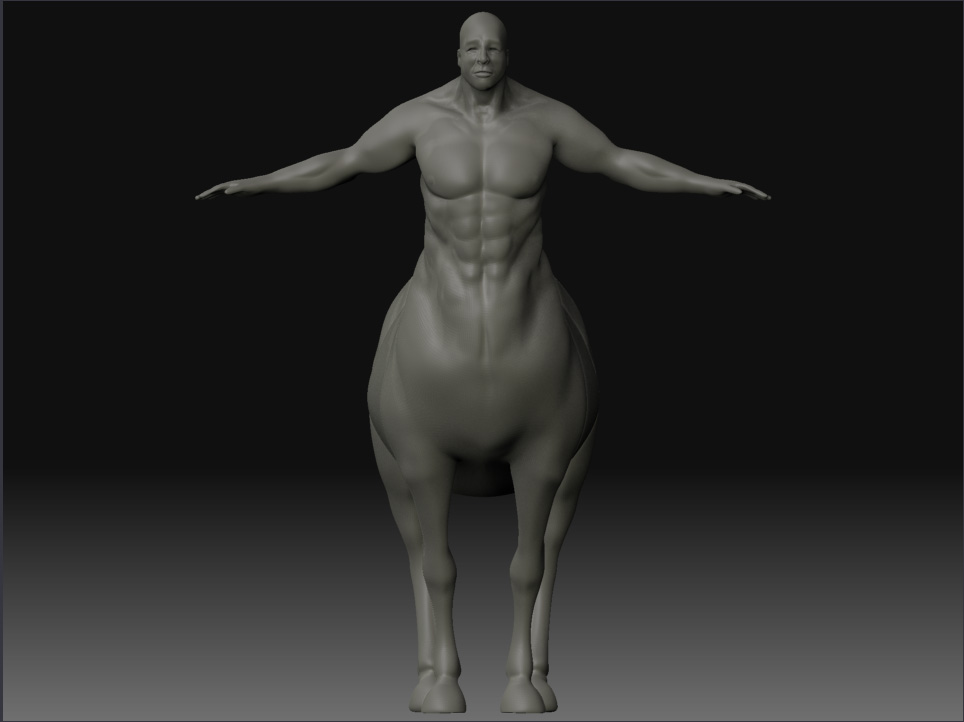
[attach=138454]centaursmc3.jpg[/attach]

Attachments

centaursmc1.jpg

centaursmc2.jpg

centaursmc3.jpg

Your work is progressing nicely. Being a relative noob myself, I’ll give a bit of help as I am able.

As to sculpting the arms separately - If they are not already, I suggest making them separate polygroups. You can the hide/show them separately without the need to make them separate subtools. It’s very easy to do, so lookup “Creating Polygroups”.

And if I am understanding you correctly, you can use Tools.Geometry.Reconstruct Subdiv to get back your lower levels, and then export it or whatever.

Lastly, after you reconstruct the lower levels, you may be able to fix that bad topology section. If not, you may have to edit the topology directly.

Hope this helps and good luck!

Thanks much Montana,

The reconstruct subdiv worked like a charm - just what I was looking for.

I made myself some polygroups and hit the same issue I was having before.
I’m sure the solution is some toggle that I don’t know about yet - feel free to point it out to me.

So here are the arms polygrouped. What I would like to do is focus on the left arm and have only it visible on screen, while it simultaneously duplicates my effort to the other arm (mirrored across the x axis). While both are visible, I can hit x and have symmetrical editing happening, but when only one is visible it masks the other. I can see how this would be incredibly useful in most situations, but is there anyway to turn off the masking so I can edit the hidden arm?

Thanks for the help - just jumping over the previous hurdle has really got me excited about working. I’m looking forward to more helpful advice from the community. Thanks much.

Hey Red,

Sorry, I don’t know of any way to have a group of hidden polys mirror your edits. Maybe post this question in the “Q and Troubleshooting” forum. I’d be interested to hear the groups’ input.

Good luck.

-Scott

what i generally do is make the one side visable and sculpt it however. then mask everything i just worked on, make the reast of the mesh visable and hit Tools>Deformation>smart resym. make sure you mask what you want to keep or it will average both sides. also you might want to go through each level with smart resym to get it exactly right. hope that helps

Thanks for the help guys! I think I have the solution via converting my poly-groups to subtools. I’ll post updates on the centaur when I’ve made more progress on my next subd level.

Plus I want to start trying some hair solutions.

Thanks again.

Here is how the centaur is coming along. My plan for the tail is to use the geometry as a base and the rest will be Maya polypaint hair. If it doesn’t end up working out how I hope it will, I’ll do a sculpt. My plan is to start poly painting next. Comments and critique is always welcomed. Thanks.

[attach=143488]ct_q.jpg[/attach]

[attach=143489]ct_f.jpg[/attach]

[attach=143490]ct_s.jpg[/attach]

Attachments

ct_q.jpg

ct_f.jpg

ct_s.jpg

Like what you are doing so far. Have a couple ideas for ya maybe. The torso of the centaur looks good so far but it seems it might be a little too small. Think about making the human half smidgen larger. It might help out with where the human and horse side connect in the back. It seems to be a little too thick there. Your arms have good form so far might need to make them a little longer as well. Seems a really good rule of thumb measurement for arms is having the elbo go almost to the superior line of the flank. to get the forearm and hand to the proper length, think about drawing the rest of the human legs out over your front side image in photoshop.cut and pivot the arms and see where the fingertips land. they should land somewhere near the center of the part of the leg. nice work so far though.
One possibility for fixing the geometry and streamlining the model for animation may be as simple as retopoligizing and reprojecting the sculpt over the retopo geometry. You can square most issues up wih a retopo. Its also easier in maya as well because the mesh should have a much lower poly count afterwords. :wink:

Thanks for the advice on the arms - I see what you mean. I’ll tone down the musculature at the back connection as well, but I think I’ll keep the big horse smaller body proportions.

This is my first zbrush project so there has been trial and error throughout the whole process - lucky I tackled fixing the topology early on… now it goes really quckly. I found a great video on it but can’t think of the name - if anyone has the link, please post it in case others run into the same problem. It is a video of an artist fixing the topology of a gorgon (medusa) - using morph targets and masking to fix geometry artifacts was a godsend of a tip.

Ohh! Does anyone have a good workflow in Zbrush, Maya, Photoshop for incorporating animated displacement maps to a character rig setup. I’m thinking in the lines along muscles flexing and facial rigs. I’m going to experiment but if anyone has advice, please post on the subject. I saw a nice werewolf video on here with an XSI setup.

np. there seems to be lots of way to fix things here, which is great. scott spencer and cannedmushrooms are 2 people to look up for more info. canned has lots of vids for every level of 3d. he explains most of the ins and outs of using all the tools. scotts book is pretty good also. he shows how to work from a sculptors pov using clay tubes and the rake. i would suggest trying that technique out. it adds a really beautiful texture to the musculature of the model. all i have to say experiment, experiment, experiment! :smiley:

Hello here is my sculpture of a centaur that I made recently