ZBrushCentral

Celebrity portrait

I made this model over the last couple days. This is a zbrush render using custom matcaps. It was composited in photoshop to add the background, and I cloned the hair from a reference image. I might do some more work on it to add some detail to the face, and model better hair, but I need more practice just sculpting too.

Can you tell who it is?

[zbrush.jpg]

yeah simon pegg =D

haha yep!

Looks like “Wee Hughie”
not shabby pal.

yeah quite near :smiley: :+1:

Shaun of the Dead?

TophT: I’d never heard of that character before, but lol they look freakishly similar.
Daemon3D: Thx.
caffeineandpixels: Ya, probably my favorite movie of his.

I did most of the sculpting on this a couple days ago, but I’ve been wasting alot of time trying to export paint effects hair from maya (it keeps crashing because I run out of memory, so his head is still bald :slight_smile: 
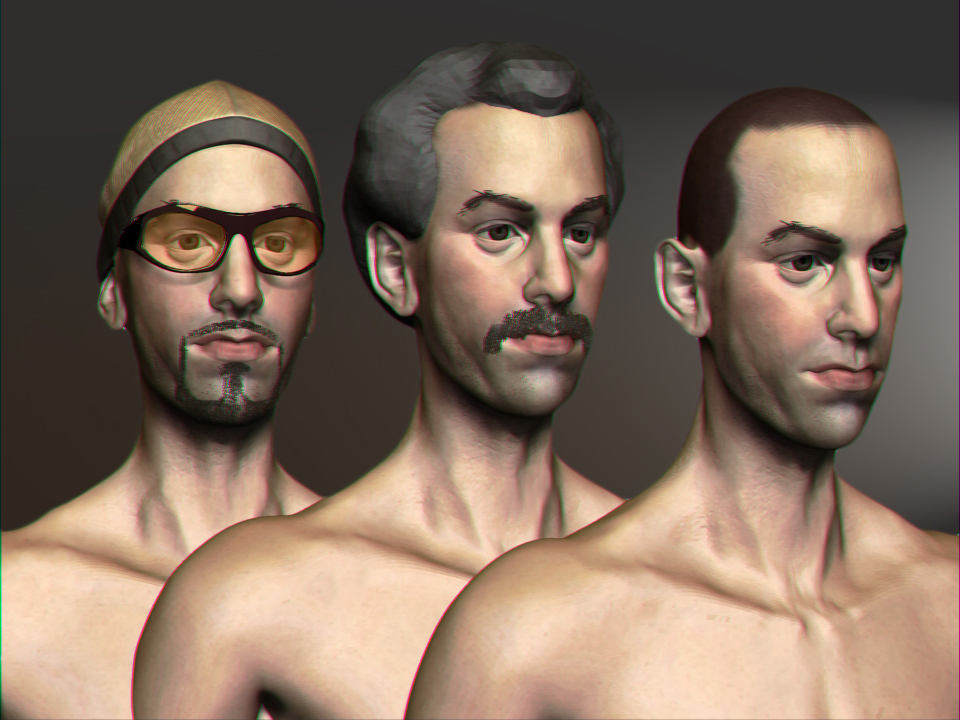
). I’m not sure the likeness is quite there yet, but I’d like to hear your thoughts.

Here is an update on sacha, does he look a bit baby faced? Working on the rest of the clothing for Ali G right now. I’m working towards a final triptych with each character in a typical pose. Might work on some other stuff in between as well just for the sake of my sanity.
look forward to your crits!

[test.jpg]

Saw Bruno yesternight, Larry Charles has the nose for good stuff, anyways…to your models - the renders are nice, but the likensess can improve. As for the characters of borat ali and bruno,you might wanna be aware that Sacha didn’t maintain the same muscular volume as for example for bruno and borat.

cr

P.S. but he’s got jew written all over him so you’re on the right track ;):+1:

completely agree with you about the likeness, trying to pin it down still. At this point i need to do another reference search i think. Thanks for the heads up about there being different muscular volumes. I’ll probably start tweaking the characters individually once I have all of their subtools.

I can see who its supposed to be with the costumes and hair right away.
Without it it wouldve been hard.
Looking forward to more tweaking its definitly 100% improvement from your
last sculpt at least sculptwise. The likeness was there on the last one too.
You should definitly get some ear references and start them at a low subdivision.

heh do the old style Bruno fauxhawk not the new thing hjes got… looks like him but could use some further refining

uhhh… wow.

Disco Stu: Thanks, they are kind of caricatures right now, but I want to go for a realistic style. I’ll give the ears some more love too.

Mikeporetti: Definitely going with the fauxhawk :slight_smile: I’ll keep refining.

some more update, i reworked the face and I think i’ll start refining it for the individual characters now (still need to fix the ears though) because I find i’m battling between different looks. I’ll probably give more thought to the body when I start working on Borat, might make him in that gross bathing suit :slight_smile: Ali G is textured but I need to do some more work on it before I show.

[sacha.jpg]alig.jpg

Booyakasha!:smiley:

I dont have any updates right now, but I just figured out something that has plagued me for awhile and thought i would share.

Normally when I want to change the uvs on my model I export to maya do them there, and try to reimport it into subdivision level 1 of the ztool. Sometimes you get lucky and it works, but most of the time it turns into an exploded mess, and morph targets cant fix it. The method I used to use to get around this was to create a clone of the original and project it onto a fully subdivided tool with the new uvs - this would still be really difficult because complex areas tend to get screwed up in the projection, and you would have to spend a long time fooling around with it just to get back to what your original tool was like.

K here is what I found (see the original post here: http://www.simplycg.net/viewtopic.php?f=22&t=5051 )

get the classic version of uv mapper (free) at:
http://www.uvmapper.com/downloads.html

open uv mapper
import your original model before uv change
import uvs of the new model after uv change
export model
open zbrush
import model at subdivision level 1 of your tool

your tool should be update with the new uv’s and all detail and subdivision levels will be preserved. I think this works because uv mapper is keeping the original point order instead of creating new ones.

Sorry if you all already know this, but hopefully someone who is also struggling with this issue will figure it out.

You achieved some good likeness on Sacha’s face, good job.
But i have some crits on the body:

  • shoulders are a bit too large.
  • biceps and shoulders are too thick in side view.
  • on the front view, you have a strong line at the bottom of the biceps, but considering the arm rotation, this line have to be on the opposite. Look at your biceps in a mirror with the same position, it should help. :wink:
  • forearm looks good in front view but seems too thin in side view. maybe the reduction on the biceps can balance that.
  • the thumb have to be a little thicker than the other fingers.
  • waist and pelvis are to narrow
  • try to move the pelvis ha bit forward in side view, he should look more balanced.
  • the bottom looks a little flat, even Sacha has not a big one.
  • thigh looks good in front view but lacks a bit of muscle in side view.
  • some mistakes around the ankle, and the achilles tendon have to be pushed forward (meaning in the direction of the toes)

The clothes really needs some work at the folds. Look at this sweat shirt: http://www.grives.net/modules/page/images/vetements_sweat.jpg
There’s a big fold that runs from the shoulder to the elbow, another one from the armpit to the belly. You have to look carefully at the directions of the folds, same for the pants. Try to gather some references of people wearing large clothes.

Sorry for the big block of text, hope it should help. :wink: Keep it up !
For the uv problem i can’t help, i’m not a maya user. :confused: