Hi there everybody, I’m here for a problem with the cavity map create in Zbrush that hount me from a lot of time now and i never find a way to fix it.
So here I am, and sorry for my broken english.
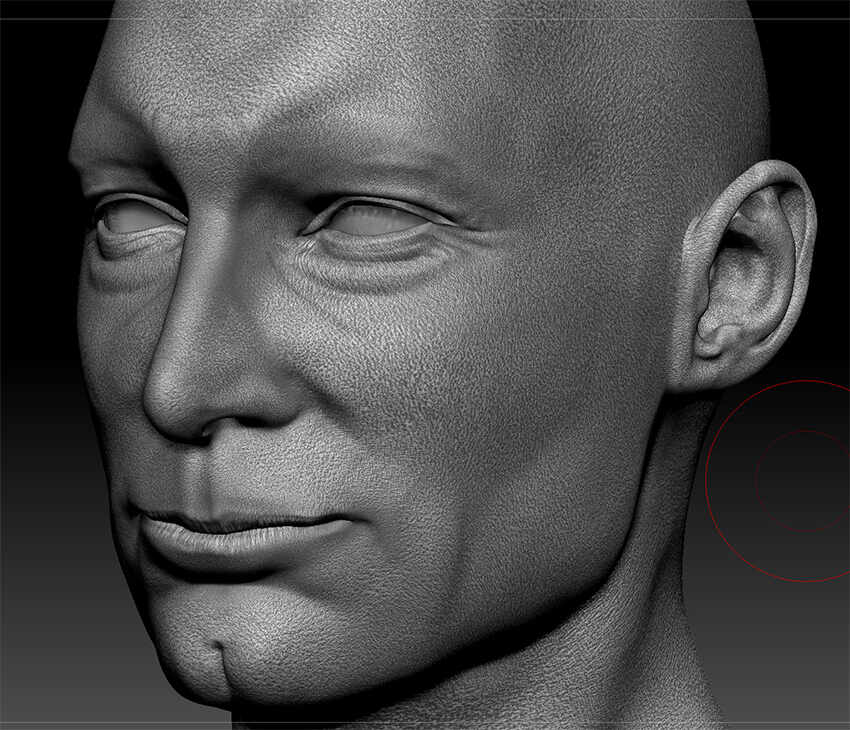
So, this is my work by know, I sculpt some details for a Base Displacement and try to bake a cavity map, so long at this point no problem at all, cavity map successfully achieved.
The problem came when I realize that the topology needed a little adjustmen (around the ears), so I went to the lowest level, export in maya change the topology, re-imported in zbrush and when it asked to me “do you want transfer the fine details onto the new topology?” I clicked a big fat yes.
Everything seems going fine, check the model, no problem; so time to create a new cavity mask and…
This: 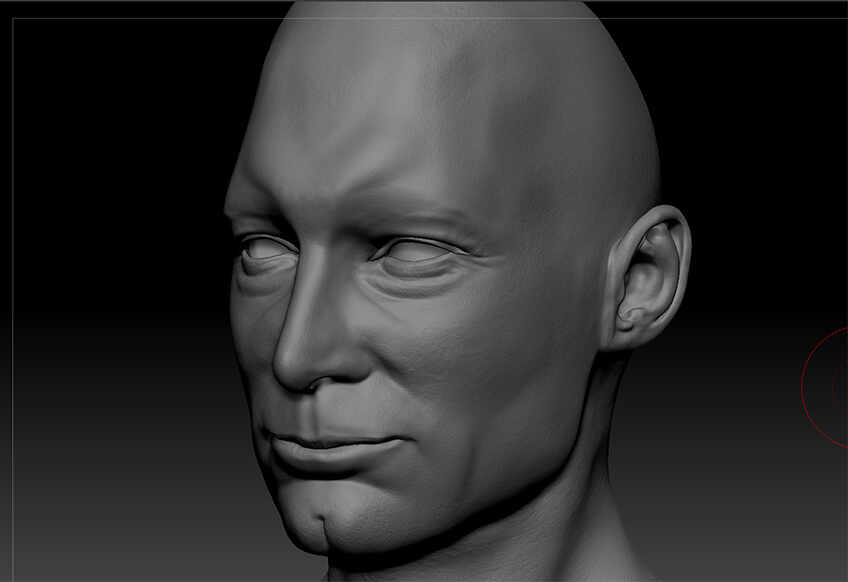
No matter how I can adjust the curve, the cavity map still appears flat as a plank.
And there is nothing that i can do about it.
At One point a little “ispiration/despair thougth”; I had a morph level stored in the tool, so I delete it, try again to project and…
This: 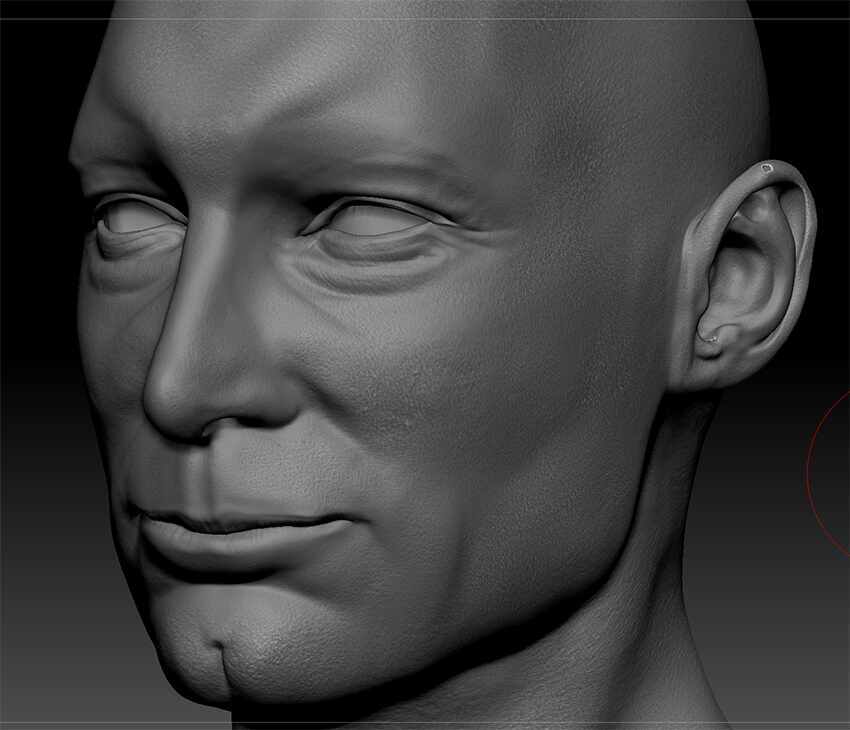
Better I think, but not close enough…
So now my question is, what I’m doing wrong?
And what i can do in order to be able to change the topology of one my work without losing detalis and the ability to create a cavity map like in the first picture?
There is some kind of “level 0” to set up, in order to make the cavity map working correctly.
Please keep notice that if I sculpt new details on the surface (maybe smothing the area before) the new ones are correctly displace in the new masking map.
And usualy that’s my exit, I simple restart the work again.
But it is a real pain and I realy liked to avoid that so… anyone here could explain me the nature of the issue and how i can fix it? It will be reaaaaaly appreciate.
So thank for the attention and sorry again for my broken english.
