That quick bit of info changed my life. You have no Idea.
Thank you.
@John - Thanks a lot for your kind words John. Really appreciate it 

And sure I’ll be posting more stuff over here soon.
@Mahlikus - Happy to help. Cheers! 
Thanks for the tips
That’s alright. I’ll be uploading a basic guide to lighting too. I hope that will be of help to some
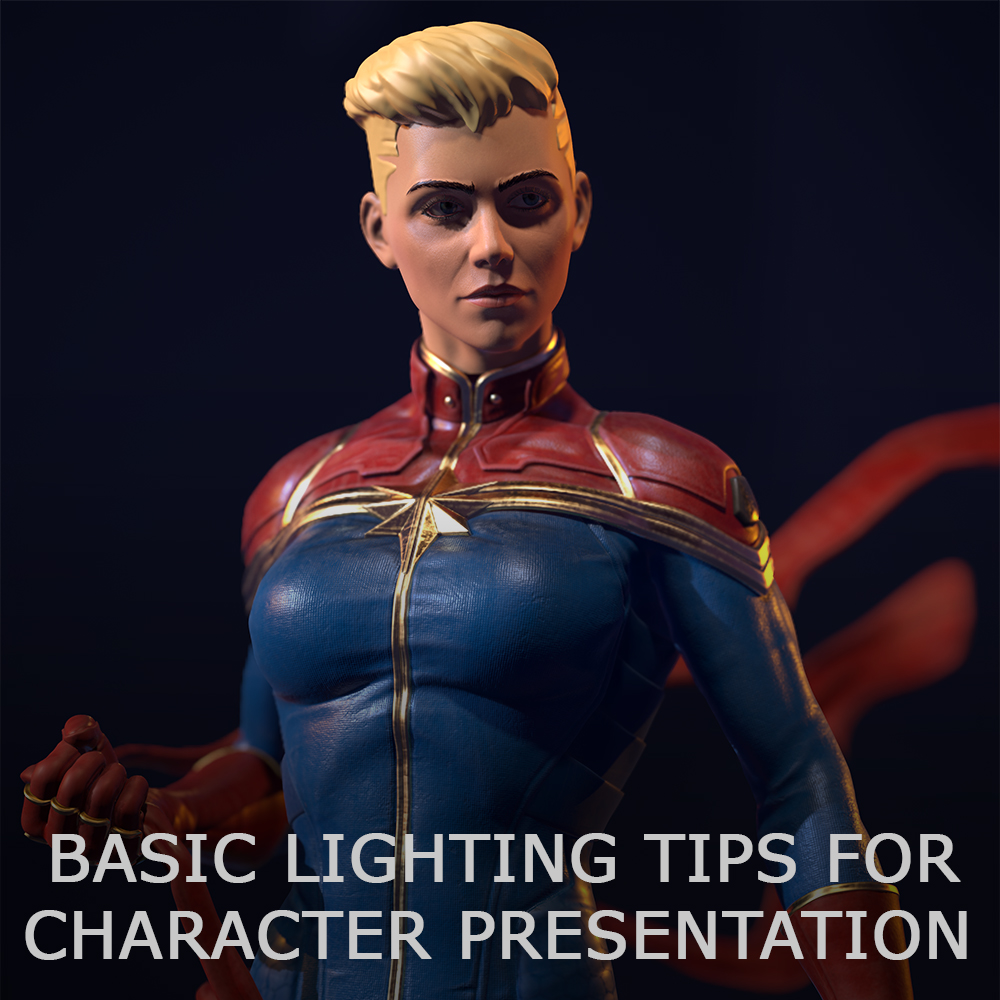
There are a lot of things that play a part when considering a good lit scene. These things are simple but easy to miss and are ignored most of the time.
The model itself is obviously important but things like Shaders, Environment, and Light are equally Important.
There is no point in depending too much on HDRIs and it better to use it as fill. In conjunction with HDRI, it’s necessary to manually lit the scene.
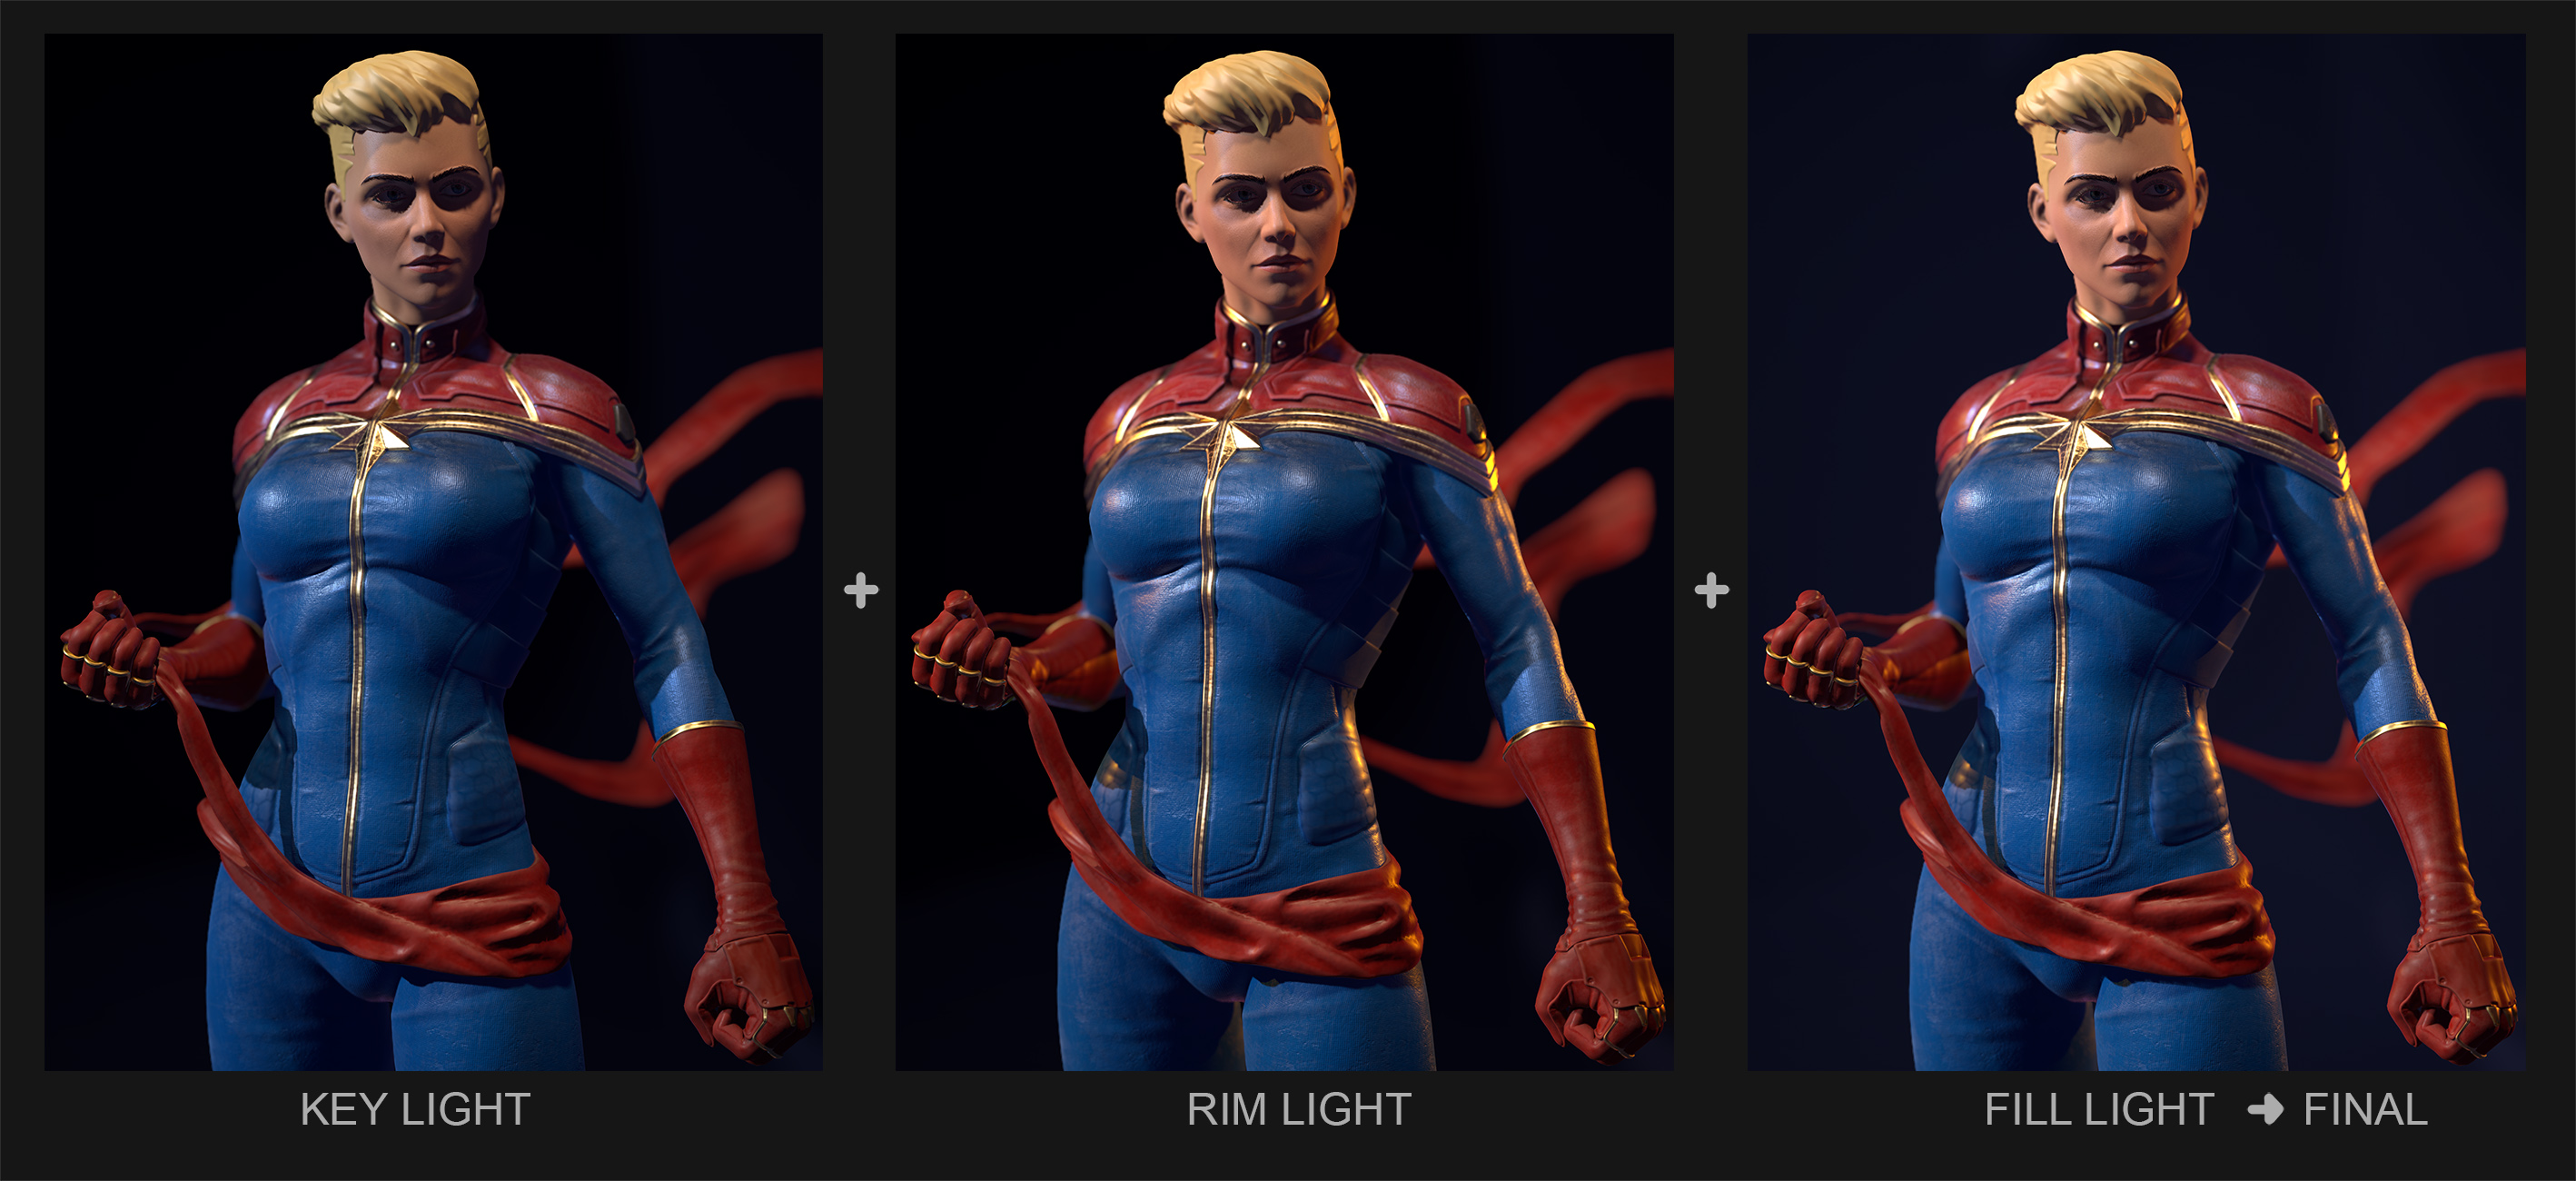
This basic light setup has always helped me when it came to presenting a character. Key Light, Rim Light, Fill Light. That is as basic as it could get. Obviously, it can and should be further extended to get it right. And sure there are many different types of light setups and this is just one of them.

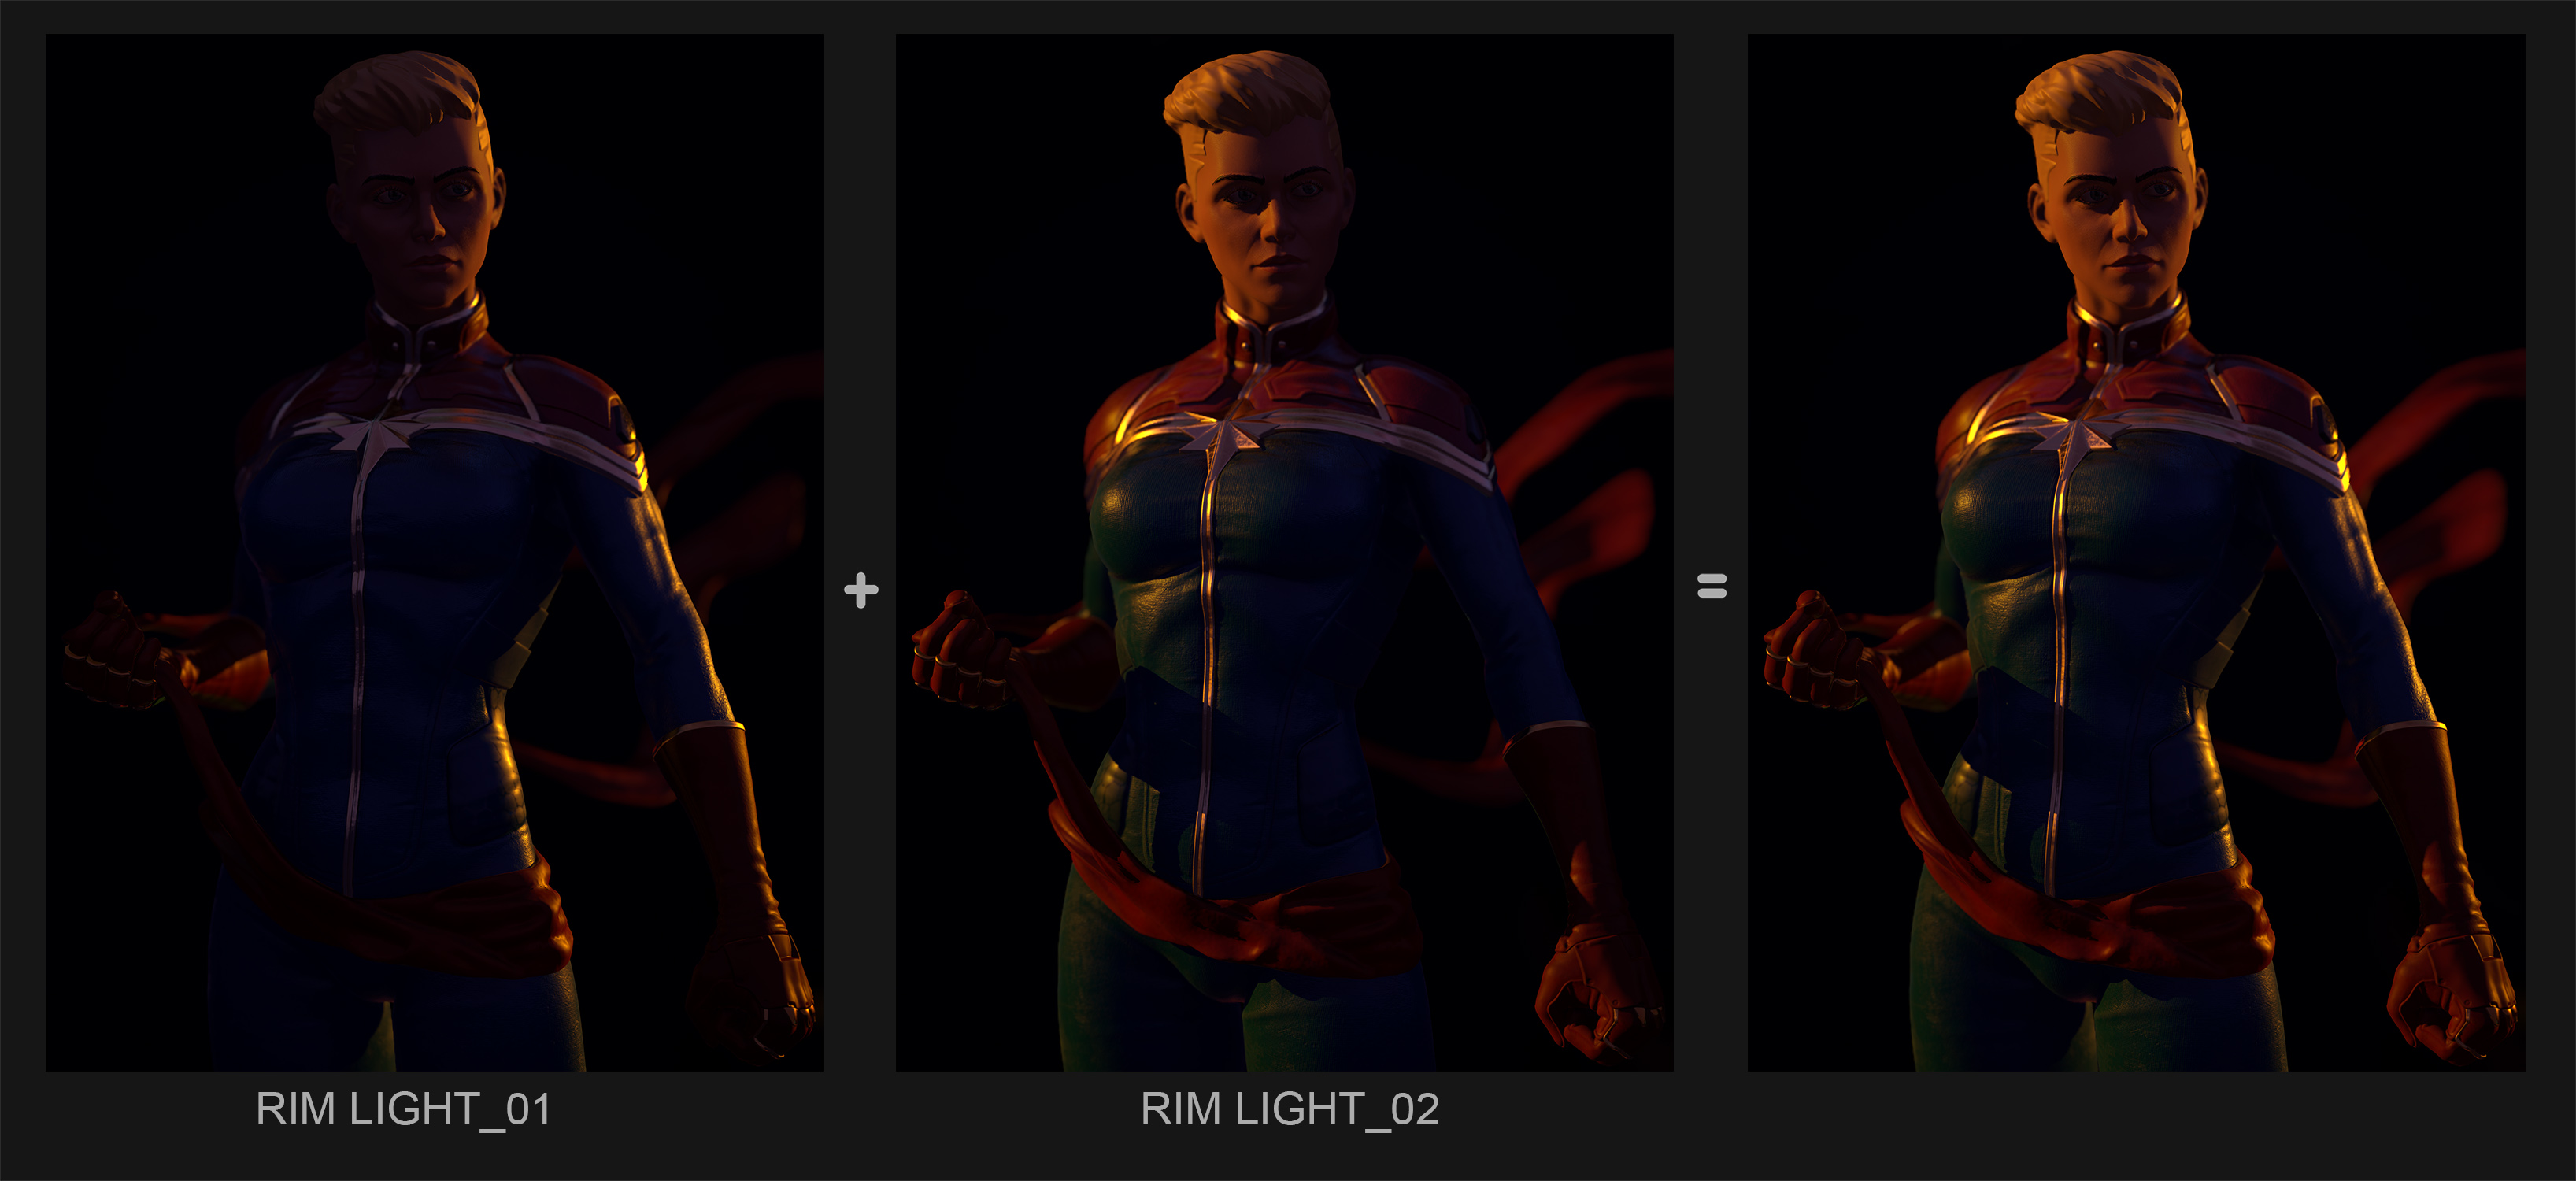
For my Captain Marvel render, I added 2 Key Lights, 2 Rim Lights and 2 Fill Lights and 1 HDRI.
Use key lights to create deep shadows. Afterall lighting is just creating interesting shadows which adds depth to your scene.
Here I’ve added one key light from the side and one from the top in an attempt to create some interesting shapes in shadows.

[FONT=Arial]Add rim lights to define the character’s silhouette. Generally pointed from opposite side of the key light to shine in through the shadows
Added one for the silhouette and one for harsh highlights from top left (different color from the key light)
One thing about shadows is you don’t want them to be too dark. Well, harsh shadows are used at times to make interesting outputs but in most cases, you won’t find extreme dark shadows in real life(Funny thing is even in a street at night with no street light, the moonlight will work as a fill light. Hah :P)
So to get rid of the harsh shadows created by the key lights add fill lights(Lights with low intensity, just enough to decrease the shadow intensity). Generally, these are placed in opposite angle of key light. These can be even used to create soft highlights from the desired angle.
Hdri are good as a fill light as it’s not just one light coming from a single direction but softer lights coming in from every direction with various colors contributing to the output.
Here I’ve added one Fill light for the backdrop and one for some overall brightness. While the HDRI is working as the main Fill light.

The environment is equally important at times. In some cases, it is good to a have small environment around the model. Can be helpful to get those bounce lights, really setting the scene.
For this piece, I wanted to go with a Collectible/Toy render a logical thing to do was to add a backdrop. It was easier to create as I had to just Simulate the cloth in Marvelous Designer and make it interact with the Pedestal/Base.
I know the Backdrop is kinda huge but It did help by adding some sweet bounce lights to the piece.


It’s obviously not possible to have the environment modeled every time but in time when its less tedious and less time consuming, it’s better to do it instead of just adding an Image/Backplate behind.
Once you combine all the lights, and you end up with Key light resulting in good highlights & shadows with rim lights capturing the silhouette and subtle fill light that helps to blend in all the pieces together.
Talking about Marmoset Toolbag 3, there are more options to use like Local Reflections, Ambient Occlusion, Global Illumination, Depth of Field, etc(currently all in use over here). These can be of help to achieve that extra layer of awesomeness
One small thing in marmoset lights people tend to forget is this guy here. 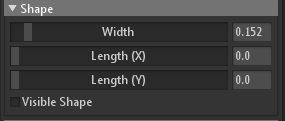
In Light properties > Shape, increase the Width slider just a bit to give your shadow some softness. the Higher the Value, the blurrier the highlights and shadow will be. but just around 0.15 to 0.2 works well.
I hope this short but lengthy breakdown to some basic lighting tips will be of help for some.
Will be jumping to the next piece for now. If possible I’ll add WIPs for the next one
- Mad.
Attachments
I knew it will be top row Congrats! Hard work pays off.
Thank you for the breakdown. It’s really great to see something so good from inside. Will try to addapt some of the usefull tips
Couldn’t ask for a better introduction to the basics of lighting, Thanks for posting this.
Congrats on getting Top Row! With such a high standard it was always going to happen, and quickly!!small_orange_diamond
great stuff. Thank you for sharing.
Your work is great,congrats man for Top Row. Thanks for sharing.
This work looking spectacular, Loved the presentation of your workflow, big thanks for that…
Overall suit details is very nice.
Awesome Render.
Thanks so much for the breakdown
Thanks for sharing your process and the lighting & comp stuff thanks a lot for that, always confusing keep sharing more
@Nebular - Thanks A Lot nebular!
@John - Thank you so much!
@Gabo - Happy to help
@3dcube - Thank you!
@Rahul - Thanks a lot bro!
@Flint - Thanks bro!
@truubluu - Happy to help
Awesome work man and congrats on the top row
Thanks a lot Rohit!!
…lights!