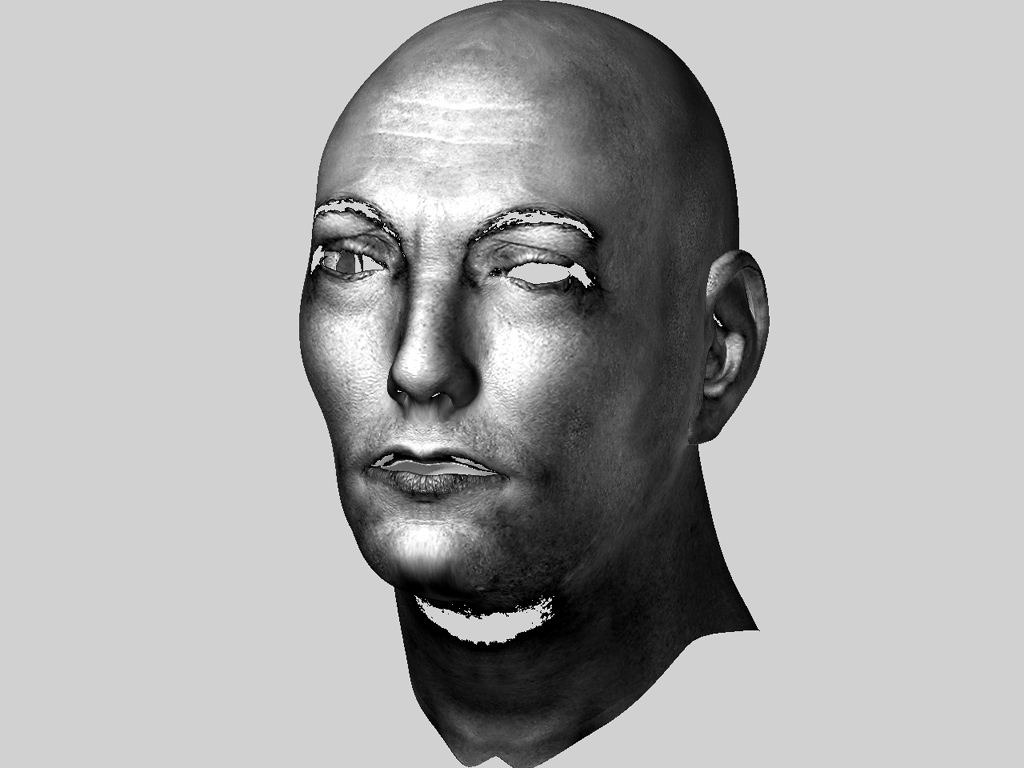
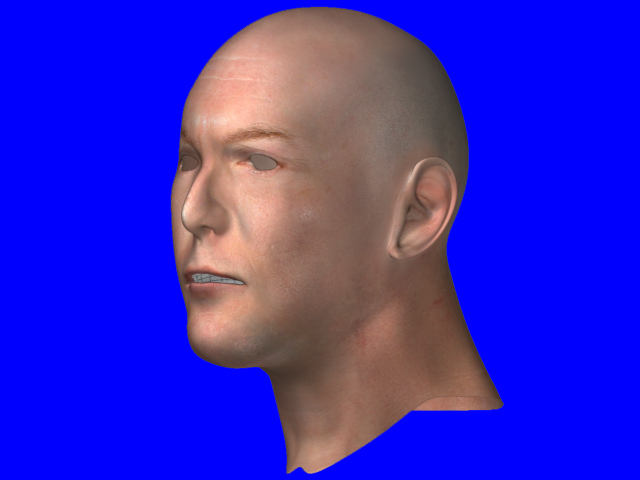
Got inspired to start work on my first real self portrait with the thought that I am my own best subject. Been up all night working my way towards a dirty texture to use in it. Obviously, I have a Lot of work to do on both model and textures but I am tired and sore. As you can see Zbrush has been beating me up 
You should switch your Monitor!  The radiation from your CRT is getting you as it seems.
Looks great! small_orange_diamondsmall_orange_diamond
Lemo
OMG, it looks like the result of an exploded monitor
Waiting for the finished head!
No, your ear is always alive 
Very well done Tartan,
Real nice texturing… he does look quite singed and a little crispy! LOL
Best Regards,
Michael
To use the vernacular…“well oil beef hooked”! Looks like you’re getting it…
Looks good. I still have trouble with this method.
EEK! Van Gogh! I am sure I have that ear around here somewhere 
Thanx for the comments on the dirt/burn texture I was doing. But I managed to accidentally delete the whole project folder and out of recycle bin. I felt like I was getting close too. sigh  I thought I was organizing lol
I tried a different model from the last one and couldnt get the ears to texture correctly. Going back to the first one I used , starting over and then doing ryankingsliens second tutorial after i catch up again
Tartan i agree with previuos comment about the texturing in both version, i will add that the model is very well realized!
Congratulations my friend,
Andreseloy
Thanks Mario  The first 2 tries helped a lot. I am working on the third attempt now and will post my thinking on it later.
ok Third attempt. I deleted the first one by accident and the second one on purpose. I am approaching this a little bit differently than I have before and the end results will probably not match the thinking. But I will share my approach (experiment) here in hopes it will help give someone else an idea of what to or not to avoid. And also because I am bored and this may help break my writer’s block
On this attempt I am using the basic head that Bas Mazur posted in his thread http://www.zbrushcentral.com/zbc/showthread.php?t=35906 . It’s the first model I have used in a long time that I haven’t had to re UV in UV Mapper Pro. I am also combining techniques and plug ins that Marcus Civis and Ryankingslien shared in these 2 threads http://www.zbrushcentral.com/zbc/showthread.php?t=26585&highlight=reference+image and http://www.zbrushcentral.com/zbc/showthread.php?t=33715 .
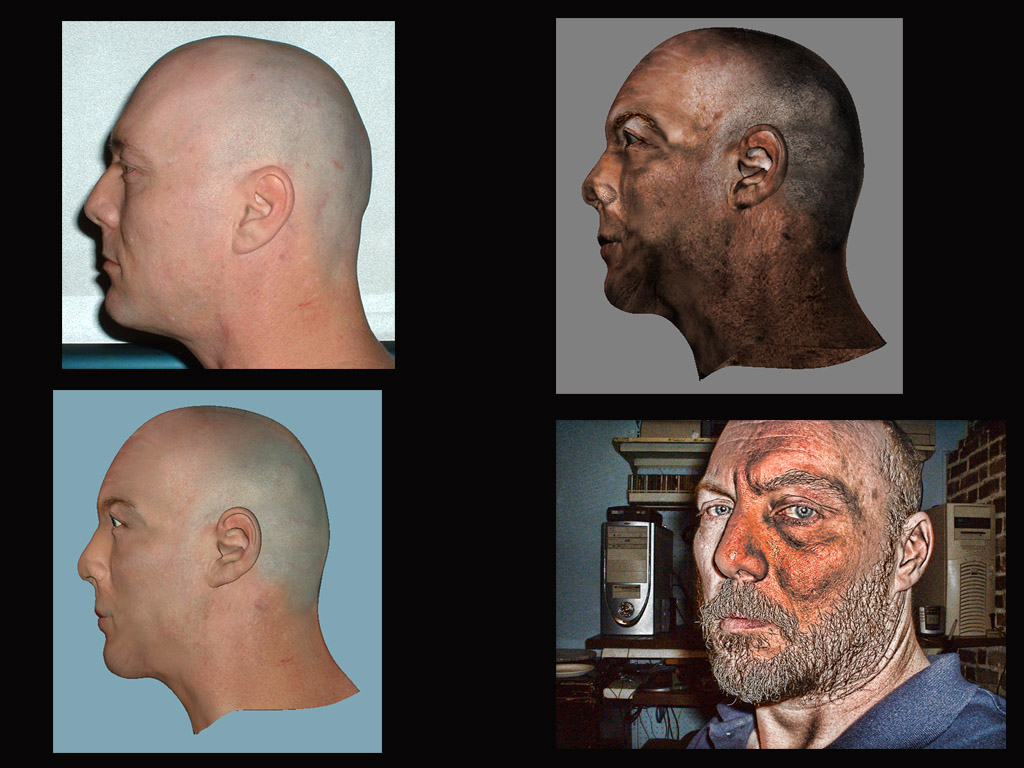
First thing. Reference Images. I decided some months ago to attempt this and shaved my head because I wanted true shape and also it saved on a haircut I used an old projector screen and set my camera on a tripod at a specific height. Then I took shots using the timer in all angles. As my hair grew back in I would repeat this every two weeks. If you try this I suggest using a blue screen. I took the first set of photos into photoshop. Selected the portions I wanted to use and dumped them all into a 2000 x 1500 document in layers. Then I selected the background around each head and deleted those and arranged them so I could see all 6 shots. I resized the document to 3000 x 2250 for a higher resolution and saved 2 different copies. One with Layers intact and the other flattened. Then out of Photoshop and into Zbrush.
I did this for three reasons. 1. I wanted to use Marcus Civis’s Reference Image plug to help beat Bas’s mesh into a rough approximation of my head structure. 2. Storing head positions along the way I wanted to use the high rez image I made in photoshop as the source for the texture. 3. After the texture was finished I wanted to use the image as my reference background while I concentrate on the models mesh details. hmmmm a 4th reason. By saving the stored head positions and using the same background I can go back and correct items like the lips which at this point I am positive I will need to do.
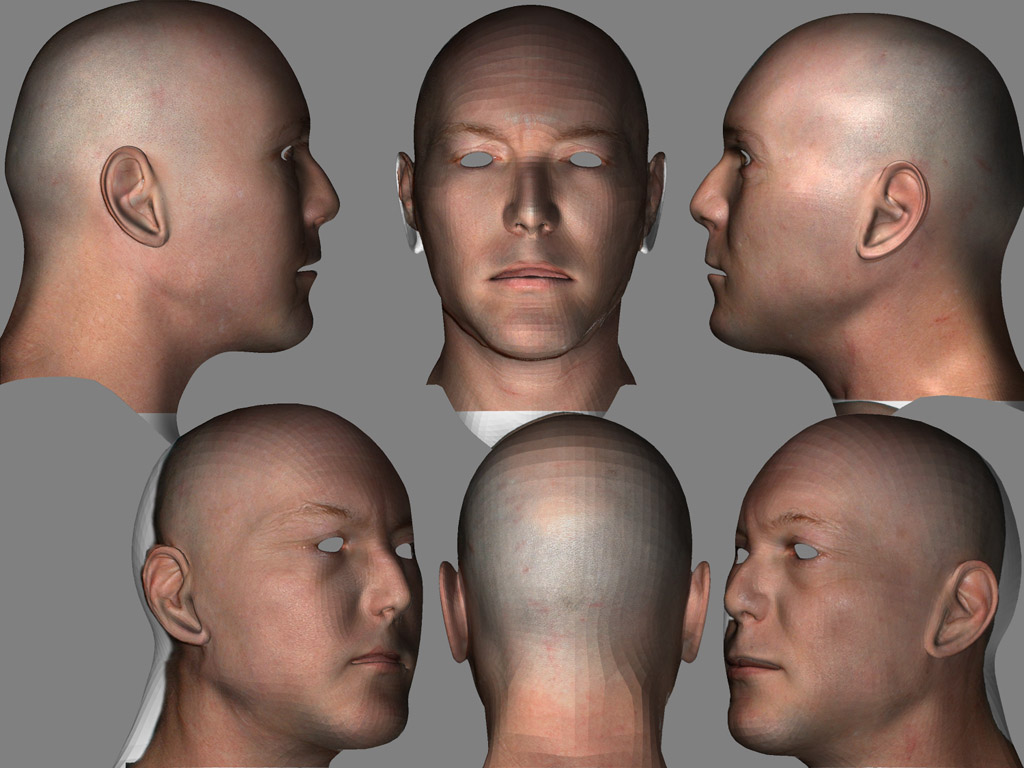
Once I was into Zbrush I brought up Reference Image from the Layers pallet and started saving head positions as a project file as I worked the mesh. The first image here is a composite of the reference image stage.

I also chose not to use fade in projection master. I prefer doing my cleanup in Photoshop. When I find time I will put it together in photoshop and show how to blend out some of the light shadows. Then it’s time to really work the mesh details and I will use Ryankingslien’s tutorial combined with a few thoughts I have had. Hope this didnt bore too much
Attachments
Uh, saving the stored headpositions, please refresh my memories about it 
Hey Bas 
Have you installed Marcus’ Reference Image Plug? If not use then use the link above. Install into Zplugs folder then when Zbrush is started go to Layers up top. When the menu unfolds down at the bottom you will see a panel with head icons on it. Whenever you shift click on one of those icons the position of your model in edit mode is saved. There are 6 of them which is why when I set up the base image I used 6 pictures. Look at picture with the semi transparent models on top of Photograph. If you were to take all those models off thats what the single reference background I was using looks like which I put together in photoshop. When I was using Reference Image to model the base I stored the postion of the model on top of each of the sections of the background image I was using. Once thats done anytime I hit a button like Front, Reference image automatically takes the model and places it on the postion I have stored. This is incredibly useful as you can save the project. When I was ready to use Image Plane I didnt have to place the models on top of my reference picture manually. All I had to do was click the button I wanted to use in Reference Image. The model popped to where I wanted. I could use image plane and then out. Hit the next button, model goes to next position Voila!. If I make a mistake in the modeling or the image plane stage I can always go back and do corrections. I love this plug in lol.
Next to those position buttons is another icon that says reference image. This takes you to menu with other options. Hit help and it explains a lot better than i do
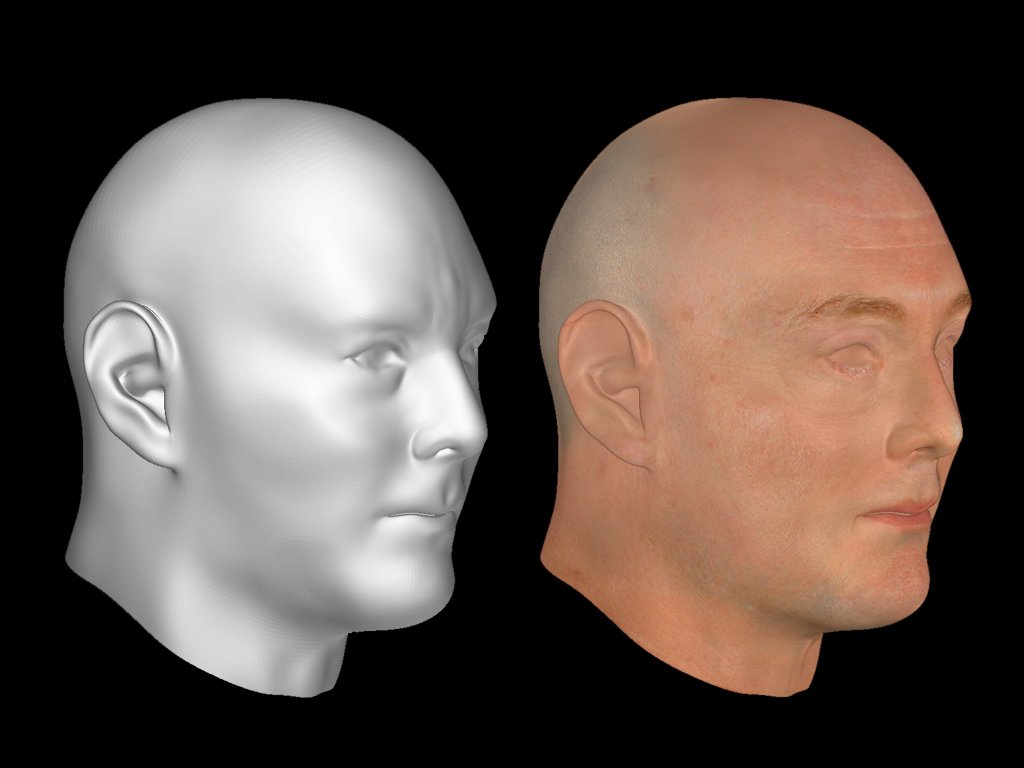
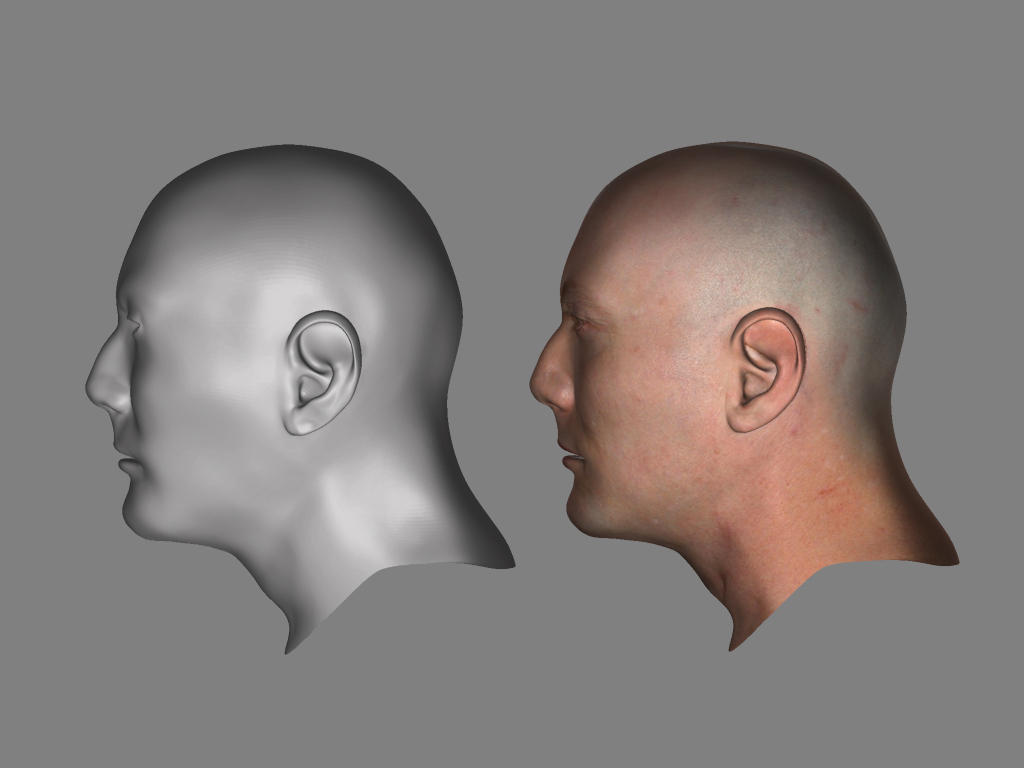
I haven’t had time to blend the light shadows out of this texture and hit my problem areas like lips but I did put the map together. Here is what it looks like so far. Needs more work and then I really need to sit down with the mesh. Wish I had more time but today is Doctors Day!  Oh Joy
You just hit the switch of the lamp
Getting real close I guess. I am almost ready to step up the modeling using ryankingslien’s texture modeling tutorial. After that, I can redo the burn texture and get back to self portrait. I know this is taking me a long time but I aint a pro! :o :rolleyes:
Don’t forget the wrinkles 
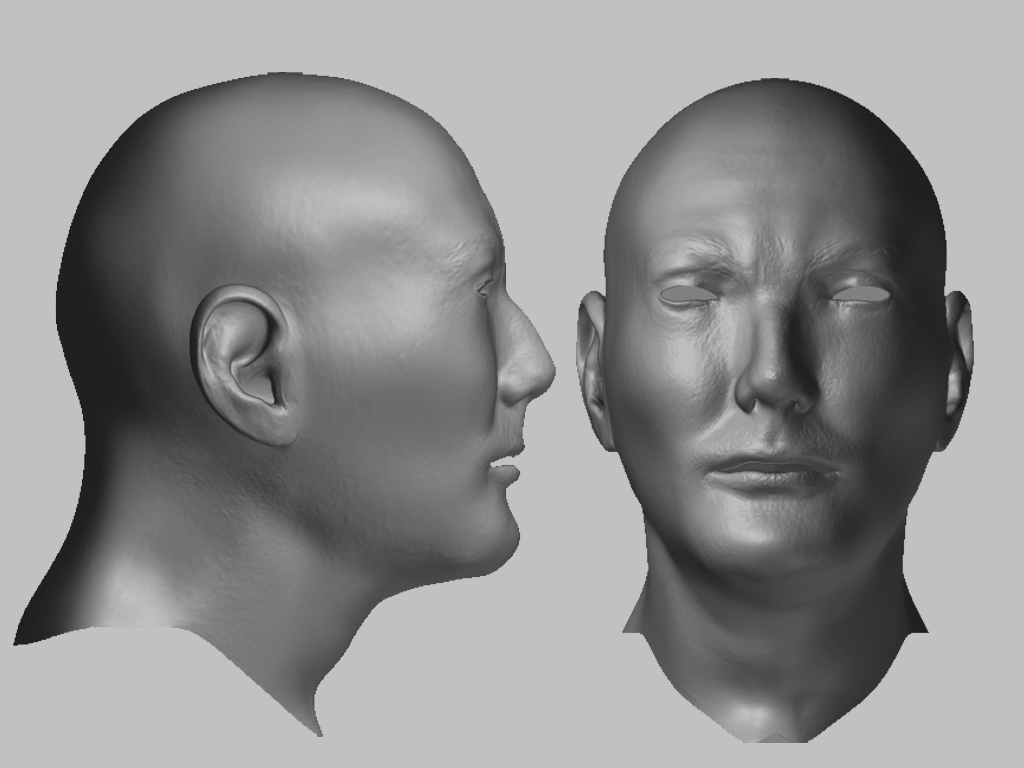
I tried to get the wrinkles in there Bas but they just didn’t show well enough. I guess I will have to try again but I am getting tired of looking at myself! I look at this and I can see where the inflation brush needs to be applied under the eyes some and to the side. Some other flaws as well like the ears. I am ready to get to an actual scene but I am so slow. Want to know what the difference is between a pro and an amateur? The pro can do in 2 days what it has taken me two weeks to get to :rolleyes: :lol: Hmmmm maybe even 2 hours! :idea: :eek:
A theme we can all relate to.
The last images looks spot on
On a righteous medical note: Your computer arrangement is genuinly bad for your health.
Ideally you should move your cpu’s moved away from you by atleast a metre. Nor should you keep your cpu down by your knees or close to your feet. Also move away such things as ethernet routers, power sources and surge portectors as well as making sure you are never flanked on both sides by monitors.
Many would also argue that wireless/ microwave communication devices should be avoided particularly having cordless telephones near you which are like having a microwave oven permently switched on.
All this depends ofcoarse on how long you spend infront of a computer.
Here endeth my lecture.
heh Thanks Boozy
Took me awhile to get the hang of the model, time to plan a scene.
On seating arrangements. I don’t sit as close to the equipment as you may suppose. I have a recliner I put wheels on and usually sit in that with a lapboard holding keyboard mouse wacom and n 52 game controller that I use for graphics programs. Very handy little tool. I rarely use the keyboard as I have my most often used keys macroed into the n52. Anyway sitting in the recliner pushes me back from the equipment. I am usually fine except for when Zbrush is beating on me
My comments would be that the ear is getting a little wide towards the bottom and you might want to give it a little more lobe. Maybe a little more muscle under the lower lip too. Nice progress overall
Thx JT for the comments, I went in and adjusted the muscle under the lower lip and the other areas I noted, around the eyes. On the ear lobe, I don’t really have one lol. Not a hanging one anyway. Take a close look at the 1st image in post. Still a lot I can do with this model but it’s starting to reek of Narcissism lol.
I am backtracking once again and taking new reference photos. Quite frankly I need more detail and better, closer shots. The wrinkles around the eyes, neck and on forehead are just not imprinting themselves as they should using ryankingliens technique. Plus the texture is blurred too much in certain areas and it shows up when imprinting the detail. I will be putting this on the burner for a few weeks while I take texture shots.
In my experiments to get more detail, I imported a 4000 x 4000 texture into the alpha pallet in psd format to use as a mask. I had desaturated and contrasted the texture in photoshop. When I imported the same black and white image in as a texture this was the result. I see possibilites here?
anyway what a curious result.
:o