Alright, this is getting really frustrating… I’m trying to follow the steps that’s supplied by Mr. Spencer.
Okay so I’m learning that for the Bumpmap Viewer approach is only available if you’re actually painting new bumpmaps over the the model. This won’t help me much because the model I have already has alot of details itself.
I put on the displacement map in MAYA and it’s not rendering enough detail. I tweaked it higher but Maya would simply just not bother render it.
Okay… I should have used project master to apply the little small details but I already did it on the model.
Now I know the cavity map will help me pull some more details off my model.
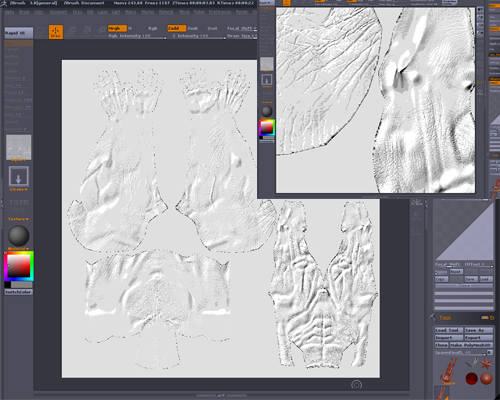
I’ve been following the directions but I can’t seem to understand these things in the directions. I’m using Zbrush3 and I can’t seem to find the options Mr. Spencer is using.
Turn Ambient (turn ambient from where?) all the way up. With Render:Best on, adjust the CavityColorize(Where are all these Cavity options in Zbrush3?), CavityRadius, and CavityIntensity until the wrinkles in your model are shaded as you like. (CavityIntensity is probably a good one to start with.) You should get a posterized effect denoting where the areas of the map will be cavity-shaded.
Once you have a diffuse (cavity) map to your liking press Texture:GrabDoc to make the document into a texture, and then export using Texture:Export.
The diffuse map can be added in Maya similarly to the bump map. In the attributes for your shader attach a file node to the diffuse channel. Dark areas will render darker and light areas will be normal. You may want to adjust the map in a photo editing package if the effect appears too strong or adjust the file node settings.