I have made a bump map with bump material viewer from zbrush.
I would like to use that map and make a noprmal map, can I some how use bump to change model and than to make a normal map???
please help!!
thanks
I have made a bump map with bump material viewer from zbrush.
I would like to use that map and make a noprmal map, can I some how use bump to change model and than to make a normal map???
please help!!
thanks
Use Z-Mapper for this.
thanks but could you tell me little more how, I am new to z-mapper
also nvidia makes a plug-in for photoshop. I tried it and it works fine.
plugin:
http://developer.nvidia.com/object/photoshop_dds_plugins.html
download at the bottom of the page
tutorial:
http://www.monitorstudios.com/bcloward/tutorials_normal_maps4.html
read carefully
you might want to set the scale a little higher than 4, I set it on mine to 35
thanks mate
oh guys I have a problem with normal map.
I’m working in Maya and render with Rendeman for Maya and got this wirerd problem
Anyone know why?
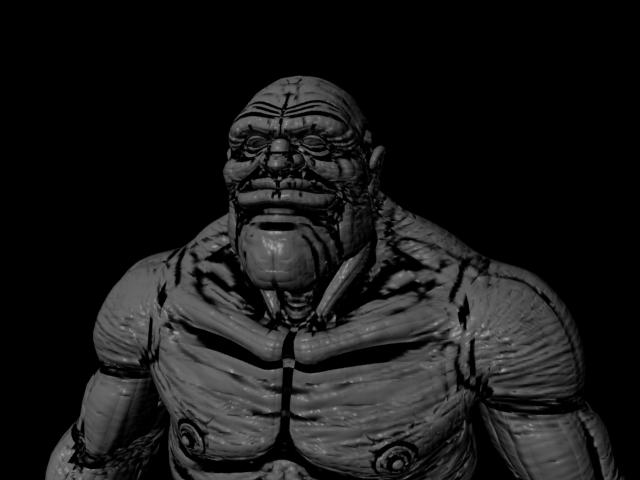
ok, I have find out that if I lover in bump vlue thqn black lines will remove,also if I make my aplha gain realy low than i remove some more black lines…and if I make realy low than all will gone, but than i have problem, details are lost…
any ideas?
It appears as though you are using the wrong type of normal map for Maya. (You are doing normal maps for this character, right?) Different softwares have different types of normal maps. You need to either generate the normal map in Maya or some program that makes normal maps for Maya.
In your scene, if you press the number 7 on your keyboard it will give you a view of the lighting. Add a point light and move it around the character. The black lines should probably turn light when you move the light into a certain position in the scene. This says that the normal map IS working, however it is the wrong type of normal map. (wrong colors)
In my understanding, with normal maps you have a spectrum of colors which assign a direction for the normals of the mesh. Each colored pixel sends a normal off in whatever direction maya interprets it as. Blue sends the normals in one direction, and pink sends them in another.
You could try the plugin I gave earlier, or try to generate the map (if you are working with a high-poly mesh and a low-poly one) in Maya, using the Surface Sampler (found under modify>surface sampler)
To use the surface sampler is easy. You first click on “clear all” then you select the low-poly mesh and under Target Surfaces click “Add Selected” then select the high-poly mesh and under Source Surfaces click “Add Selected.”
Then scroll down to the name of the file and rename it. Click “Bake” and Maya does the rest. The meshes have to be in close proximity to one another. That’s all I know.
i find itr, it’s all in alpha gain and offser, you should make offset twice lower than alpha gain it’s like with displacmnet maps 

Well, nice work then!
Character looks really good.
You should add a specular map to it as well.