ZBrushCentral

Bump map exports with some kind of grid on.

Hello there…
Can someone help me…

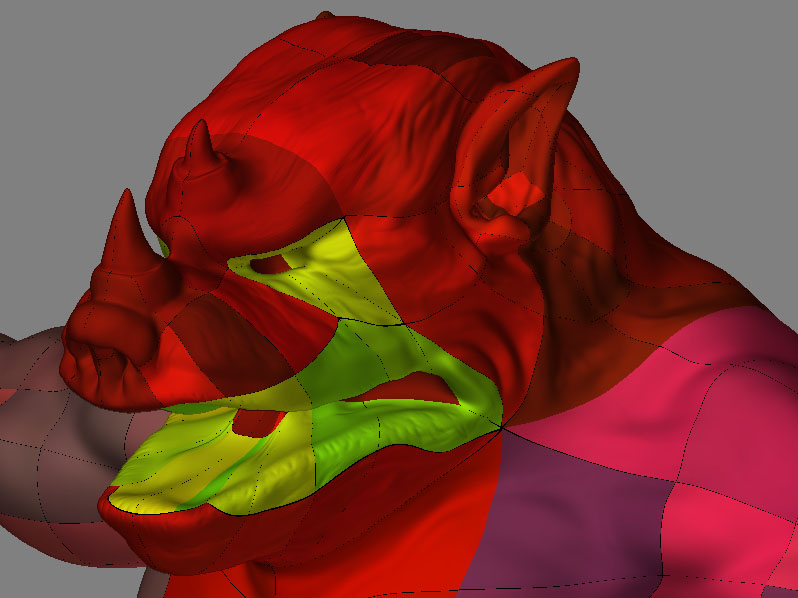
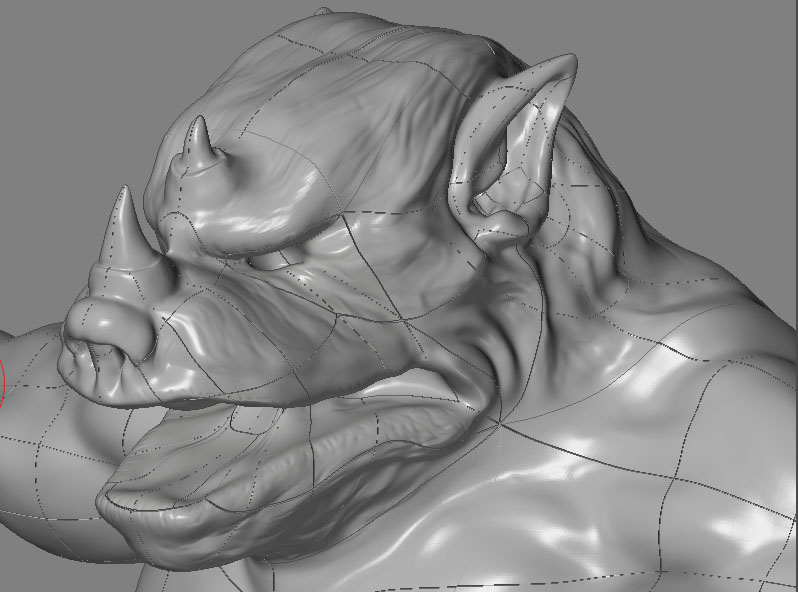
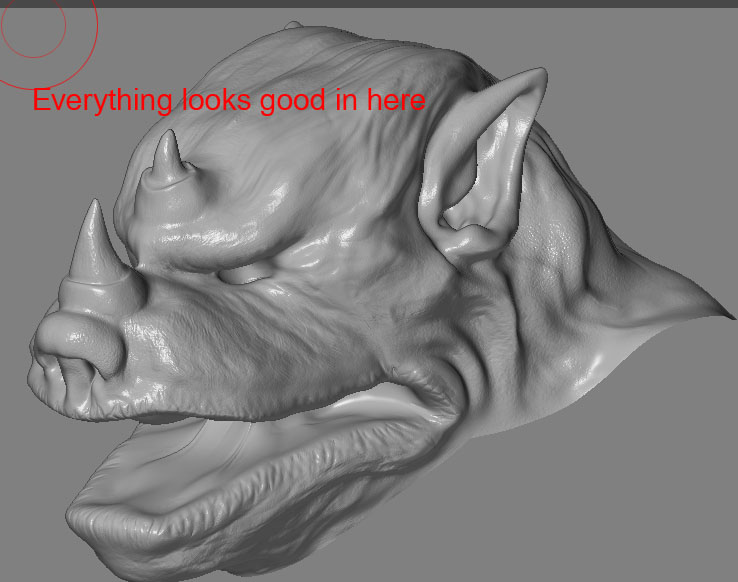
I finished making bump-map in Zbrush, everything looks good in Z but when i try to render in MAYA i am start getting some seems or a grid if u will.
There is an option in Z, Fix Seems but it does not reel work. I load the texture and then use that option but nothing really happens, in MAYA i still see the same problem, maybe i am doing something wrong.

Any idea where is it coming from ?

I am adding an immage for u to take a loook at…

Attachments

Bump.jpg

I doubt that this is a problem with the export. Please check the settings in your rendering engine to make sure that all texture filtering (such as anti-aliasing or MIP-mapping) is turned off. Those algorithms by their very nature pull in data from the surrounding pixels, which tends to introduce artifacts like you show – they’re especially noticeable with bump maps and displacement maps.

If you continue to have trouble, could you please provide information about the model’s UV’s? For example, how were they assigned?

Here it is:

  1. All UV’s where done in Z using UV_to_Texture. I’ve checked UV_Overlapping, everything was good, no problems there.
  2. On the first image u can see BUMP in MAYA. If you look close then u will see small indentation in there, like there are some kind of lines, I tried to smooth them out using blur brush it did not help.
  3. On the 2ned image u can see UV in Zbrush. There are also some black edges between the different colors, like some kind of a greed.
    4 On the 3ed image u can see the same texture but with BUMP shaider on and this is where the problem appears, using FIX seams does not really help. Even if i use it i can still see the grid and this is the problem because for some reason it also effects my original BUMP texture.
  4. On the 4 image u can see the head with my bump map file on in Zbrush. There everything looks good, no seams no nothing i did not even know that I had a problem, only after i went to MAYA i saw it.

Attachments

Bump_In_Maya.jpg

UV'sINZubrush.jpg

UVsWithBUMP.jpg

ZBurshLooksFine.jpg

You may need to ajust the UV’s slightly in the U and/or V direction. You’ll find settings for this in the Tool>Texture menu. Try values of + or - .05 and then click the Adjust button. It may take a few tries to find the correct values for your renderer, but once you have them you will be able to apply them to every texture before exporting to get a perfect fit every time.

Once i find the problem… Do i have to reexport the model with the texture or just the texture file ?

Just the texture. The adjustment doesn’t modify the UV’s. It simply adjusts the texture’s position slightly on the map.

Basically, UV coordinates read from 0,0 to 1,1 for a standard map. But not all rendering engines are exactly the same in how they register that 0,0 point. What ZBrush calls 0,0 another engine might actually call .05,-.05 or something similar.

With color maps, this slight misalignment is rarely noticeable. But bump and displacement maps are more sensitive.