Coooool really beatifull shader thanks very much for sharing!!!
Fantastic work and love the tutorials. For the SSS shader, it looks like you have different detail on the epidermal and subdermal layers. How did you come up with subdermal detailing? I guess the weight layer was its on texture rather than in the alpha of one of the SSS shader layer textures?
I hope the first image got at least top row.
@cherrypig: Your welcome! 
@rodrigo23: glad you like it
@womball: thanks a bunch man! in fact usually i take the time and make noticeable differences between diffuse (or overall), epidermal and subdermal textures specially for subdermal as it does’nt have much to do with others. subdermal is the underlying tissue of skin therefore it contains all the red/purple stuff such as veins, etc. to distinguish these color slots for instance look at your hand on your palm you may see some red dots(veins, etc), those red dots are definitely in the subdermal layer of skin because if you press your palm in those red areas they disappear and you can surely say these redness are not really part of top layer of my skin(diffuse/overall). so just look at references and analyze where is what! i wish i could say it a little more clearer but at times i fail to convey my meaning 
for those who don’t have mix8layer, i’ve attached it to this post.
P.S. one thing i forgot to mention in the satin shader tutorial is that if you have a file texture for the base diffuse color you may instead connect the ramp node to its color gain.
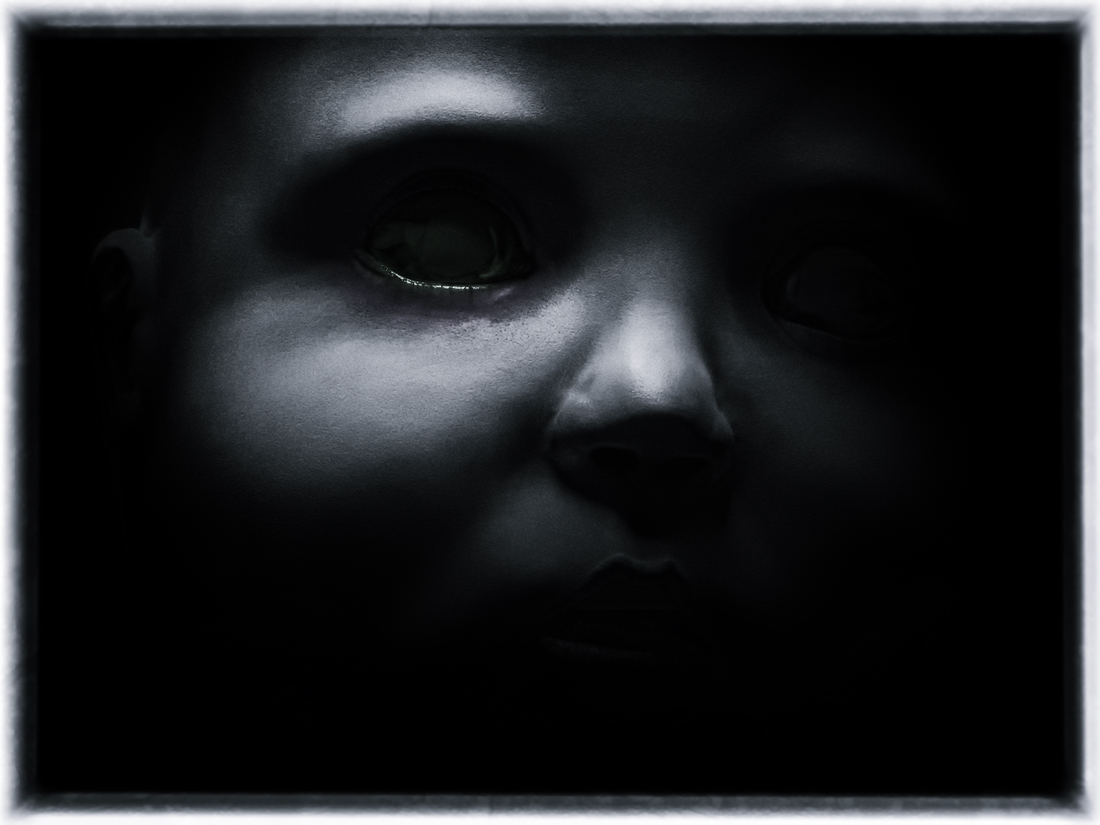
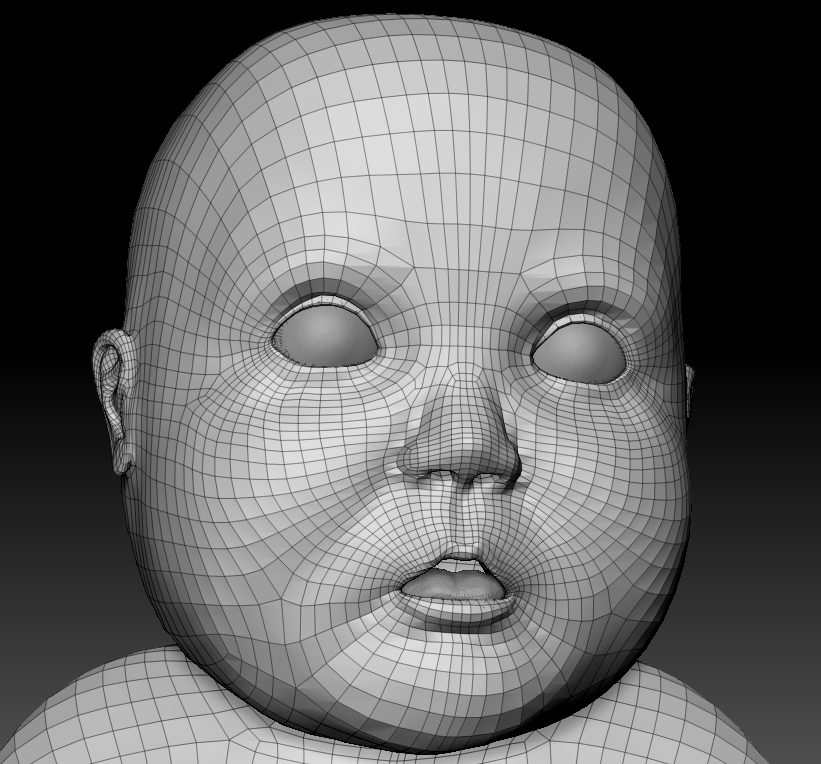
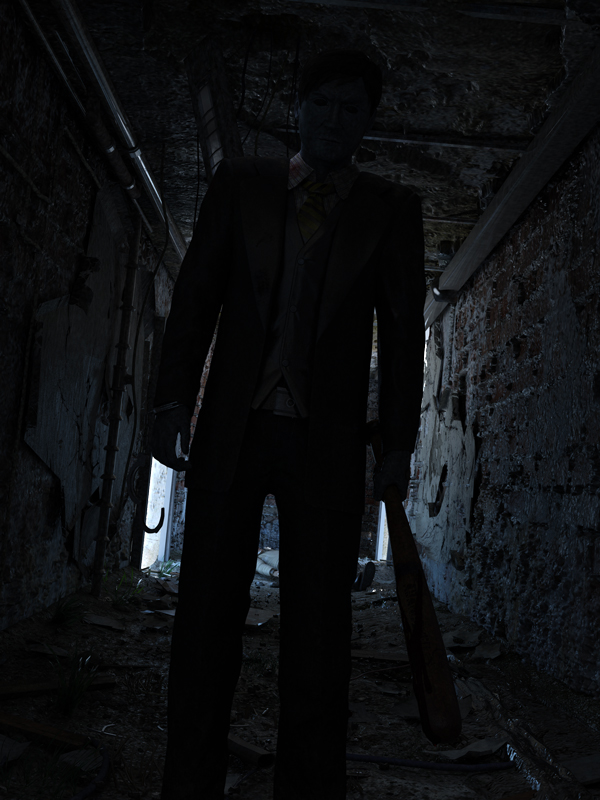
This one is titled Enchanted and is based on a concept by one of my most favorite 2D artists, Max Verehin.
As usual all done with mouse, modeling, sculpting and retopo were done in ZBrush, Maya for scene setup, mental ray for rendering, bodypaint for texturing and photoshop for both texturing and post-production.
CnC are most welcome!
[EnThumb.jpg[/ATT]%3C/font%3E"] ](http://%3Cfont%20color=%22#9A9A9A%22%3E[ATT=247928&thumb=1)
[Enchanted.jpg[/ATT]%3C/font%3E"]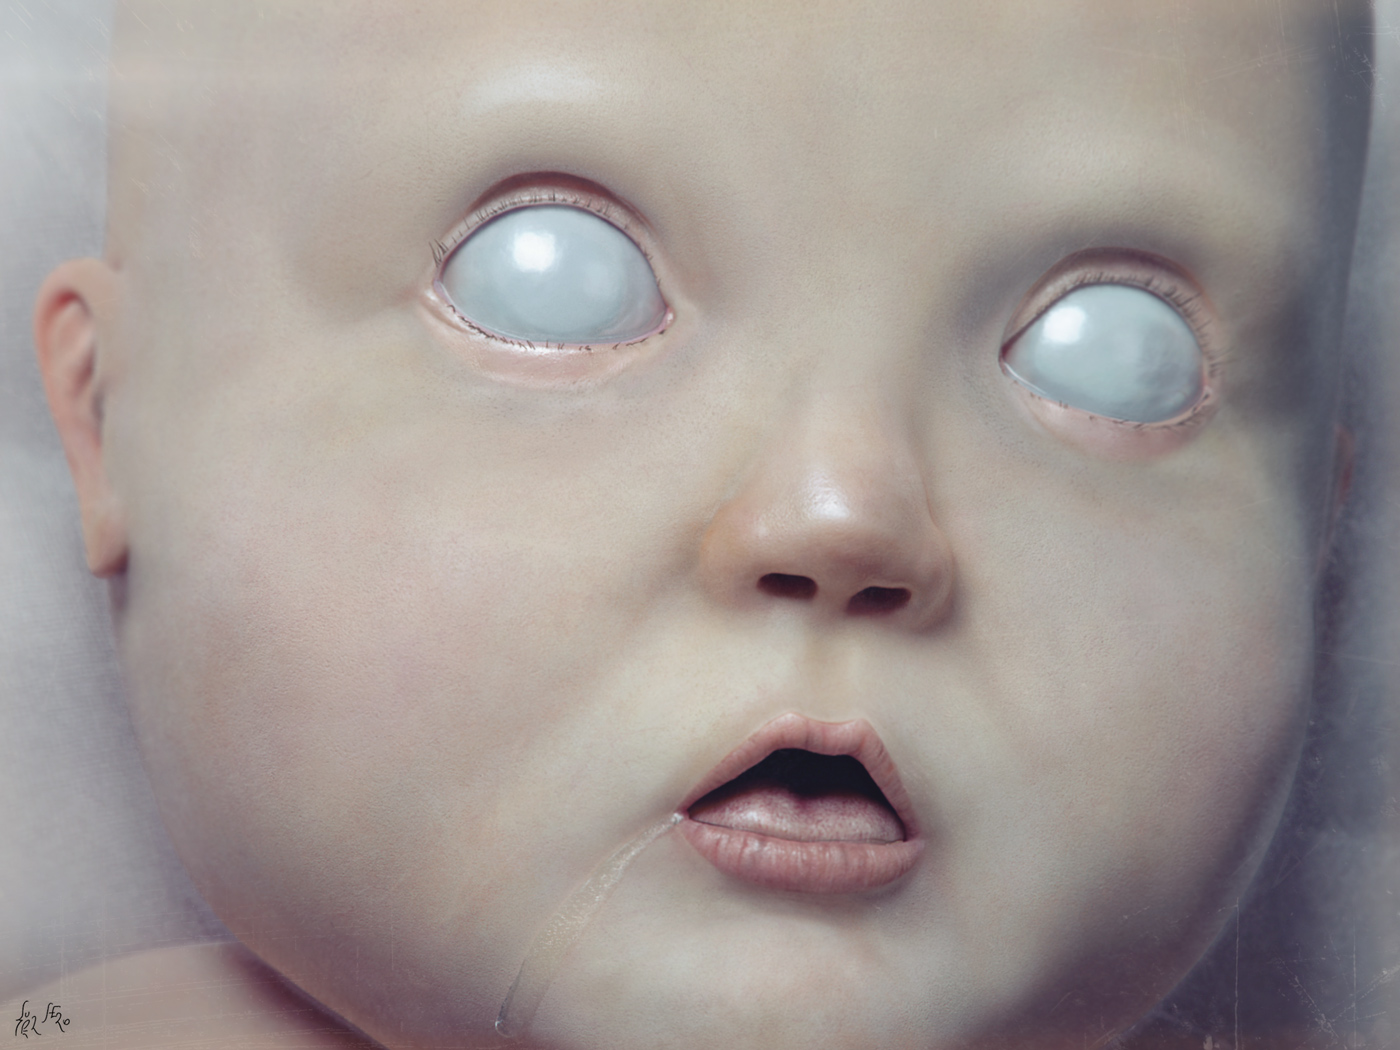 ](http://%3Cfont%20color=%22#9A9A9A%22%3E[ATT=247930)
Attachments
Great work man, the tutorials are very nice also. +)
Many many nightmares to come…
@AjdinBarucija: thanks a lot!
@Jerick: sounds cool 
Attachments

Attachments


nice work superhero , that guy is a little bit rigid , if i been in you i will spend a little more time on posing , maybe looking on some reference.
anyway thank you for the turtorials, they’re awesome!
I disagree, I think in this case the unnatural “rigid” pose is working out to create a more creepy feel. I like it
very well done,if your intention was to get creepy dummy frightening feel,you got it.i got that type animation movie feeling here. small_orange_diamondsmall_orange_diamondsmall_orange_diamondif you done for an realistic human,you should have to more spend on his posing and shader,but i think yours was not that.your all image has special feel…keep it up…:D
@mohamed raoof: yeah, i was looking for more of a creepy looking feel, yet as you said i have to work on my posings. thanks a lot. you works are awesome dude
below is a test render:
Attachments
Wow Great Job man. Could you share your process in the making of this piece? It look amazing man.
Thanks a lot Eiad! i don’t think there is anything special in this. however if you narrow down what you want to know about more, i will surely explain it
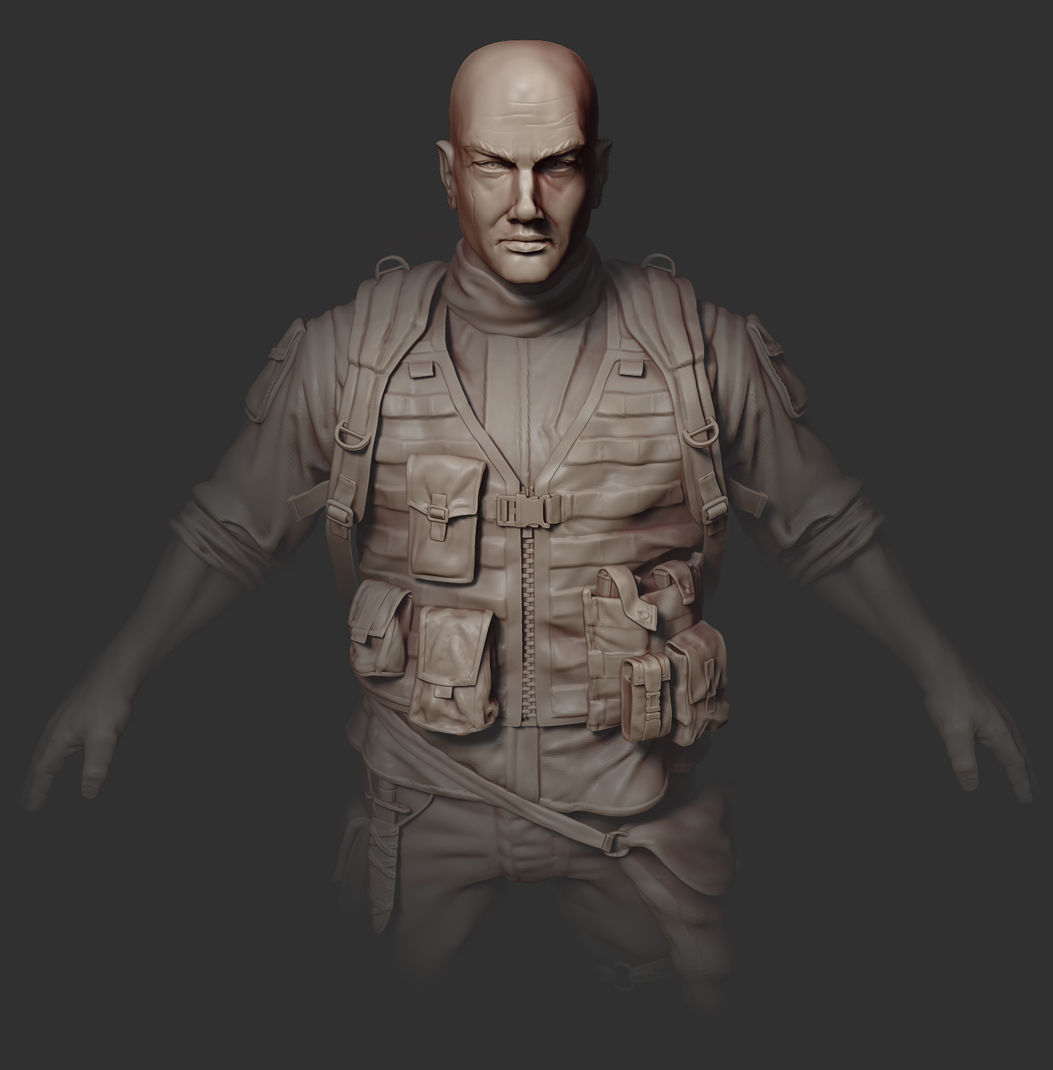
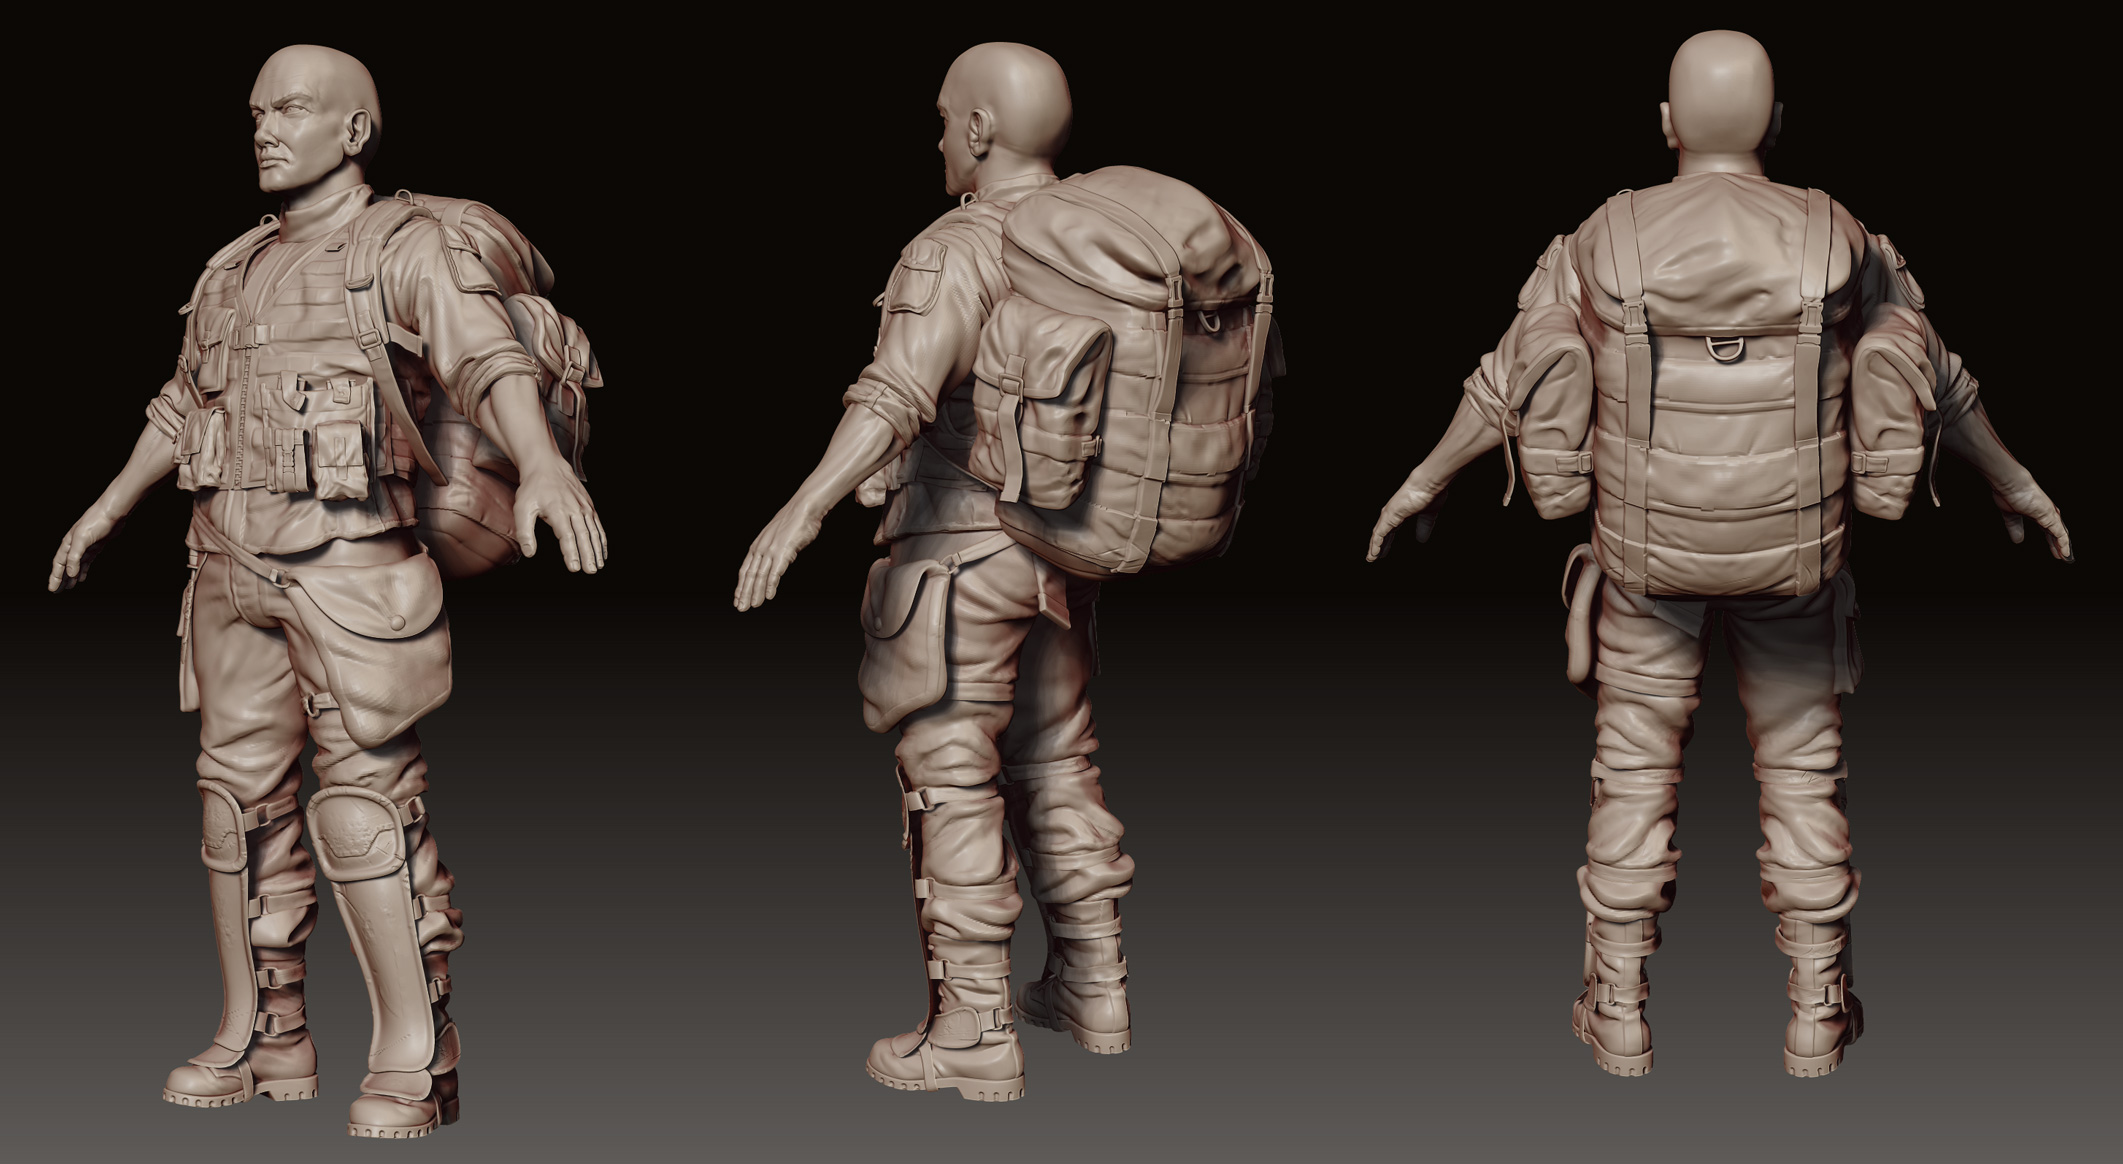
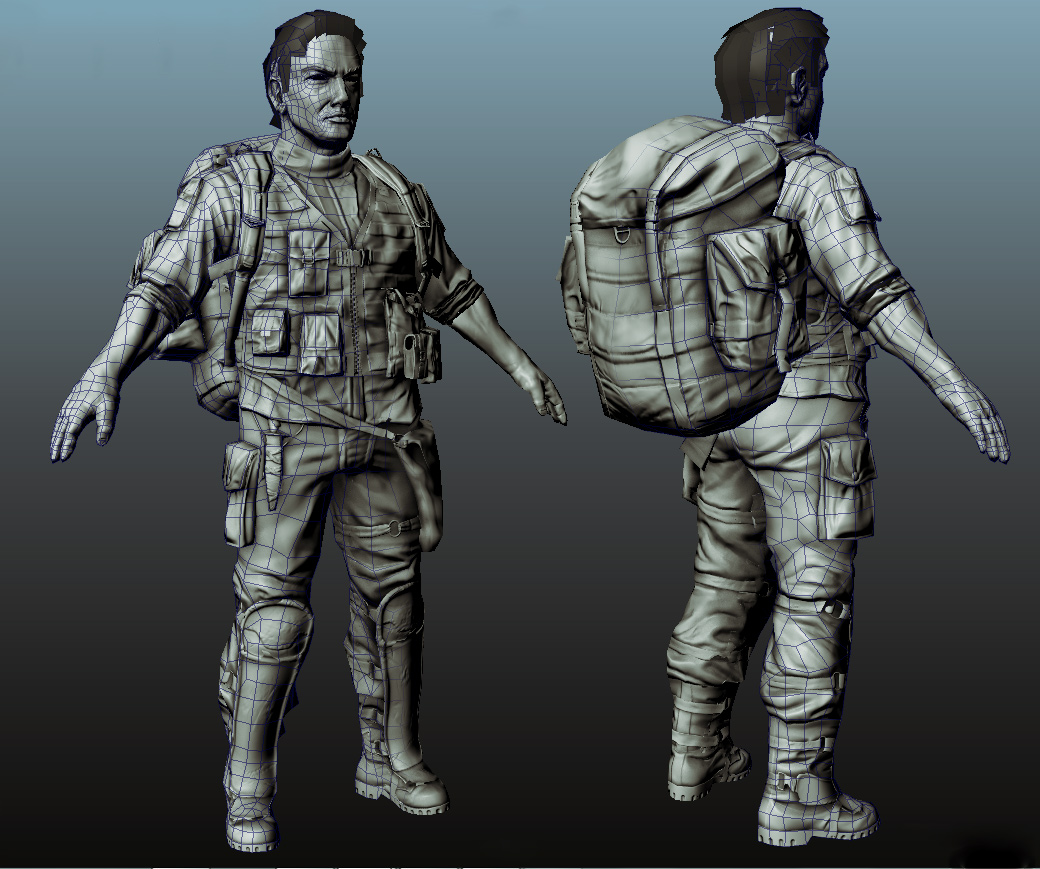
Actually it was my first time i completed a game character! it took me 4-5 days to make it(including retopology) working more or less 14 hours a day on it.
ZBrush was heavily used and i used Nex to retopologize it. xNormal was also used to bake the normal maps. done with mouse.
thanks for watching
Attachments

Amazing Character I love it.
My weakness is the lighting and rendering. For some reason I can’t comprehend how to make good lighting setup! most of the times the textures are terrible to show in my renders. It’s not the lack of the texture quality, it’s the lack of the understanding in how to use them to represent what I wanted. I use 3ds max and you use maya but it doesn’t harm to say the least explain how you did the bat the guy holds. The rendering of the bat look amazing. The coat is well done too. I would love to understand how you made it like if there is a dirt over it.
Thanks for sharing.
Eiad
These looks pretty great! I think you’re technical skills and rendering are just amazing. Your characters however could use some work. The proportions and anatomy on your human characters are somewhat off. In this latest soldier character, the arms appear far too short, his head is too large, and his facial features are not in the proper positions. I also think your clothwork could use some love. They aren’t bad but they aren’t great either…a lot of it is blobby and doesn’t quite have the gravity pulling cloth feel to them. I would compare with reference and tweak those some more. Hope you are able to remedy this stuff cuz it would really take your work from amazing to just insane excellence with your already fantastic rendering skills.
You seem pretty strong on the sculpting side of things though. That is not something to ignore, that is a very powerful skill.
oops i forgot to mention that the tris count is 7656!
@Eiad: thanks a lot buddy. first things that you always need to be sure of is linear workflow and correct physical scale of your objects. those are you mandatory. as for the texturing check out these two links they pretty much contain what i usually try to do. Link Link
also for the coat, i already have a tutorial about Velvet Shader in this thread. and thats what really did the trick for the coat rendering
if there is anything else you want to know just tell.
@sarakawa: Thank you so much! it was just what i needed to know. i will definitely take those into account for future works . usually i’m too meticulous when i’m making something but this one i indeed didn’t have much time to work on it  .
.
@Jerick: thank you heaps for the kind words!