ZBrushCentral

Best way to go about creating this character? Good Workflow?

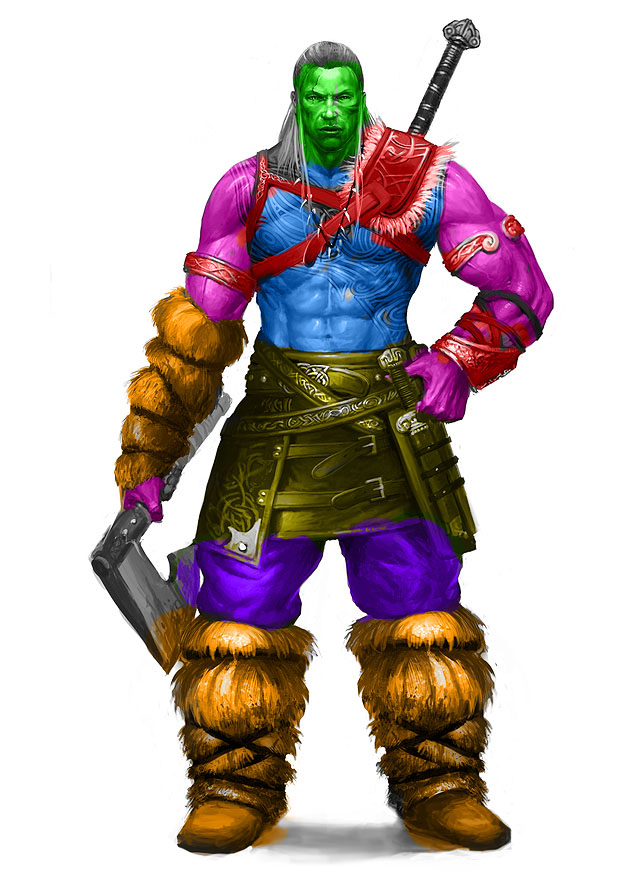
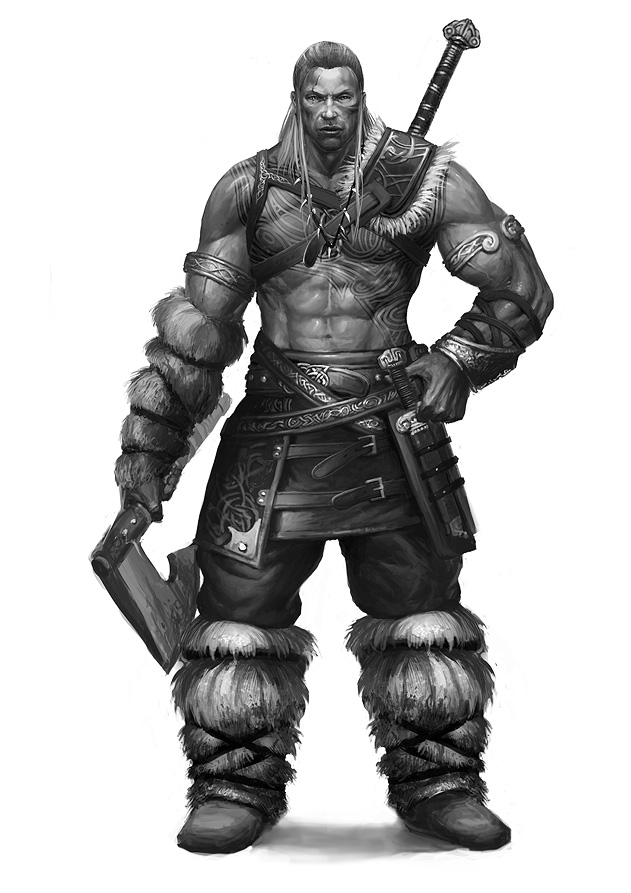
Hey, I’m going to be using Maya 2008 to do all the low poly modeling for this character. I plan to model the entire body (naked) and then adding separate geometry for his armor on top of him.

Then I’ll UV unwrap everything and export it out.

I want to then bring him into zbrush and do a super high poly sculpt on him and then create some 32 bit displacement maps, normal maps and cavity maps.

My question for you all would be how should I go about creating those maps the best way? My computer could have limitations on having separate displacement maps (since a 2048x2048 is about 48mbs) for each different piece of armor.

Is there a really efficient way to use subtools or polygroups for this character?

Also taking into consideration I would eventually rig this character.

I realize that it’s probably a whole lot easier to just model the character as one piece with armor welded on him, but I want to be able to easily change pieces and swap them out, I also want to make sure his form stays right.

Body_Ref_1.jpg

Any advice on a workflow for this is GREATLY appreciated.

Attachments

Body_Ref_2.jpg

Well, the traditional way most people would go about doing this, is to split the figure and his various armour pieces off into separate subtools, which allows you to easily sculpt and manipulate the various elements separately, as well as apply your machines maximum polycount potential to each piece, rather than over the entire group of elements, vastly increasing performance and detail.

If you’d like to be able to easily isolate components of a single mesh but keep them able to be “live” and edited simultaneously for continuous sculpting (for instance they way you have the arms separated from the torso), you may want to keep them part of the same subtool, but assign them separate “polygroups”, so you can easily hide or mask them, when need be, but keep them part of the same seamless mesh of the torso.

From there, you have a number of options depending on your intended output. For a game style animated figure, you could then construct a new, unibody, lo poly mesh cage over top of the hi res/ multi mesh figure, then project all the hi res detail onto the single lo poly mesh which you can then animate, and create single texture maps for color, normal, cavity, etc. Or if your output needs were more forgiving, you can simply then export and combine all the low poly subtools and their associated image maps for a more complicated but realistic animation/rigging process. This is all very general, and depending on your output needs, there are any number of variations on these approaches that might be appropriate. Unfortunately the specifics of this basic process does require experience with any number of aspects of the toolset, and is more that could be spoonfed to you here. So I suggest you familiarize yourself with the toolset and the various options it gives you, and put them through their paces so you learn all the ins and out and quirks there may be, which sadly, wont be an overnight process.

Thanks for the response, that was quite insightful. I think I have a pretty general understanding of how I want it to work and you’re 100% correct when you say in laymens terms I should just “play with it”.

That’s always the easiest way to learn isn’t it haha.

Thanks again!