hmm did you tried to export and fix the lowest level in maya and then instead just reimpoting of the current mesh to just reproject it?
to bump the sub d lvl’s up and then reproject all…
hmm did you tried to export and fix the lowest level in maya and then instead just reimpoting of the current mesh to just reproject it?
to bump the sub d lvl’s up and then reproject all…
too cool work 
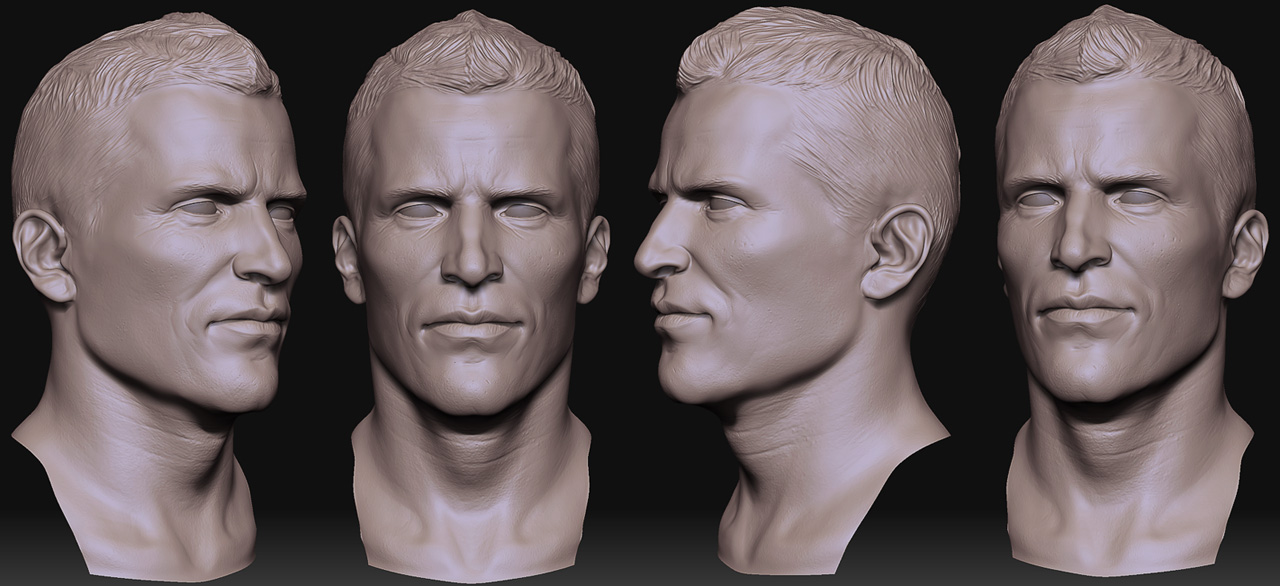
Hmmm. Maybe check to see that your base mesh is perfectly mirrored. On the import zbrush could have made it assymetrical. Just a thought 
Are you using the PC or mac version? Have you tried using Smart ReSym instead of ReSym? Not entirely sure what the difference is. Also, are you doing your resymmetry on the lowest or highest subdivision level?
thank guys, I finally found the problem. For some reason when I rescaled the model in Zbrush the head shifted (perhaps an hidden mask??)
I did a smart resym just on half of the head on the lowest res and it fixed the problem.
thanks again for all the replies guys.
here are some stuff I did and posted on my blog but forgot to post here.
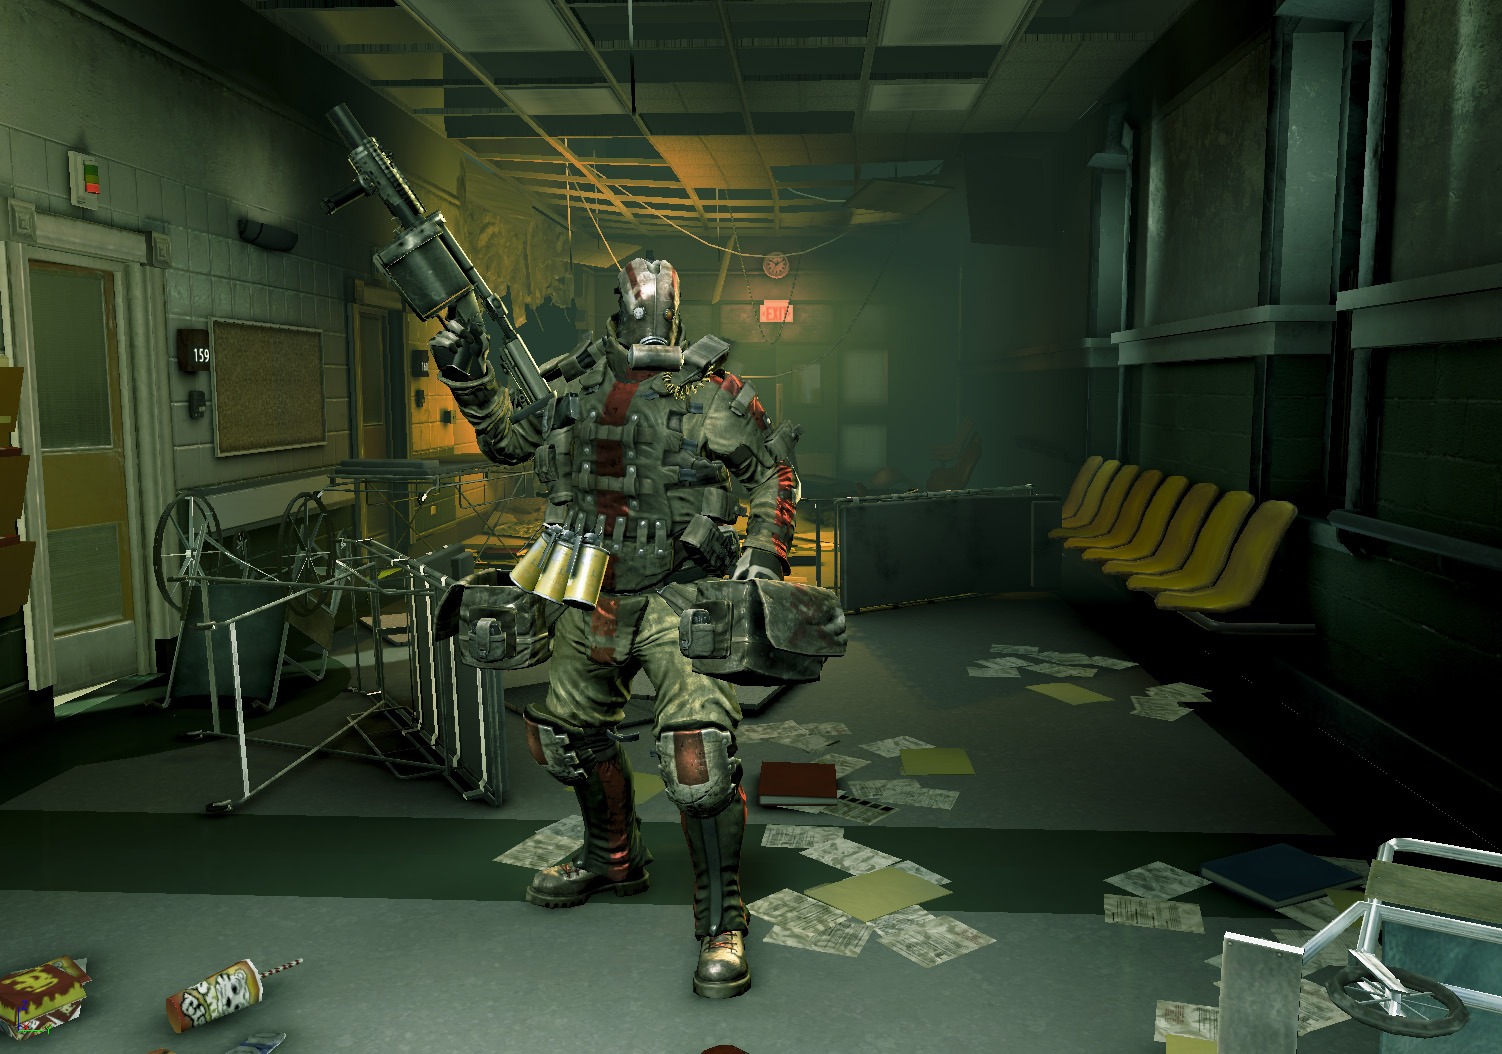
here is a realesed picture of one of the character I did for Army Of TWo: TFD
Here are some posings and ingame renders that I did for the AO2 website
I did the modeling/texturing for Salem and Murray and Joseph Botardo did the modeling/texturing of Rios
Murray’s hair is a bit funny:), it was hard to have a nice result without using alphas (decision was made at the beginning of the prod) and Unreal3 is not the best for hair work.
The skin is a standard material of Unreal but with just a diffuse, a spec and a normal map. I added a cubemap reflection very subtle but the result is nice for a cheap cost. (hair/skin/clothes shared the same material)
the two next pictures were tests I did for dark skins
and more 3dsmax render tests
Simply amazing, the DW entry is awesome love the design.
Really awesome work as usual man!! Keep it up!
And i’d love to see that DW entry finished!! Looking good so far!
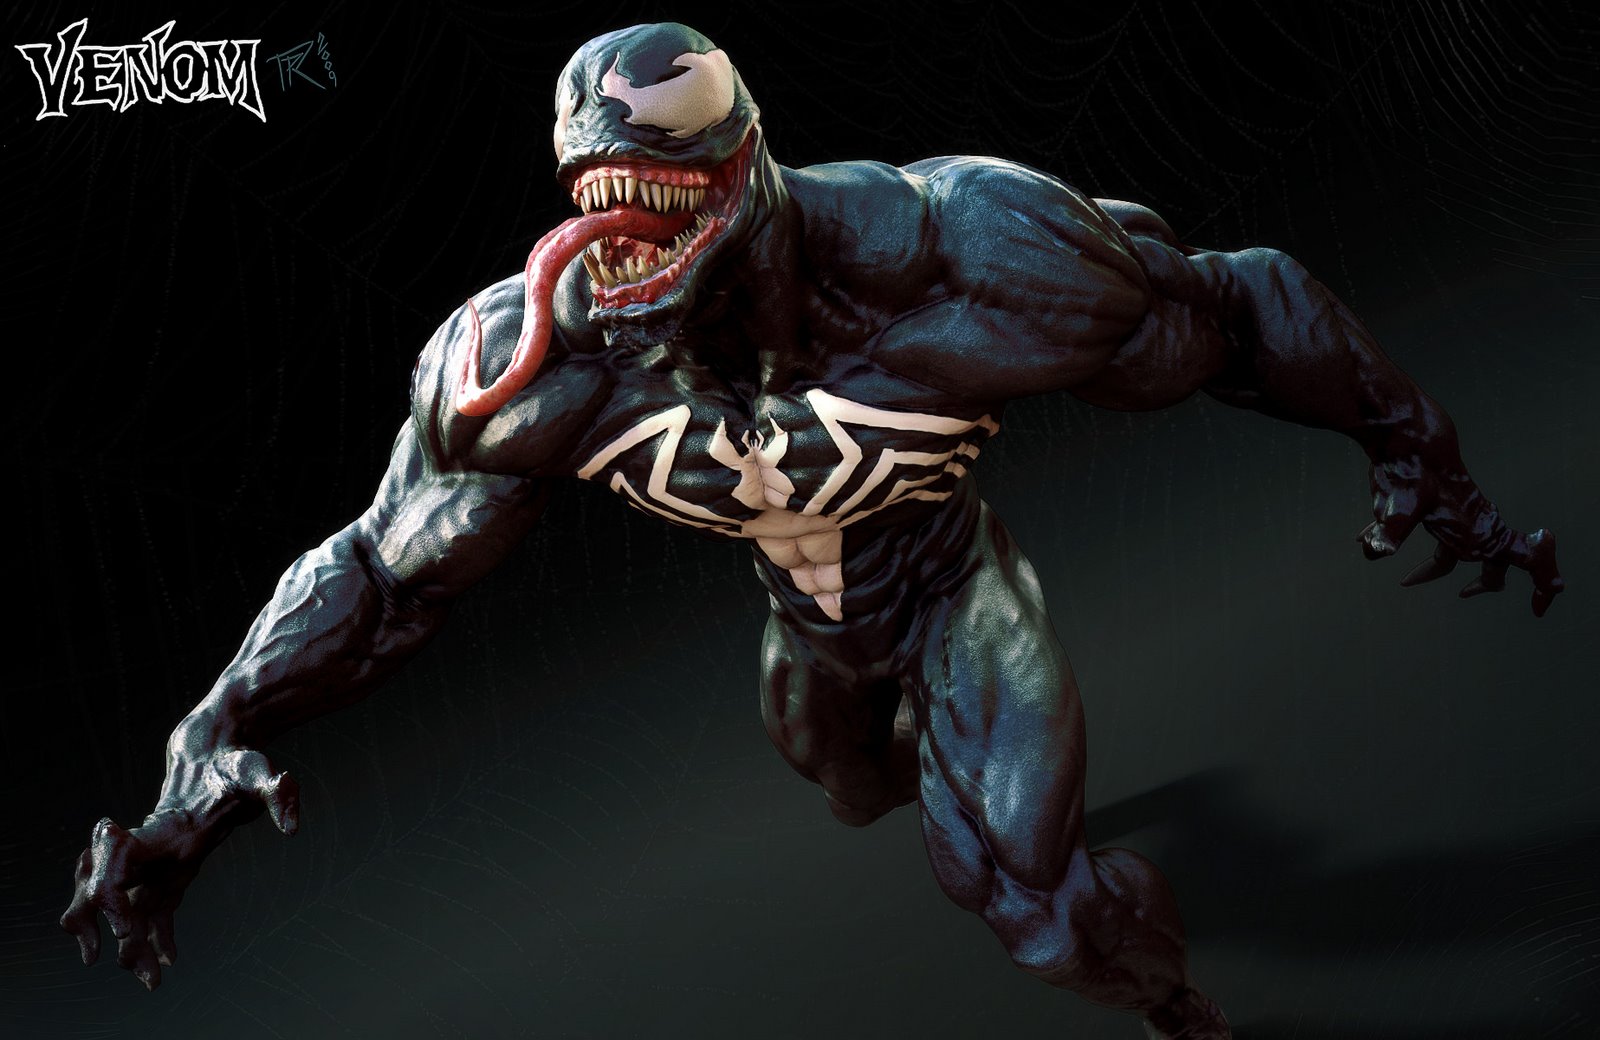
wow ! impressive works man ! love the black male, great character !
Very nice work!
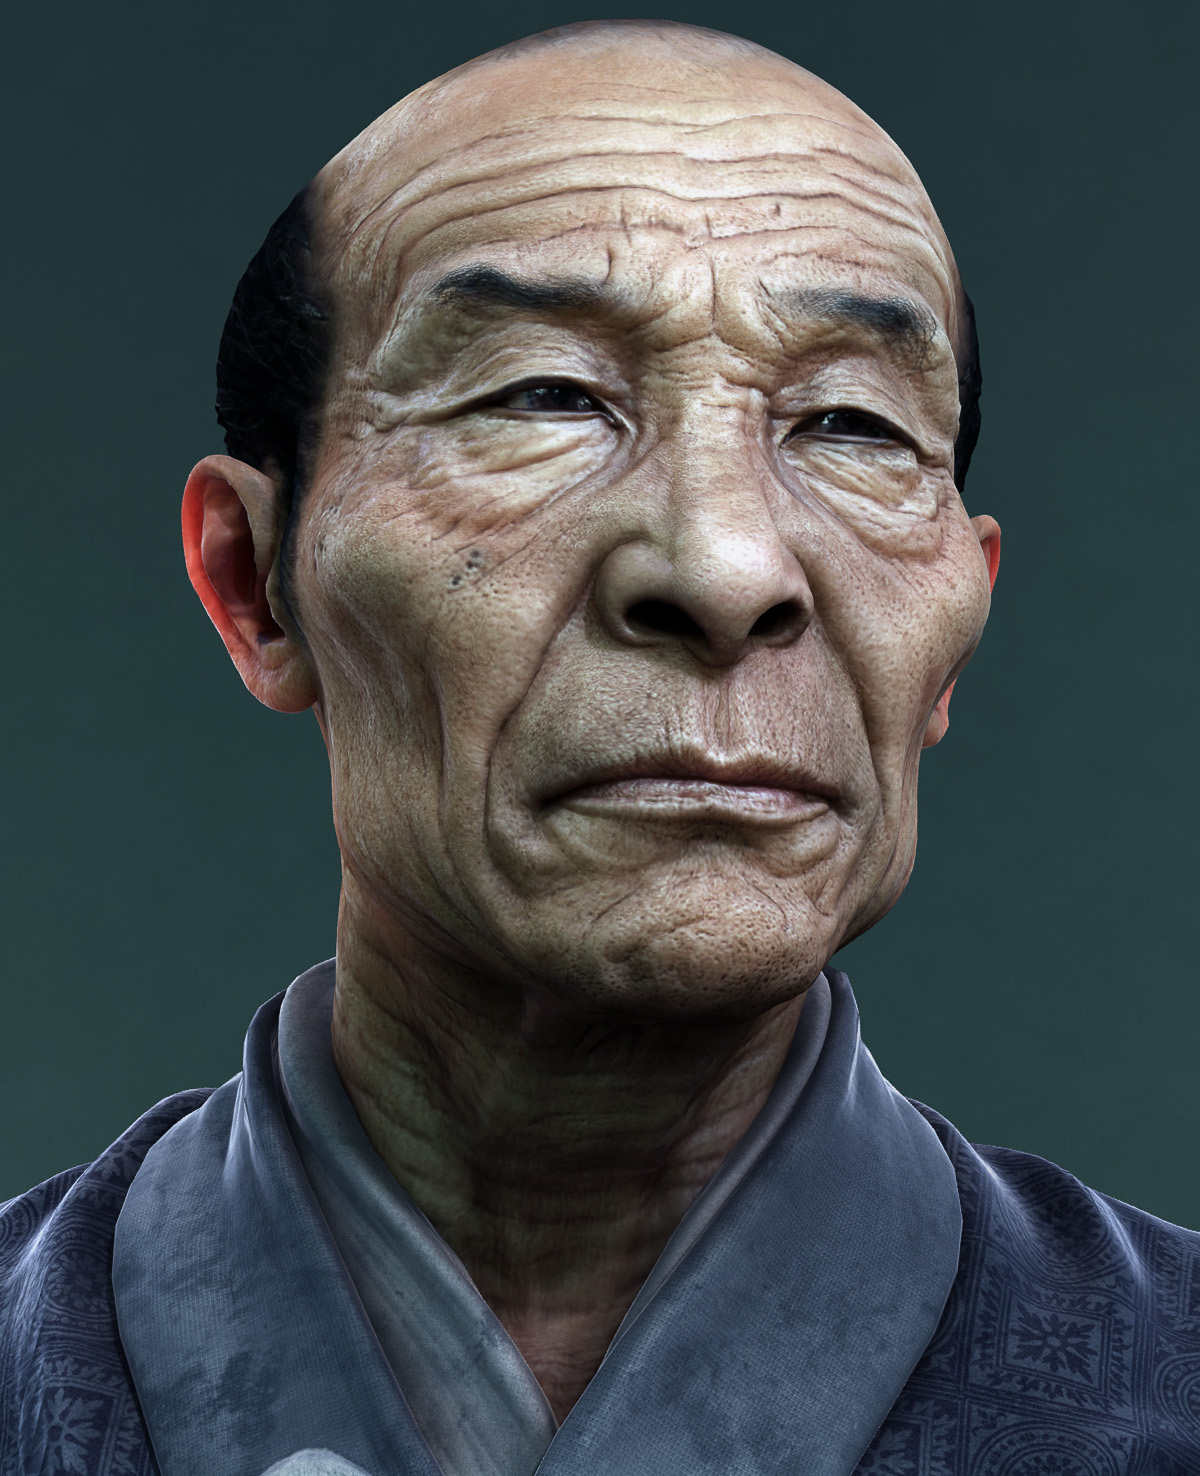
Fantastic work, man! Only crit is maybe dial down the cavity map for the Japanese guy. He looks a little dirty.
I’m curious. When you UV clothing…for example on the guy with the white tank top and the cargo pants…do you model and UV the inside of the pockets, or us that just sculpted relief?
I modeled a strap for something I’m working on right now. Modeled the whole strap in max, didn’t just sculpt it onto my character. Between trying to figure out how to make the strap flow smoothly along a specific path around my character, doing UVs for it, and texturing it…that friggin strap took entirely too much of my time. And that was just one strap, some of you guys pimp your characters out with TONS of accessories. I can’t imagine having to UV all that stuff. It seemed like a waste of time to UV the back of the strap since no one was ever going to see it, but I did it anyway because I thought it might cause problems if I didn’t. ZBrush in all of it’s finniky glory has me taking the “better safe than sorry” approach to everything. The point is I’m getting mired down by technical crap like that when I really just want to know how to knock this stuff out quickly so I can keep creating.
I’d be really interested in seeing a quick walkthrough on how you made the chest strap for your DW4 character. It looks to me like you probably started it in max.
love the ao2 characters, inspirational work mate 
amazing work man no words for it.
thanks guys!
I hope I will be able to show more soon.
I’m doing some cartoon models for a toy project, and other stuff but I have to wait to have the GO to post them.
DustinBrown: I always unwrap everything I bring into Zbrush, even small screws etc…
For the straps generally I use a plane, extrude and edge along spline etc…
then I apply a shell modifier for the thickness. I don’t collapse it, and add on top an editable poly modifer to add details like holes or borders. I never collapse it until I’m ready to unwrap the UV. Not collapsing it allows me to be able to go down to my plane to twist, move etc… quicker.
When I’m ready to do the UV I collapse all, split edges where I want my UV cut then bring the splited model into unfold 3d. The problem with unfold is that sometimes the result is too organic so in 3dsmax I use the UV relax tool to go back to something more workable. I also sometimes use the pelt tool for simple objects.
here is another render I did for the Old guy :
Awesome new stuff! The latest old guy render is fab! ! Thanks for posting!
How do you extrude an edge along a spline in max? I only see the option to extrude along spline in poly sub-object mode, not in edge mode. Thanks.
oh wow! I really enjoy your DW character
all of stuff are great but the Chinese face is the best.
Awesome stuff bad_koala …really dig your work and Venom looks insane - great style :D
your works inspire me veryyy gooood
and plz send me anatomy drawing books dvd
Amazing work. We are in your debt for the matcap overlaying. Did you ever make progress on making one matcap out of the three for skin? Thanks.