Came out much better! Great piece:D
Top quality work!
i rather the first one (but its very shiny)…colors are very desaturated on your second test…just my personal idea !
i found it via google but im not sure its the thing you want…
ithttp://www.supermanhomepage.com/multimedia/multimedia.php?topic=fonts
Nope,there is no Superman font available.I searched through almost every site i could think of and even googled but couldnt find anything.So it means its hand drawn ^^.
But dont worry you could always use Photoshop and vector the symbol :lol:
what did you do for the background on the last image?
great work on the superman, your faces feel so heavy and thick. The way the folds lay are incredible. What kind of brushes do you use for those?
its looking great, may I suggest a steel base, or maybe more a cast iron base with polished steel letters.
it’s looking pretty good. how many sub-tools are you using? can you show us a wip or wire frame? cool stuff. i also agree with “point” i believe a steel base or brushed metal might look better imho. keep up the good work
Very cool bro …his got a very solid feel to him …kinda bulldozer weight 
I do think the logo good be a separate sub tool …you could get away with more I think
And this is a personal thing but I cant imagine him in a suit at the office  (Clark Kent version) no offence but to me his more like a hard hat worker I feel the same way about Antropuses Superman …again just my op
but regardless very cool stuff :D
Great job there. Would look amazing as a 3d print.
Ah nice! the colour is looking great. sf4 ftw!
hi guys
thanks for the fonts/logos link -->favorites:)
I like the idea of the iron base/brushed metal, I think I will give it a shot next week-end.
the subtools on Sup are : the head, the torso, the hands, the cape, the leg,the belt,the buckle, the underwear and the boots.
For the background it`s just a curved plan with a flat gray on it, the color variations are from my lights (2 in this scene with big fallof)
I just started something new, its from an old drawing I did a year ago and colored by a friend of mine. I always wanted to try modeling it. Hes and undead swamp sorcerer, he will have a chest armor, rings, props etc…
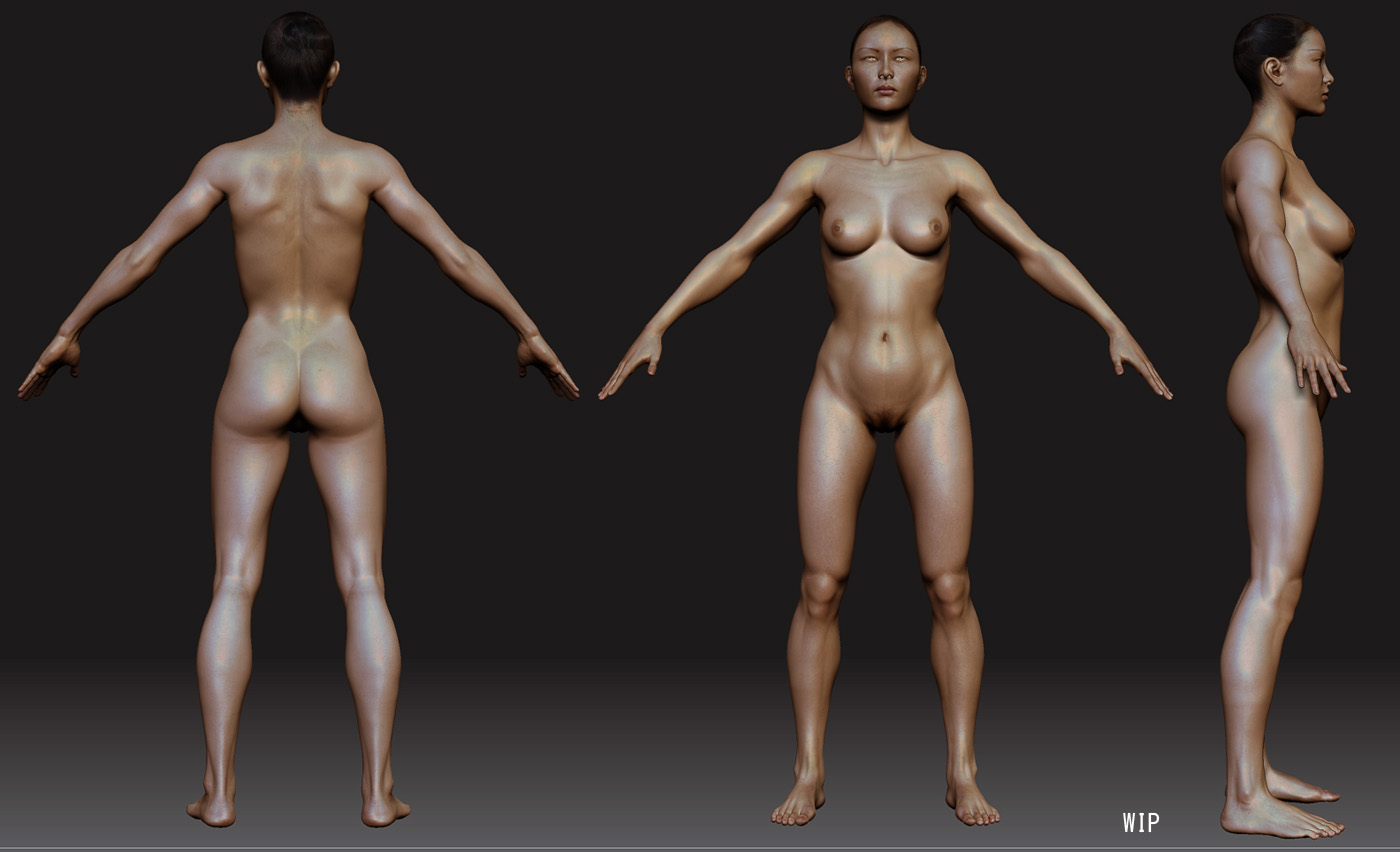
Im still playing with the proportions and havent touch the hands and most of the back yet.
Attachments

I like his porportions do you still have the original drawing?
haha awesome style !
your flowing like a mad art demon.
Guys I have been having something very annoying
I just started working on a female template but for some reason the symmetry is off and if I try to use the resym button the model ends up all messed up and if I try to smooth it I have tons of artefacts showing. The base mesh is just made of quads, I have UVs and the only major thing that I did was to scale down the Ztool. I’m sure I must have missed something somewhere but I don’t know what. Tomorrow I’m supposed to do all the skin pores, the details, etc… but right now it’s all ****ed up 
anyone has a idea?
Attachments
I have had this problem before as well. 2 reasons that have caused this for me are…
- There is a mask on a few select verts that is very very faint but can simply be cleared.
2.If it’s a vert that shares 5 edges it is very hard to sculpt on after resym. You can smooth it out with the clay brush or flatten tool.
Usually it’s case number one for myself. I hope this helps you.
The workaround I usually take for something like this goes as follow:
- Bring the lowest subdiv in Maya (or 3dsMax)
- In Maya, copy the mesh and mirror it
- Snap the verts of the “wrong” half to the verts of the mirrored mesh.
- Re-import the adjusted mesh in ZBrush.
Doing this keeps the vert order and nothing gets screwed up.
I have a script that I use for the vert-snapping process, I don’t do this by hand.
Hope this helps!
Bryan: what’s weird is that I have no masks and the model only has 4 vertices faces and I already used that base for another model and it worked. It started acting funny after I resized it with the SIZE deformation tool…
Beneto: I already tried to export my model at last division and re-imported it in Zbrush then reconstructed the low-res and it didn’t work. I will try your solution and see if it works.
thanks for replying guys.
I hit this a while ago. I ended up resymetrizing each level of subdivision one at a time. starting with the base mesh and working my way down to the detail mesh.