ZBrushCentral

Applying Displacement in zbrush artifacts

Hi all, thank you for all of your help. you guys/gals are awesome.

ran into another kink in the pipeline…

i was transferring detail via displacement map i made in zbrush… i did a quick AUV tile for the UVs.

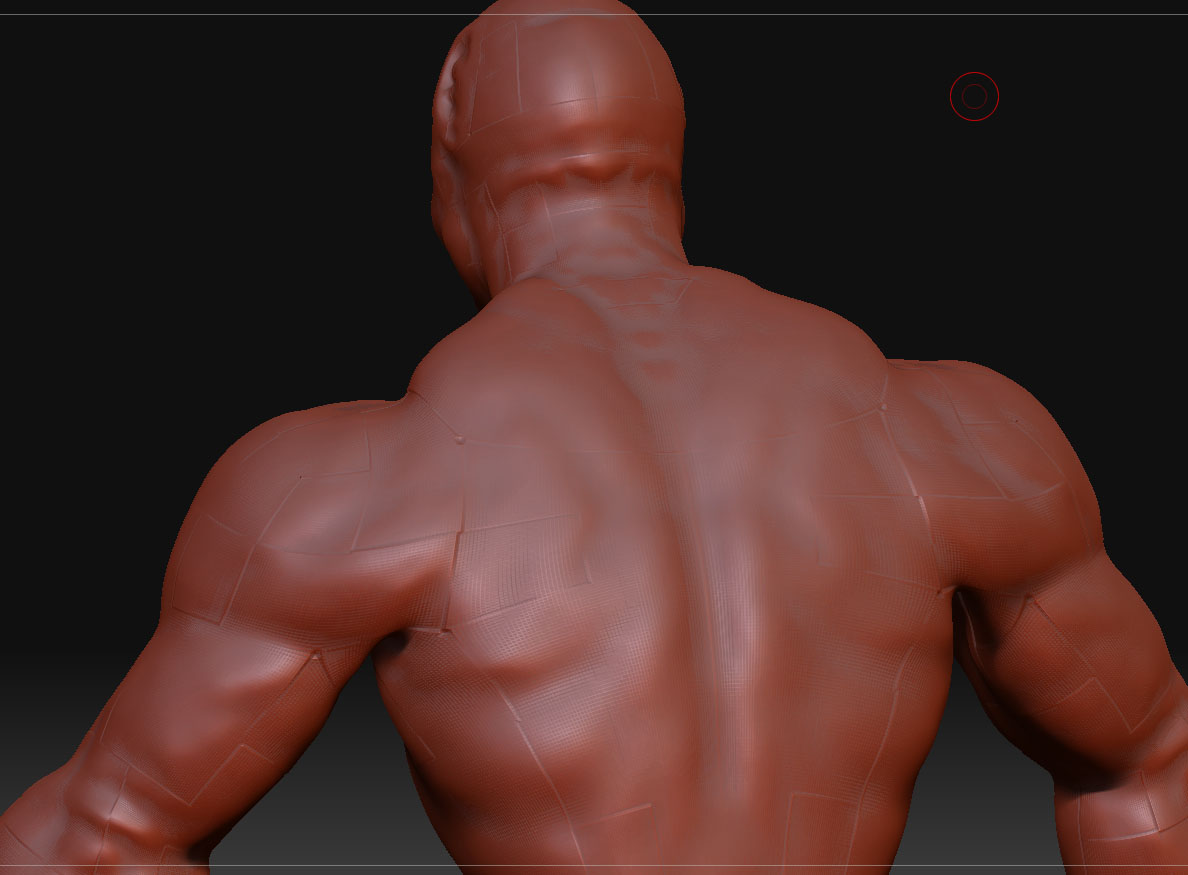
and i get these square artifacts in my transfer.

  • Is this common when working with the AUV tile function?
  • Is there anyway to minimize the artifacts?

I plan on going through manually and just trying to smooth them out…but i wind up erasing some detail as well and its quite time consuming…its a tad annoying. any help would be greatly appreciated. heres a pic to show what i mean.

Attachments

Untitled-1.jpg

overly common when working with AUV tiles

you can try to turn the FS border down to Zero
tool>texture

but that will most likely just give you another headache in a different direction.

To avoid the problem all together, don’t use AUV tiling. A proper unwrap is your best bet.

thanx bro!!

A common mistake when assigning AUVTiles (or GUVTiles) is to simply click the button. These are precision mapping methods, optimized for the size of the currently-applied texture. If no texture is applied, ZBrush maps based on an assumed size of 1024. This can then create issues if you’re actually creating a 2048 or 4096 map.

For best results, use a map that’s a power of 2 in size and assign a blank texture of that size to the model before clicking the mapping method. ZBrush will then calculate the ideal map for the current texture size.

thank you aurick…i followed your instructions, but to no avail… the problem still persists

:evil:

Ok! whew. Captains log stardate 52034…

well i’ve solved a few of the problems …they mostly had to do with when i retopologized the model my normals were inside out…that was the stem of most of the errors i was getting.

So now i am able to get new uvs on my ztool. Yet…i am not out of the woods yet.

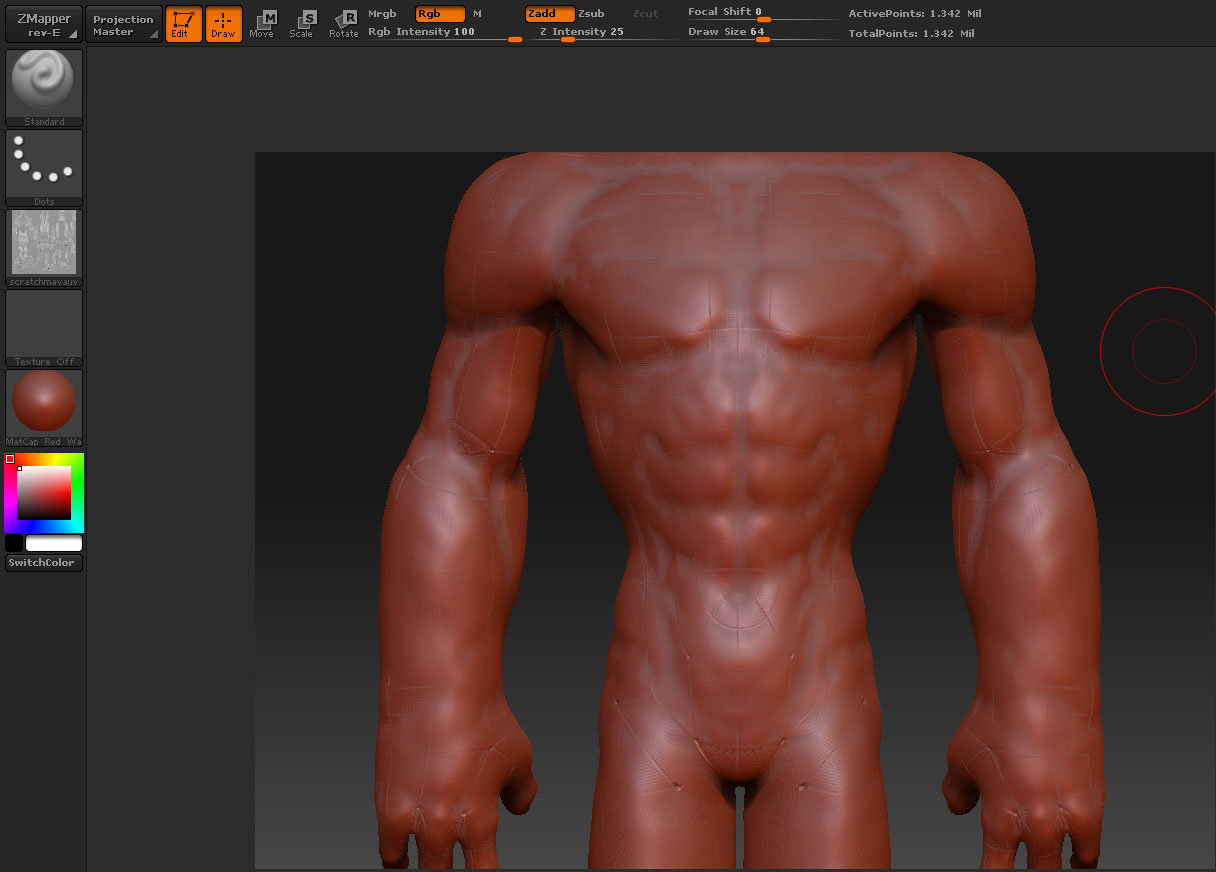
i still get artifacts when i use the displacement to transfer details.

i took a look at the alpha map, and these artifacts are not visible there…the alpha is perfect.

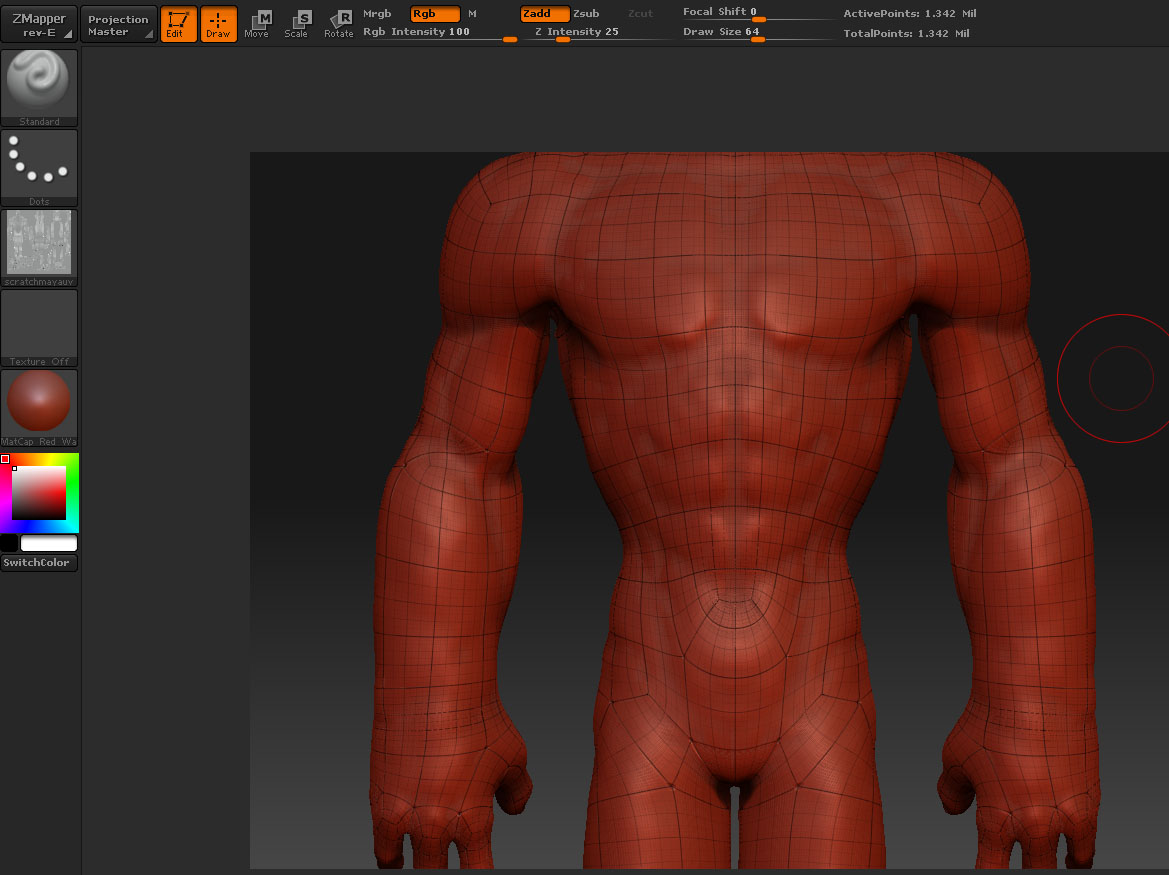
But when i took a look at my model in frame mode…the artifacts are occuring around my topology.

any clues as to how to fix this?

[Untitled-1.jpg](javascript:zb_insimg(‘139961’,‘Untitled-2.jpg’,1,0))

Attachments

Untitled-2.jpg

The artifacts seem to be my level 1 topology showing up through the higher subdivision levels.

The artifacts aren’t in my alpha they for some reason show up when i apply the displacement in zbrush.

I suppose i could just try to smooth them out and rework the details…but i would just like to know for information sake, why this is doing this…because i’d hate to be working on something highly detailed in the future only to have the pipeline have a kink in it like this.

i imagine that if i had pushed the sculpt further into detailing before retopologizing i would have had much bigger problems.

Which version of ZBrush are you using?

Also, are you restoring the base mesh before creating your displacement map? Or are you just going to level 1 and immediately creating it? And have you tried rendering the map in your other app?

I am using zbrush 3.1

Yes i had just been going to level 1 and creating the displacement. What do you mean by ‘restoring the base mesh’?

It appears to be two issues you got there;

01 the pock marks are 5 sided stars
02 Perhaps you need to weild/merge your uv seems on the base mesh
note: this may change vertex order in which case you’ll need to use project all to transfer details.

when you get your mesh clean the displacement map transfer should work withou8t a hitch.

hope that helps
cheers

thank you again for all your help but nothing so far has worked

I did some searching on restoring base mesh, and tried that. no effect.

Perhaps if i told you my pipeline you would better understand what i am trying to do.

I have my retopologized mesh, but i just have a hole for the mouth. In order to create a mouth cavity, i make a displacement map of the detail model to capture the detail that way i use the UVs to transfer detail to the new model with the mouth cavity.

here is the process:

  • made a displacement map of the detail model

  • exported that model (same lvl i made the disp map from)

  • using the lvl1 of the detail model as the base. I create a mouth cavity. and uv map it on a seperate polygroup. (outside 0,1)

    • In zbrush i will import my lvl1 mesh with the newly added geometry, and subdivide to lvl6. store am morph target and polygroup

    • Then i import my displacement map.

    • Under the displacement menu i set my strength to 3 or 4 and and hit apply displacementmap.

    _ boOm all my detail will be there…but i get these artifacts. as if my lvl 1 mesh is showing through.

    ( its not the mouth geometry thats making them, because i’ve been testing all day on a model without extra geometry)

    please help!

The seams are most likely being caused by the offset that takes place when you export a displacement map. This is done automatically to help get better results in other apps. But it does create an issue if you import the map back into ZBrush for use.

Instead of dealing with displacement maps, why not use a different approach? Import the new version of your model and append it to the first one. Divide it to have enough polygons, then use Tool>SubTool>Project All to copy the details from the first model directly. No displacement map involved.

You might want to hide the mouth section before doing the Project All. Since the mouth is a different UV region, use Tool>Polygrouops>UV Groups to group the model based on the UV’s. Now Ctrl+Shift+Click on any of the main body’s polys. This will hide everything else; namely the mouth. Now Project All.

hmm…thats a great idea! i’ll give it a try.

just curious. is it possible to turn off this offset that occurs? or to counter it?

Thank you aurick.

Your suggestion has lead me closer to where the problem may be occuring it seems that one of the programs is slightly scaling the model either upon import or export. ~ when i import the obj to maya 2009 and go back to zbrush....the obj is slightly bigger than the ztool. (even if i dont change anything) I noticed this while trying the method you suggested and imported my new geometry to append. The OBJ is always slightly bigger than the ztool.

I tried ‘Unify’ under the deformations tab, it had no effect on the lvl 1 obj, yet it did enlarge the ztool…it helped slightly but the models still are noticeably off to project.

and still my problem persists.

lol gotta be like columbo to trouble shoot these programs.

Help is greatly appreciated

try deleting your morph target before applying the disp map

but yes, i agree project all is a superior technique and uv sets outside o~1 could cause issues for what you are trying to do.

The scale won’t match because when you divide a model it is smoothed. That smoothing causes the mesh to contract. When you return to level 1, that contraction will be carried down to that level with the result being that level 1 is now smaller than what you started with. That’s why you need to restore the base mesh if you’re going to be creating a displacement map.

So when you import your new model it will be a little larger. But if you were to divide the model so that it has the same number of subdivision levels and then return to level 1 you should see that they’re now the same size.

thank you all for your reply.

Yes that is the restore technique that you spoke of. I did try that, yet, the models are still off.

It seems that it is zbrush is doing the scaling.

i found other threads where there have been problems with scaling with exported/imported zsphere mesh.

This thread using Tposemaster has helped me to at least accurately project all: http://www.zbrushcentral.com/zbc/showthread.php?t=50843&page=2&pp=15&highlight=ztool+scaling

Yup yup ^^

the link in my last post has allowed me to project all so, i can continue. Mouth cavity installed and detail transferred

Thank you all for your time and help! Special shout to Aurick Ur the man!!!:+1:

Though i am still curious to what caused this in the first place…so that i can avoid it in the future.

here is my ztool, if anyone has a quick second to look at it and see if its just my machine creating the alpha problem.
http://www.sendspace.com/file/st7c1d

Hey Sandman,

I got your PM and thought I would try and shed some light here. Aurick has some great points especialy with the AUV tiles needing a texture to calculate correctly. It looks like your problem was solved my Aurick anyway so rock on all :slight_smile:

The workflow I present in the book for transfering details between sculpts is really a pipeline hack that can save you when you need to move between meshes. There will always be artifacts but if you are using it to avoid having to resculpt an entire head or body its worth the time to take down the artifacts.

Now you can also use project all but that will potentially cause issue where there are new faces (the horns, the mouth bag, ect)

I would reccomend using project all to shrinkwrap one mesh to another then use a morph target to restore the new faces.

Example

polygroup new faces

store MT On new mesh

project all to shrink it to the original mesh

restore original MT and mask the polygrouped new faces

use the morph nrush to restie the shrinkwrapped areas without brushing over the new faces (They are masked anyway).

The intention of the tutorial is to give you as many options as possible when adding new parts to an exsisting sculpt. The problem is you may start a character then need to add a horn, a mouth bag, any number of other things that arent in the original mesh.

Other solutions include using mesh insert and retopology as well :slight_smile: I hope some of this was helpful. If I missed something earlier in the thread or if its just not clear at all shoot me an email :slight_smile: I will try and clarify.

S