ZBrushCentral

Another displacement problem thread

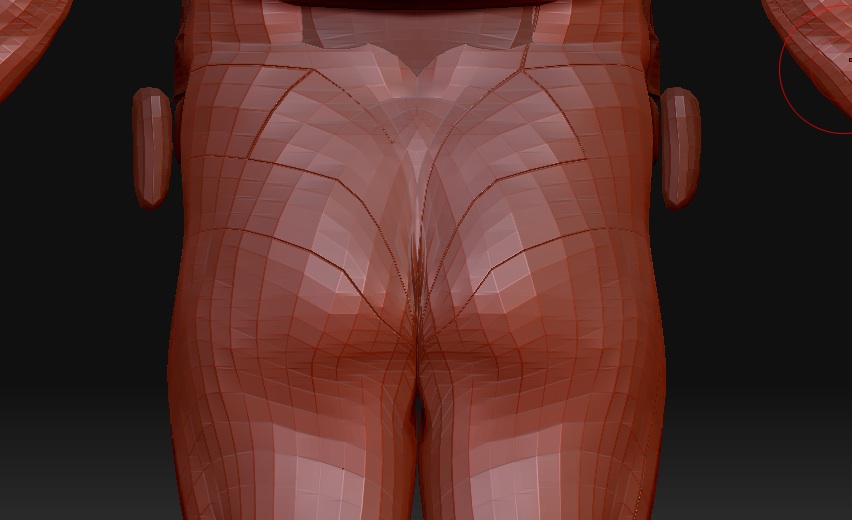
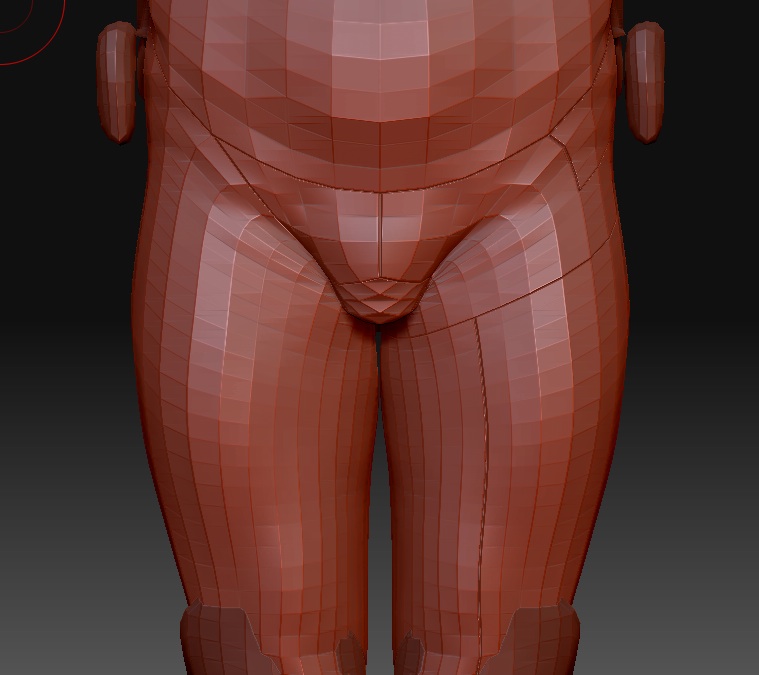
Hi, sorry to start another displacement question when there are several on here already but after looking at the others I can’t find one which matches my problem.

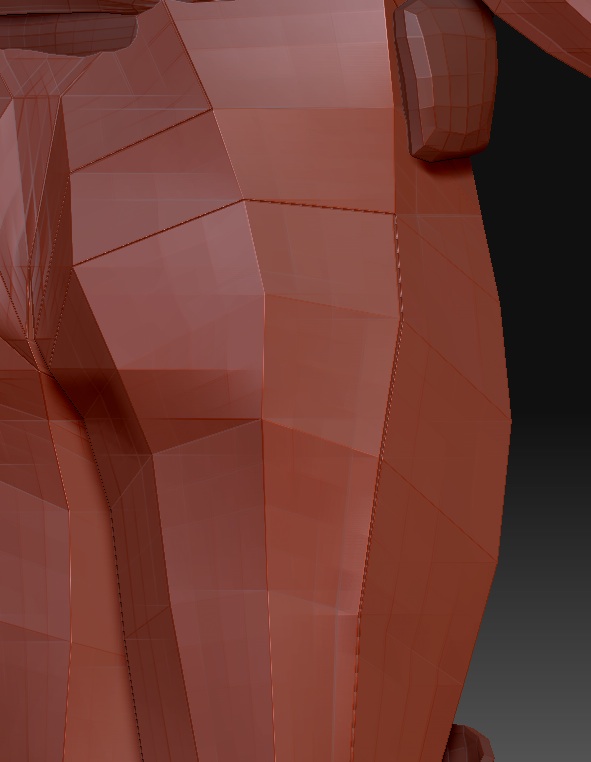
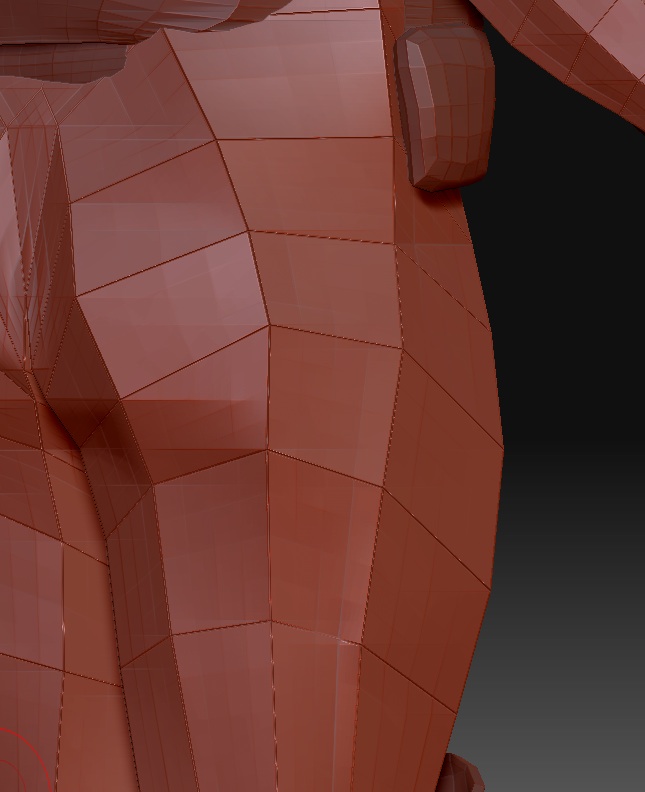
I keep finding seams on objects when i create the displacement map which sit exactly along the lines. I’ve tried this with my own imported objects and with objects created within zbrush itself so i’m not sure what it can be

The example here was done by doing the following.
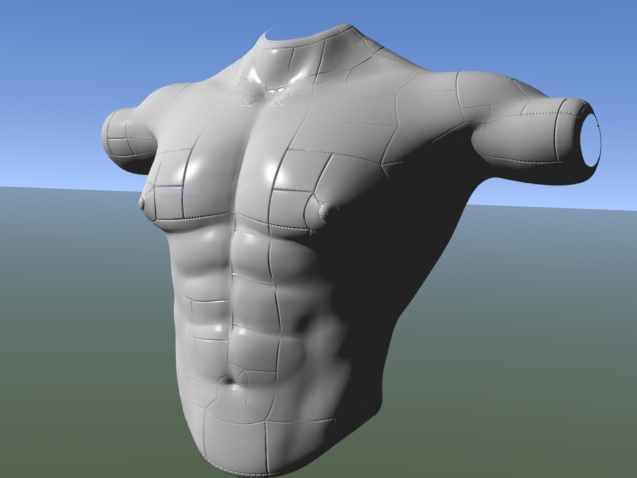
1)creating a sphere, upping the division and drawing some shapes over it. (active points is at 393k)
2)deleting the lowest two subdivisions so i end up with three levels of division
3)going to uv map, deleting the existing map then setting the map size to 4096 square. I have tried with larger and smaller sized maps as well as changing the UV map border settings with no different results.
4)i now set the mapping to GUVTiles but i have tried with several other settings, all with similar results.
5)Next is creating the displacement map. again i have tried different settings but get similar to worse results

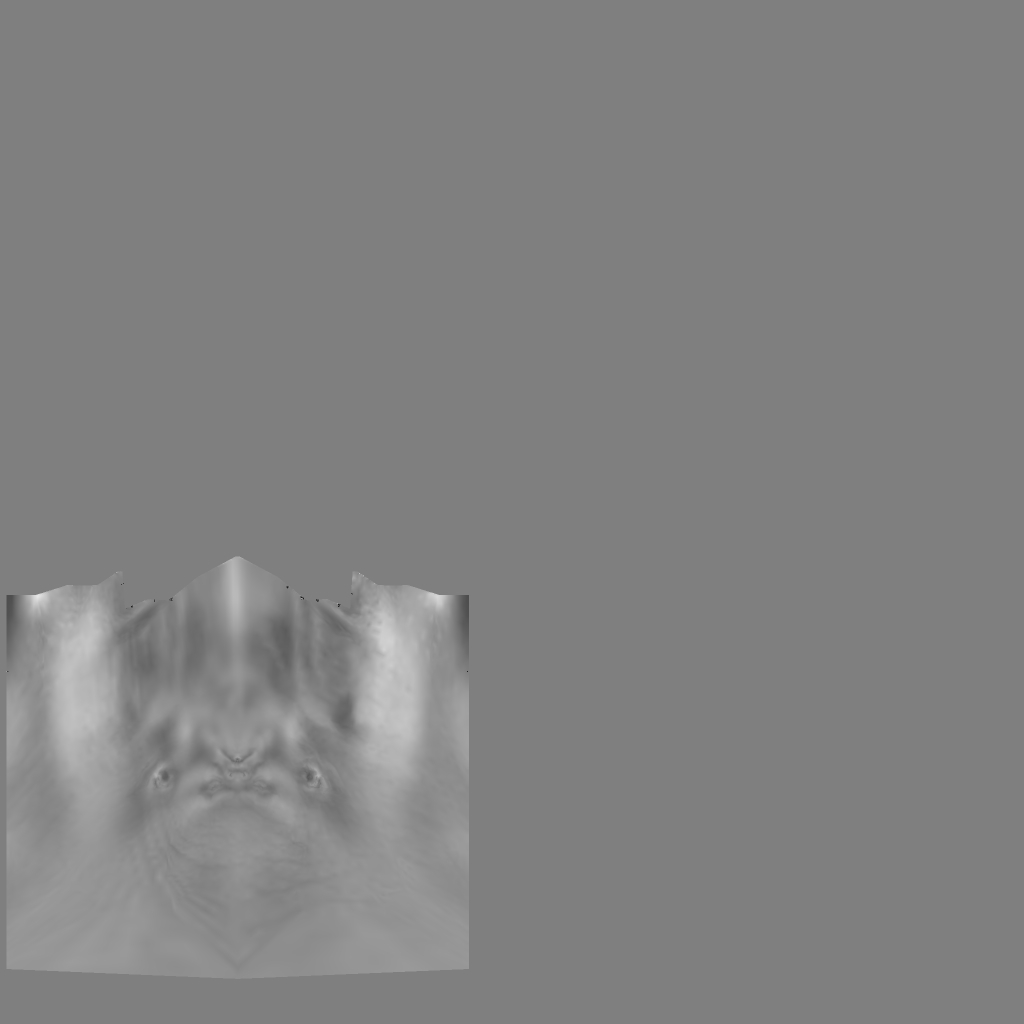
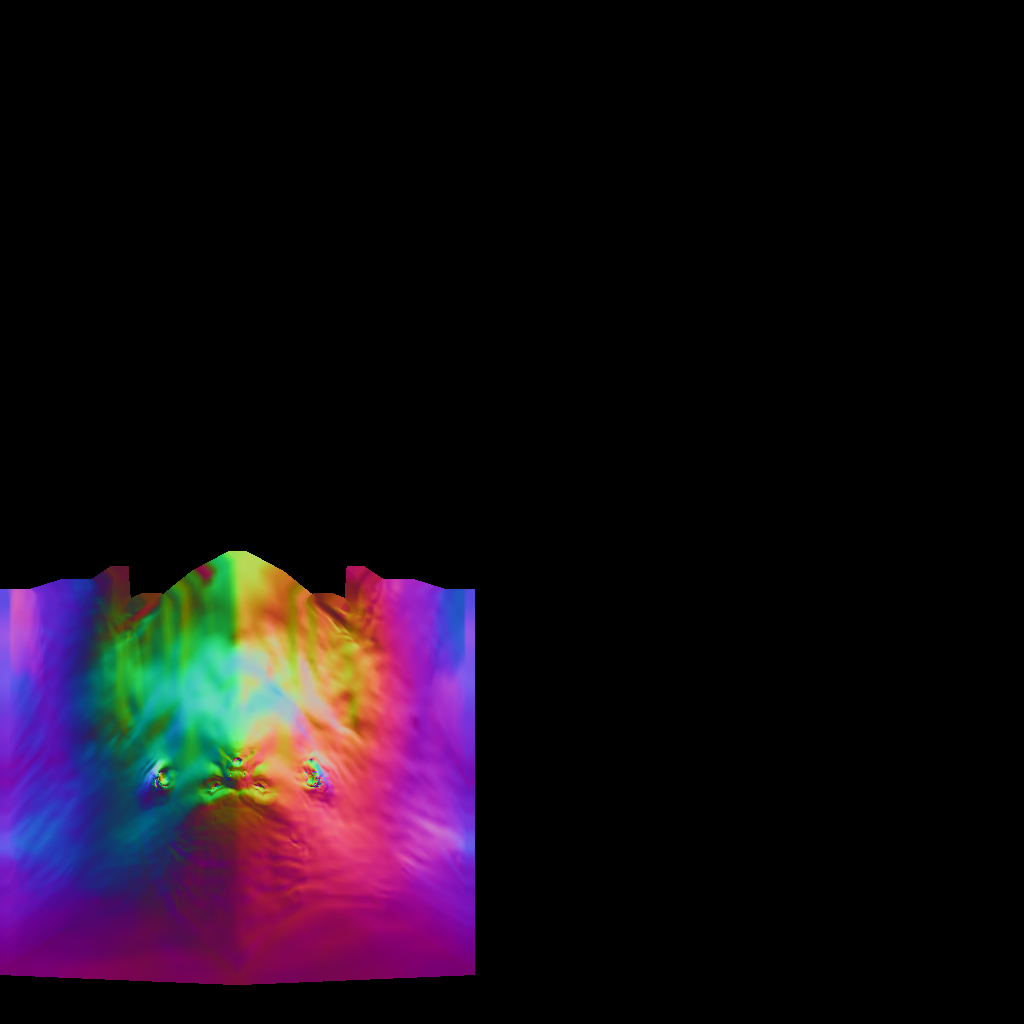
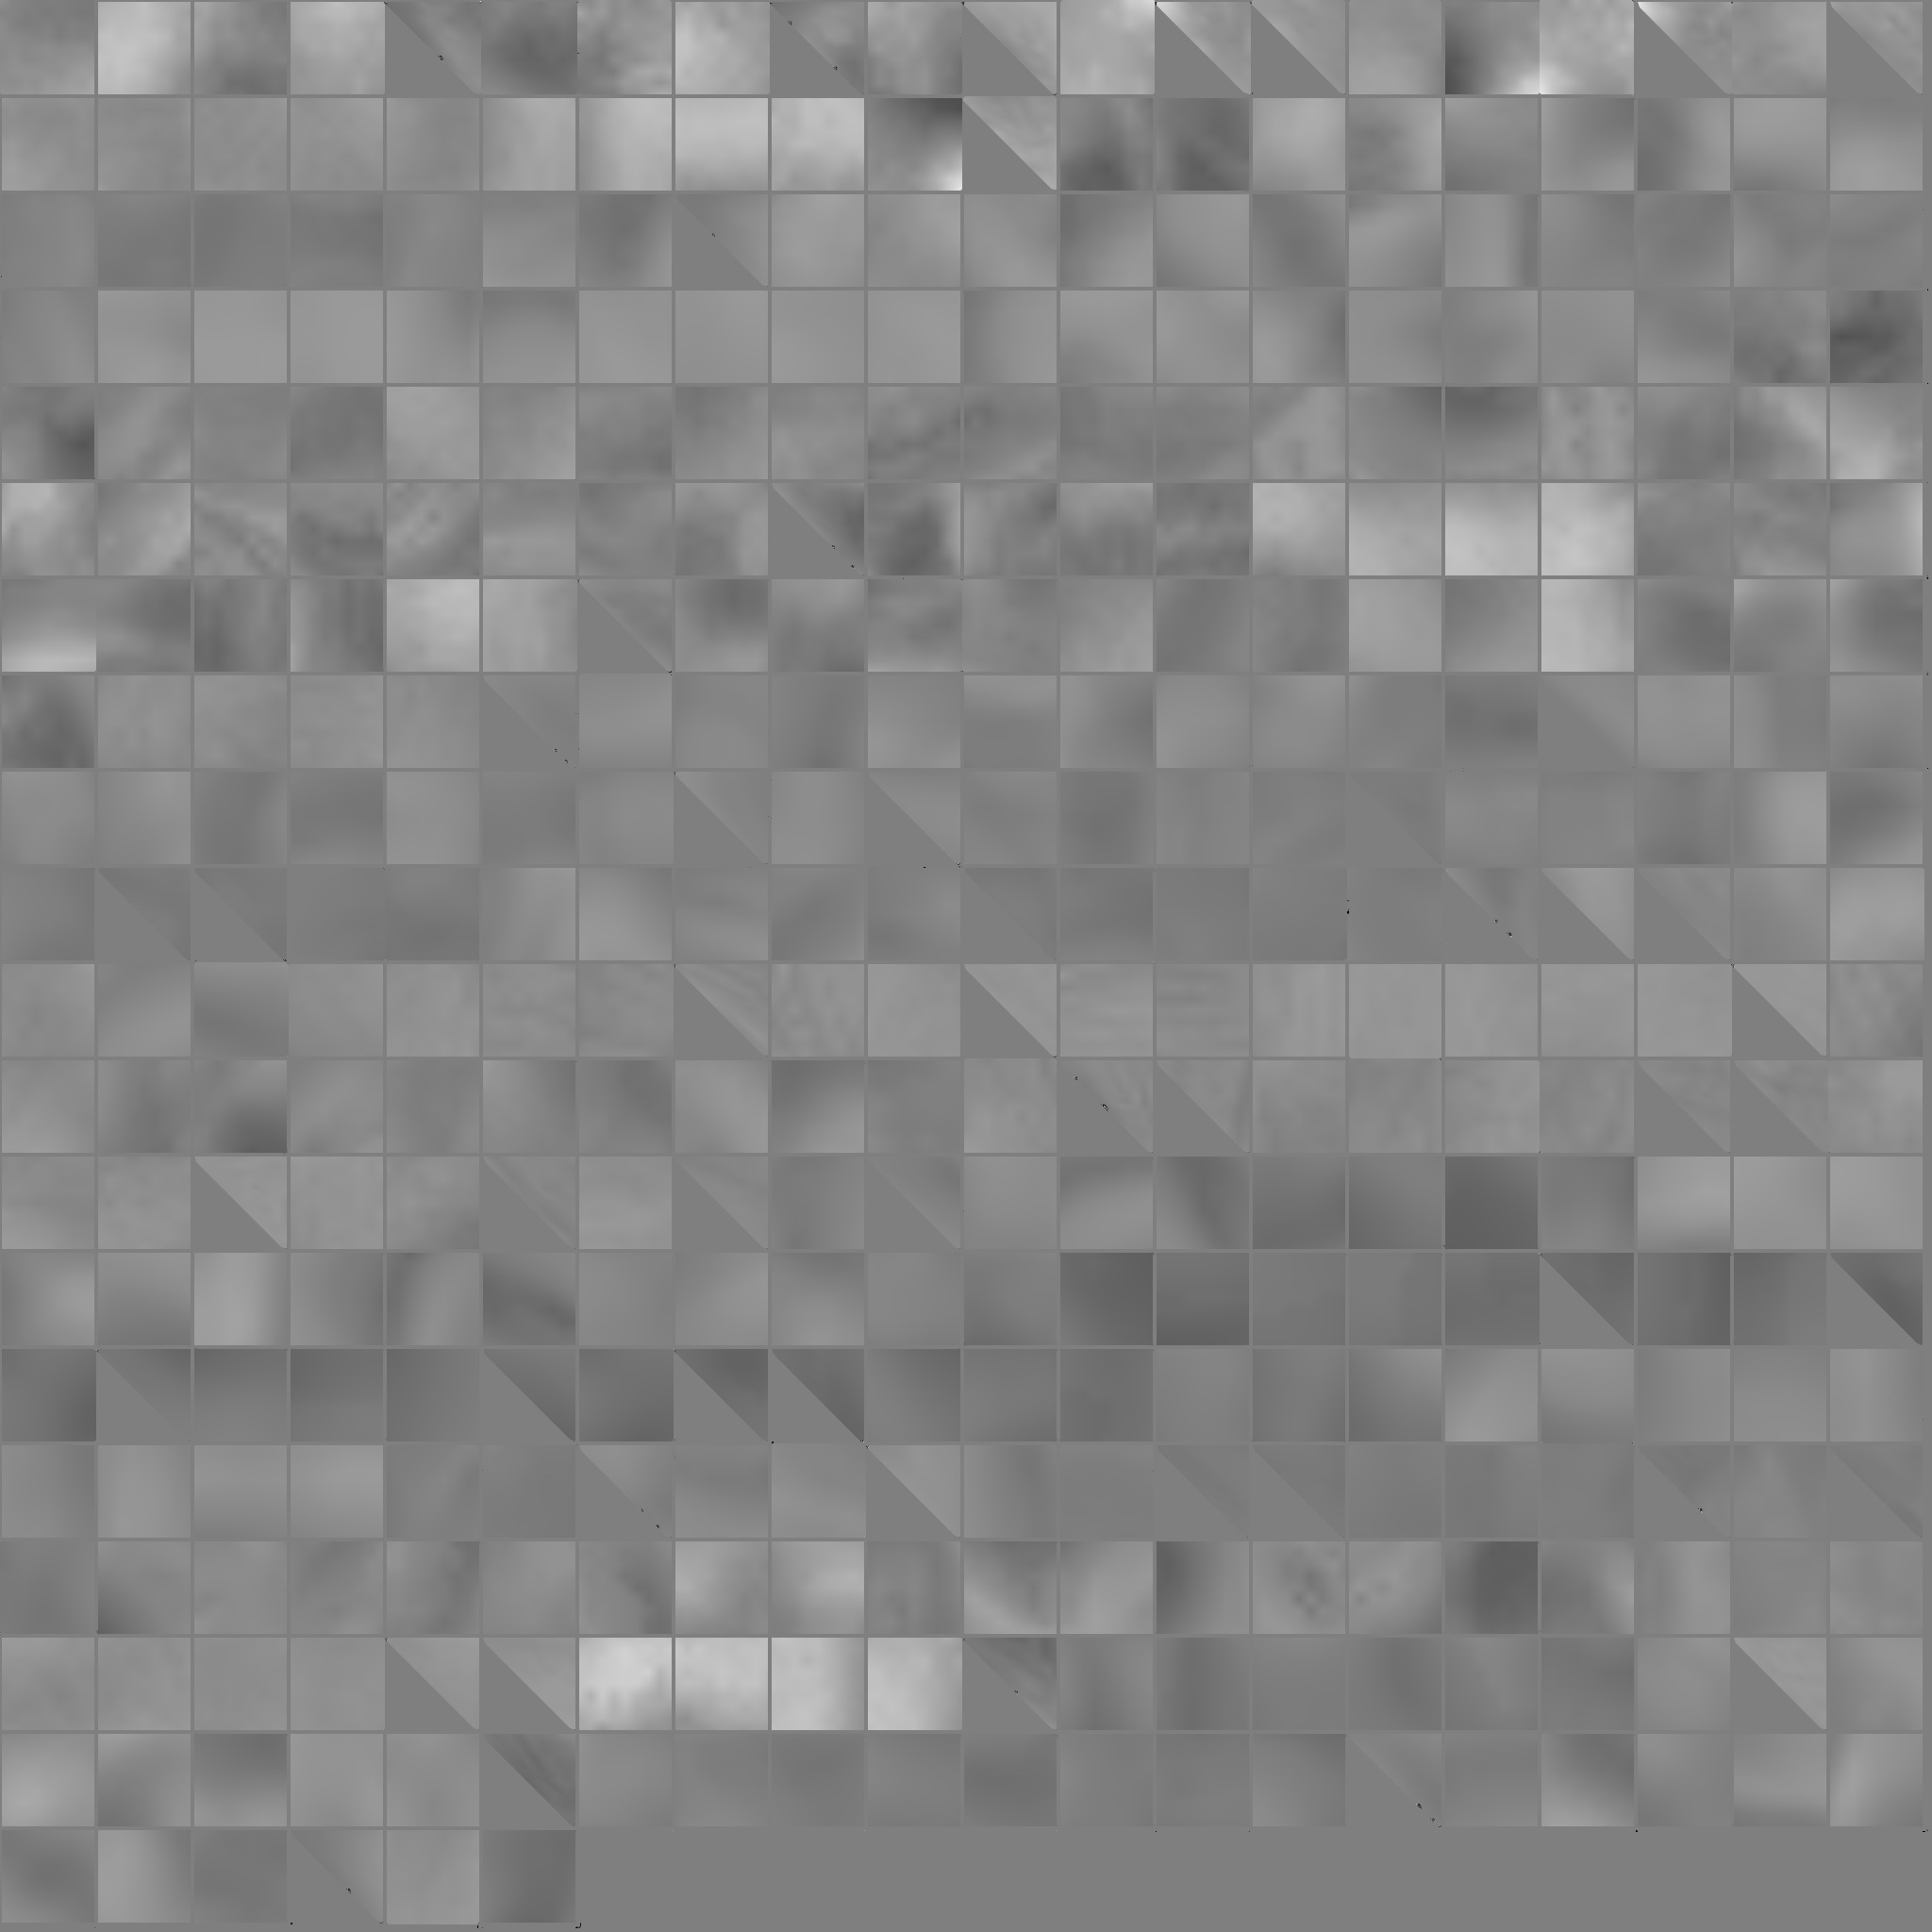
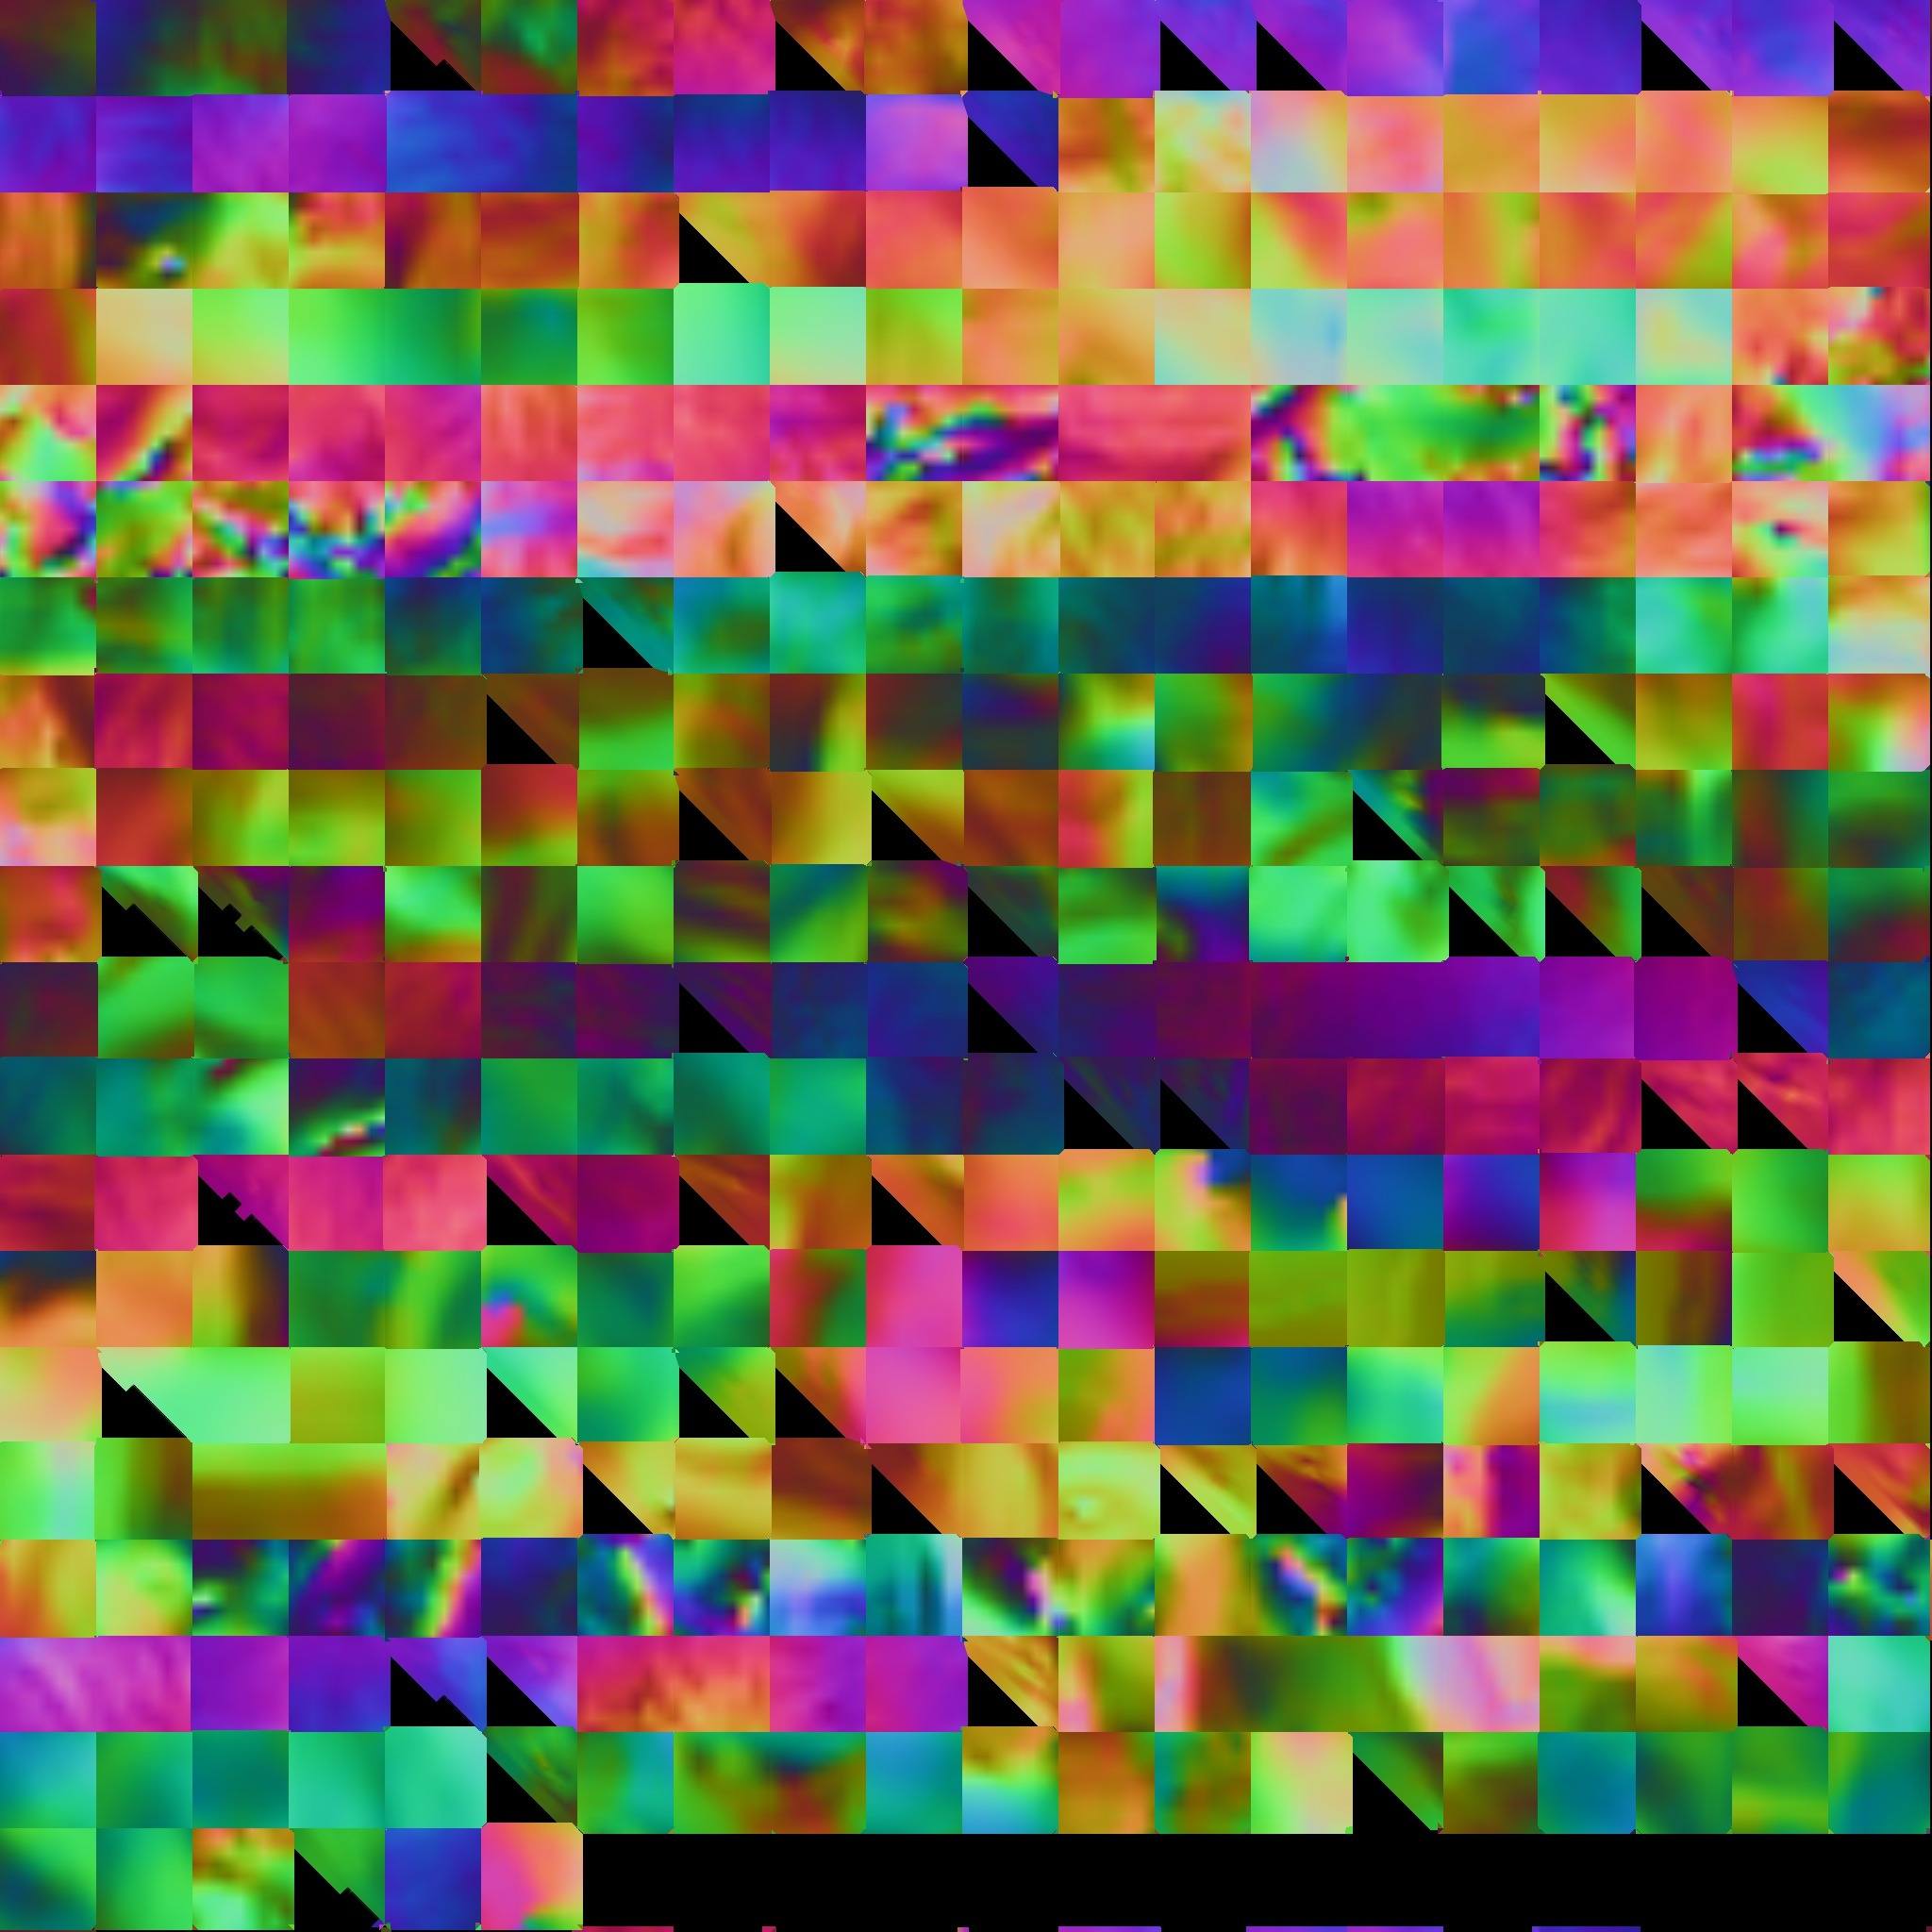
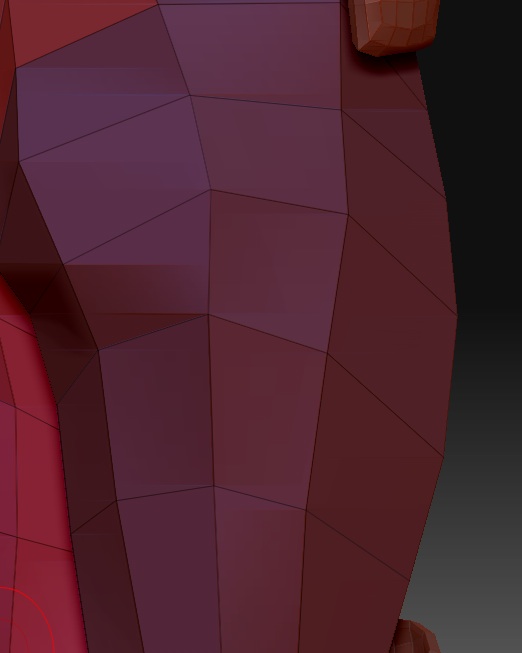
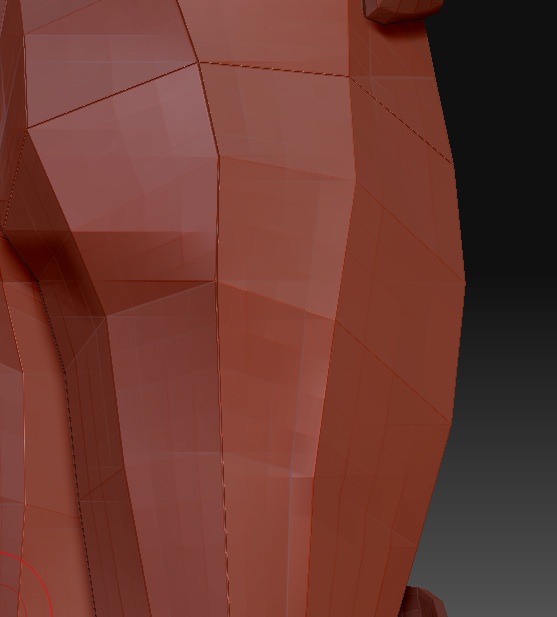
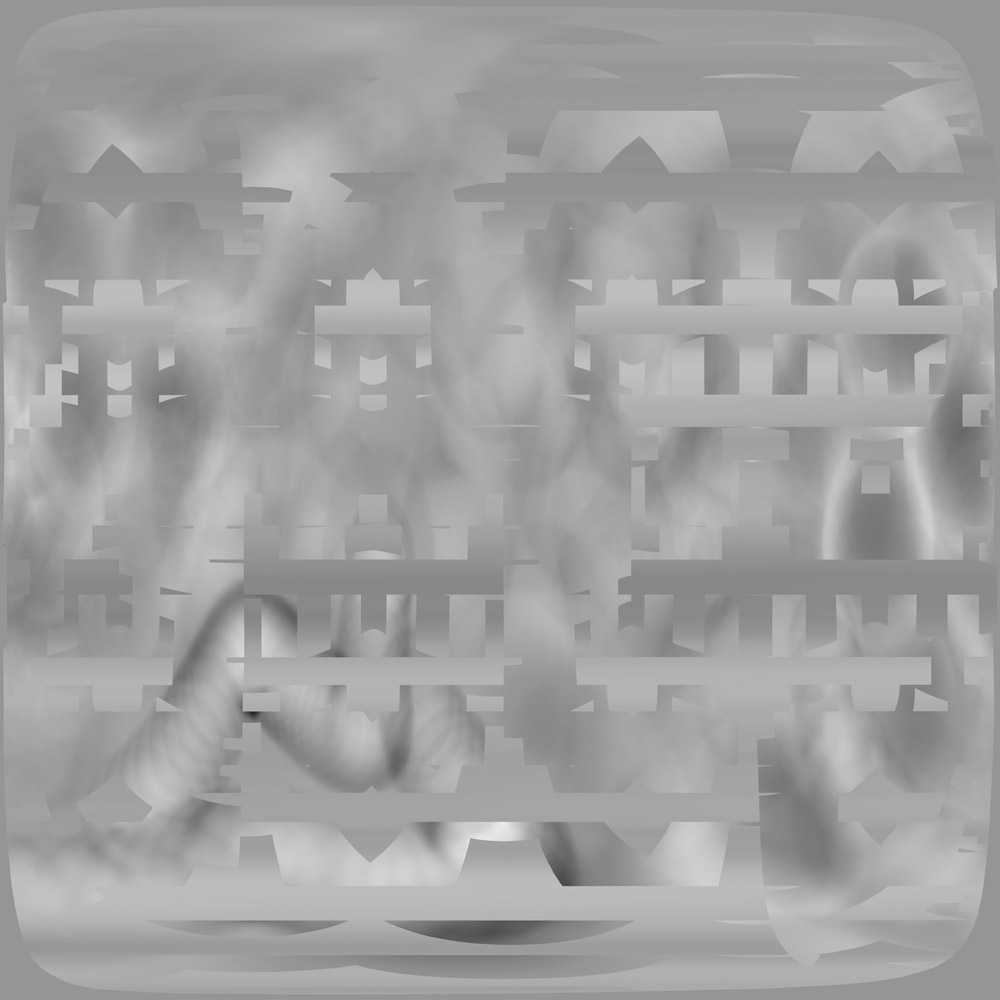
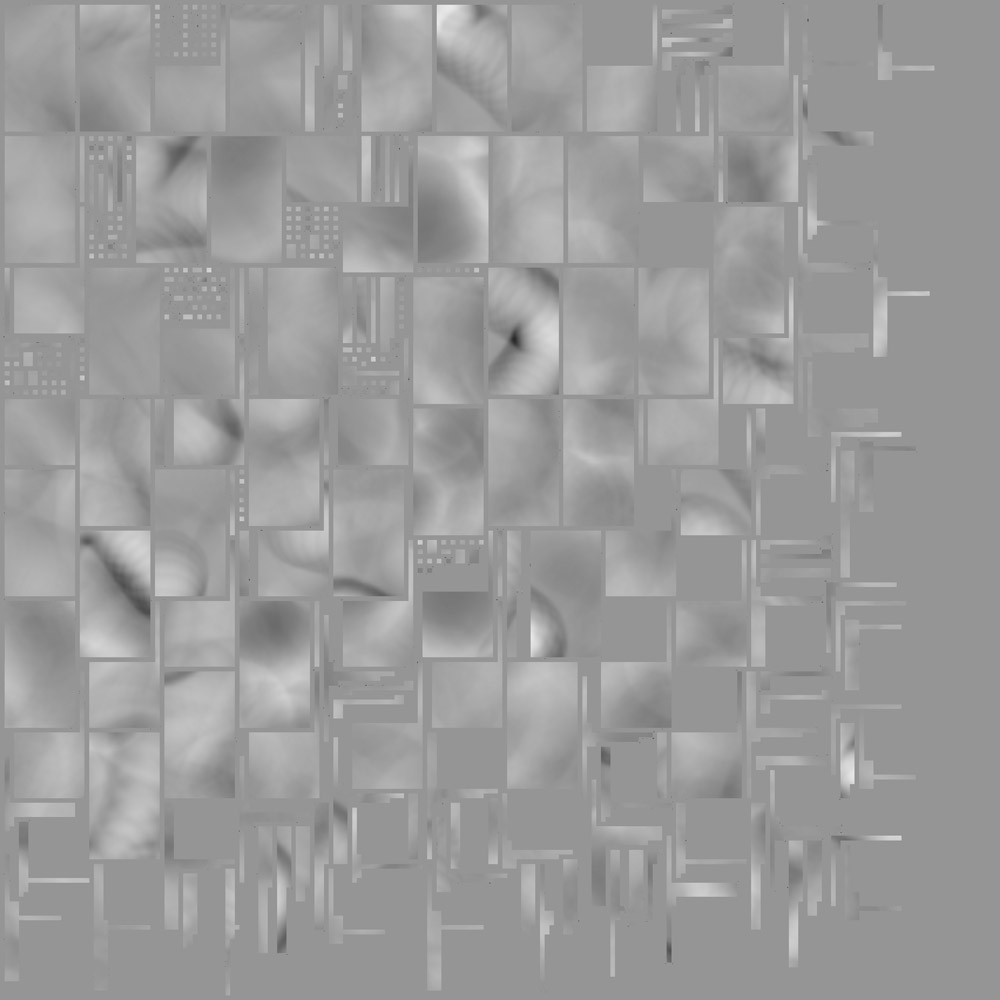
When the final displacement map comes out it seems to have big seams running along the poly edges as seen in the screen grab on here.

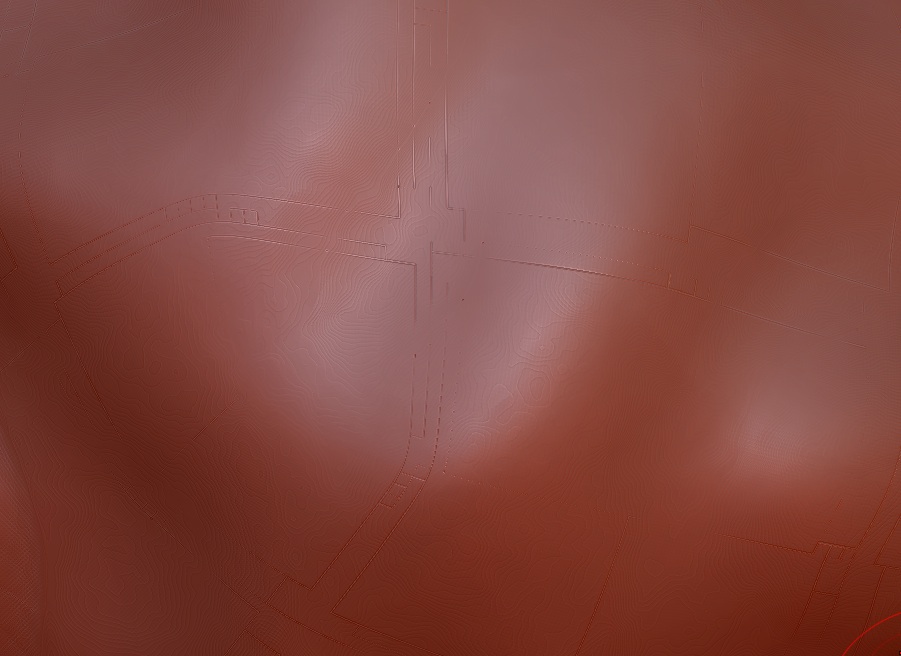
I’ve also added two low res jpgs of the displacement maps, one with GUV mapping and one with spherical mapping. Both had seams but in different places. I have tried exporting the maps to be imported into c4d but when i render up in there the same seams appear so its not a problem with one app or the other and seems to be a problem with my mapping (at a guess)

I’m probably missing something obvious here but any help would be great. I didn’t have any of this with zbrush 2 and managed to export loads of displacement maps with no problems at all so what am i doing wrong here? I’m guessing its something to do with me not knowing all the settings :smiley:

I’m running the new zbrush 3 on an 2.4 Ghz Imac with 3GB of RAM.

Thanks in advance for making me look like a fool with an obvious answer :stuck_out_tongue:

Attachments

lines.jpg

spheremap.jpg

guvdisp.jpg

I’m having these issues too. For some reason I just can’t get displacement maps to work most of the time. Still searching for my answers…

Yeah, i’ve seen a couple of your posts about it and even tried a few of the ideas you pointed to in one about morph targets and original models but its still not working. I get the idea about an object stretching/changing when its subdivided in zbrush and thought that was the answer but i still think i’m missing something.
One of the models i imported as an obj from C4D only had a very small number of seams appear but the objects created and tested in zbrush are horrible.

Are there any good training videos which show the process in zb3? I’ve got a couple of the Gnomon zb2 dvds and picked up most of what i know from those so anything which could be recommended by anyone would be much great.

I know this isn’t getting anywhere but i’ve been trying other things and after several nights of trying i’ve yet to have one single clean displacement map.

I tried opening the demo soldier file and tried a couple of displacement settings on him and ended up with some really big seams all over him. I’ve overblow the models displacement to demonstrate better but after messing with the mapping types this is the best i got on the GUVTiles settings.

Whats changed between v2 and v3 (besides the obvious :wink: ) ?

Is there any chance someone else could have a bash at this on a PC or anything else just to prove its me cocking up.

Attachments

cheeky.jpg

frontbits.jpg

Last post on this thread then i will give up as its going nowhere :stuck_out_tongue:

I’ve been messing with all of the free models and noticed something interesting (to me anyway). All of models need UV mapping setup apart from the troll object. If i goto create displacement or create normal map for him without touching the default settings i get a nice clean, well laid out map.

Troll#1 disp 1.jpg

I’ve been told by another mac zb user that he has seen this before but he can’t remember how to fix it so i’m guessing there must be someone else out there who has stumbled over this.

Anyone know how i can get a layout like the clean ones and not like the messed up versions?

Attachments

Troll#1 norm 1.jpg

Troll#2 disp 1.jpg

Troll#2 norm 1.jpg

I’m having the exact same issues. My displacement maps are turning out the same way. Even with the UV unwrapped version (the first one). Also, you see all of those black specks through the map? That seems to be another bug in 3.12. I’ve reported that one.

I’d love to figure out why these issues are occurring as well. Hopefully some responses or workarounds will come after the weekend.

Damn. If there are some bugs with the displacement maps then thats a serious flaw to let seep through. :cry:

I did notice that if you hover your mouse over the thumbnail of a diplacement map and the slightly larger popup appears, there are black lines around the edges of the textures. I thought they might be just because thats how zb shows the thumbnails but i’m not so sure now. I loaded one into photoshop to have a look but the background is all solid black so there is no way of seeing if they are there or not. they would account for the lines if they are part of the map though.

Folks, you’re not understanding the differences in UV mapping types. That’s the source of your trouble. There’s nothing wrong with the maps that you’re seeing. You’re just not understanding what they mean.

UV mapping, in simplest terms, maps each polygon of the model to a portion of a texture map. Different mapping types accomplish this in different ways.

It’s like peeling an orange and flatting the skin out on a table. The bigger the pieces and the more connected they are, the more trouble you’ll encounter. In CG terms, this means stretching, which makes it hard to get good textures.

So a spherical unwrap will have no seams except at the very edge of the map. But the entire texture is going to have a lot of distortion; especially at the poles.

The “traditional” pelt mapping that the troll enforcer uses is broken into smaller pieces. That means less texture distortion, but there’s still a fair amount of it in certain places. There’s also a lot of wasted space on the texture in the form of unused pixels. Finally, this mapping type needs to be laid out manually for best results. It’s tedious and time consuming to get a really good unwrap.

AUVTiles unwraps every polygon to its own square on the texture map. This is a zero distortion mapping method. The resulting map doesn’t make any sense to the naked eye, but it’s still perfectly understandable by the computer. So even though you can’t make heads or tails of your map, when the map is applied to the model by your renderer it will look just fine. AUVTiles gives you zero distortion mapping with a single mouse click. It’s fast and easy, and works very well if you’re using Projection Master, ZAppLink, and/or PolyPaint.

GUVTiles is similar to AUVTiles except that it tries to keep the polys grouped together as much as possible, only breaking them apart if not doing so would result in distortion. This gives a very clean unwrap that makes a little more sense to the naked eye and has about the same overall use of texture space as a “traditional” UV mapping. Again, it takes a single click to create this mapping.

ZBrush 3.12 introduces the new PUVTiles (Packed UV Tiles). This mapping method is sort of a hybrid between AUVTiles and GUVTiles. It keeps the groups as large as possible, but it packs the mapping as densely as possible onto the texture map. In fact, most times it results in between 90 and 95% utilization of the texture space. That is far more than even the most talented UV artist can accomplish through manual mapping, while still avoiding texture distortion. This is a really cool thing because it means that you can get higher texture resolution in the same texture size, or you can even use a smaller texture to get the same resolution. Either way, it’s the most efficient UV mapping to be found.

The correct way to apply any of the three Tiles mapping methods is to first set the texture size that you’ll be exporting and then click the button for the mapping type that you want to use. That calculates the map for the most efficient use of the selected texture size.

Once again, Tiles mapping doesn’t make much sense to the naked eye. But that doesn’t matter with ZBrush 3 because PolyPaint allows you to paint on the model. Why mess with compensating for seams and texture distortions when you can just paint what you want to see and let the computer handle that compensation stuff in the background?

If you really want to use more traditional UV mapping, you certainly can. Don’t expect it to be fast or easy, though. Here’s a tutorial to get you started: http://www.zbrushcentral.com/zbc/showthread.php?t=8558

Hi man, i get the different mapping types and i had no problems with the mapping in zb2. What i am not understanding is why i’m getting the seams on the map.
If you look at the screen grabs of the models i’ve posted you can see the seams which are being pushed into the model at the poly edges.
As i stated earlier i’ve tried all of the mapping modes with no joy here and each of the three which map the details i need (GUV, PUV and AUV) are all giving me the unwanted seams. I’ve been using bodypaint for a few years now so i’ve had a little experience with UV’s but not like this.
I’ve been told by two other people now that these have been seen before but neither could offer a reason for the occurance. Now ilollar has also pointed out the black dots which i am getting and this is something that on closer inspection of earlier maps i am getting as well. I am running these out at 2k and 4k with no joy.

EDIT

Sorry, i should have pointed out that i was posting the two maps in my previous post as an example of how a clean map appeared and how the second map appeared which was giving the seams. All of the detail is there but the second map was adding the seams which is why i was asking about making it clean to apply, not about the way its spread out over the map.

Hi, sorry for flogging this horse past its death date but i want to make sure you know what i am asking about and that i am not just asking about the way the UV’s are laid out.

This is the demo soldiers bum as its lowest level of mesh

demos.jpg

I would say he has some wicked VPL going on there :lol:

Each of the mapping settings ran off at 4k and notice how the AUV seams are right on the polys edges. As pointed out earlier, AUV maps out each poly separately which is why i commented about the fact you don’t get the seams when they are touching each other.

Attachments

puv.jpg

guv.jpg

auv.jpg

Just bumping this back up. Unless someone definitely knows different - and can explain it - this is a bug in 3.12 on Mac.

Irrespective of what UV mapping system you get, ZBrush is adding a border to the tiles in the map which, when used to displace an object, creating ugly seams engraved in the mesh.

Pretty much as the guys above have explained!

Thanks for the extra opinion mate. As Danger Mole is saying this is starting to look like a bug.
There are at least three other people i know now who have seen this, all mac user who have used 2 and now are on 3.12 and it has nothing to do with the mapping type and there is a guy on CGTalk who started a topic about this, it would be interesting to see if anyone else from there sees it.

I’m bumping this back up as no-one has replied to try and solve the issue. At the moment, we can’t get decent displacement maps out of ZBrush - well, not without these ugly seams.

Here’s a pic of my torso mesh with displacement map added in modo. Anyone got any ideas??

Attachments

Picture 1.jpg

I’ve just finished a sculpt and paint in ZBrush and want to take it back to Maya. But I’m now facing the world of pain that is replicating it as I have it in ZBrush. I had the sense to manually UV map it before taking it into ZBrush. This so far is giving me the best looking displacement map. The PUVs etc are causing artifacts for me. I’ve not done a test render in Maya yet with either so I could still be facing problems.

The Displacement Exporter plugin has the advantage of having the same alpha setting back in Maya all the time. Easy, but not been released for 3.12 yet. So are we back to the old method of having to record the depth factor from ZBrush and having to use trial and error to get ‘decent’ displacement back in Maya?

I’m glad I stumbled upon this thread, because I’m having the exact same infuriating problem. Has anybody been able to fix this issue?

Are Pixologic selling an application designed for making displacement maps that doesn’t actually create workable displacement maps?

I hope not, because that would be the mother of all screw ups right there. I think we need an official response on this.

Aurick - could you at least confirm if this is a bug/issue - or that we’re just missing something? So far I haven’t been able to get any useable displacement out of ZB.312, which is infuriating after such a long wait…

Please help!

They are discussing it over at CGTalk too:

http://forums.cgsociety.org/showthread.php?f=140&t=684520

Displacements have always worked fine in ZB2 and ZB3 (for windows), so an official response is needed, because people need to know if they should stop wasting time by trying to get this to work.

Then, if it is a major screw up with 3.12, a patch can be made.

.

Hey Aurick? Any response for us??

hi there ! im new in this displacement methods… ive been following all steps of thsi tutorial but… nothing seems to work… i work with max 2009 and when i export my work, i do it with a preset of zbrush and then i follow all steps… but i get this when i do my displacement with vray displacement…

Attachments

me.jpg

I see that despite going through pretty much every thread in this forum this week, Aurick has managed to avoid commenting on this one.

I’ll assume it’s a bug then.