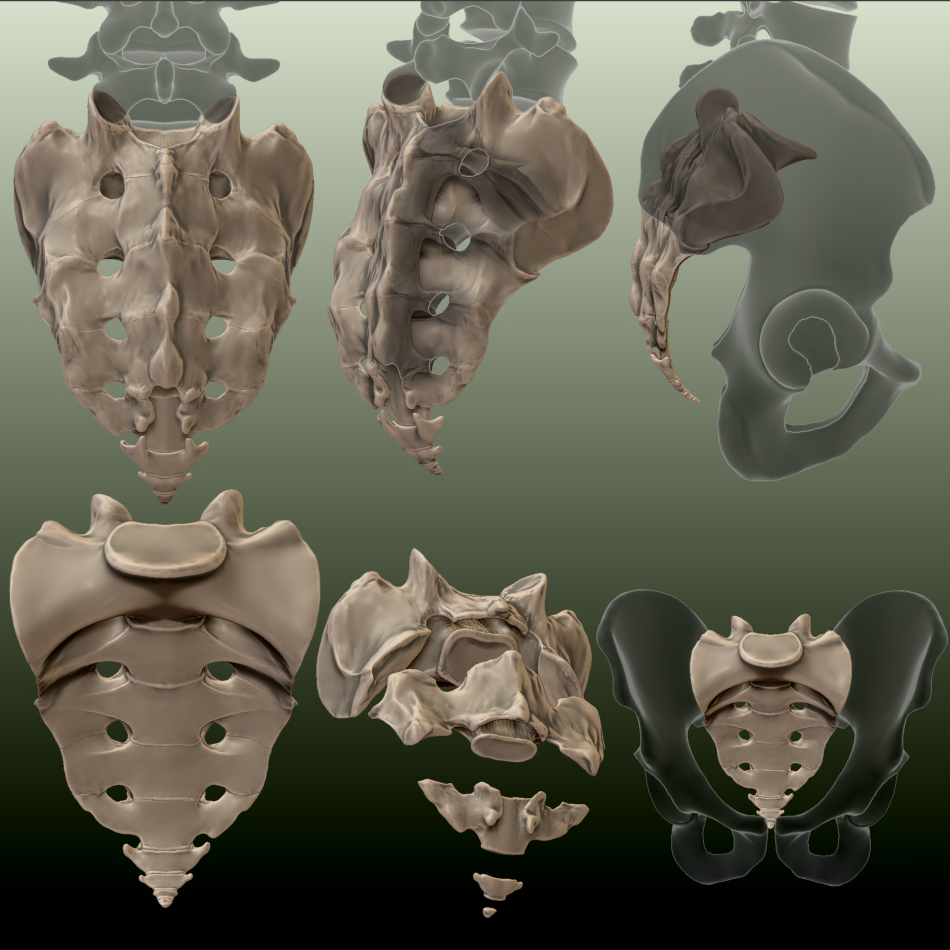
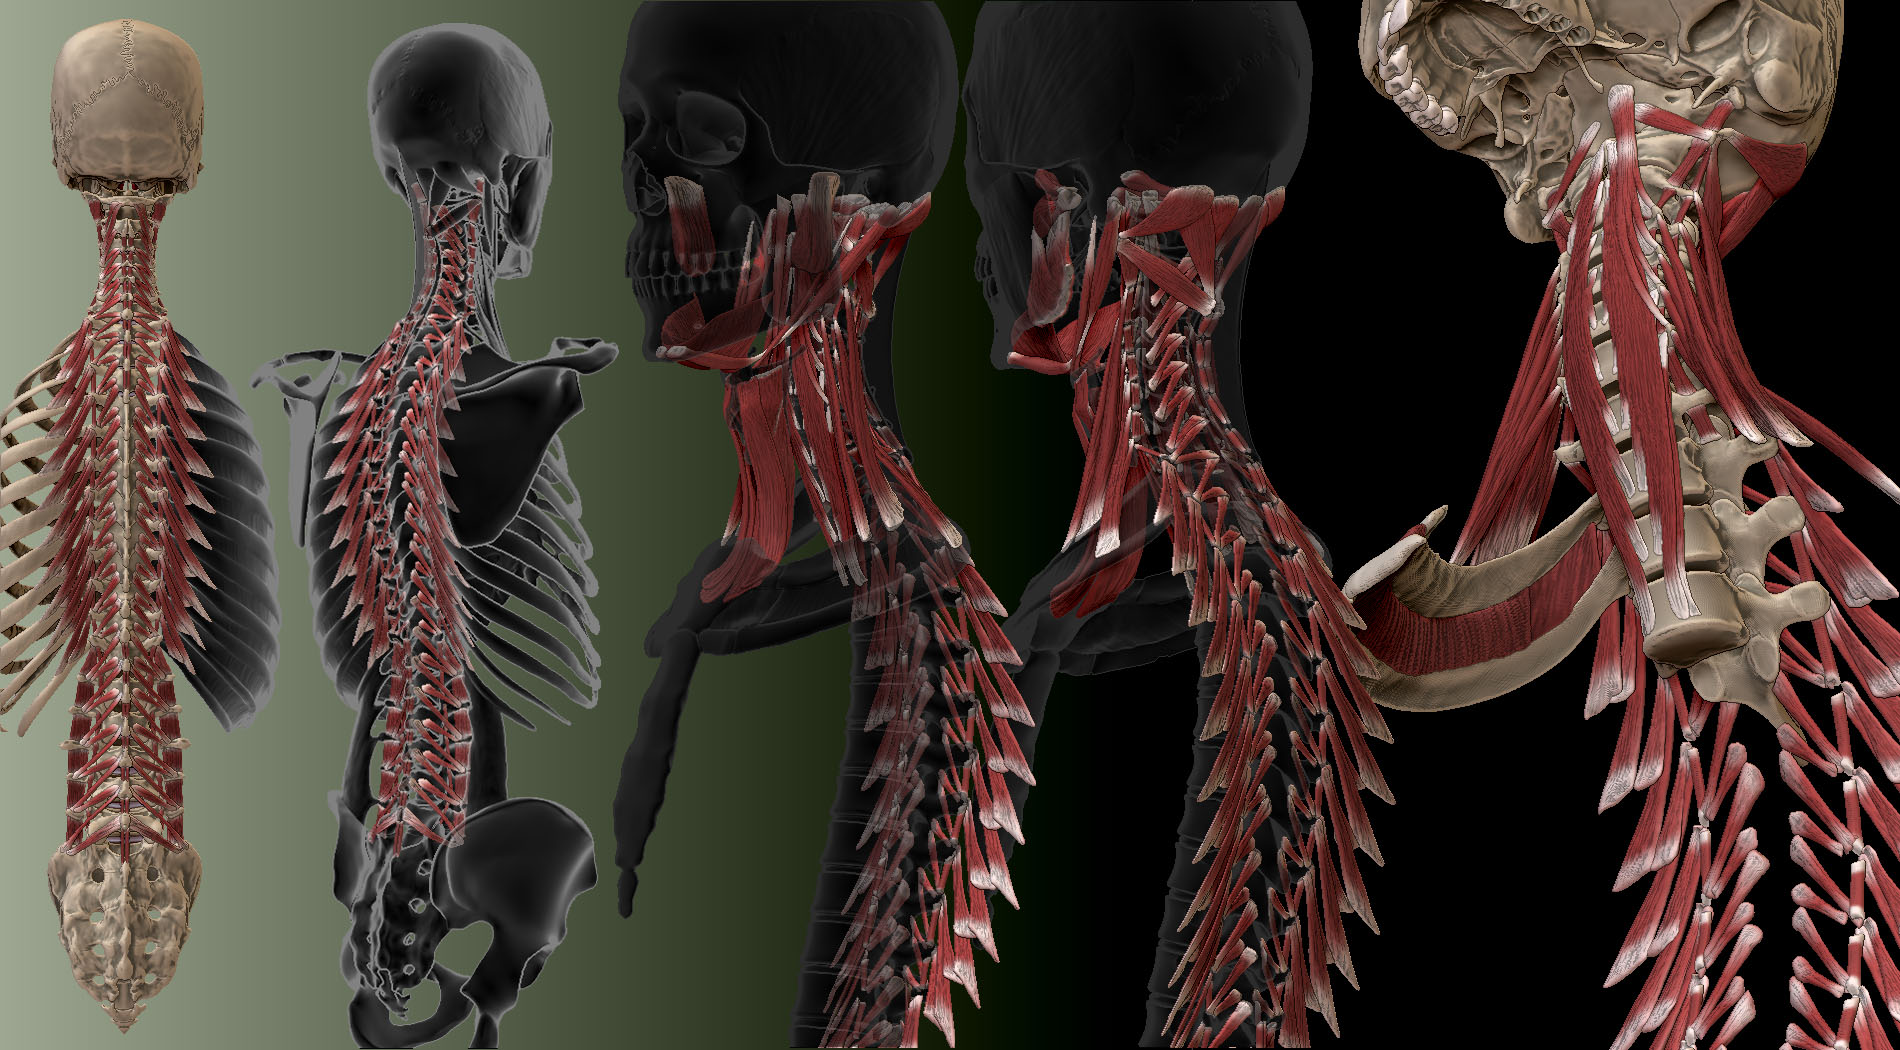
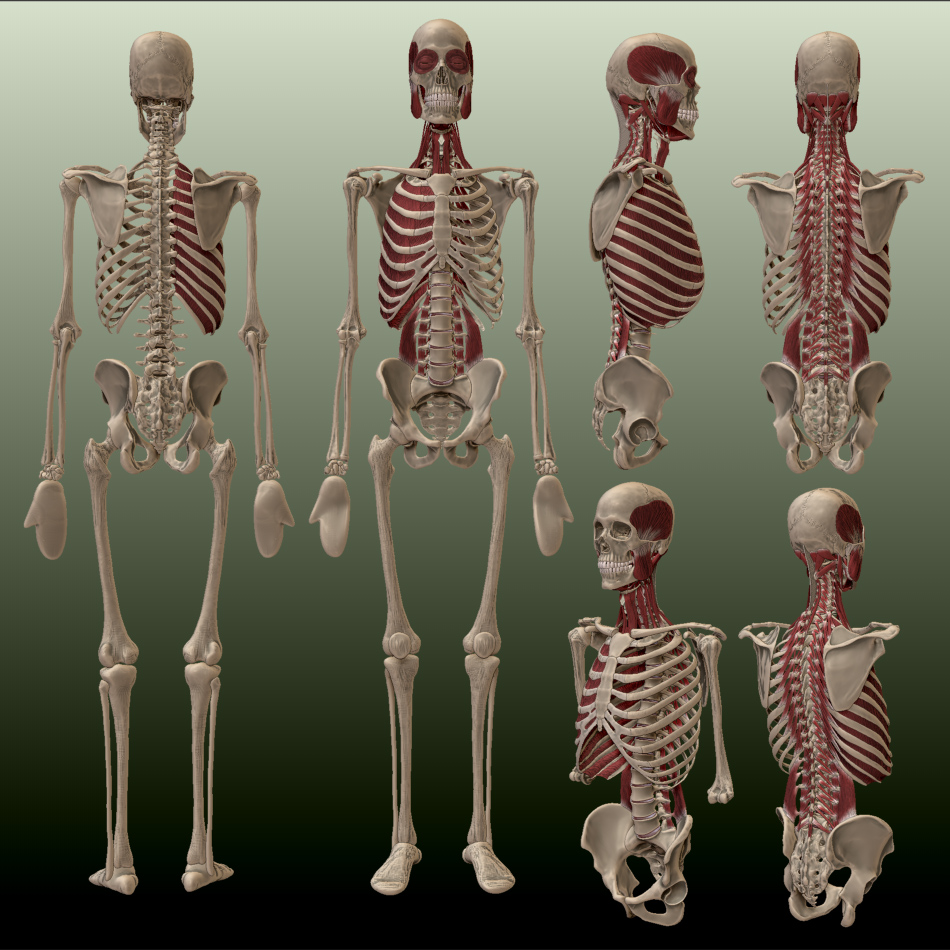
#Daniel Biggers Thank you for your comment!  I still have to do the upper and lower extremities, but doing the muscles proved to be too tempting so I’ve started with that for now
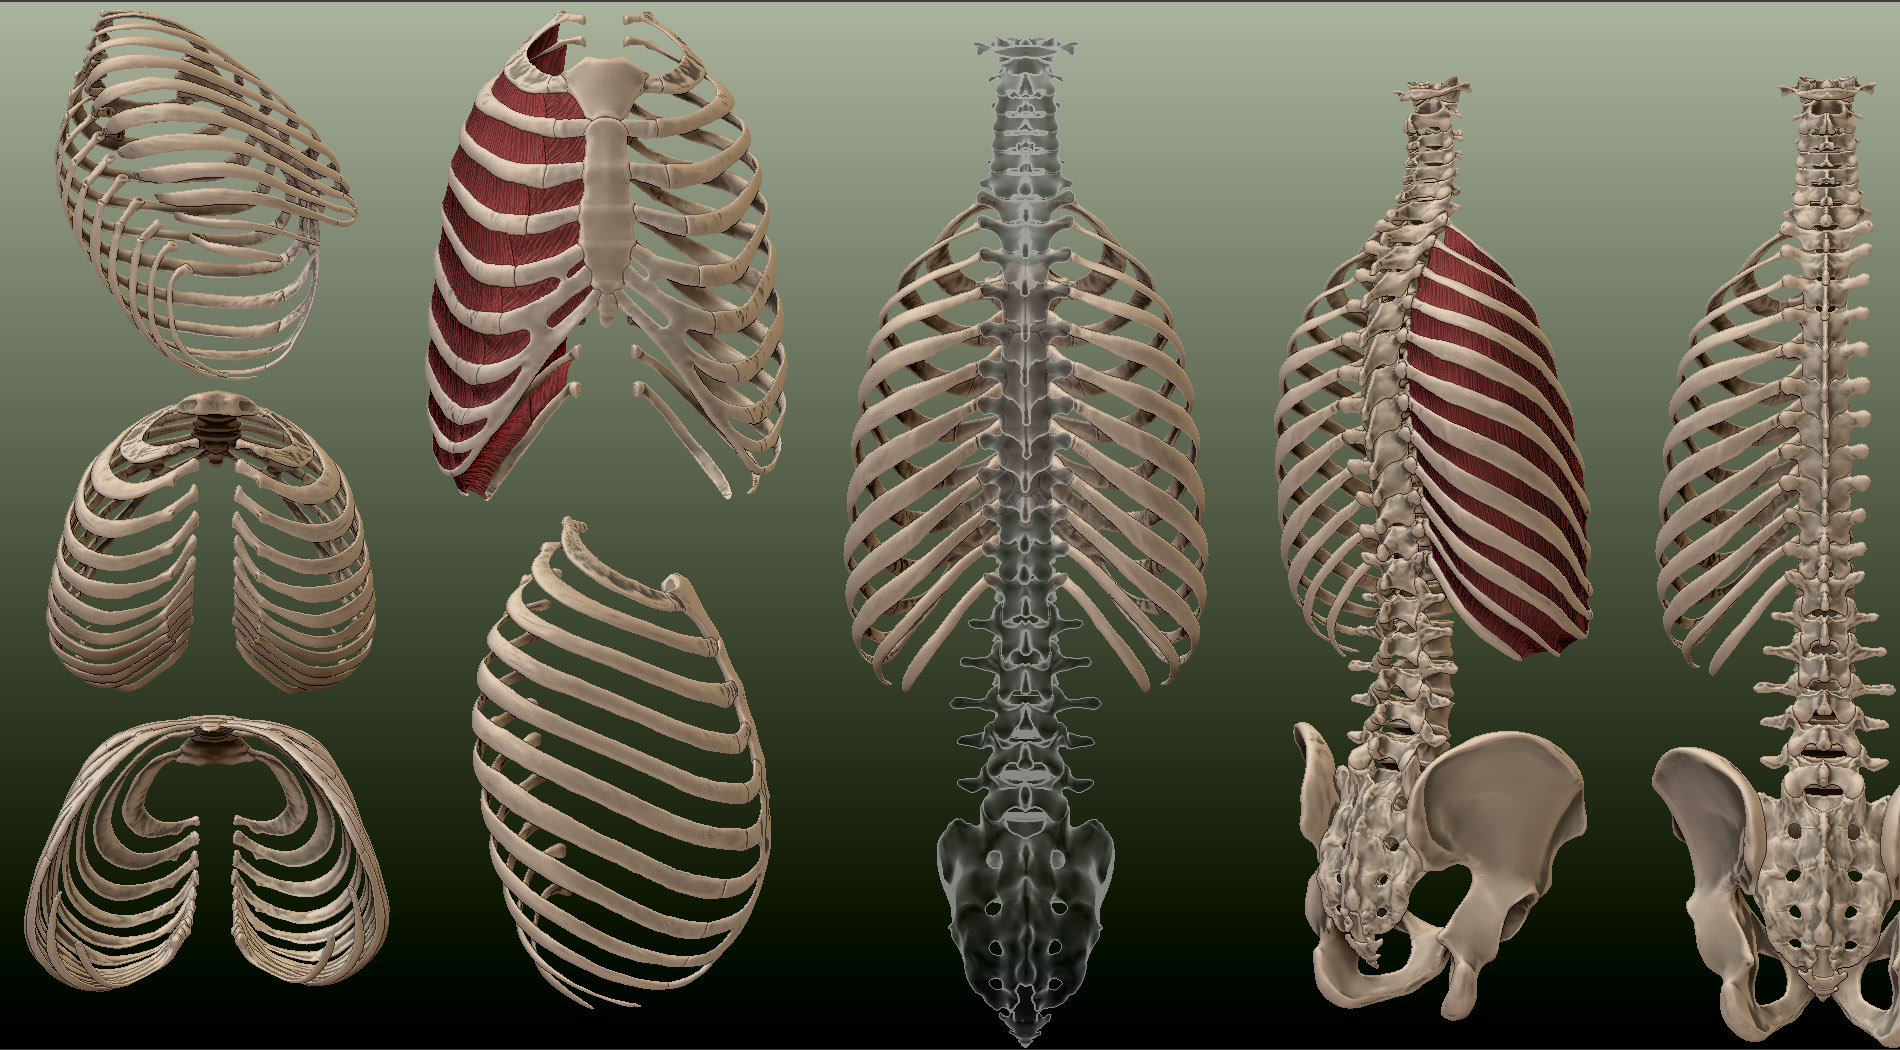
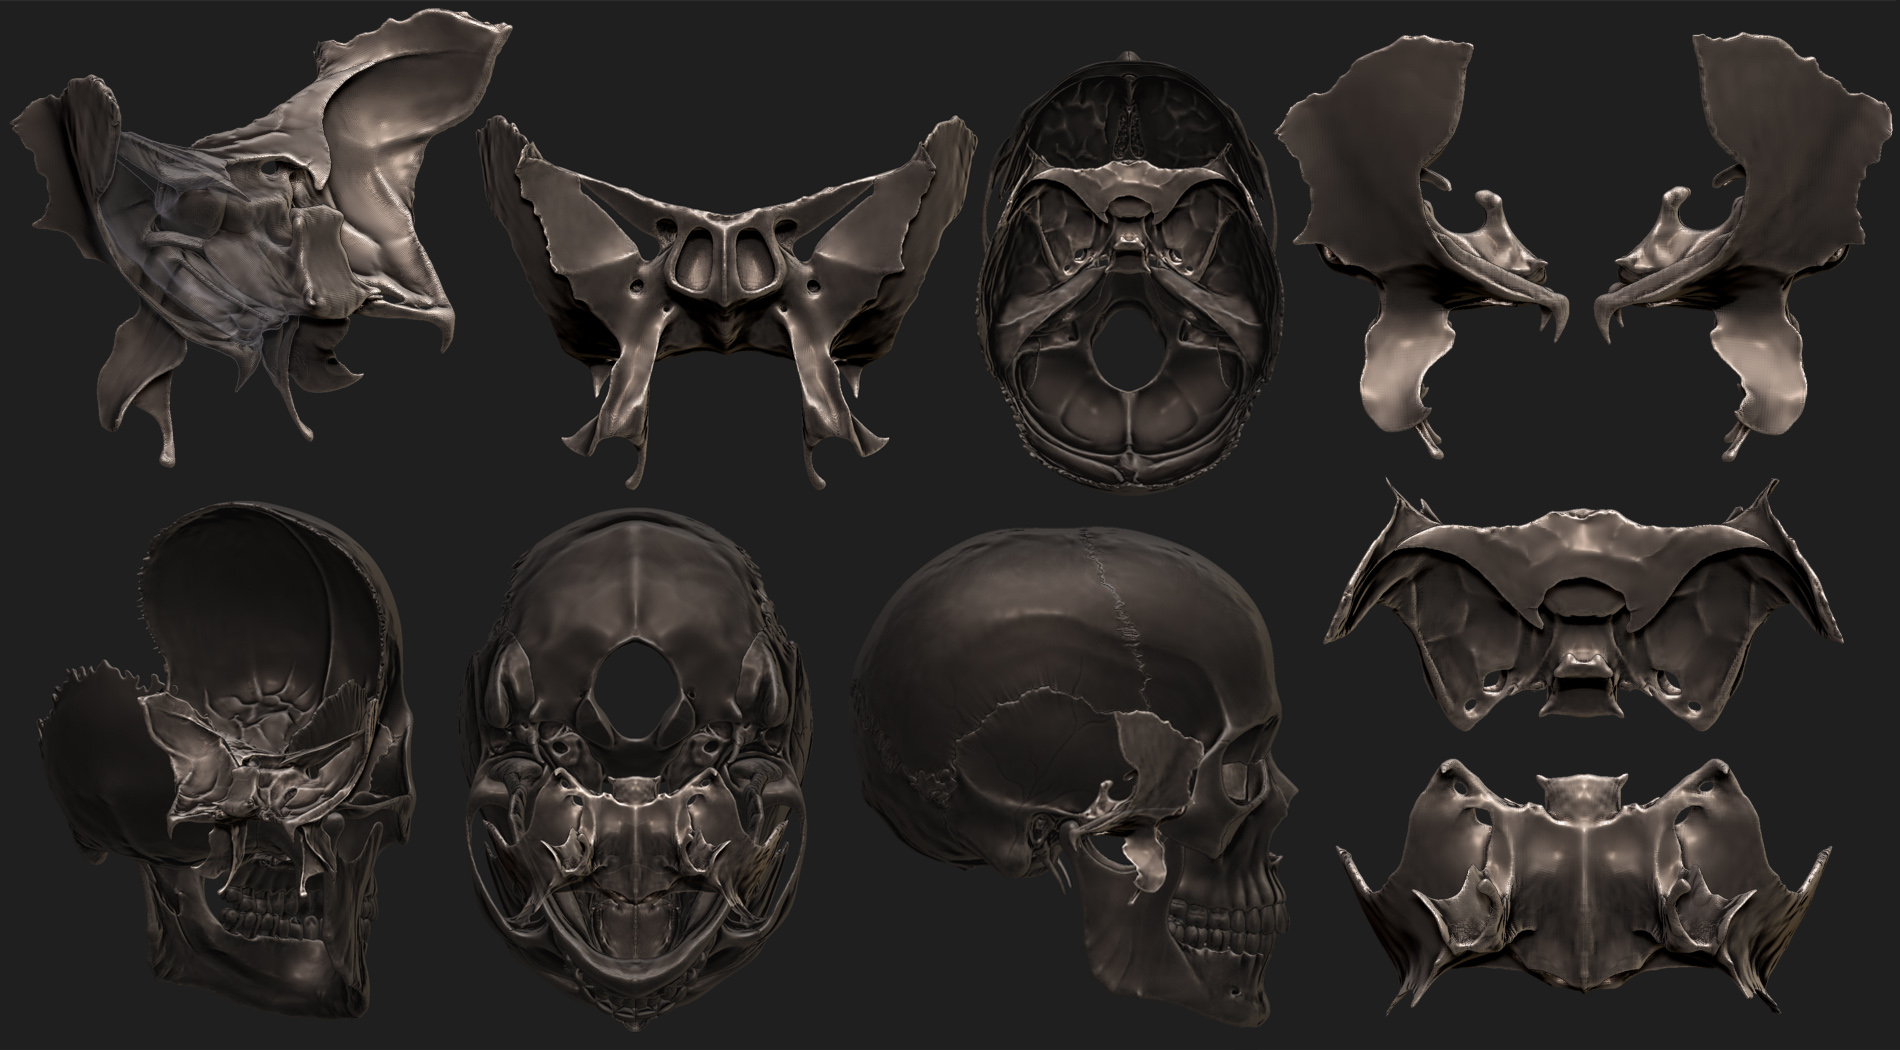
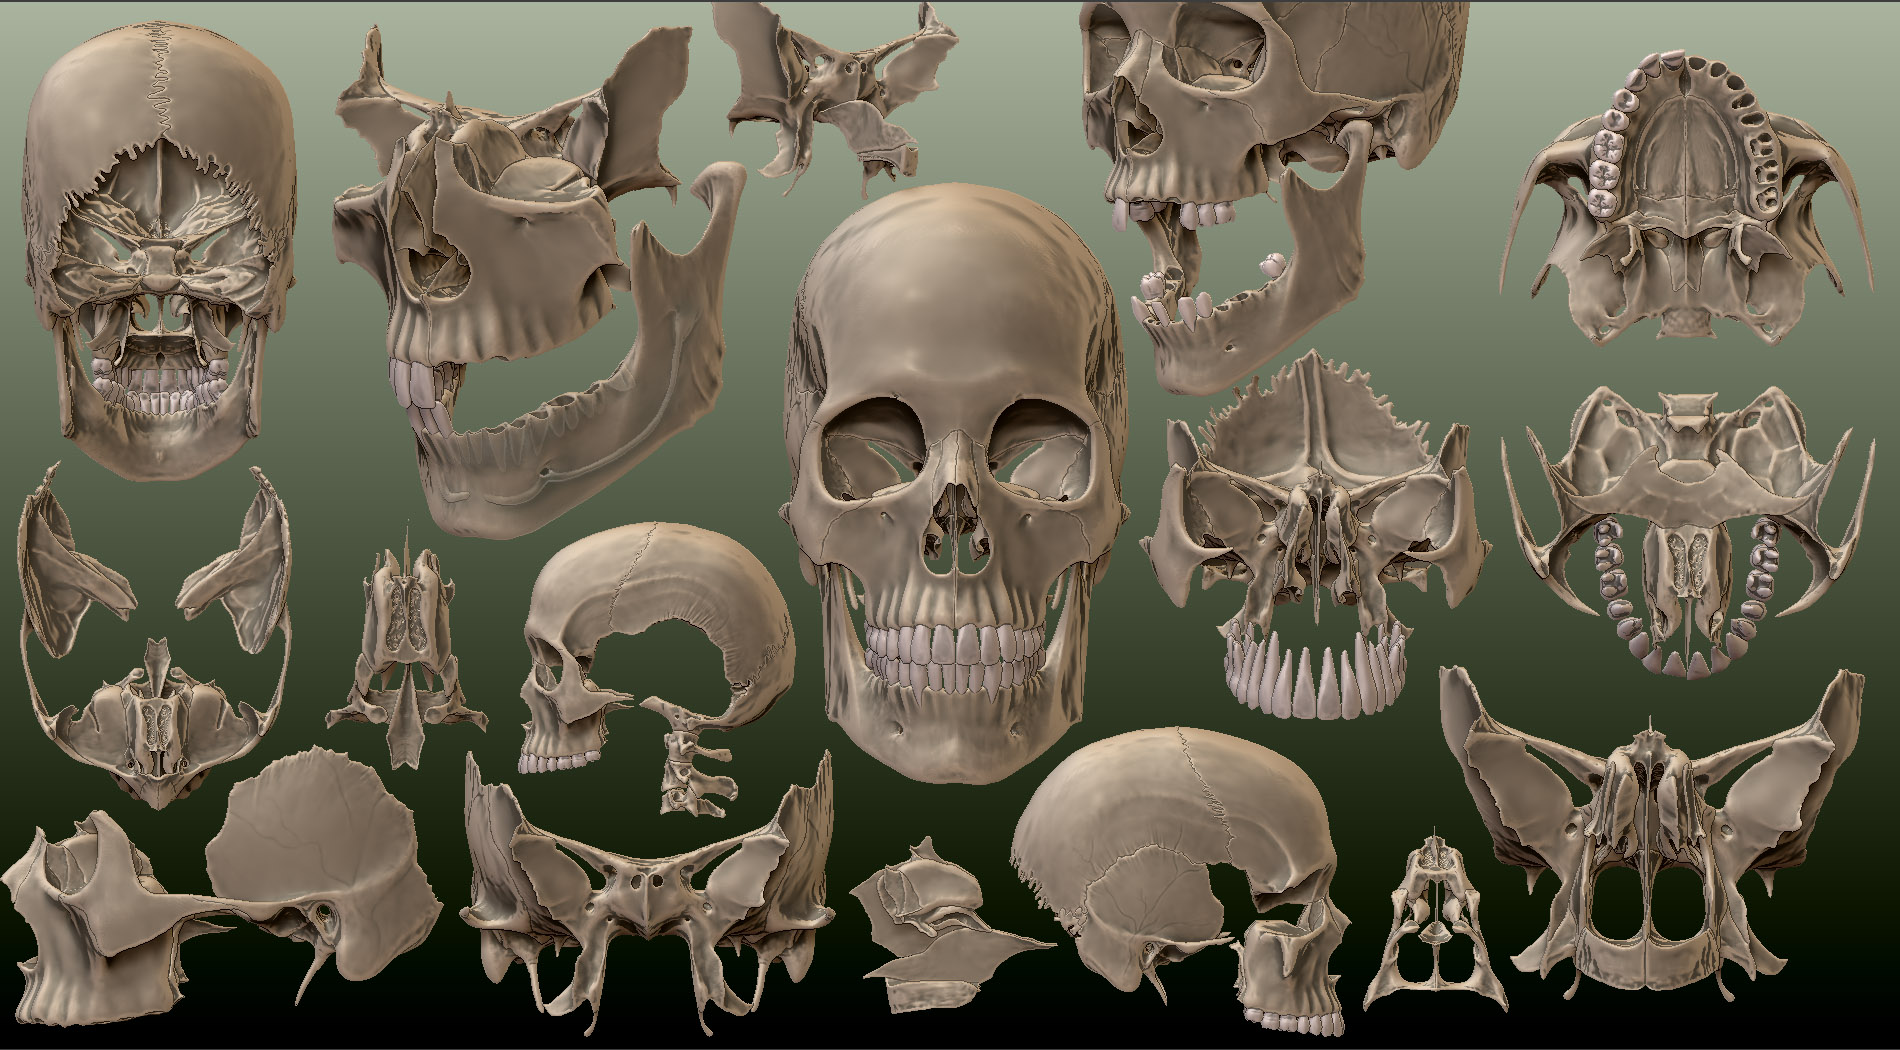
The skull is extremely complex indeed. Every little crevice and shape has its purpose and is always there for a reason.
That together with the infinite small or more dramatic variations in form just makes it mindbuggling to grasp, like a never-ending stream of information to jump into! (=
Regarding your questions:
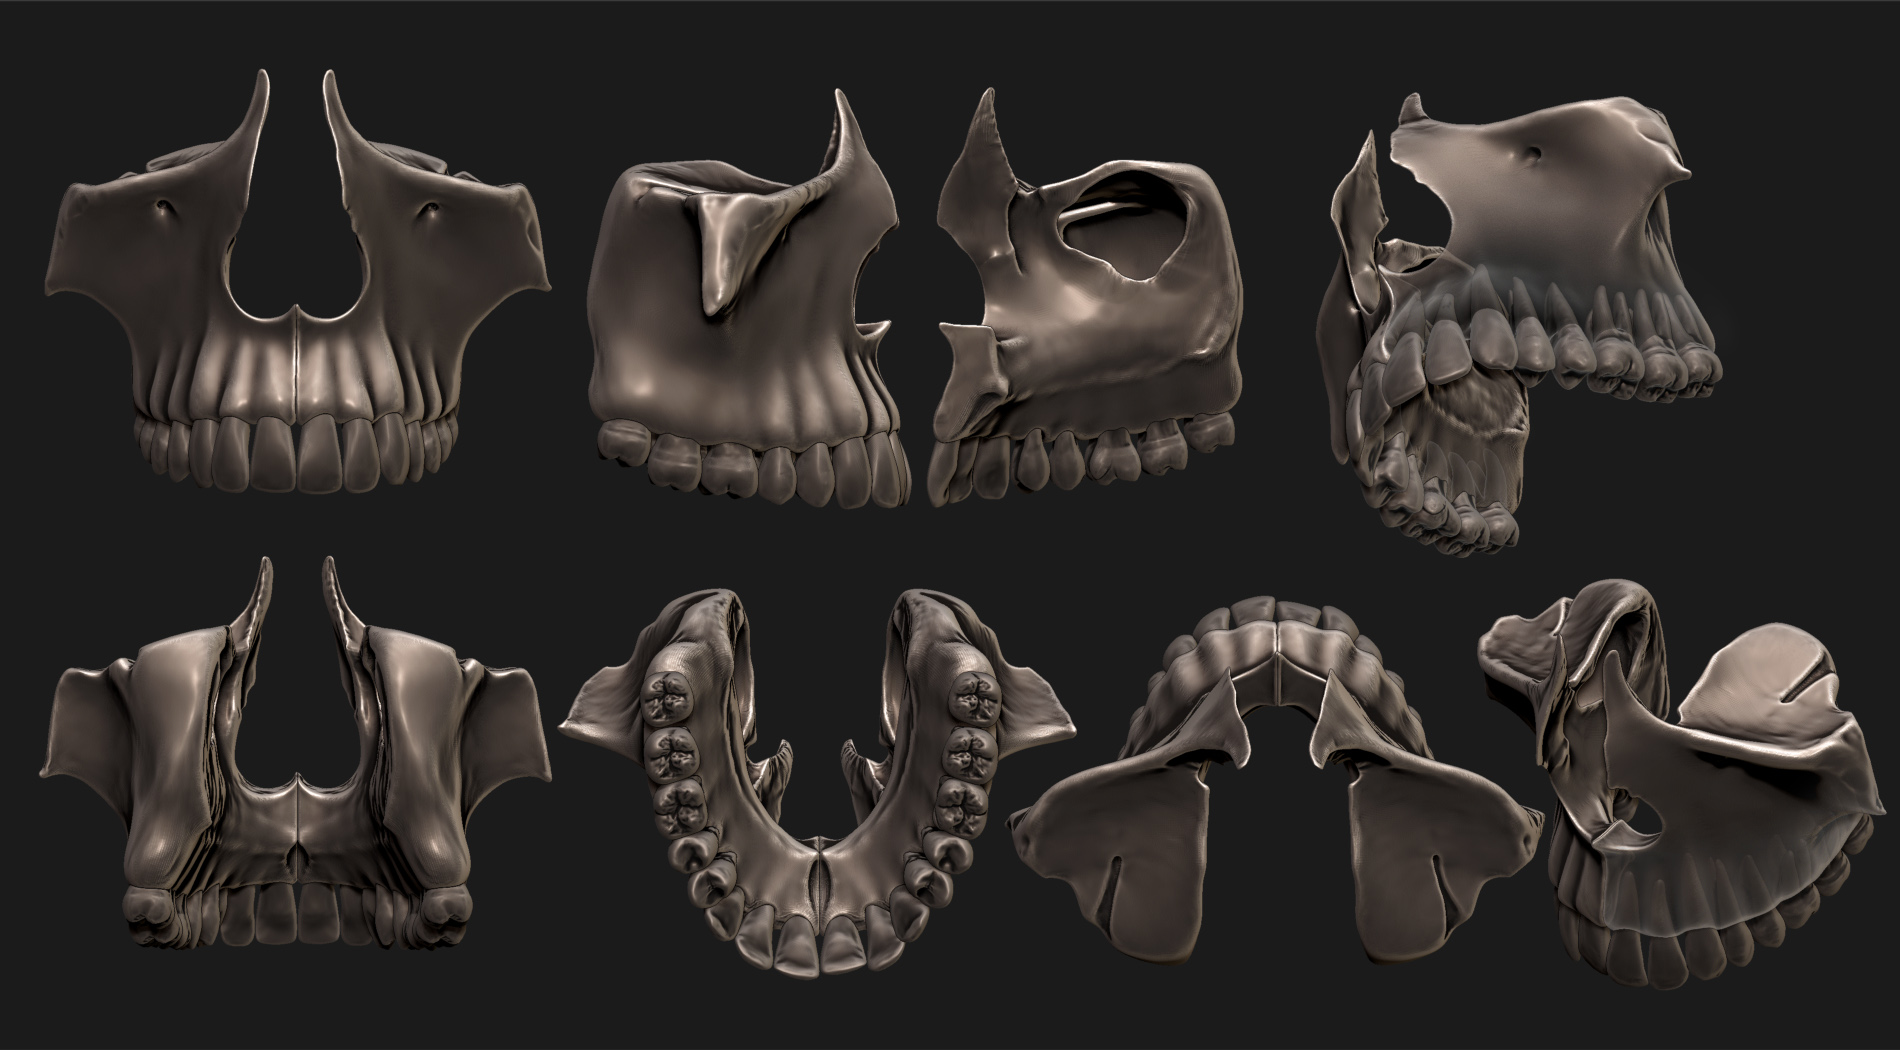
Step 1. I started with a one piece mesh as in the image below and separated the sections that were to become the different bones into individual polygroups using the SelectLasso brush,
to display each respective part, and then GroupVisible in the polygroups palette.
This is what it looked like:
Step 2. Dynamesh the part you want to start working with.
Step 3. Most parts will get quite messy when dynameshed so in this step you have to clean it up by sculpting and smoothing and re-dynameshing and if you want z-remesh.
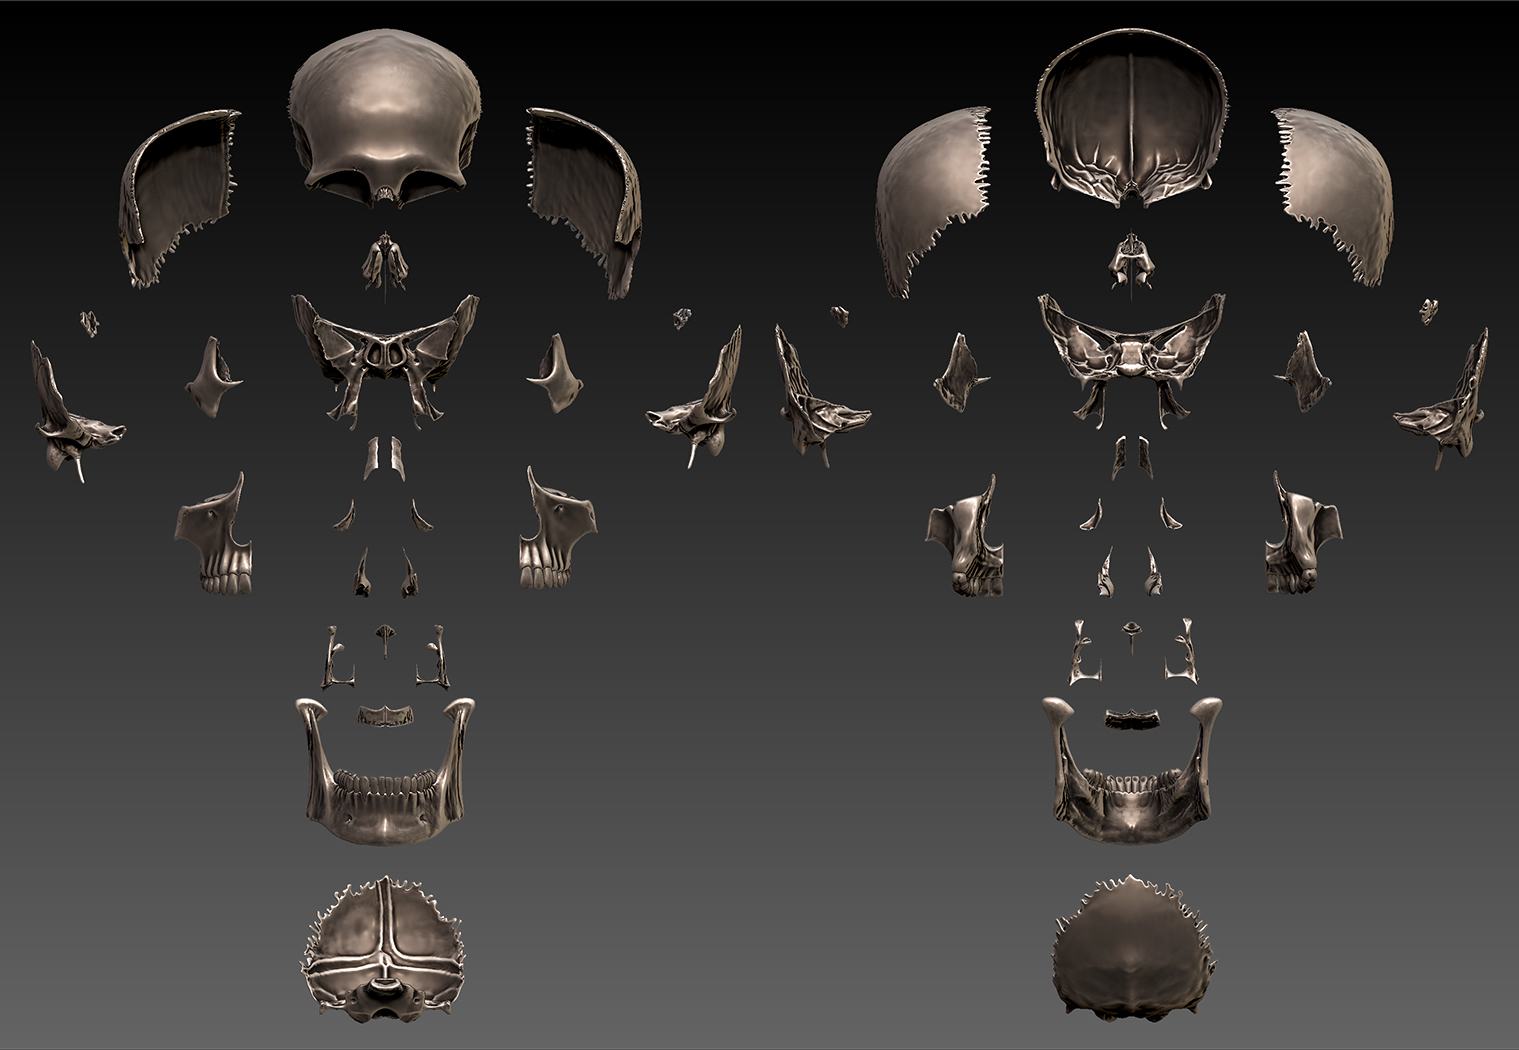
Step 4. In this step you separate, in this example, each side of the maxilla by turning off symmetry and then with the SelectRect brush hide one side. Then under Tool>Geometry>Modify Topology click Del Hidden.
Now with that one part duplicate it and then mirror, merge them together and under Tool>Geometry>Polygroups click Auto Groups.
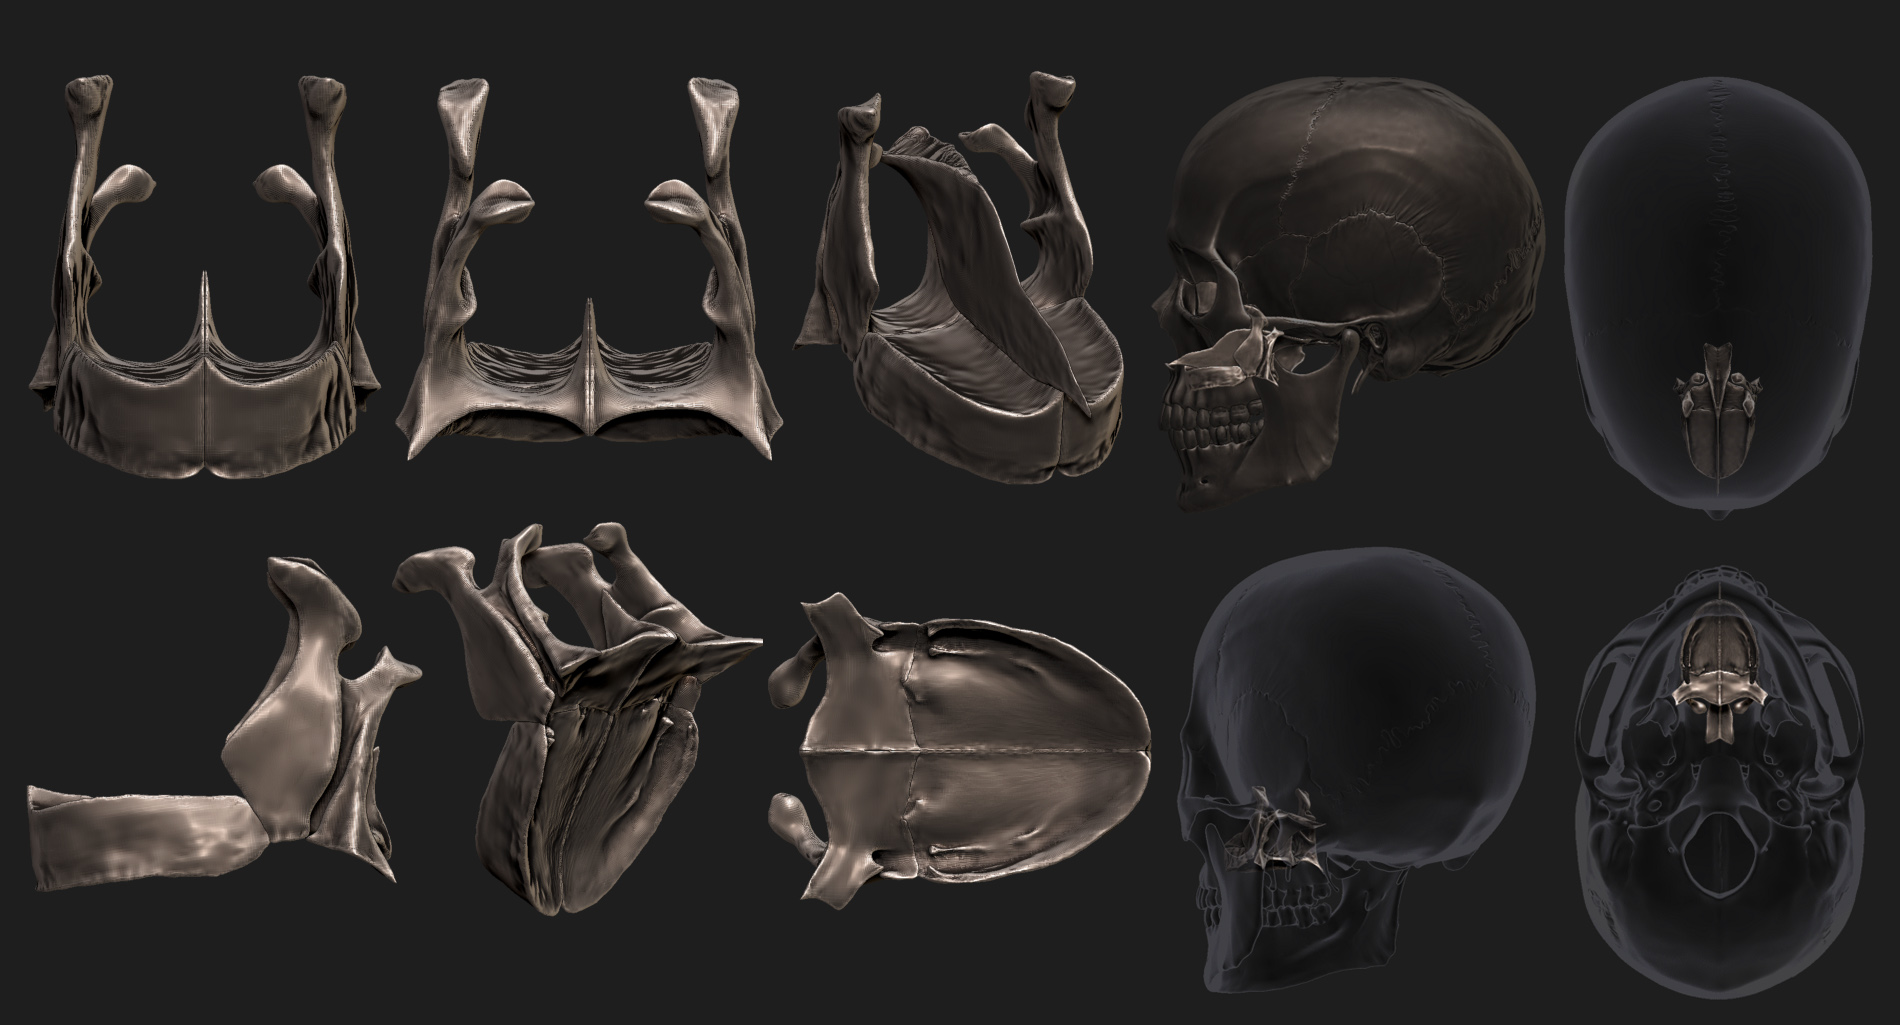
With the parietals and frontal bone and maybe some other bones I would instead use Tool>Geometry>EdgeLoop>Panel Loops with a thickness of 0.02 and Elevation at -100 and then Group Visible.
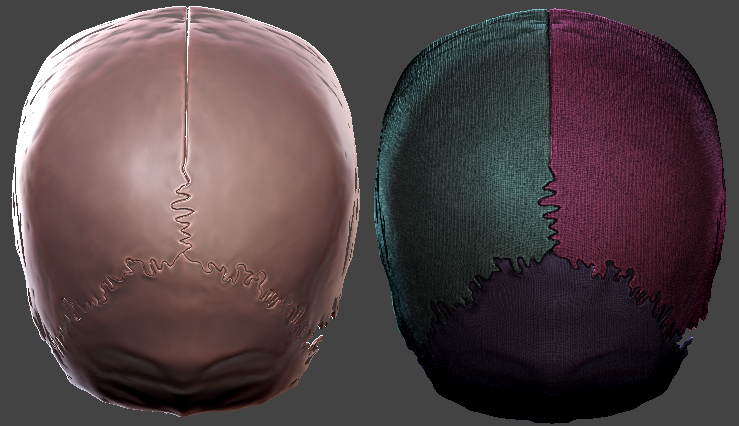
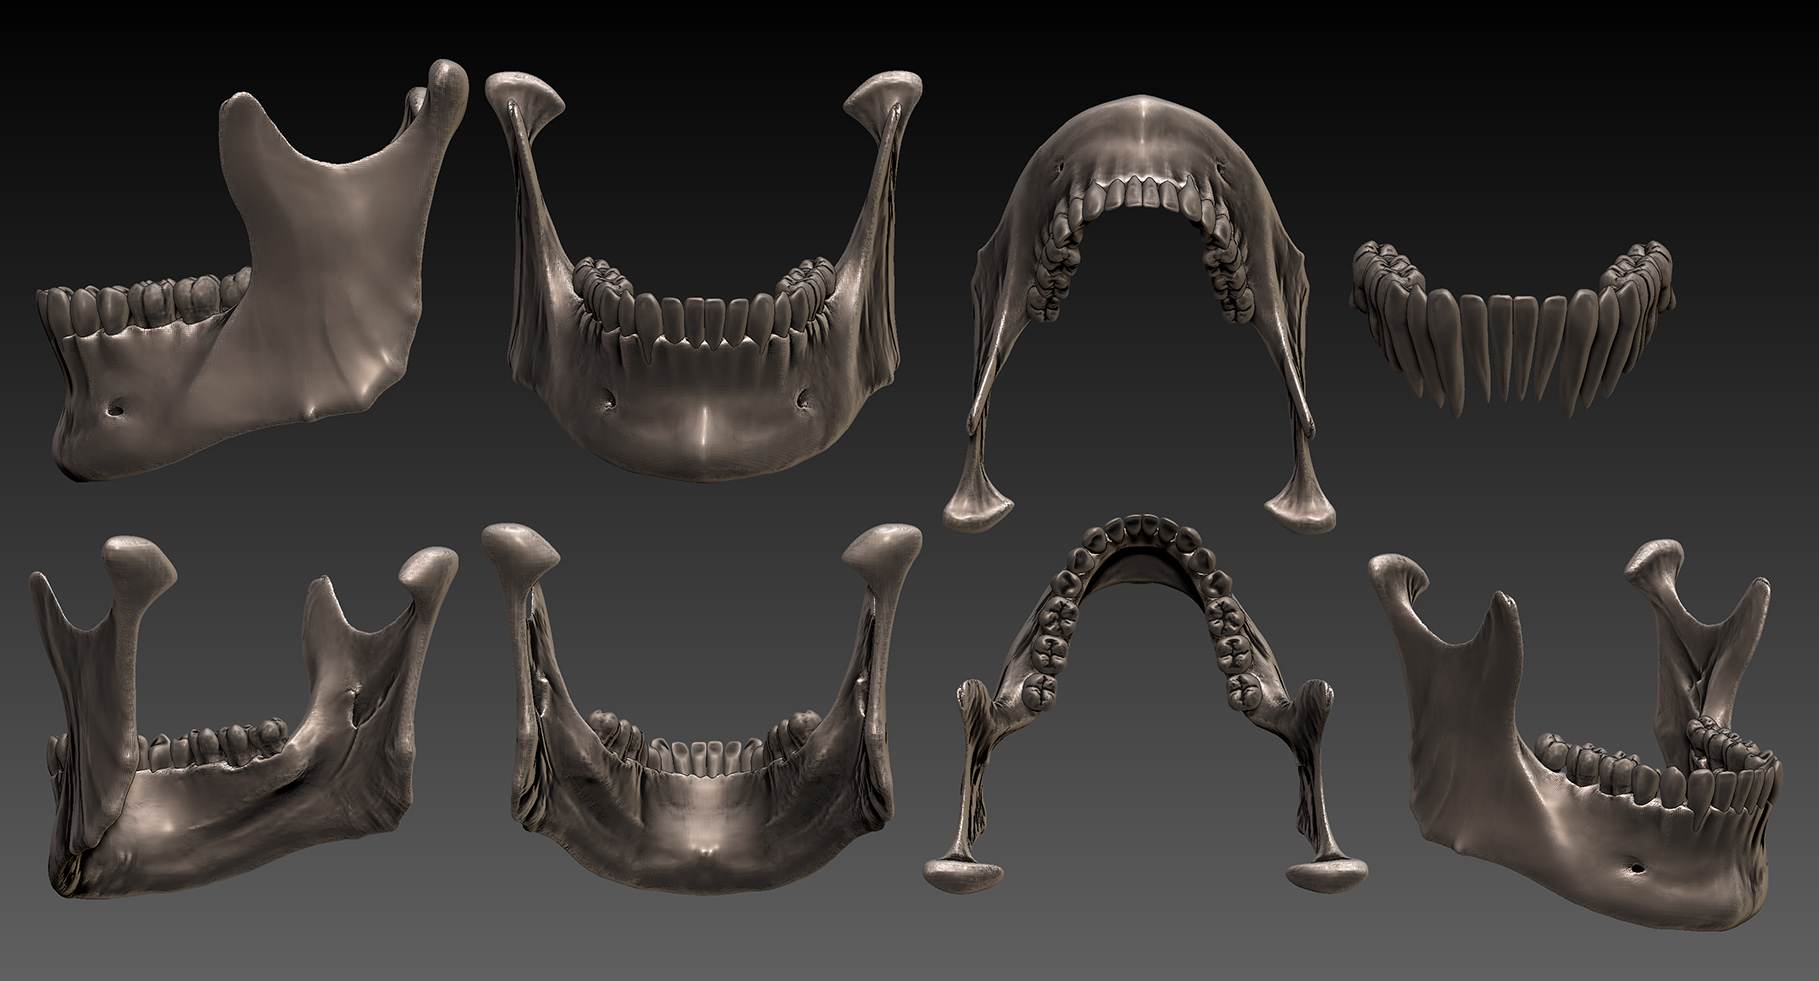
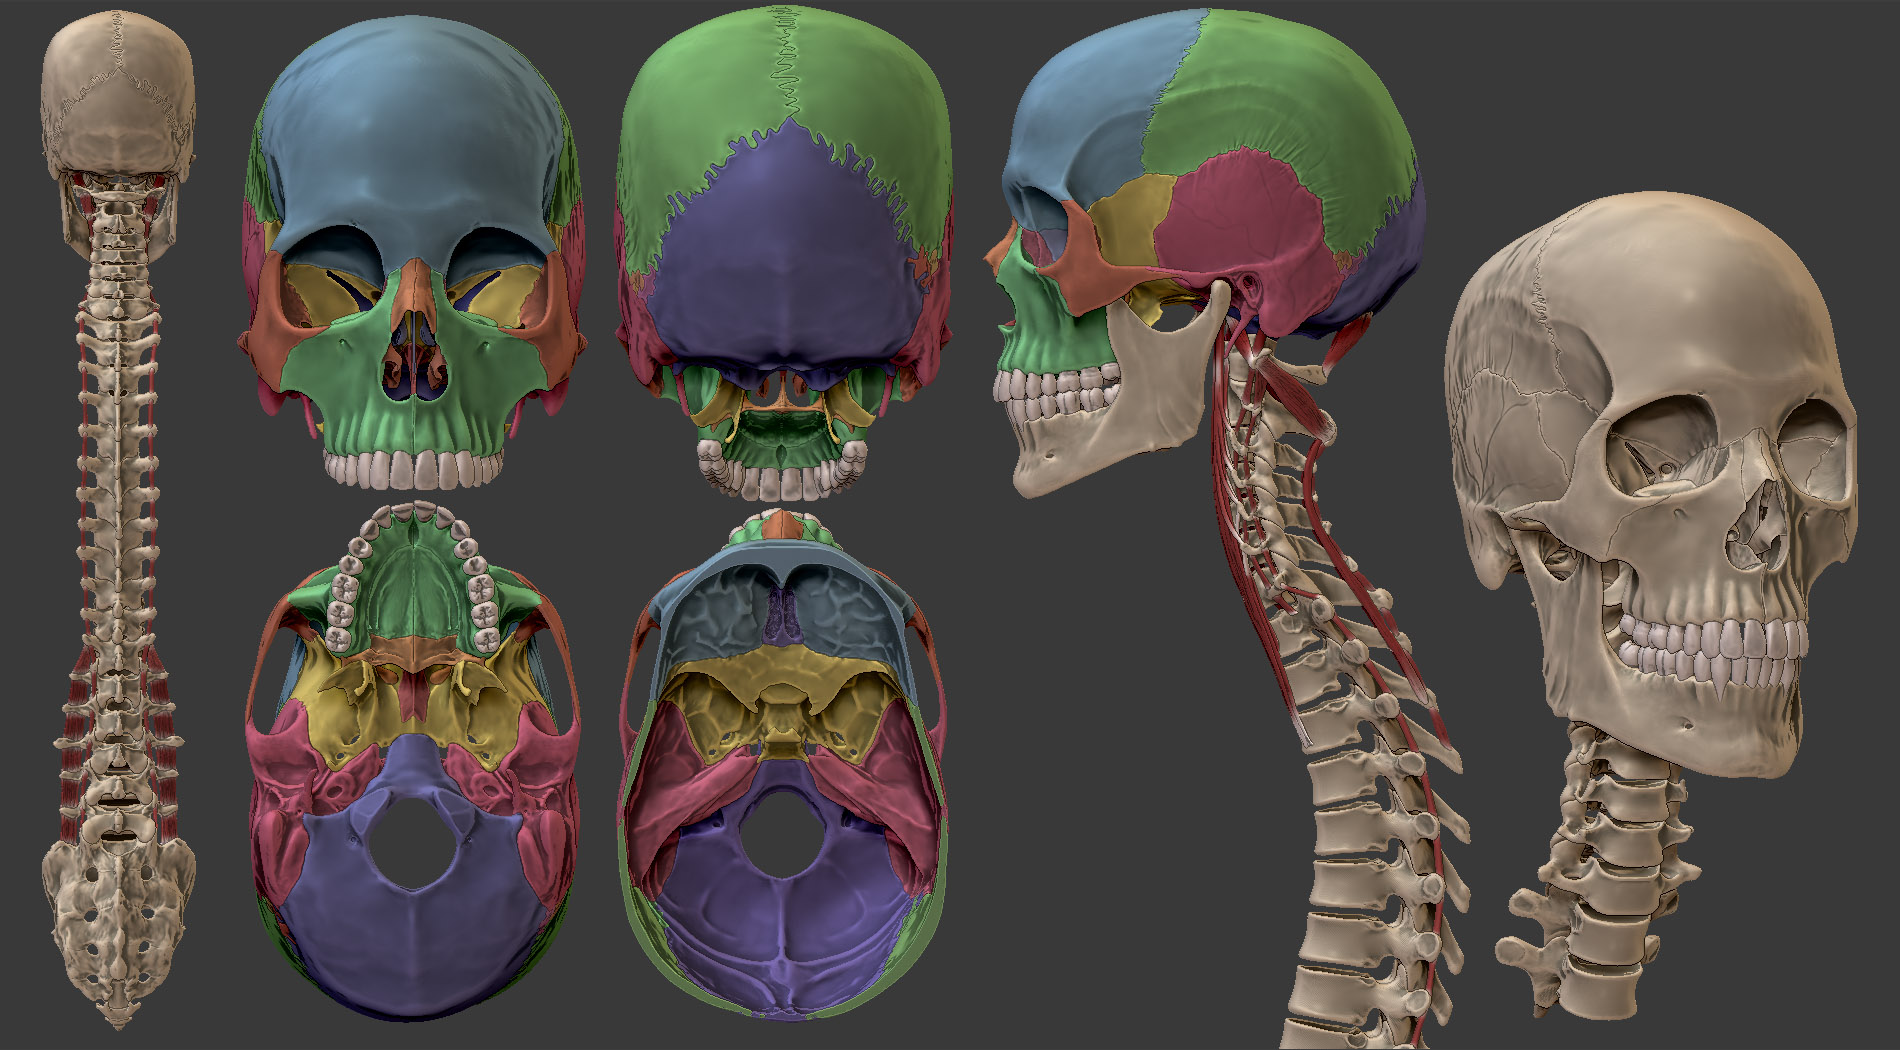
The sutures I started doing as late as possible. I used the move brush mainly for this. For example with the lambdoid suture I would have the occipital bone and parietals as one subtool, each with their own polygroups assigned.
It was a sort of try and adjust as you went along. The density of the meshes had to be high enough for the deformation. So starting with the even borders you’ll have to do a lot of moving using this method.
I was thinking about the sutures all the way from the beginning but realized early on but realized they would just be an obstacle if those jaggedy edges were there from early on,
since theres been so much adjustments made and I knew I would be doing a lot more of those before I was satisfied with the overall shape of the skull. But yea, this step was quite fun.
I did screen-grab the sagittal/coronal and lambdoidal suture views and in photoshop try to sketch out something I was fairly pleased with before doing it in zbrush. Heres an image from that process:
Hope this helped answer your questions Feel always free to ask anything else regarding it, I’ll be happy to help!
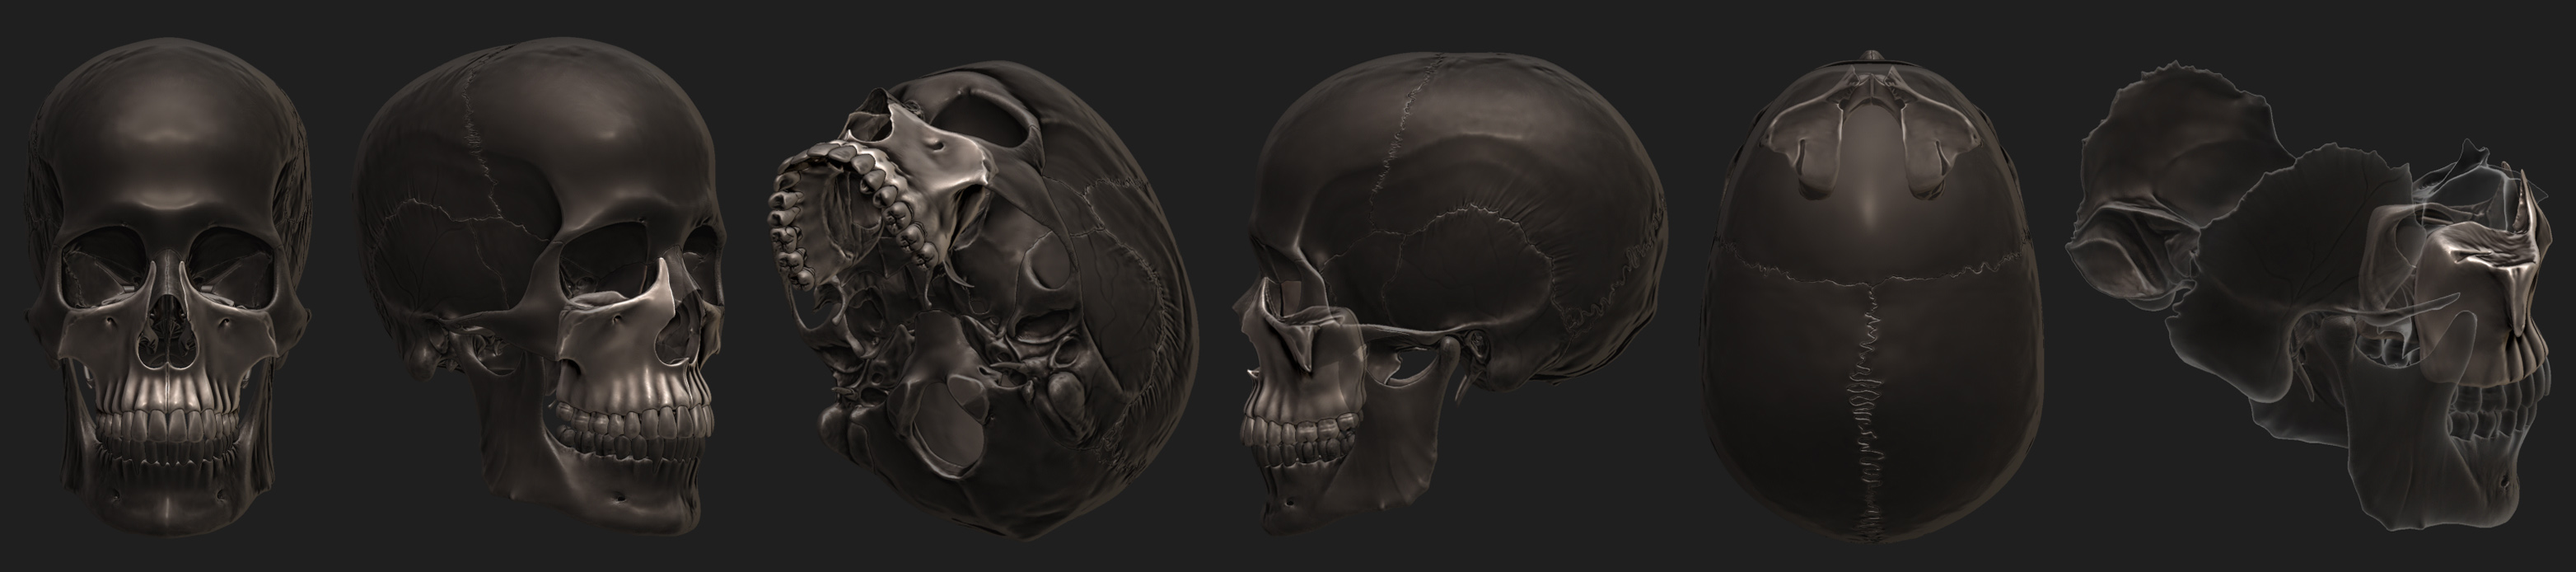
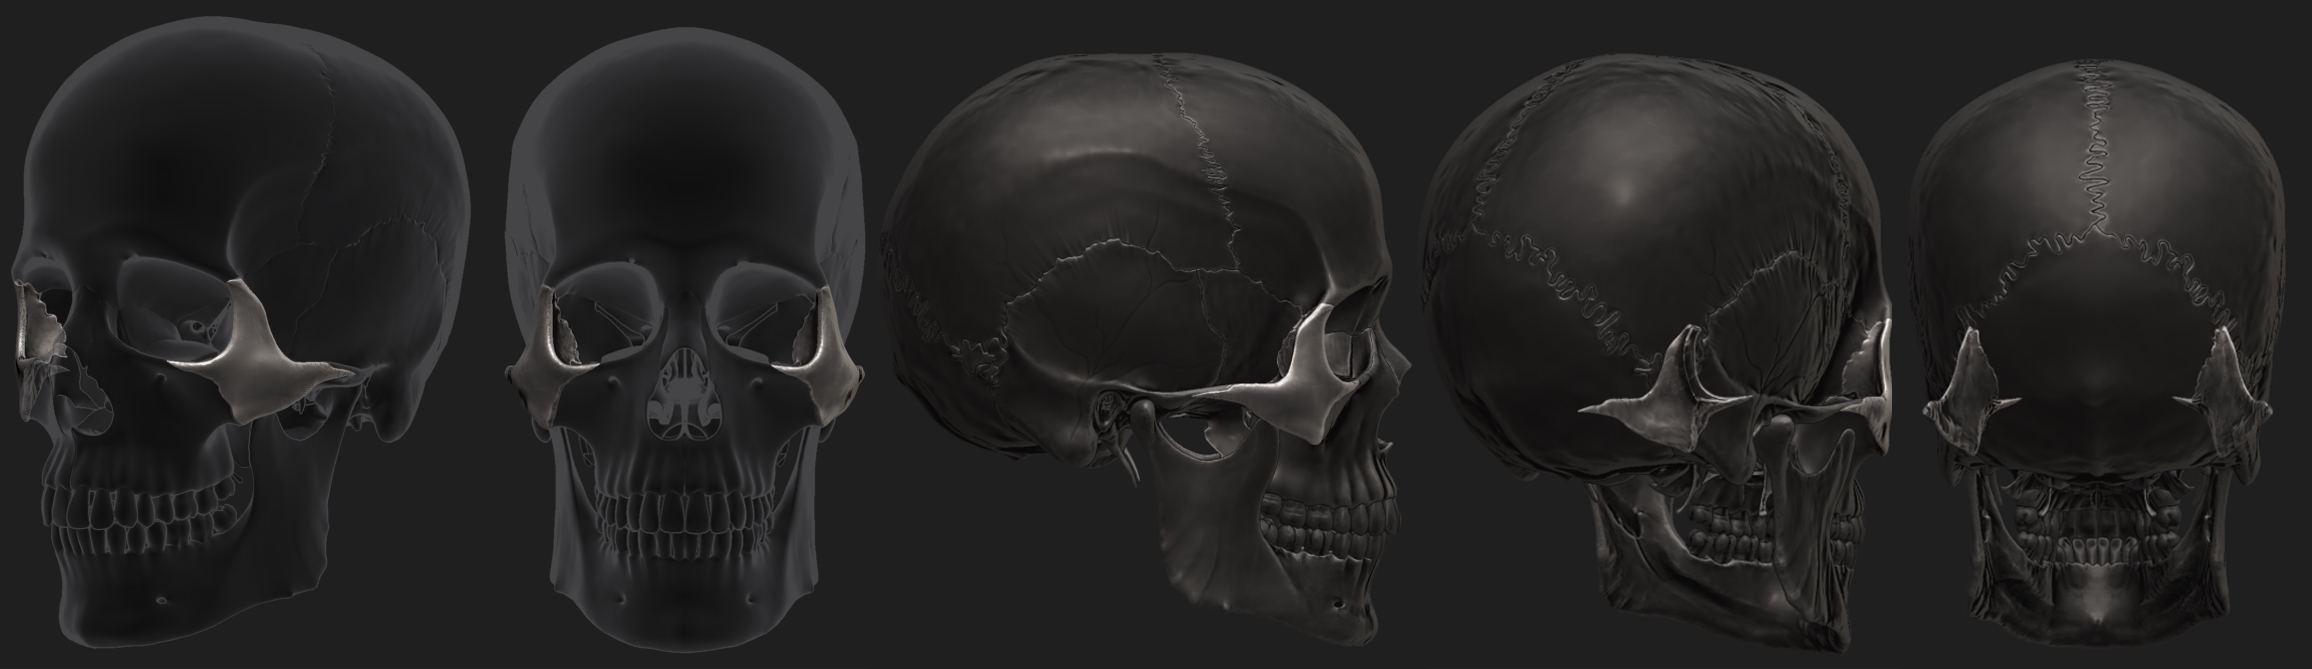
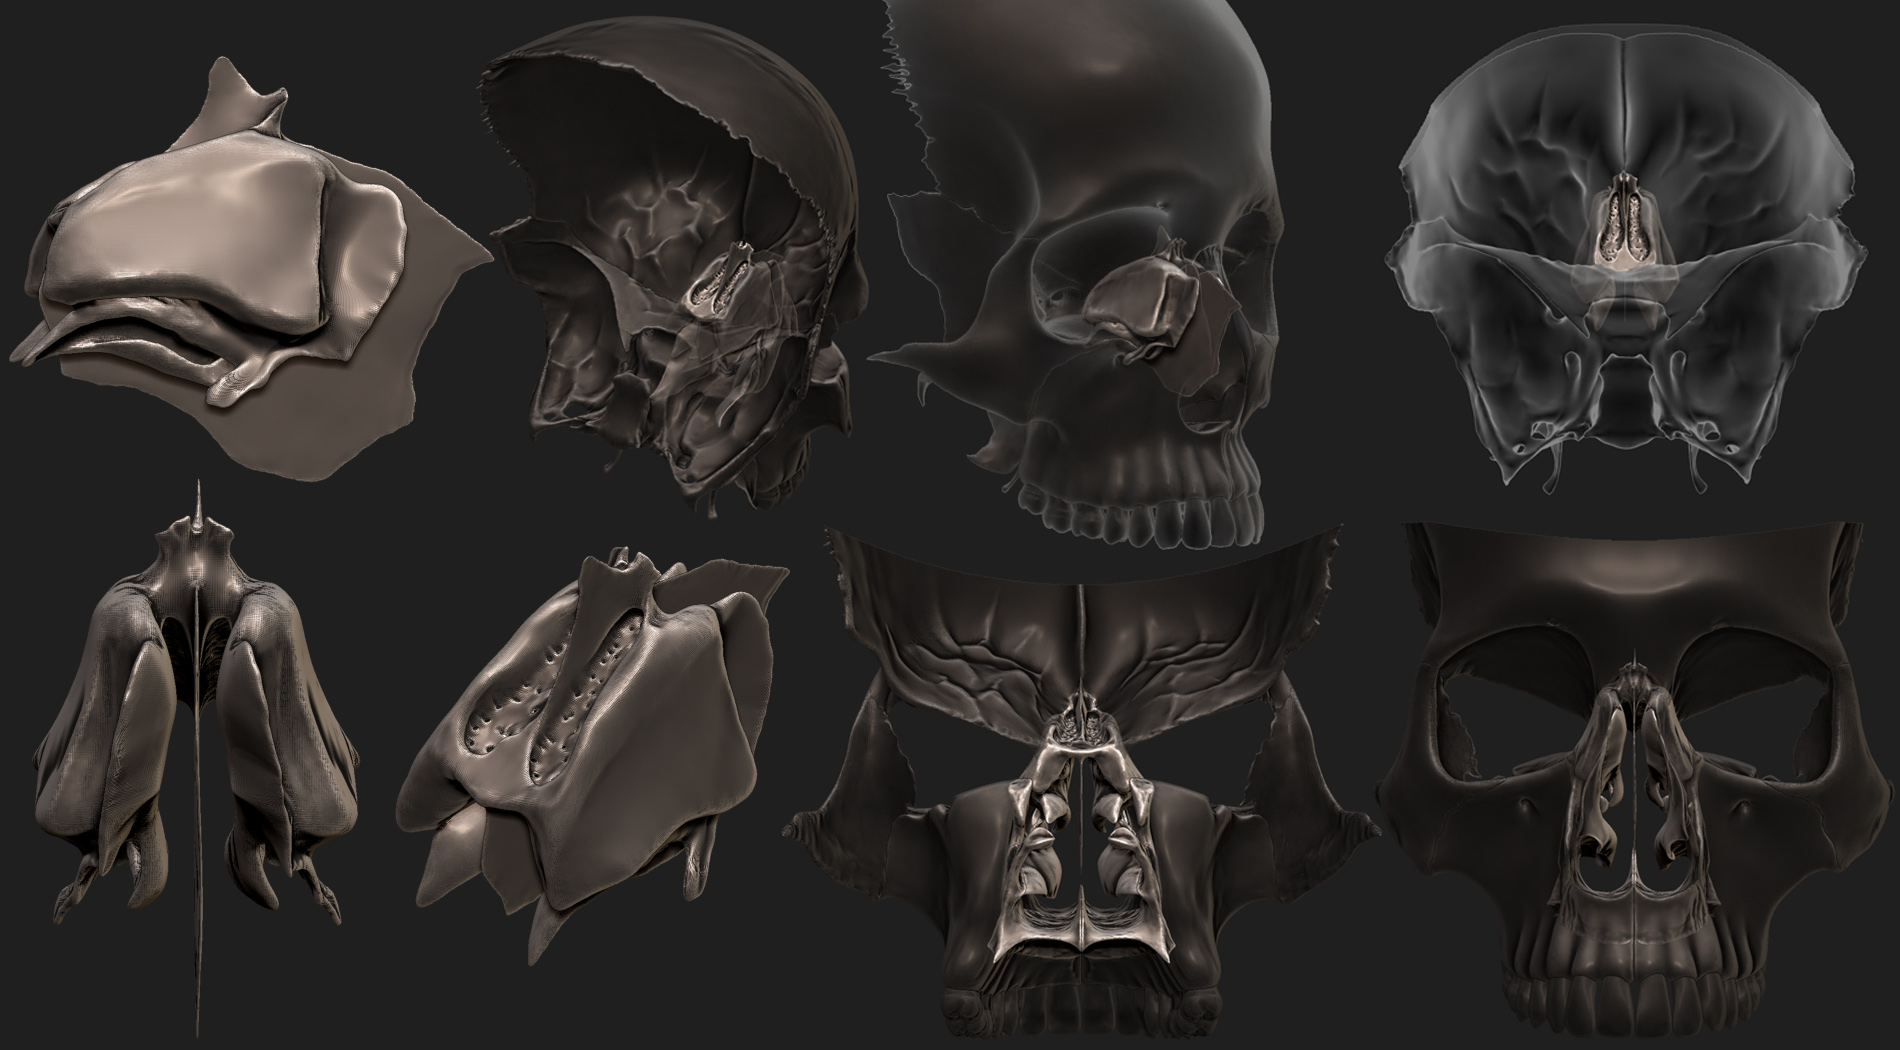
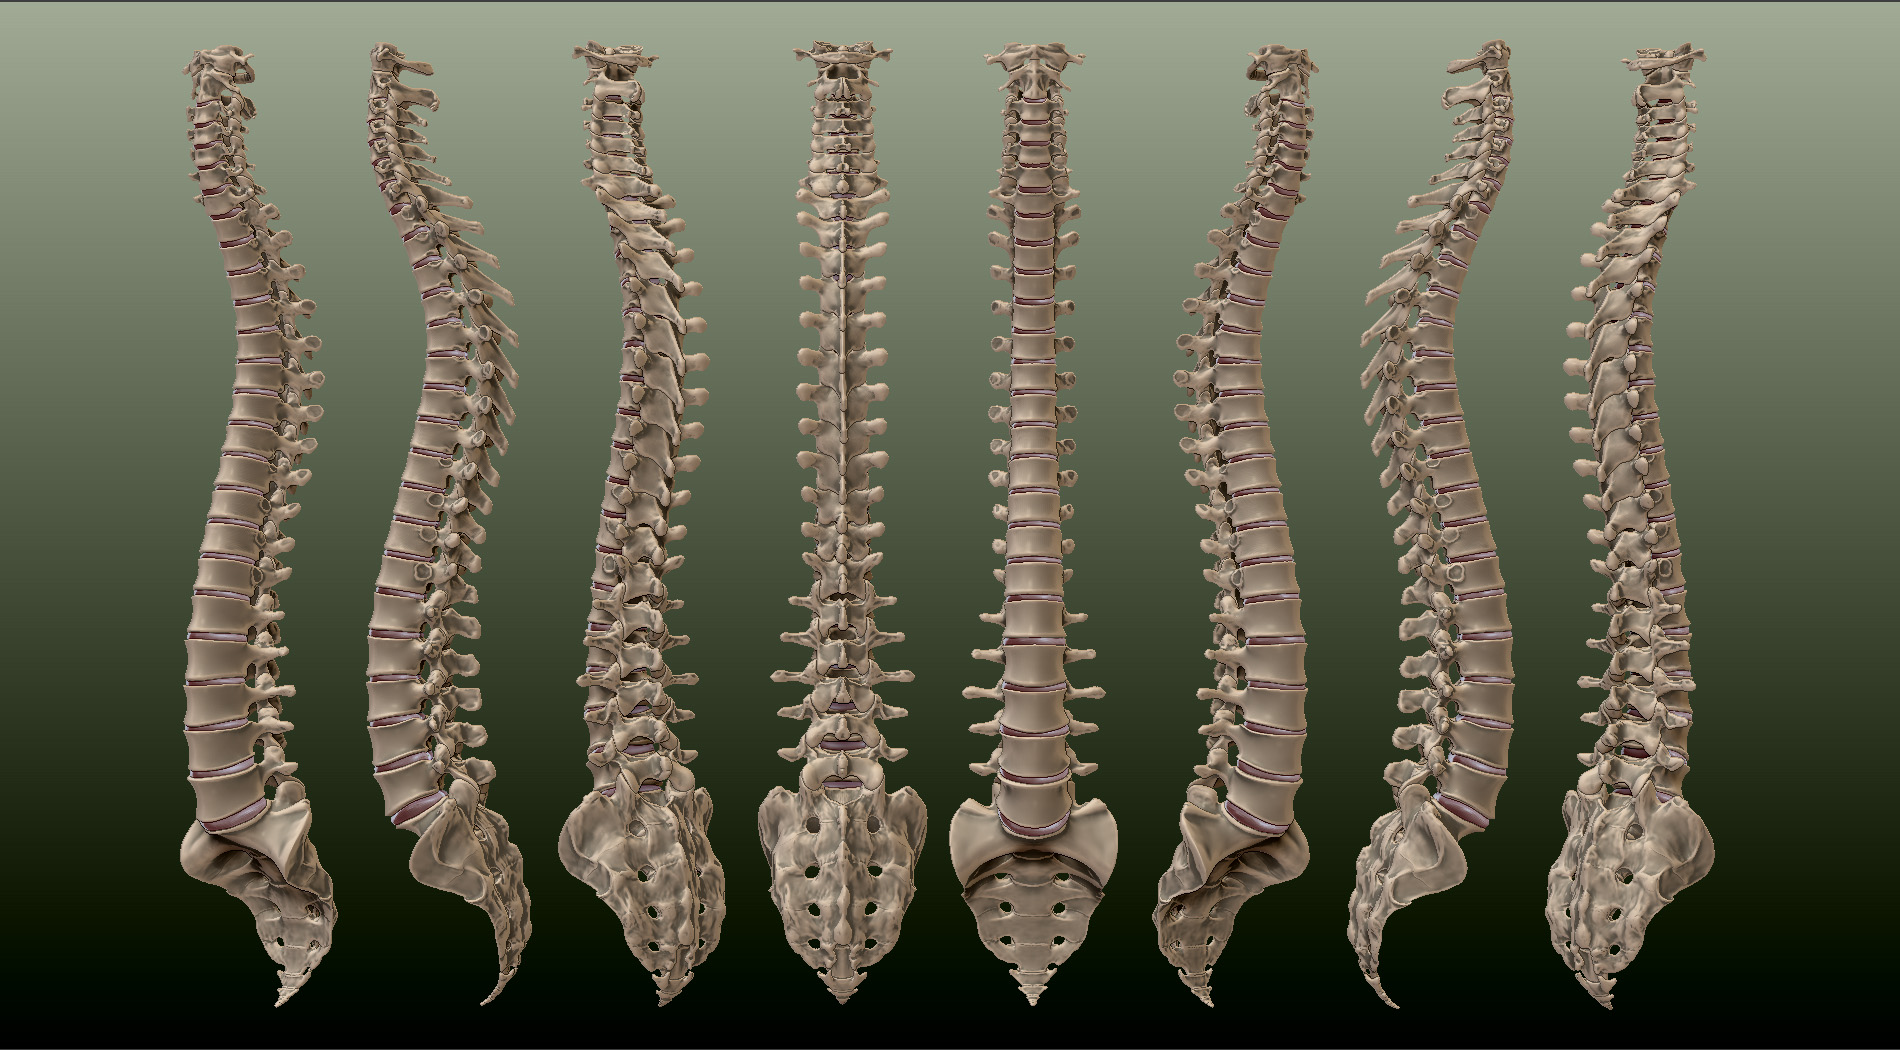
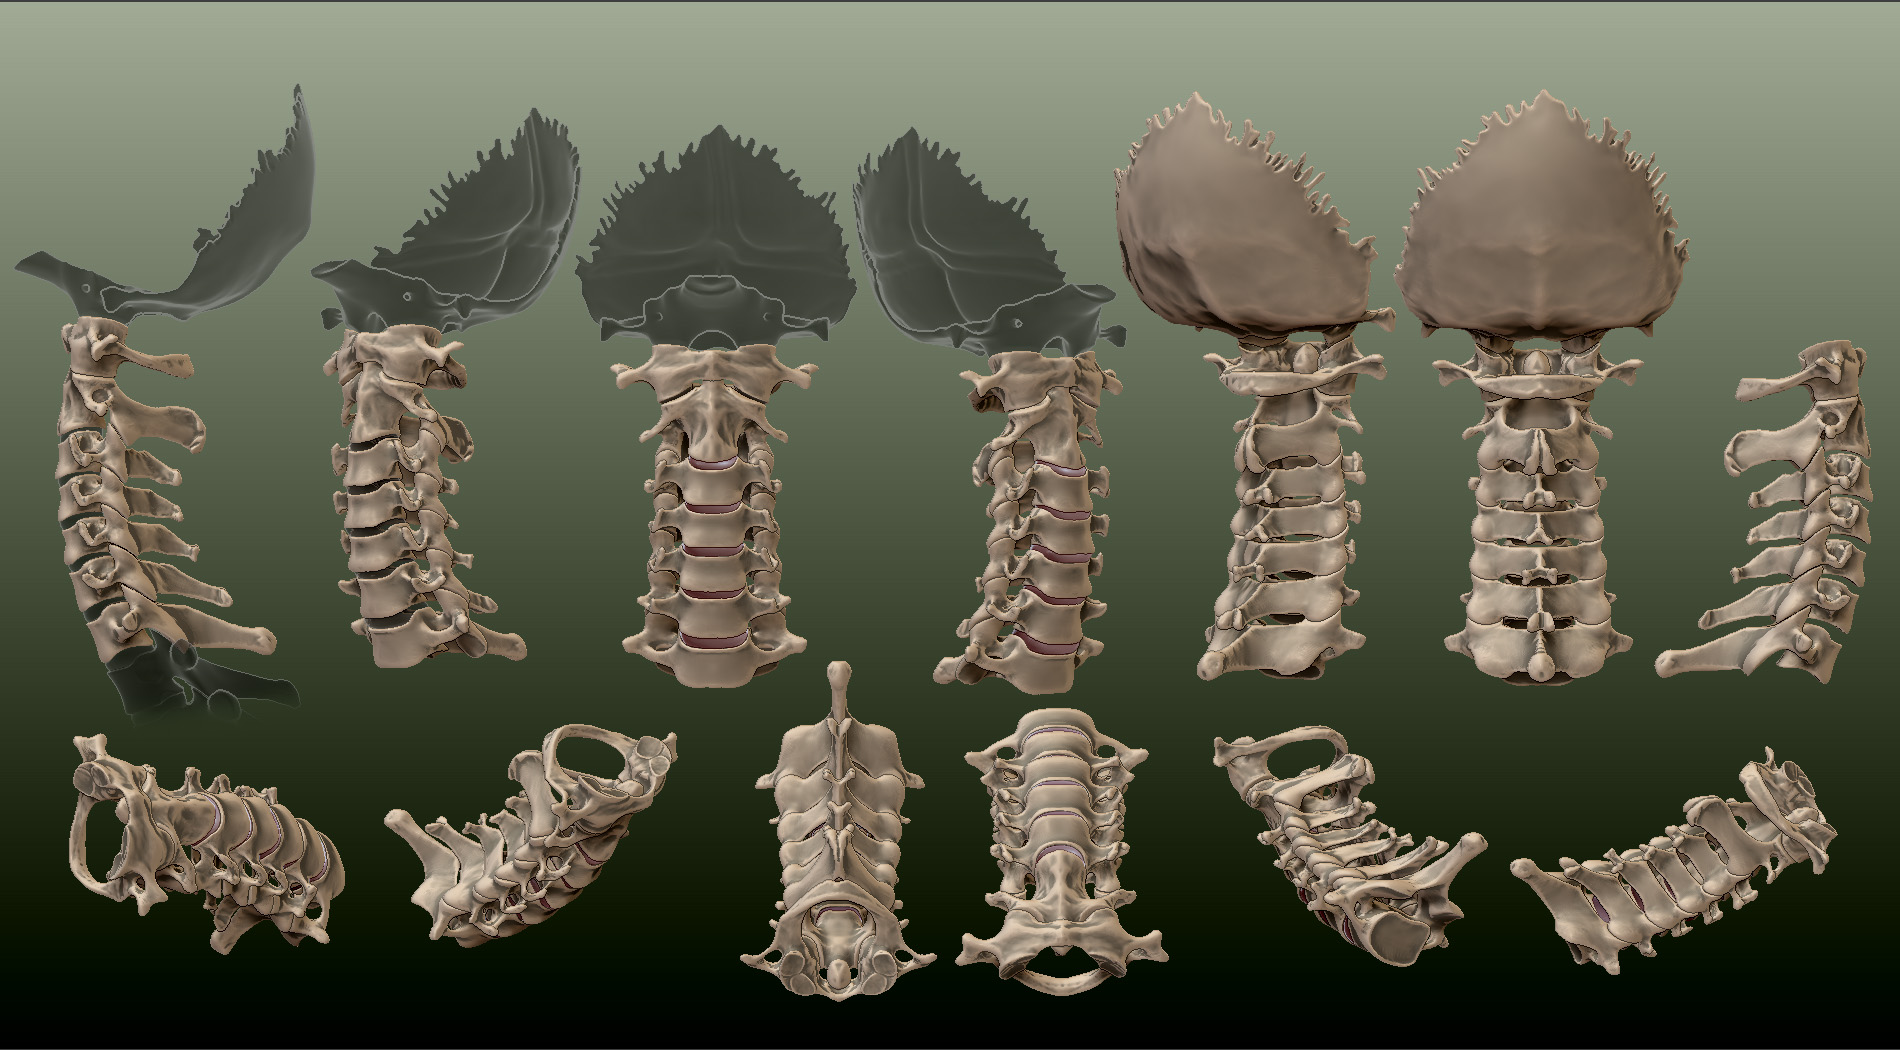
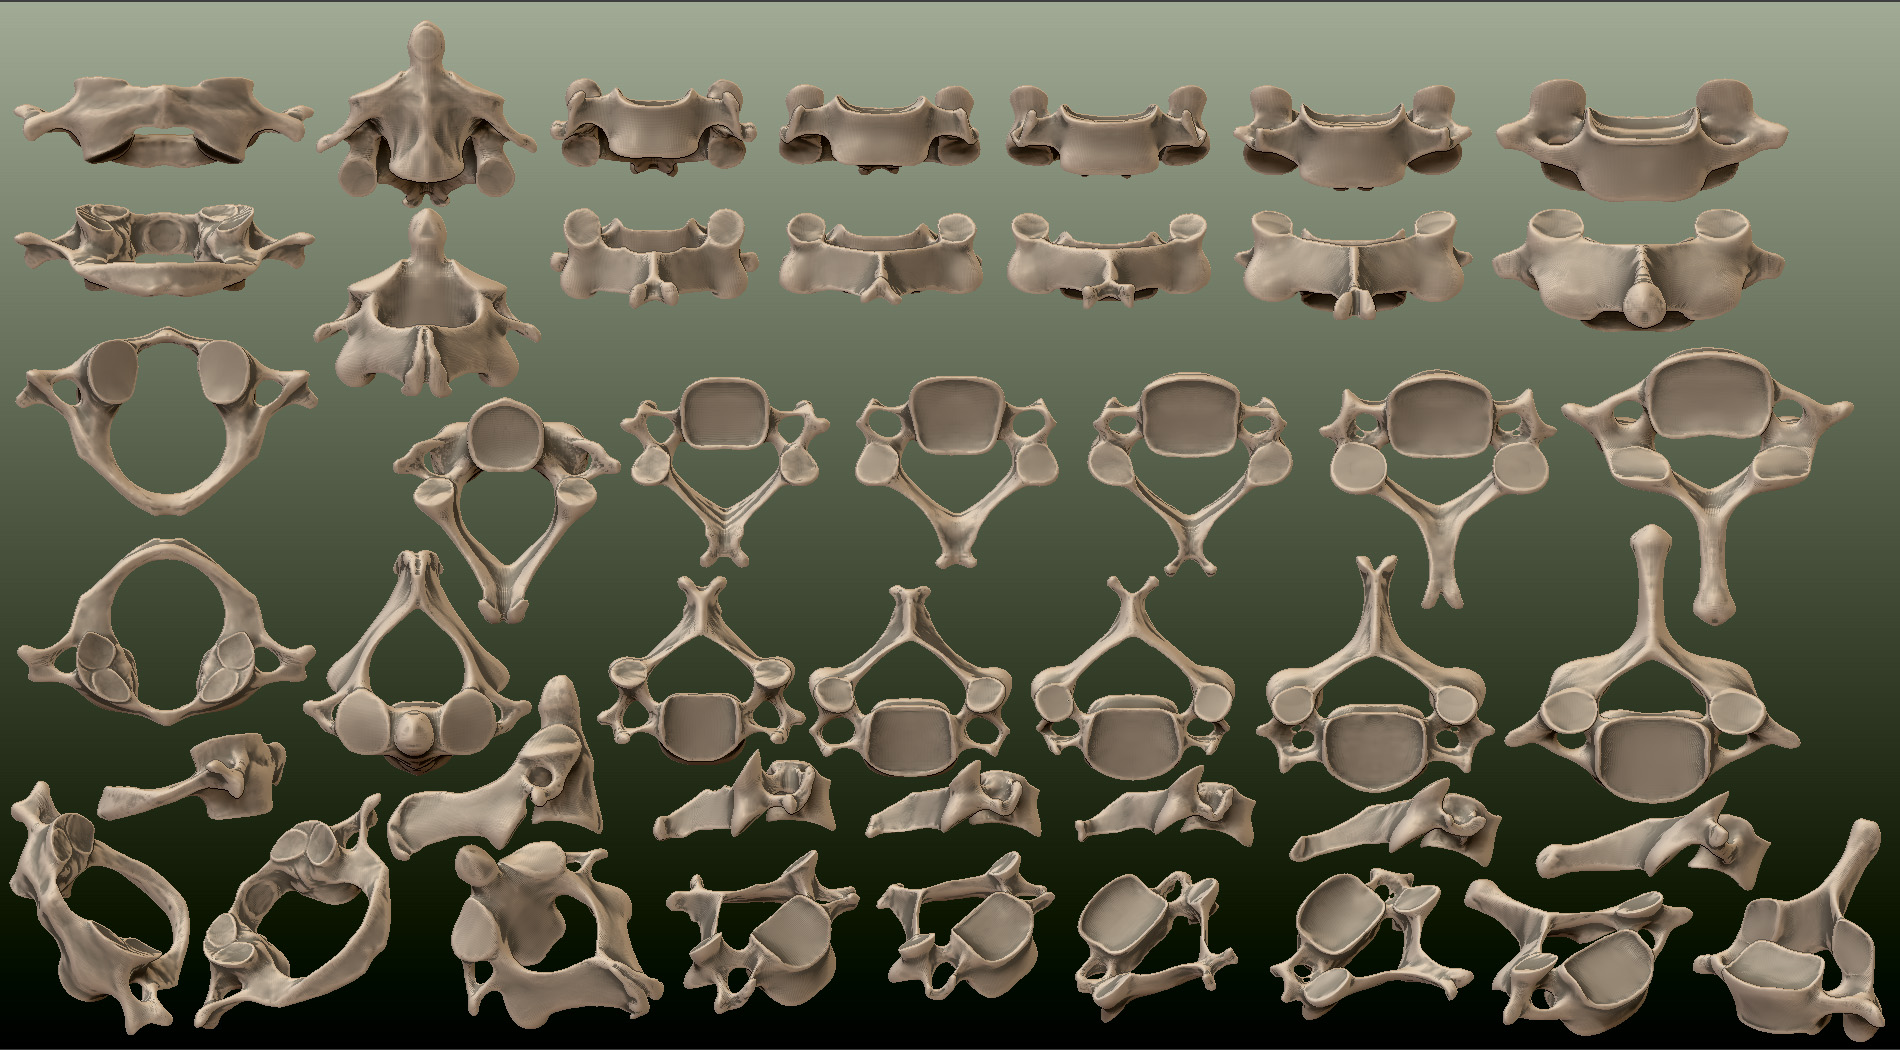
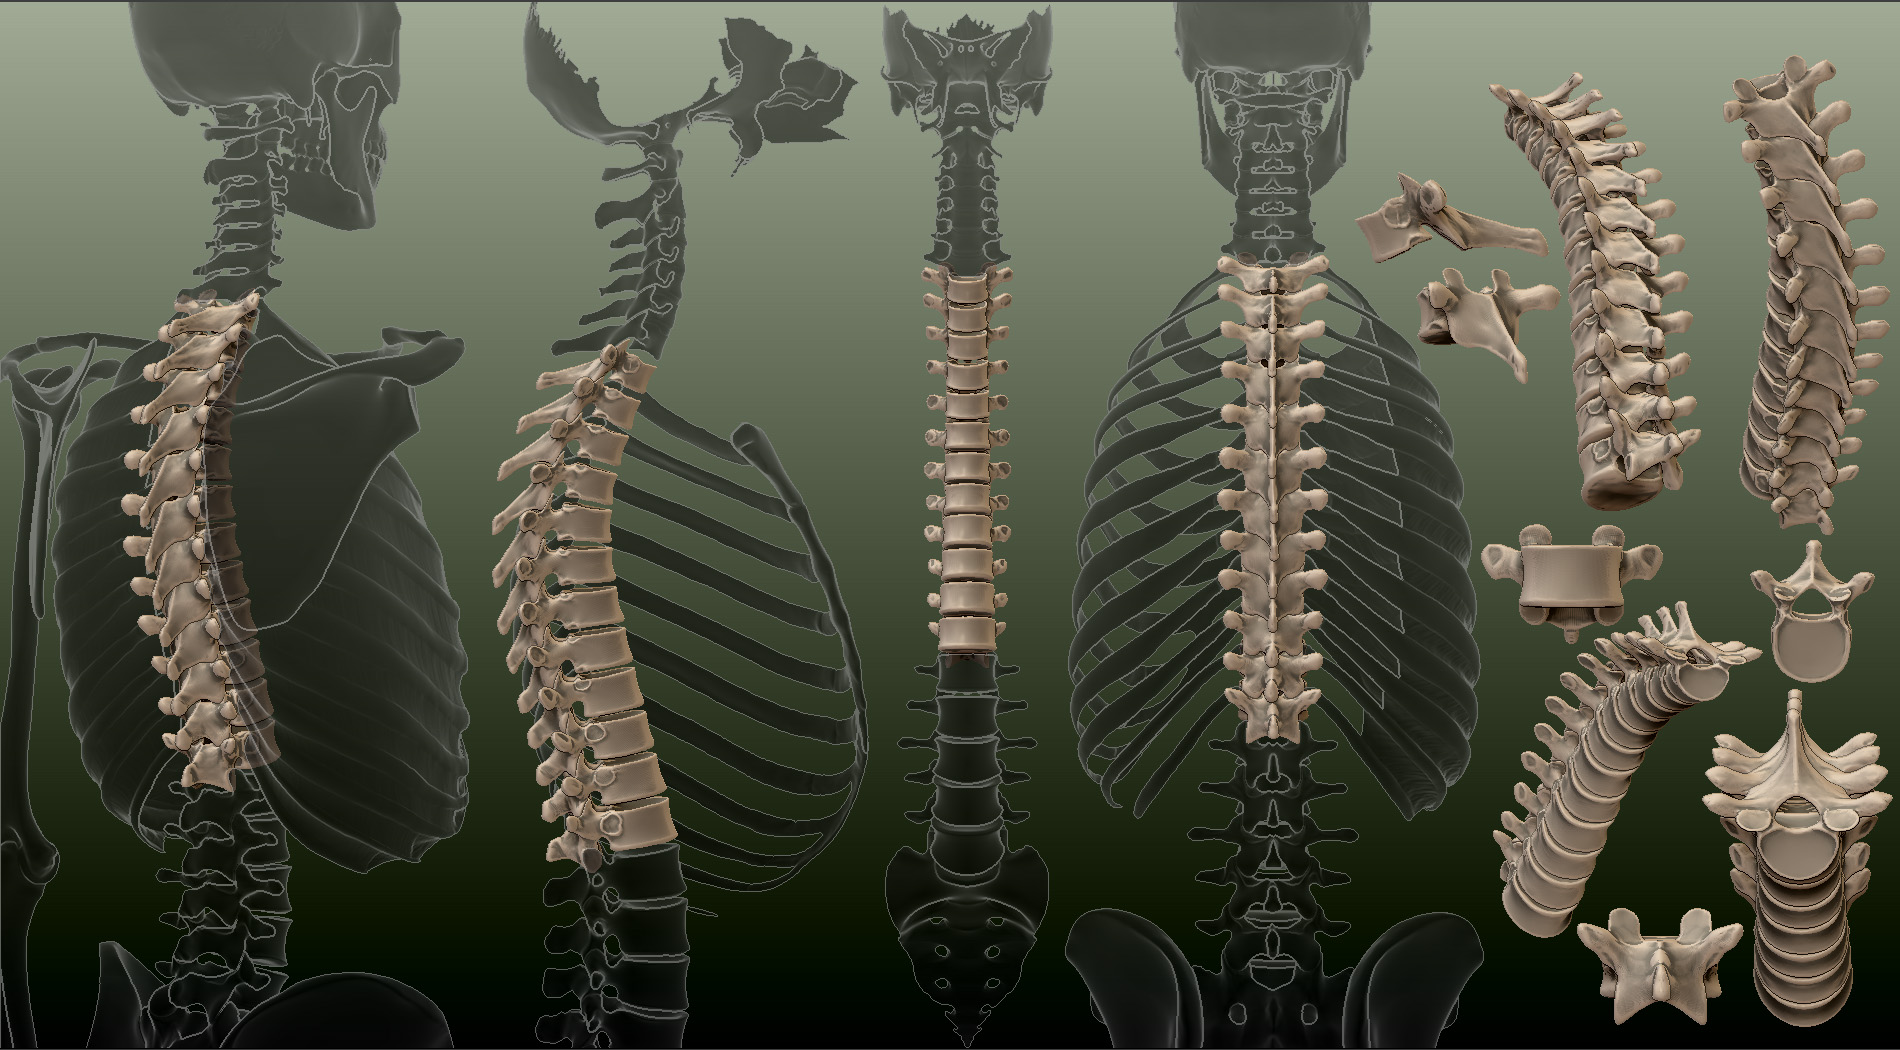
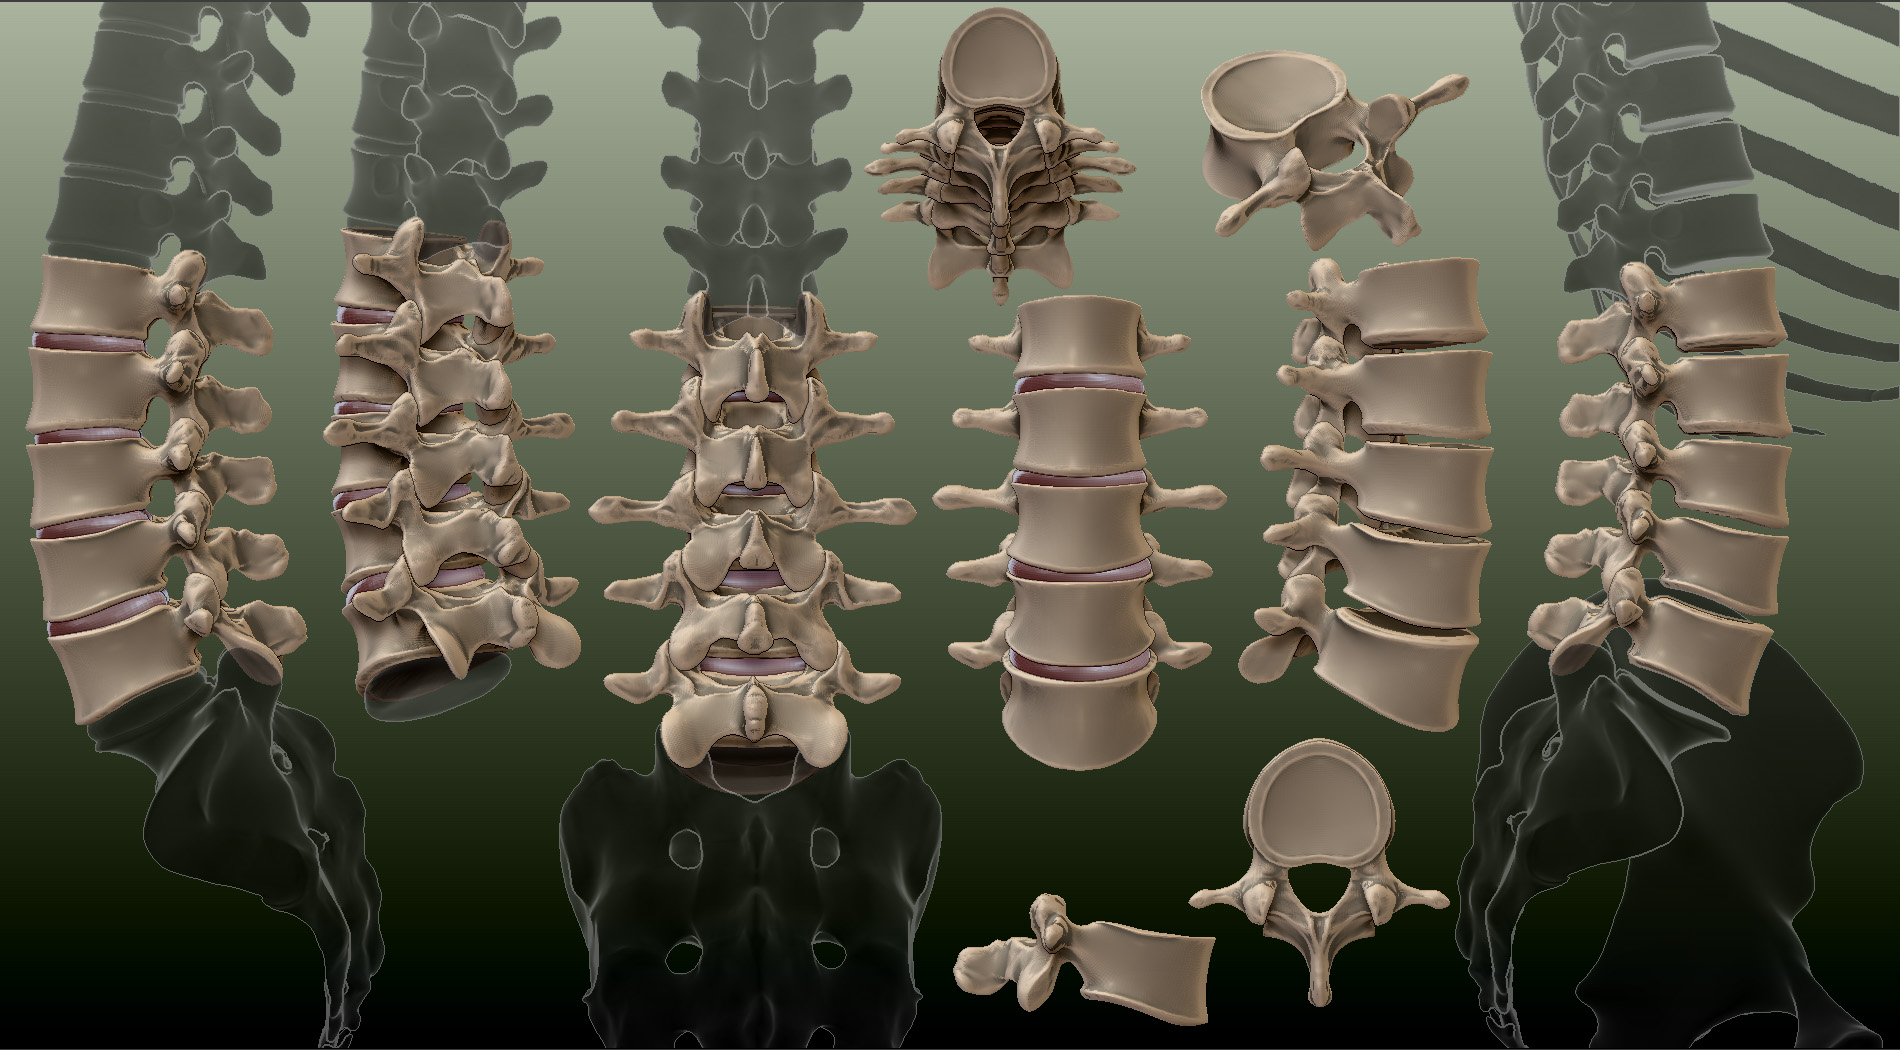
 When I started it was supposed to be a simple evening crunch idea to sculpt a skull, then dynamesh got the better of me and now it has become too interesting an endeavor for me to stop and jump onto something else! None of the pieces are final yet as the goal is to up the realism as much as I can. Many hours have been spent in studying and trying understanding/figure out each part, and is still something thats ongoing, but I just keep on learning more and more, so thats good, although its quite overwhelming! lol!
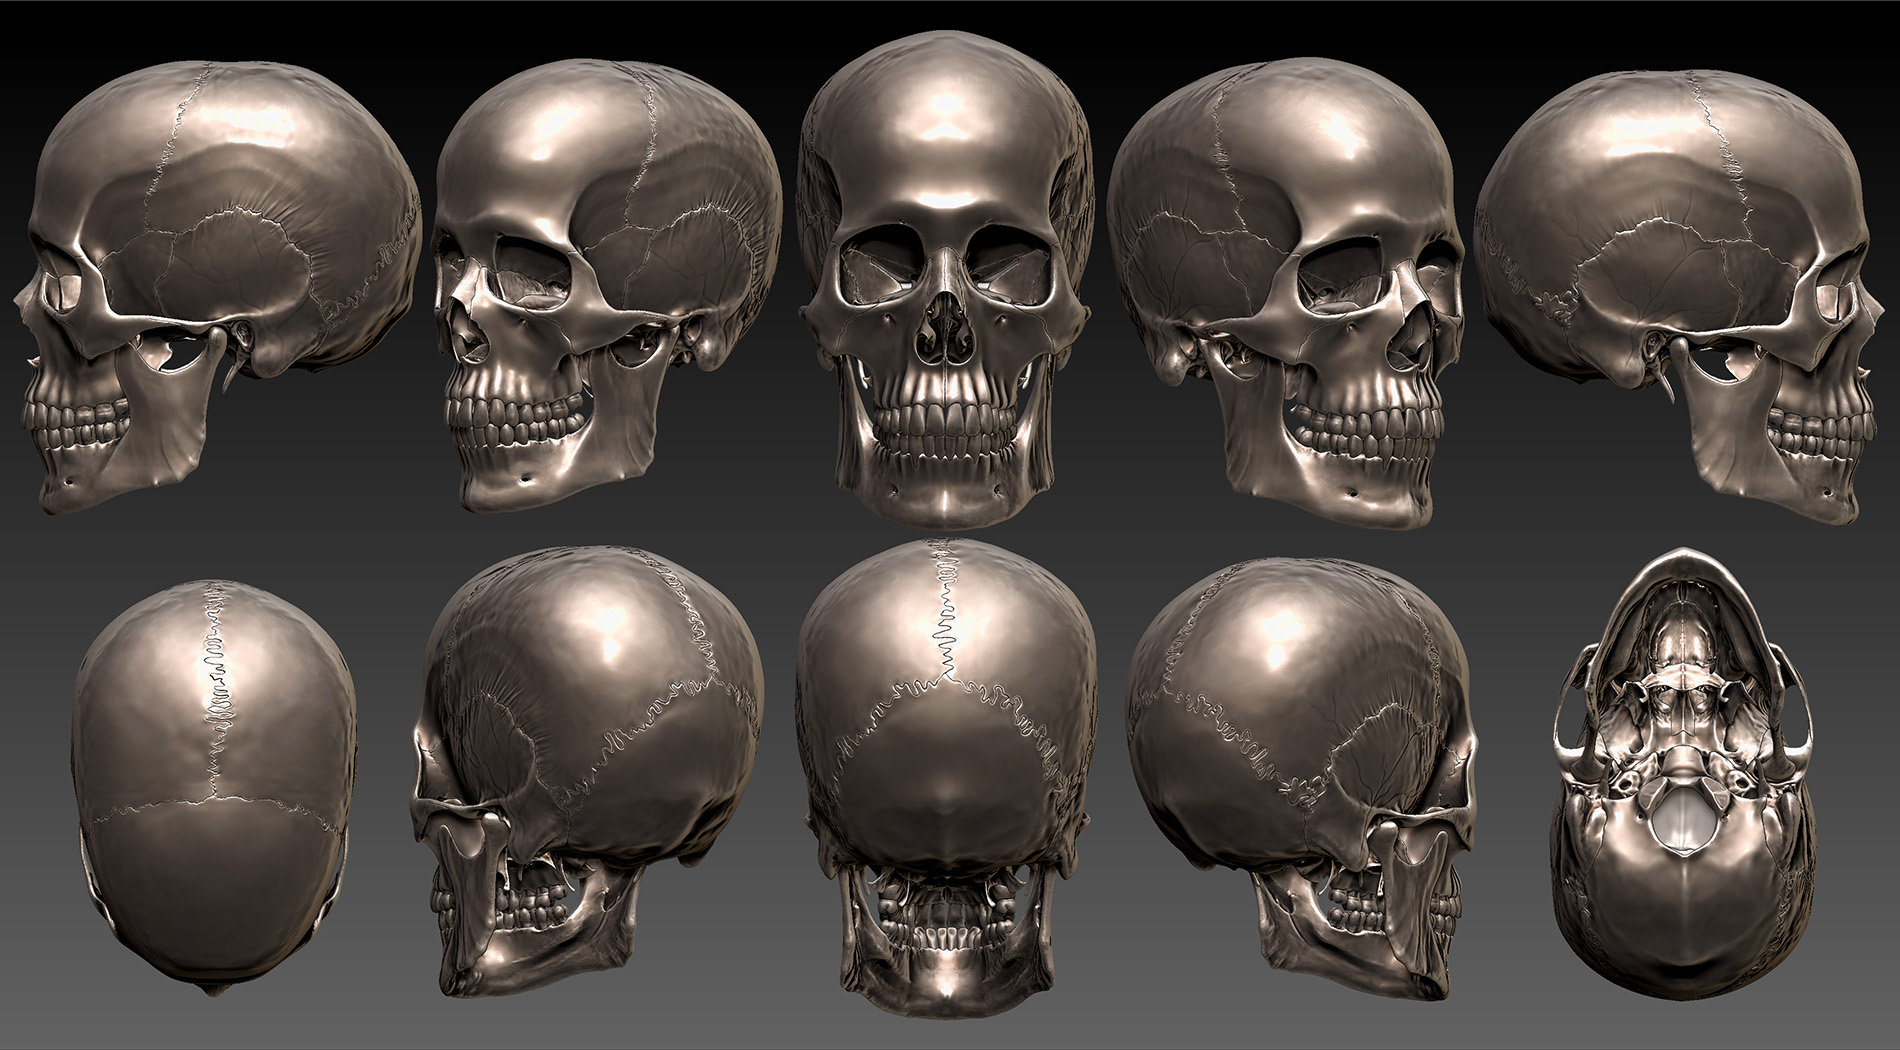

 I still have to do the upper and lower extremities, but doing the muscles proved to be too tempting so I’ve started with that for now
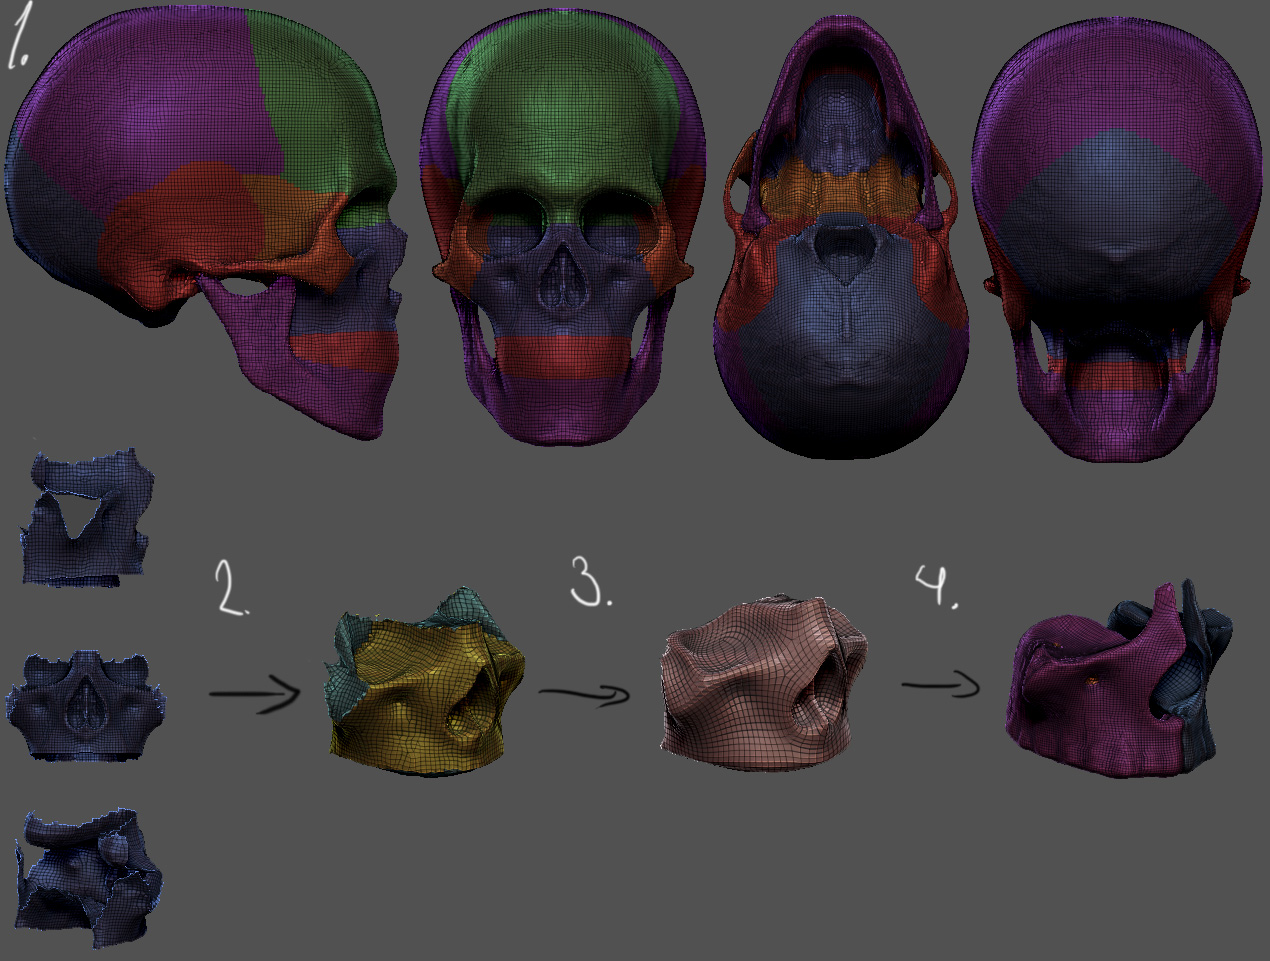


 , but I am glad to see you have