ZBrushCentral

Alex- Portrait of a Young Woman

bukkit & BigGun, I’ve been following your threads for a while so I guess I learned something from you :P) . But for this kind of work you need not to hurry… that is you only enemy.
Hopefully I can archieve the same realistic art level as you too.

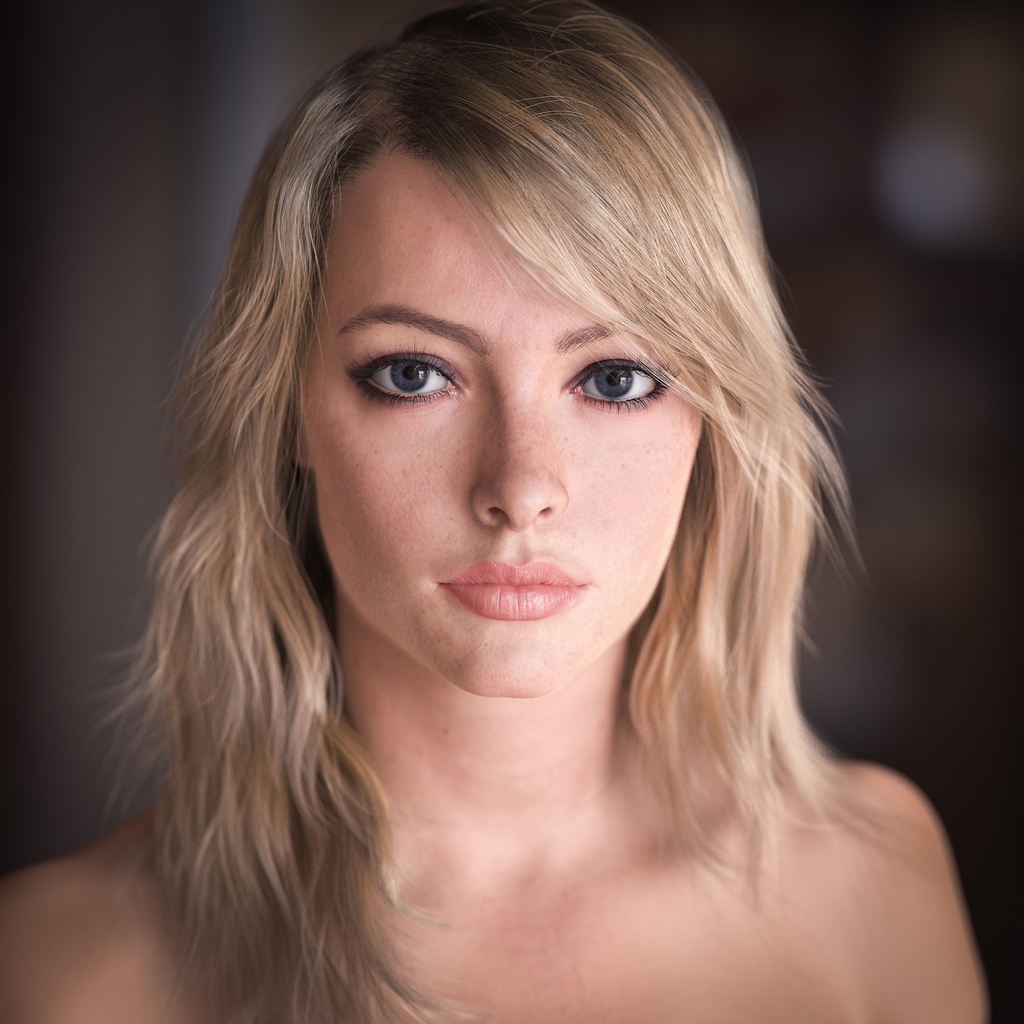
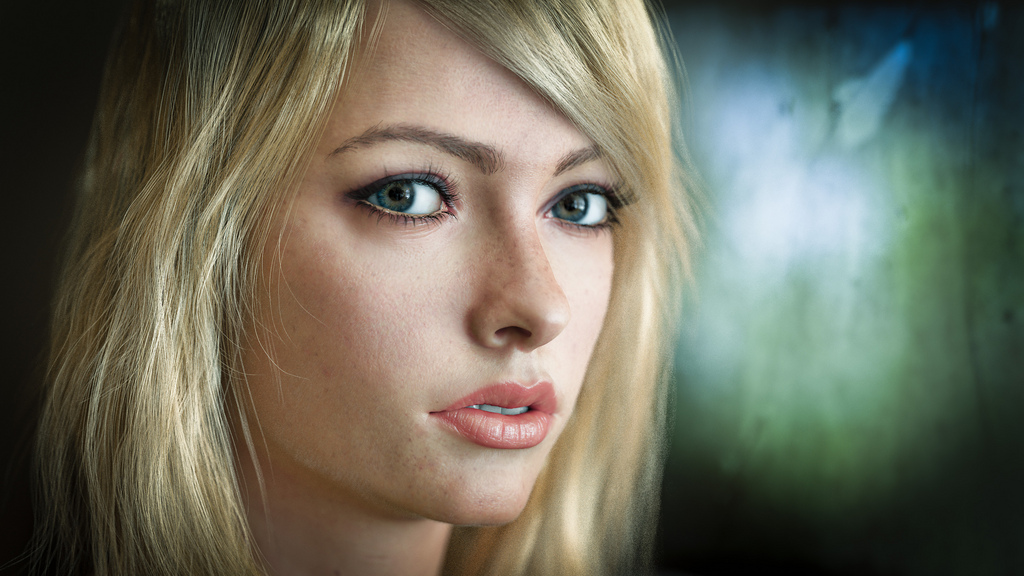
Here is a small update nothing fancy… still correcting little things like the lips and eyeshape. Change the eye/iris glassshape to get more reflection in the centre.

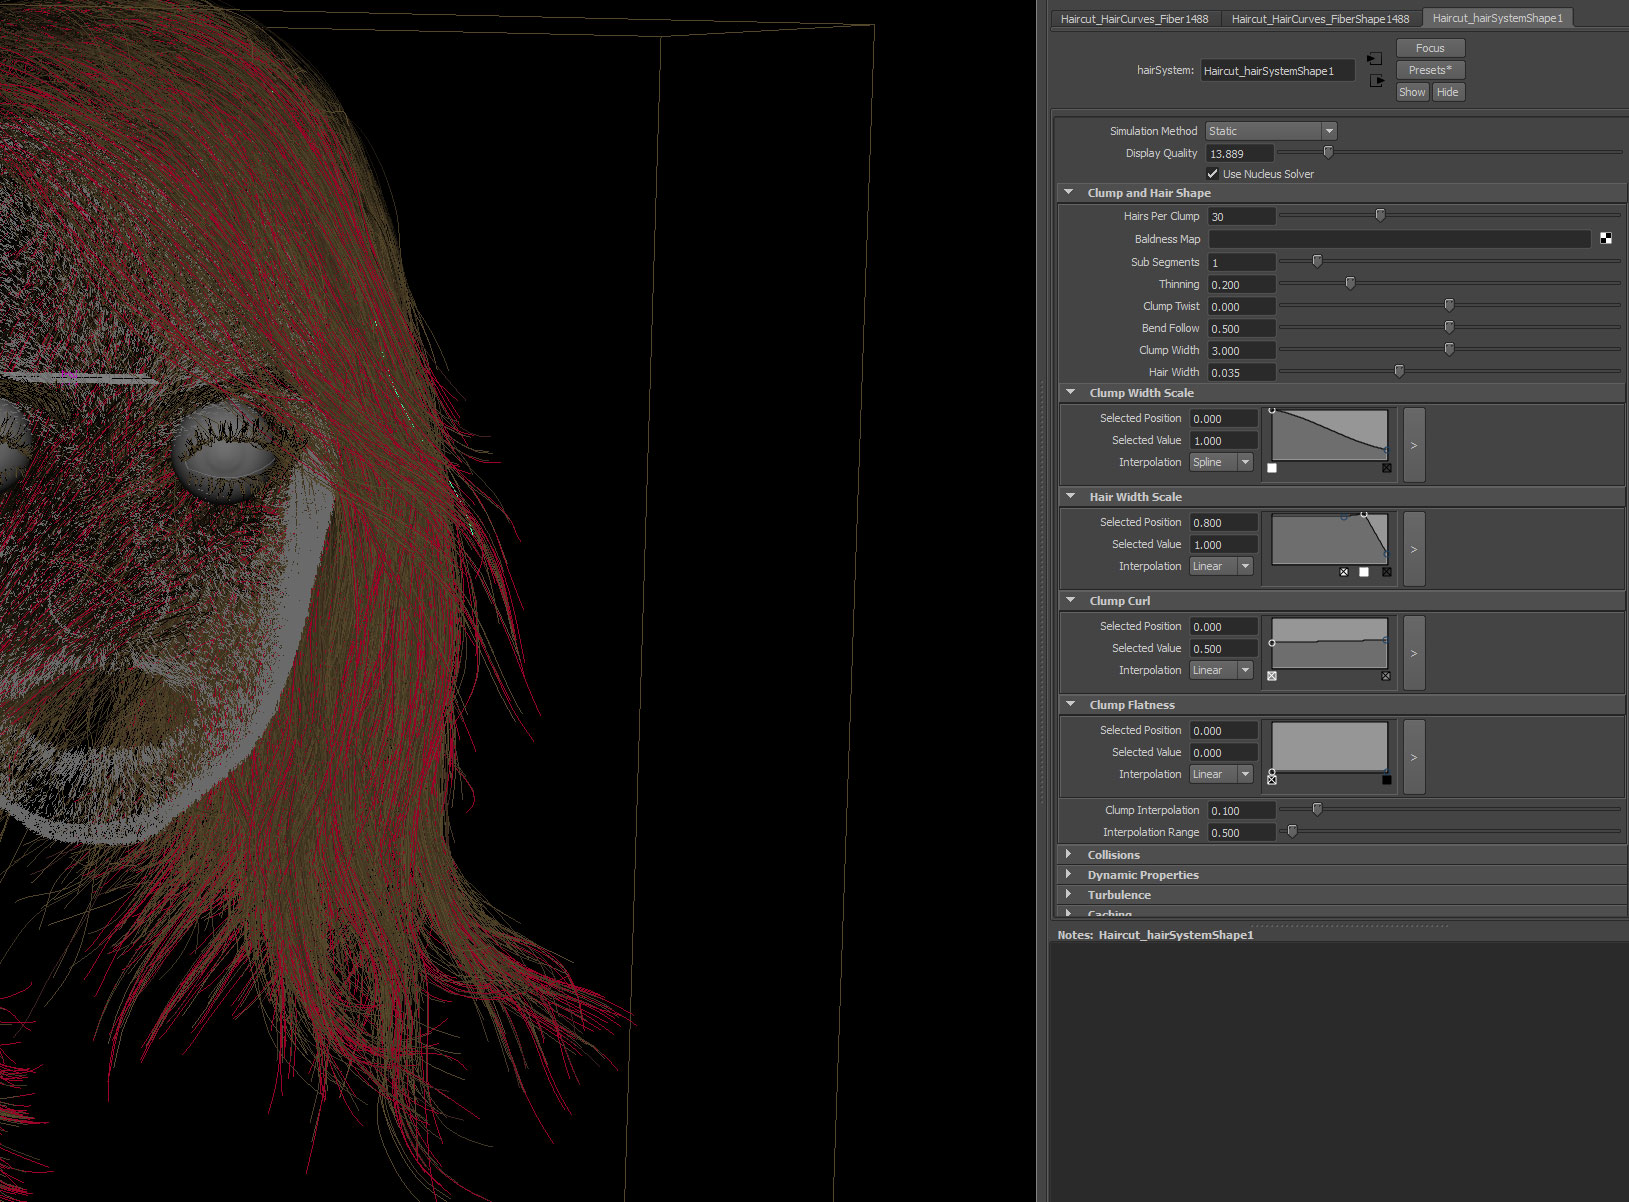
One thing that really still bugs me are the eyebrow… I cant get it right with fibremesh so I think I’m gonna do it from scratch with Nurbs curves and manually place it like the eyelashes.

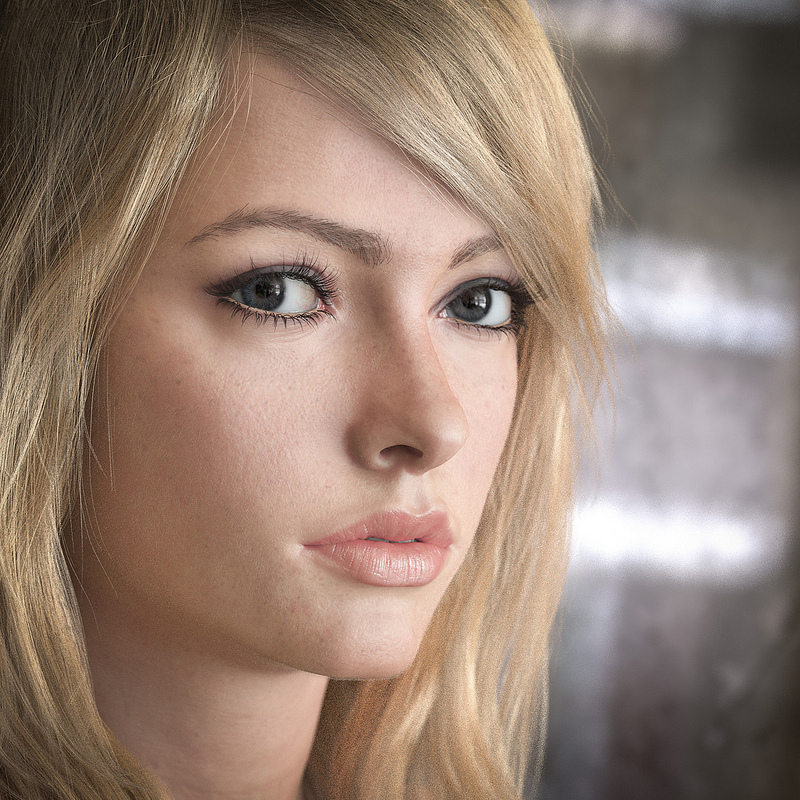
Here is a small update on the eye… still old texture but with peachfuzz. Also doing some grading to see how it change the look and feel. The upper picture is the raw render …the one beneath are Lightroom corrected.
Maybe I should try instagram :wink:

Eye_detail.jpg

Great work so far Khitan, great seing the progress too!

That would be awesome. Will keep my eye on this thread.

I am also a 3D artist, Recently, is making a character Modeling, in the eyes, i need a HDR map, can you give me some HDR maps? It is look like your work!

i [email protected] thanks

Hi xingyu, I am actually using some freely avaible HDR from HDRlabs: http://www.hdrlabs.com/sibl/archive.html Its free and very good… I used one with windows to get natural soft box effect.

Not much time to work on Alex recently… New eyebrow ,lips and lighting change, iris texture tweaks . Ears still needs some work. This is a render without colorcorrection straight from the Arnold framebuffer

girl.jpg

Not sure dude, but I like more the previous light set up from your previous renders, this new one makes the chap looks more flat…

Wow - Fantastic work. Looking forward to further updates.

@Enishi , You right… previous lighting looks better… I do like how the eyes come out in this new lightset. .hhhmmmmmm dillema.
Also the skin looks better in the new one… but it maybe I can find a way to combine both.

the eylashes are so much better now - great progress!!

I have one suggestion: to me it looks as if the teeth could be moved backwards a bit

“But for this kind of work you need not to hurry… that is you only enemy.”

You´re so right, and you prove it!

never saw a closeup with this kind of quality and realism, the skin and the peachfuzz… wow, just WOW!

Khitan, try light linking. That should work pretty well. Great work.

Yeah lightlinking should work but I try to be physical accurate for this project i wont cheat anymore :slight_smile:

SOme update on the teeth , UV master and polypainted

Teeht2.jpg

awesome work !

Hello, khitan.
Can I ask you what is the total number of fibers you created in the beginning in Zbrush? Also, you mentioned you have exported only a part of them so what is the number of hair strands per clamp in Maya? Basically, I’m wondering are you trying to replicate exact number of hairs in human head (Google says blondes have ~140 000) or you are just tweaking it until it looks good and natural?
BTW agree with others - it would be awesome to see a small tutorial or making of.

Hi Vir,

My apologies I forgot to check this thread so didn’t see your questions before. Concerning the numbers of hairs .I didnt create the exact nr of hairs on human hair. That would slow down the system and create too much haircurves to
manage. I usually start around 20.000-50.000 fibres and increase the thickness of those hairs a bit to get a better volume representation.Its still a lot but I tried with lower numbers but it gives me that tube look of hair.
The reason for this is I gonna use Maya nHair and that has a “Clump width” attribute that create “thickness” or offset around that curves.

Main reason for me using Fibremesh as a modelling beside the fast feedback is it creates natural clumping of hair and I can determine the output curve density.

Here is a screenshot of my Maya nHair settings: One curves from Zbrush creates 30 hair around one NurbsCurves.

haircut.jpg

Sorry for the radio silence. Got some amazing feedback from people around the world. I finally finish it and this is the final results:
10882813173_d67b9d9ff1_b.jpg

Alternative pose and X-mas Edition :slight_smile:

11583337785_37e89cebe0_c.jpg

]<iframe src="//player.vimeo.com/video/82769174" width=“800” height=“500” frameborder=“0” webkitallowfullscreen="" mozallowfullscreen="" allowfullscreen=""></iframe>

11582129843_0a15c94cbf_c.jpg
I manage to render a 6K of the top image and got it printed on a 120 cm x 120 cm Dibond:

ELisa.JPG

Attachments

11582713156_6209aa2a84_b.jpg

simply amazing!:+1:

congratulations for finishing this masterpiece, thanks for sharing details about the zbrush to maya hair workflow!

BRAVO!!! Absolutely excellent!