Thanks Marsyas, appreciate it.
good works. i like it
So I quickly realized, with all the obligations and stupid crap going on, I have no desire to do much anymore. I would love to have daily sketches and improve, but I have no time for myself anymore. I am giving up. I don’t think this post will even be read by anyone, but if it is… I probably wont be posting anytime soon. Screw it. :td:
It’s just a bump in a very long road. Those setbacks happen to us all. You know for a fact I’ve had mine. If there’s a “cancer” in your life, it’s usually best to cut it out. Sort out what you need to and come back when you’re able 
Thanks Dustin for the encouragement, I appreciate it. It’s one of those low points on the roller coaster of life. I’m sure I will be back at it in time, I am just hoping its sooner than later. Thanks again for the encouragement, you should post some new work so I can get inspired too! 
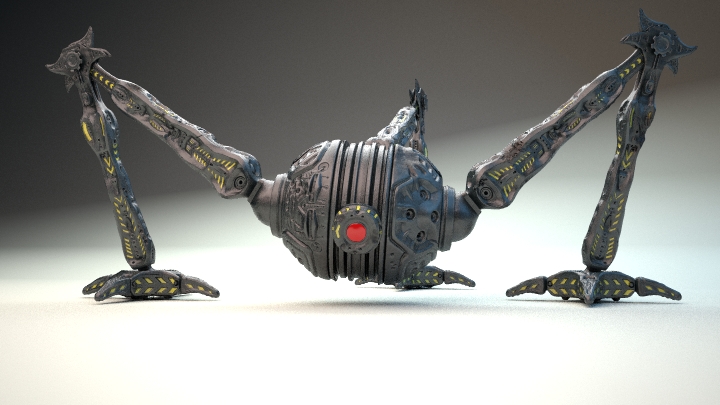
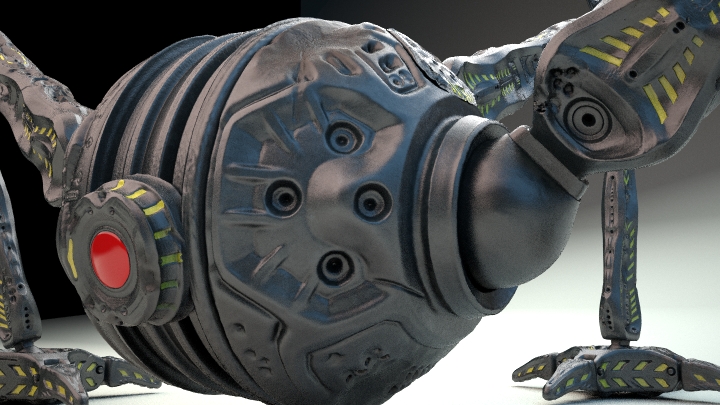
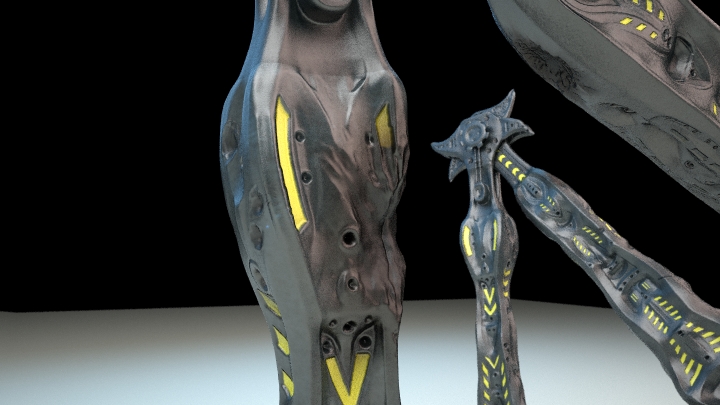
Here is a WIP still got some final tweaks and coloring to do. Any crits welcome.
[ ](javascript:zb_insimg(‘149235’,‘Mech-WIP.jpg’,1,0))
Here’s my crit: get your way to the demonoid.com and type in “medical books”, you’ll get a 4,67 g heavy file of all that you’ll ever need to know not only to start learning anatomy, but study to become a neuro surgeon.
Not a bad start, man. It’s human shoulders look too broad and boxy. If feels like you made a cool mech then stuck some organic bits in it. A better method would be to start with a human torso, get it looking anatomically correct, then stick your robotic bits on it. If you think about it, that’s how it would happen in real life, and it insures that things look more plausible.
Also, try this. Disable perspective mode, go to Render and enable Flat mode. Now export a side view of your mech and bring it in to Photoshop. Evaluate the silhouette. Is it dynamic and interesting? Make a new layer and start doodling in white to add interesting fins and wires other larger shapes. You can also subtract if you want, this isn’t purely additive. The point is to get an interesting silouhette, which can be hard to do unless you get all the other distractions out of the way. Just explore shapes. Keep it loose.
Thanks Dustin for your critique, its always appreciated.
For the shoulders = Yes your right they are too broad, I will revise that
The bolts = They are placeholders, im going to make a detailed one and use the feature in z brush that lets you place objects on a mesh. I forget what its called but ill do some reading up.
The photo shop silhouette = Thanks for the tip, I have seen it in peoples work in these forums, but I have never given it a try. I really should and I will starting with the next piece I do, this one has got too much time for me to want to make more geometry and such. I want to get this guy done and on to something better. It was something that I just took way too long on and lost my enthusiasm. :-/
Thanks again for the crits, and keep up the inspirational works yourself. You have always produced work that has great craftsmanship.
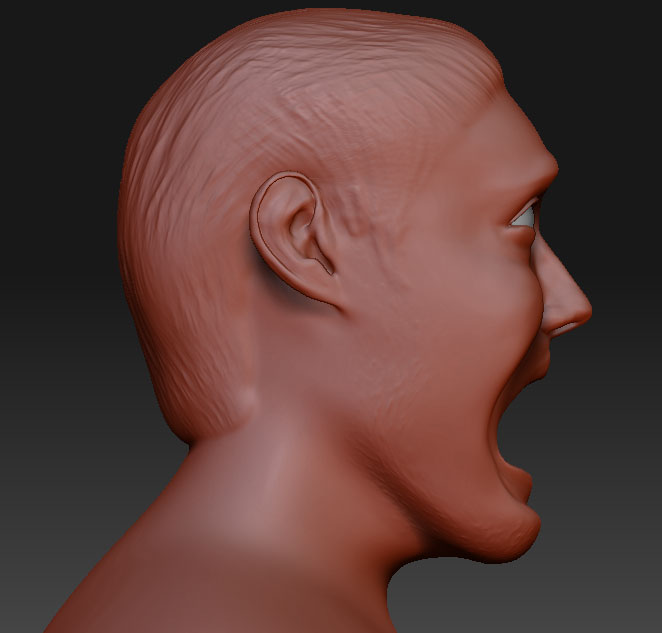
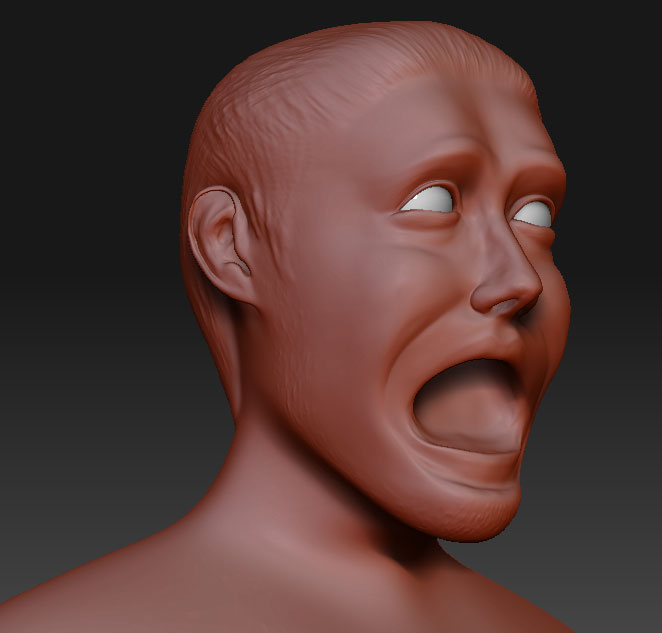
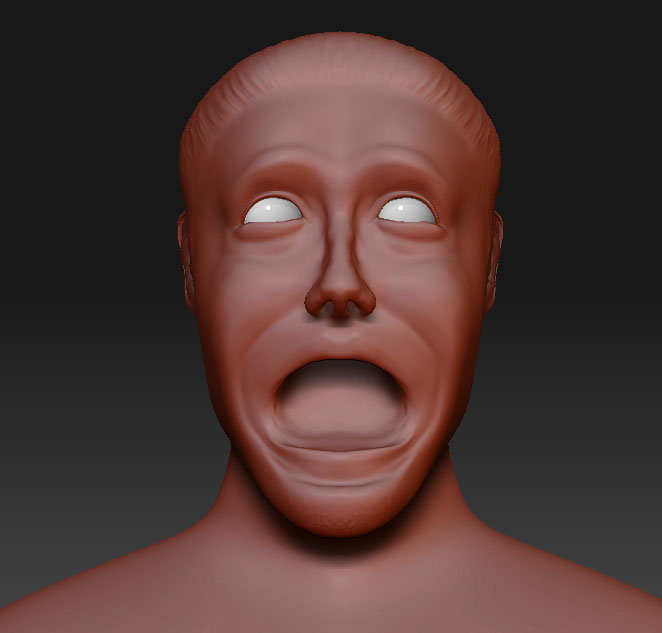
Messing around with my self portrait trying to capture an exaggerated scream. I had no reference and I know its not anatomically correct due to some of the exaggeration. Anyway, critiques are welcome and it was just a quick fun thing (15-20 min)
[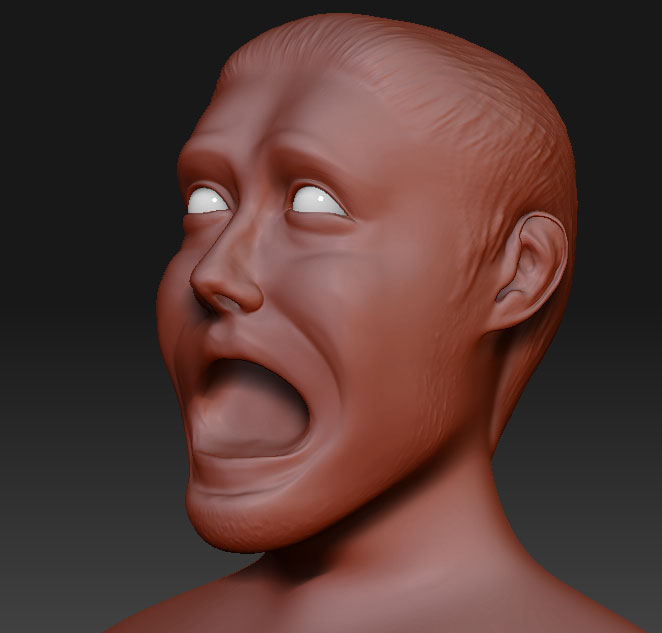 ](javascript:zb_insimg(‘150642’,‘Scream_04.jpg’,1,0))
Attachments
I’ve seen you make that face when Glenn walks over to your desk :lol:
LOL! :lol: that would be my, “more revisions!” face haha.
I actually plan on taking some reference photos of myself making a face and I want to try to capture it a bit better.
Nice start on the cyborg (is it your concept?) He’d look great next to the Mad Scientist (hope you’ll finish that one!)  ! Keep goin!!
Thanks for the encouragement Etcher, having some one as talented as yourself comment on my work is awesome. Your work inspires me and gives me something to strive for.
I cannot take credit for the Cyborg concept, (I wish I could) it was actually a sketch drawn up by my friend Buenaventura.
The cyborg needs a bit more hard surface work and lots of polypainting, but I am happy with how its coming along. The scientist is something I may never finish. I feel its so bad that it would be best to start over instead of trying to fix something messed up.
I will ensure I finish the cyborg, I just need a little break from it. Its one of those things that is taking too long and I got burnt out on.
I was trying out some new things and came up with this.
[ ](javascript:zb_insimg(‘150991’,‘Doodle.jpg’,1,0))
Heres a doodle I did in a couple hours. I am not finished, I would say about 50% complete. Any crits or ideas would be appreciated.
 ](javascript:zb_insimg(‘159012’,‘WIP_05.jpg’,1,0))
Attachments


You asked for it I don’t get the sense that it has anatomical foundation. Until you get used to including that foundation work in your sculpts, try starting on graphic or tracing paper. Draw your character on one layer, then over that draw what it’s skull and skeleton would look like. This will force you to think about structure, and you’ll have to make adjustments to your original drawing to compensate for the skeleton. Then make a superficial muscle sheet over that. You don’t have to spend a long time on these to get them looking beautiful, you just want to have something well thought out before you go to 3D.
Also, get some great anatomy refs and pin them up on the wall around where you work at home. Sometimes I’m too lazy to go fetch an anatomy book when I’m working, but nobody is too lazy to look up at the wall. It helps, trust me.
Thanks for the critique Dustin. I actually have not done that before but I see some artists do. I should definitely give it a try. It was a quick doodle from a sphere, and I did it on the fly with no goal in mind. I am not making excuses however, if I decide to finish it up I will do sketch of a couple skeletal and muscle layers. Thanks for the tips.
Also a quick question to you. I have tried using D32 to export and I cant get MR working with displacement. I went through a bunch of tuts step by step. Do you have a link to a tut that works for you? I am using 3DS Max 9 right now.
Displacement exporter using D32. I use 2048 maps with a 4 px seam overpaint. I also turn map adjustment from 100 to 0. I made sure all UV’s are in 1 UV space and adjusted the export options. The export options are as follows
Channels = 3, Bits = 32, Vertical Flip = Yes
Scale = A.D. Factor, Smooth = No, Seamless = No
Channel 1 Range: Full Range, Full Range, Full Range.
Channel 1 Res: Full, Full, Full
I set MR as my render engine, and under the shadow/displacement settings I set my edge length to 1 and the max displace to various settings 1, 2.2 and others.
I select the material and I will apply the displacement map to, and under mental ray connection I unlock the displacement slot and add a 3D Displacement node. In the node I select my displacement map and make sure to set the RGB offset to -.5 and the blur to .01
For the displacement settings I used 1 in displacement length various values for extrusion strength. I have tried 1, 2.2, 220… all give me very bad results.
I’ve been meaning to make a video on that subject anyway. Hopefully this helps you.
[ ](javascript:zb_insimg(‘171679’,‘03.jpg’,1,0))
This is a WIP, and I plan on refining textures a bit. Any Comments and Critiques are welcome.
Attachments