Awesome work mate, Really loving what you’ve done so far, cant wait to see the breakdown!
very nice work, glauco.
-r
Thank you a lot guys, appreciated.
I`m finishing the breakdown, should post it here later.
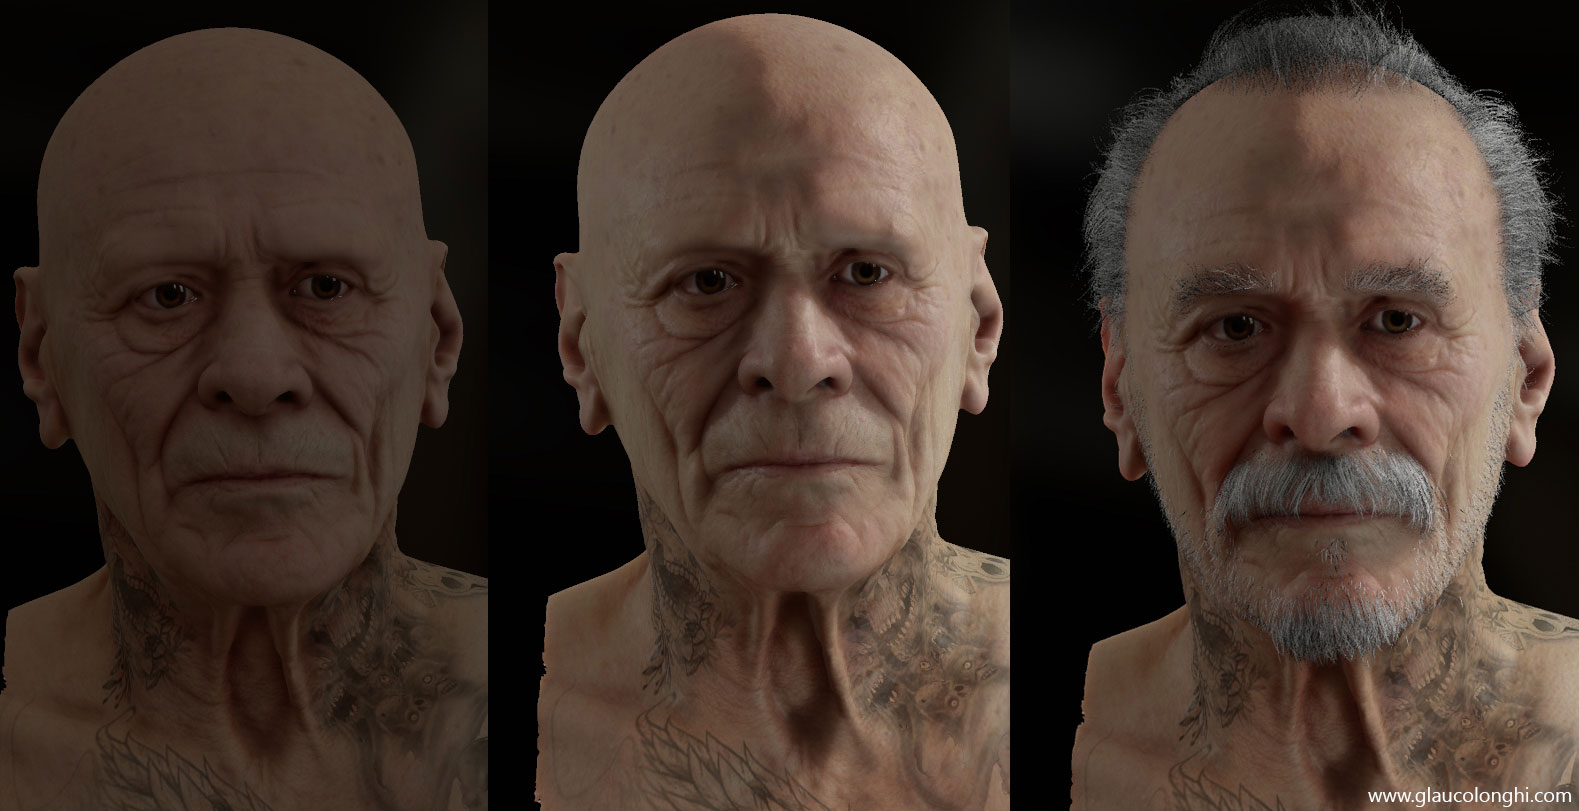
Antone - A mix of everything together. Of course the scanned head helps a lot to sell that look but Id say the lights and shader. You can make a poor texture look good under amazing lights and shaders properties. But a realistic/photoghaphic texture without the proper shading setup wouldnt look natural, so you must balance them all. BUT an amazing texture with a lot of fake translucenly WOULD look amazing under no skin shader. Thats how we paint latex. Its an opaque material so we cheat trying to give a translucency look to it, and when achieved, you feel that!!! The glossiness plays a huge role here too, so spend some time on it.
Damn, what a hard question to answer, never thought about that before lol.
Nagulov - yep, hair cards, placed by hand. It doesn`t take that long and you can control it better. More info at the breakdown 
Jabusby - you guys rock my friend. Thanks for the kind words Awesome scan data to start with!
Another image that I rendered early today for my breakdown but there you go.
Attachments
1 Like
wow!! just…wow! this is looking amazing glauco! o sss ficou muito bom no MT2 . como vc conseguiu deixar tão suave?:D
-BREAKDOWN-
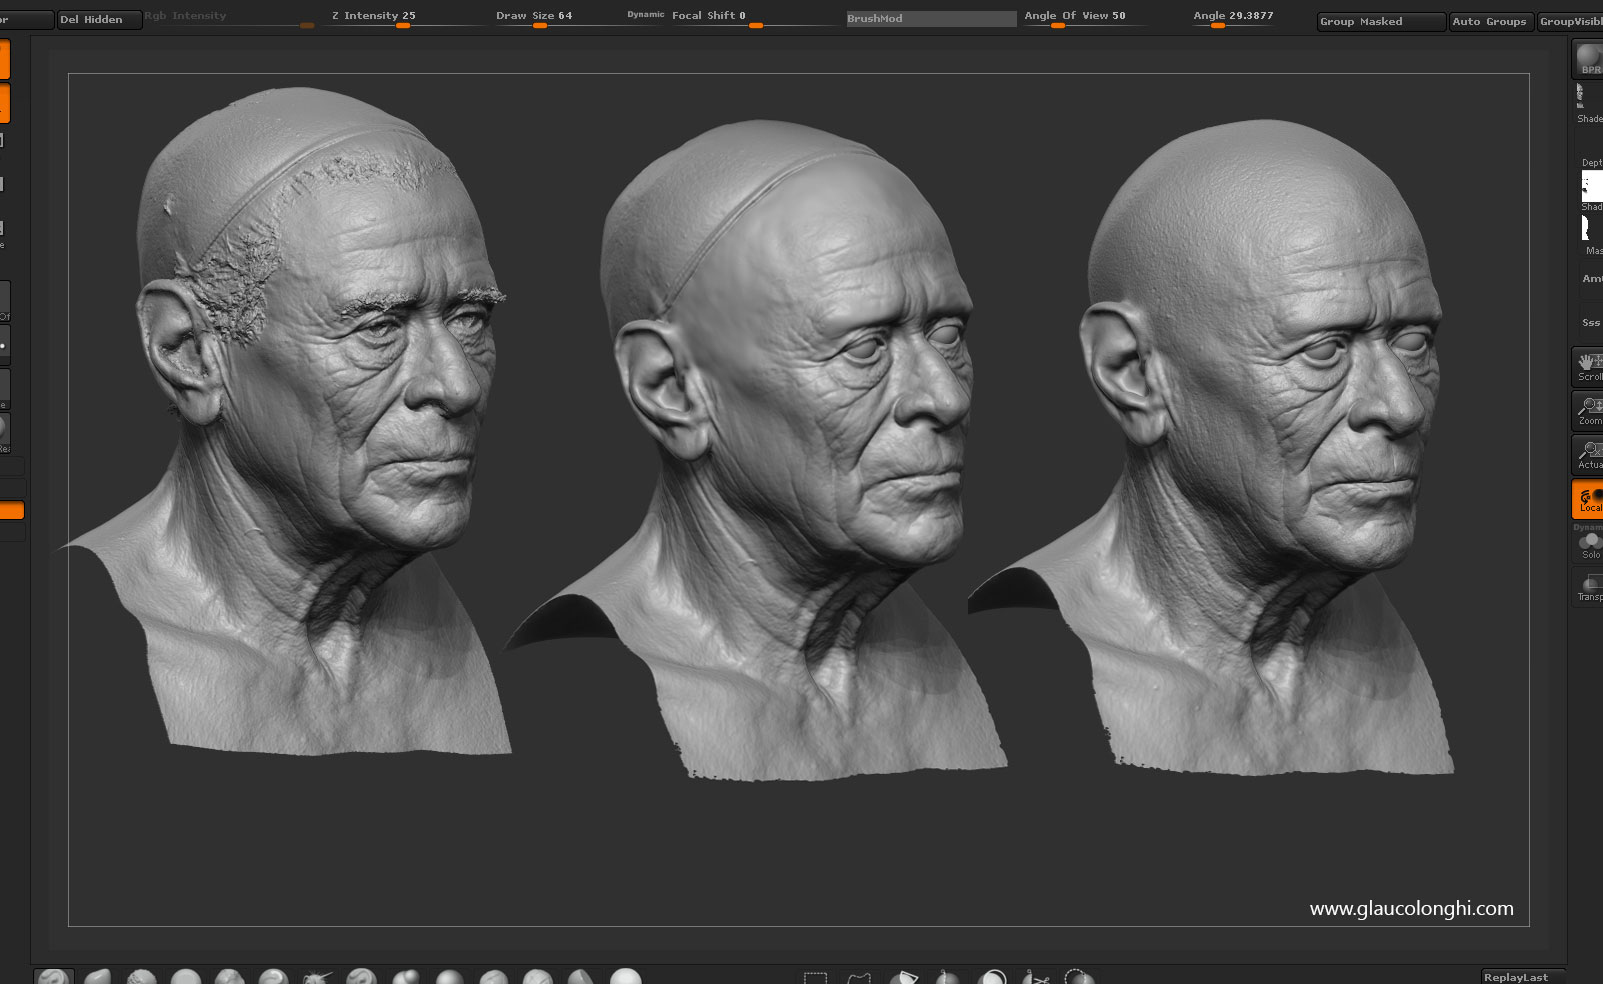
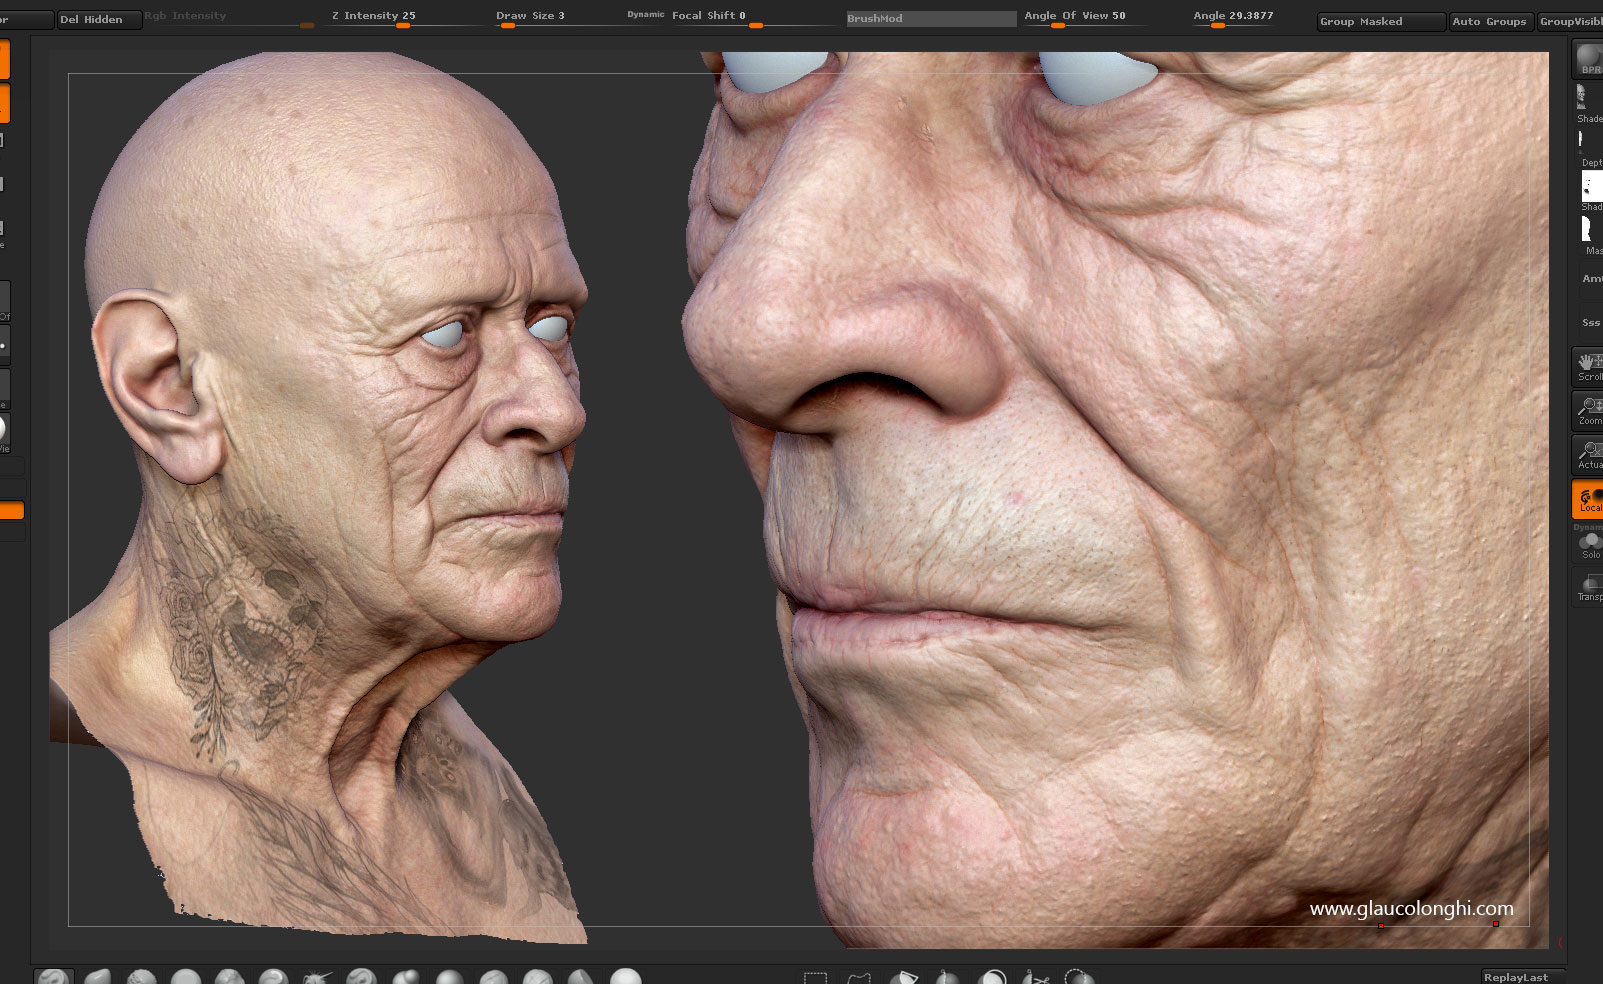
-I started cleaning the raw data using the clay brush with alt pressed (zsub) and also using the Smoothing`s tweaked algorithm – Hold shift, click and hold with the pen, release shift, and then you go. This mainly smooth out the surface without changing the overall surface too much. This also removes all those stars and triangles points that you get using dynamesh.
-I duplicate the head, set a morph target and then re-project all those raw details back. With the morph brush, I can JUST remove the needed stuff. Actually this process helps if I just want to get rid of something specific for instance. In this case I re-sculpted all the micro surface and some small forms to make it more interesting.
__
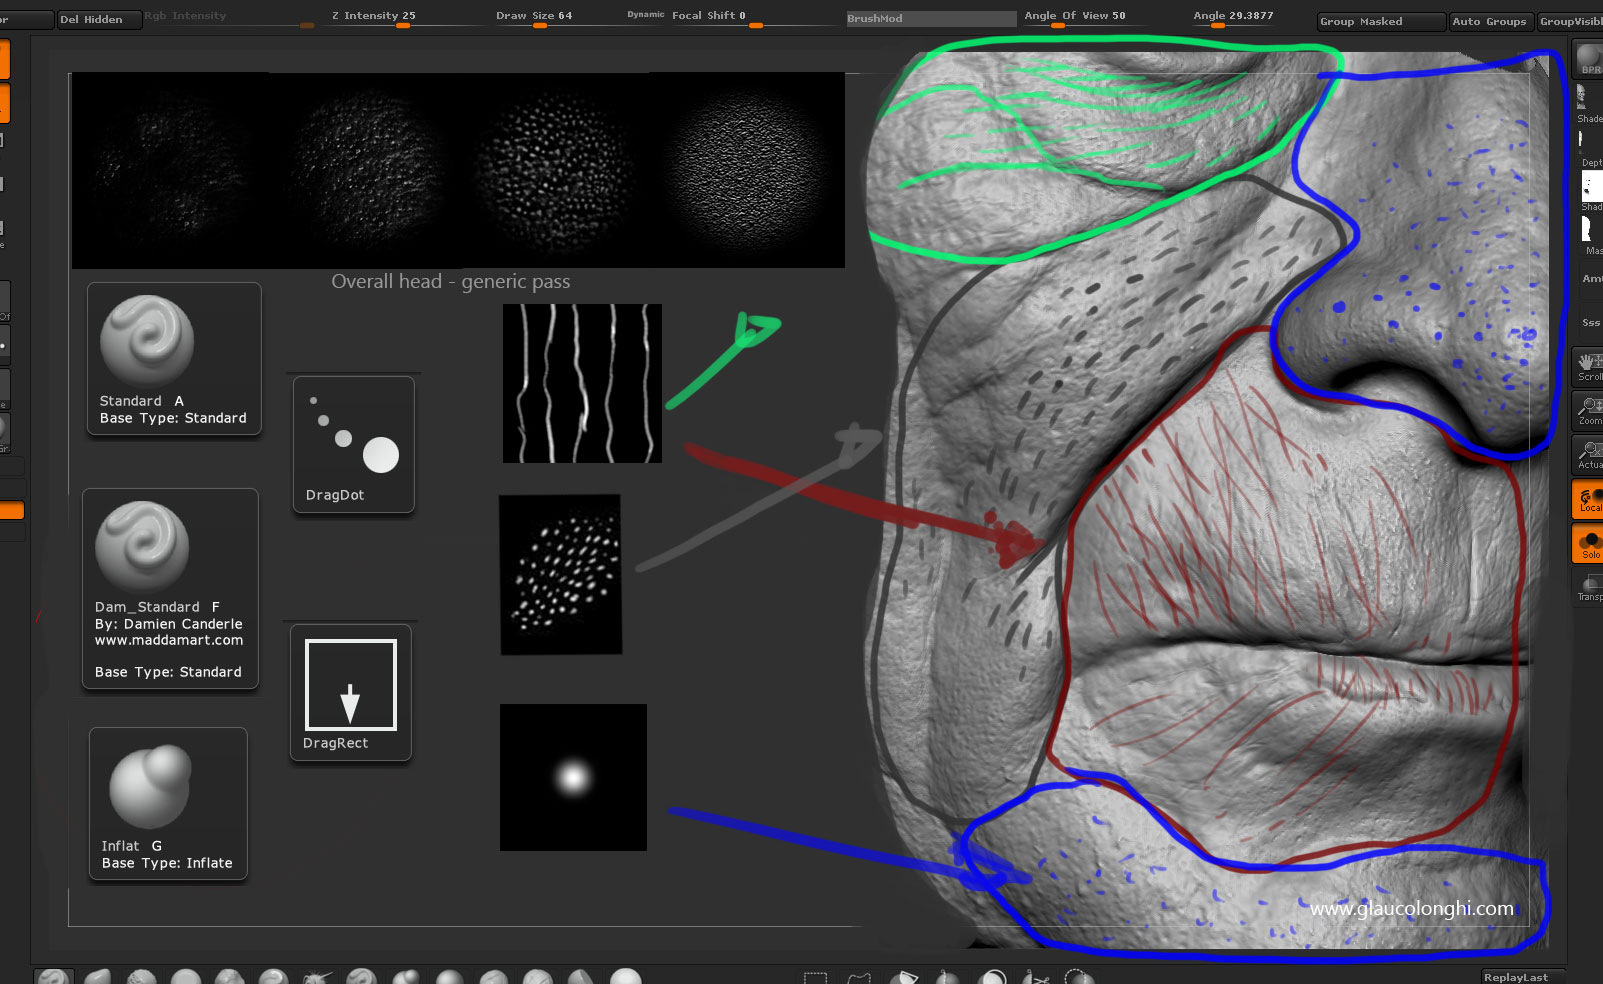
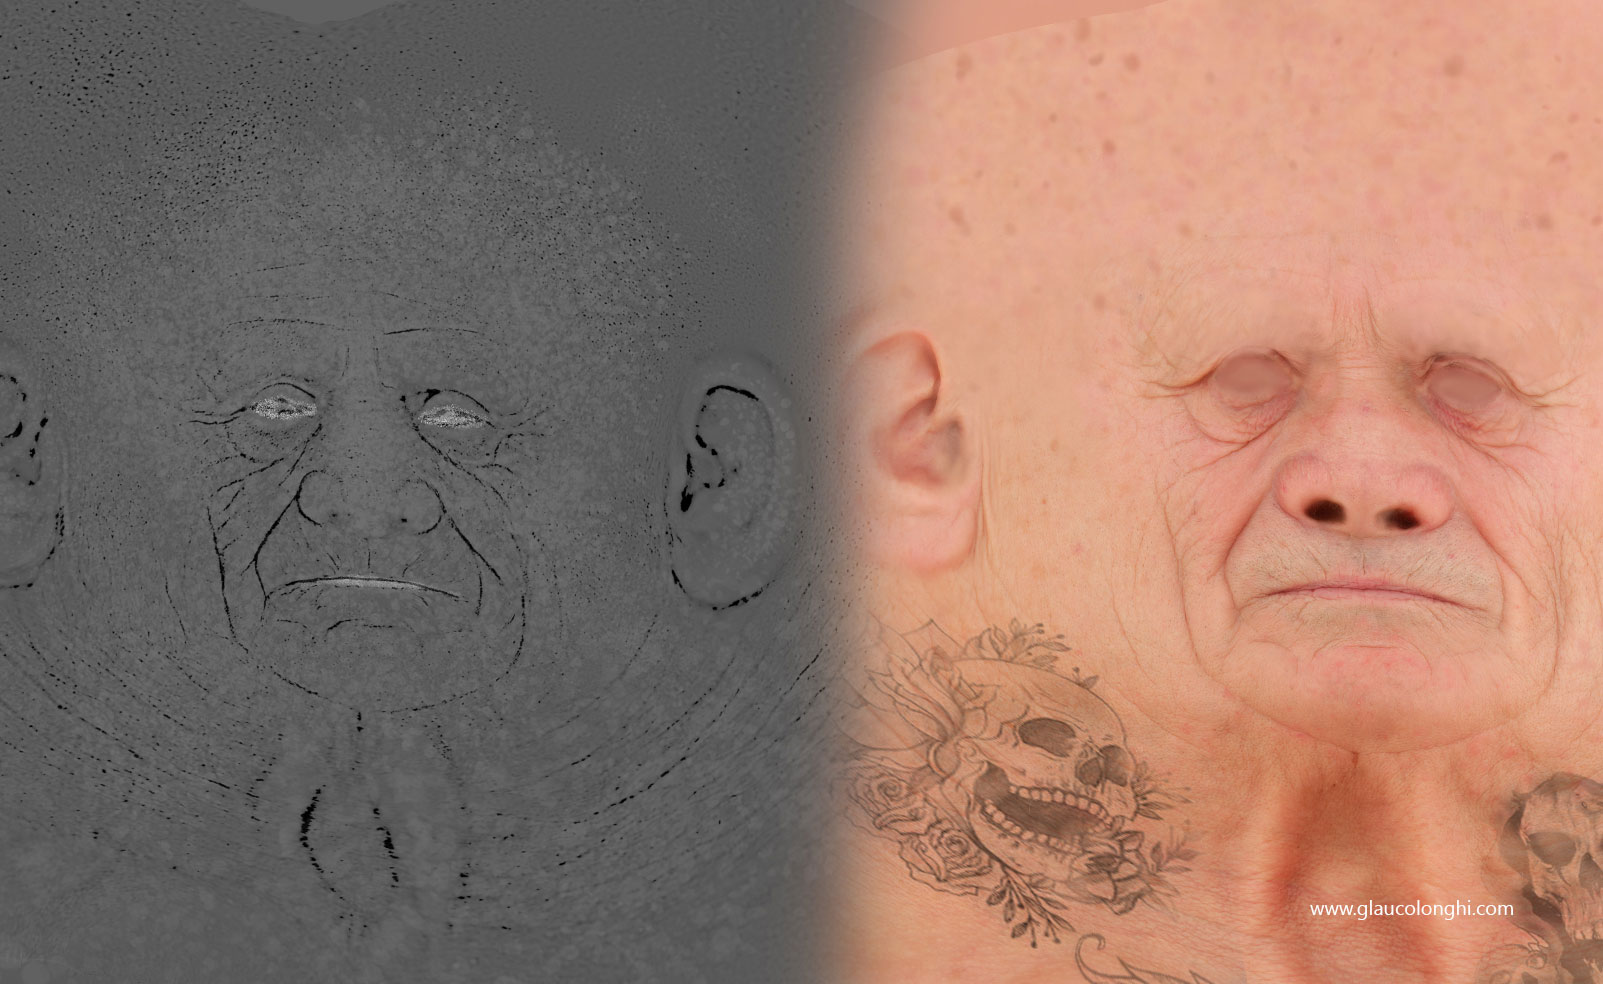
-I love sculpting pores and this kind of details. I dont think that its boring or whatever. Maybe its because Ive been doing it for the past years in traditional sculpture, mainly by hand without using “alphas/stamps” .
Anyways, this is a small breakdown of how I approach those details, variations and pores direction.
Standard brush with dragrect mode for those alphas, dam_standard to carve fine wrinkles and inflat to give it more weight/gravity feeling. For specific pores like positive details, I tend to use the dragdot mode and change the size of the brush manually.
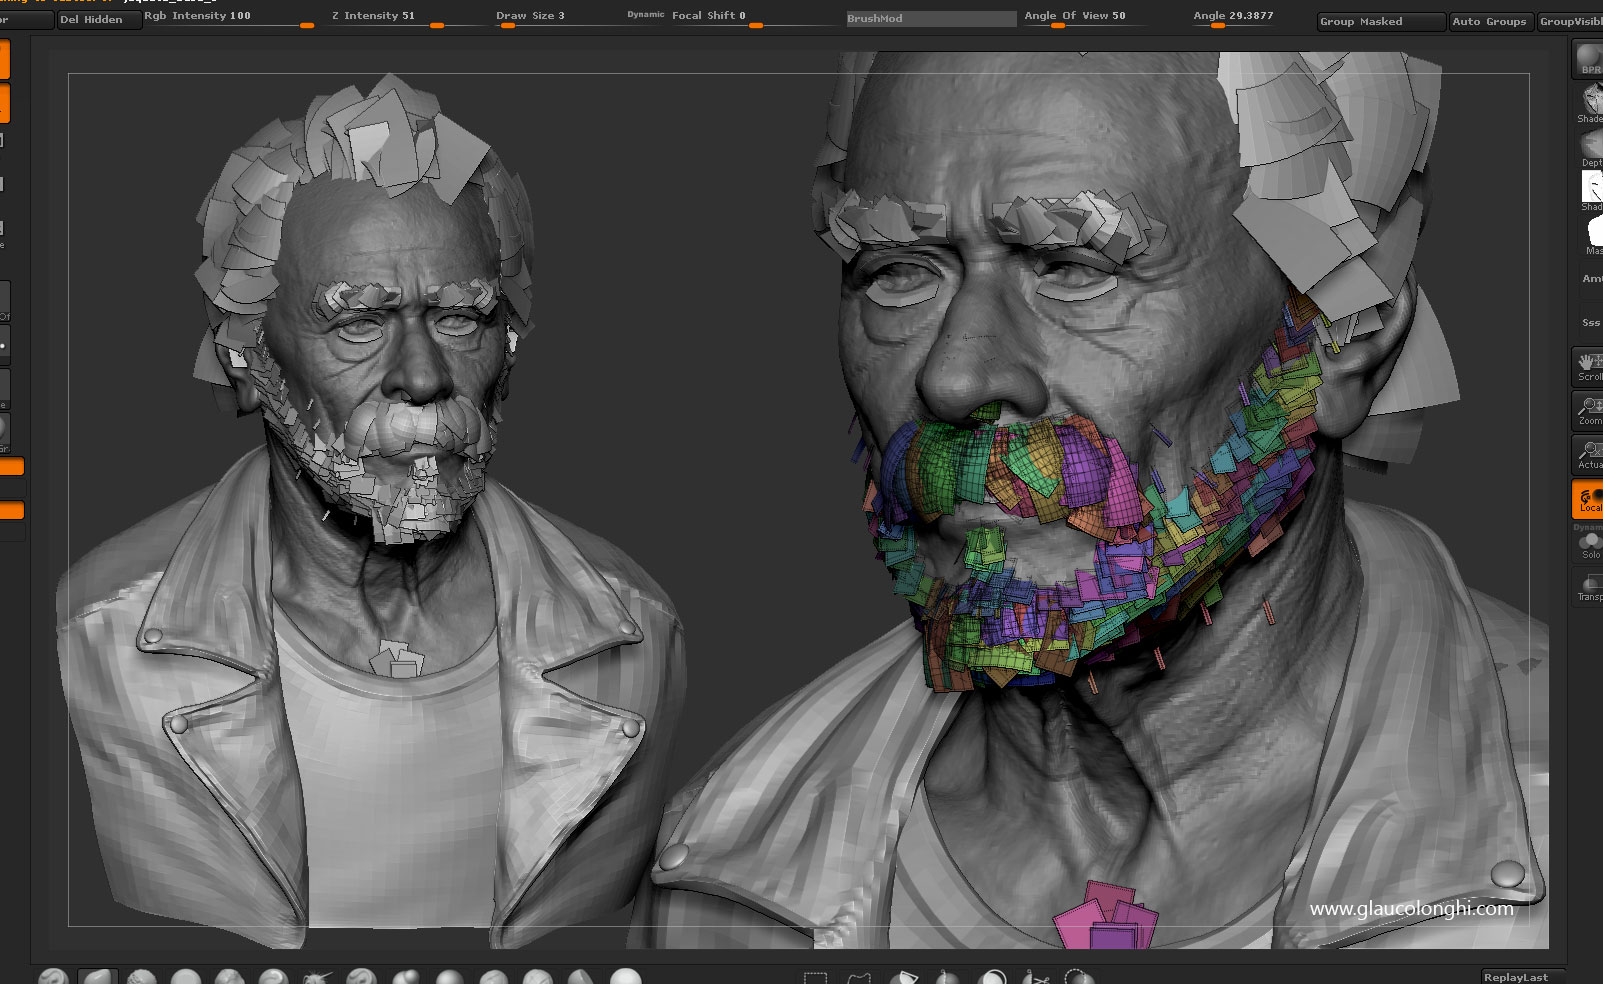
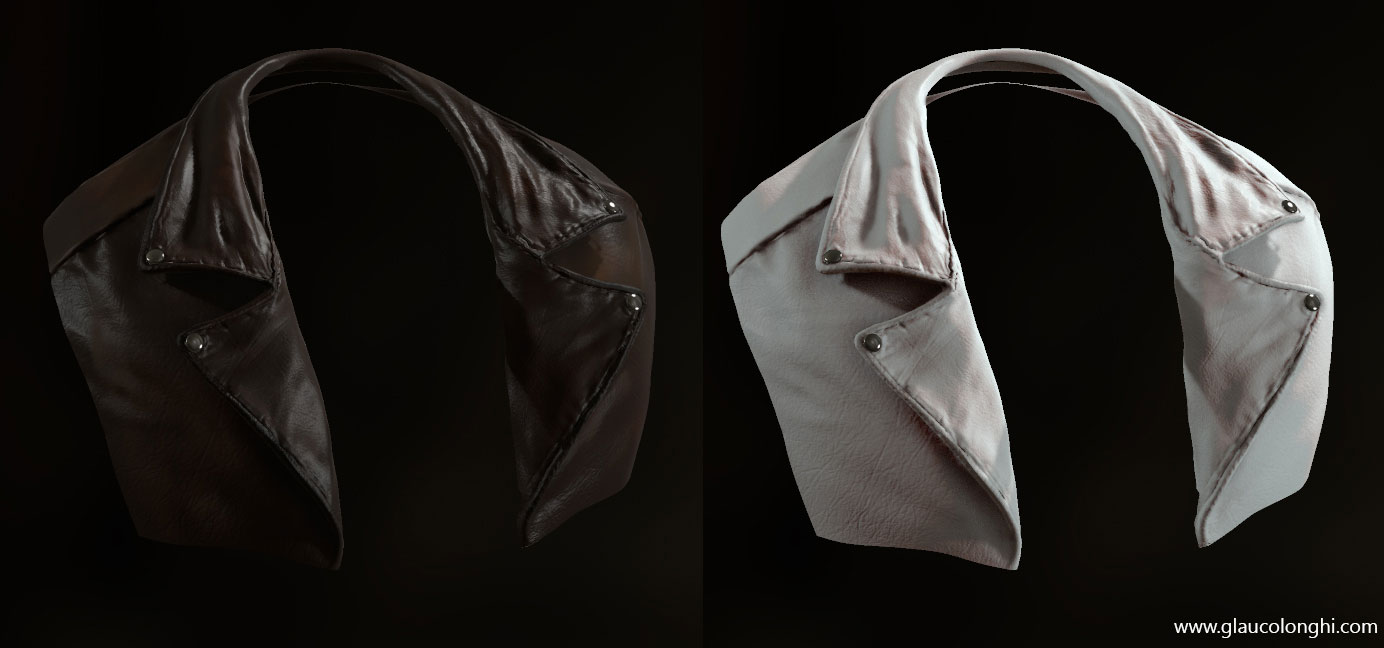
-The jacket and t-shirt begun with a simple sphere dynamesh sketch, quick zbrush retopo, then into 3ds max to close the topology and UV it. Then, back to zbrush to sculpt and detail for normal map extraction.
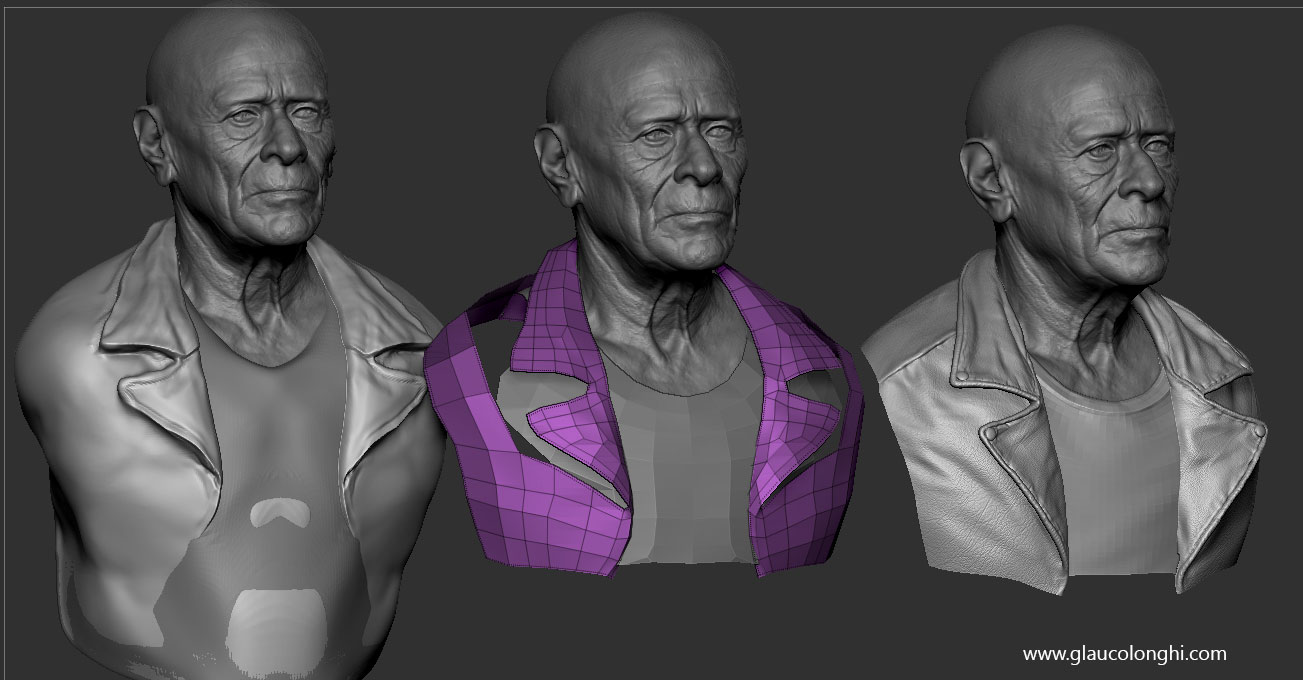
-I`ve used two leather alphas for the jacket and then sculpted by hand those fine details. The image can tell by itself, just be careful about using the Inflat brush over textured surfaces. Usually, I go to a lower subdivision to inflat them.

-For the textures Ive jumped from zbrush to photoshop, using the same principle as used on cleaning up the mesh. The uvs were done with UvMaster.
I`ve projected the textures into my polypaint, then painted it as I wanted, then exported and mixed with the raw data in photoshop. Also added some tattoos and blurried some details too. I exported a cavity map to bring back some details lost in the painting and used this map as my base for the gloss map. Having no spec inside deep wrinkles seems to help the contrast between the forms. I was going back and forth to marmoset so I could check the end result of what I was doing.
Attachments
1 Like
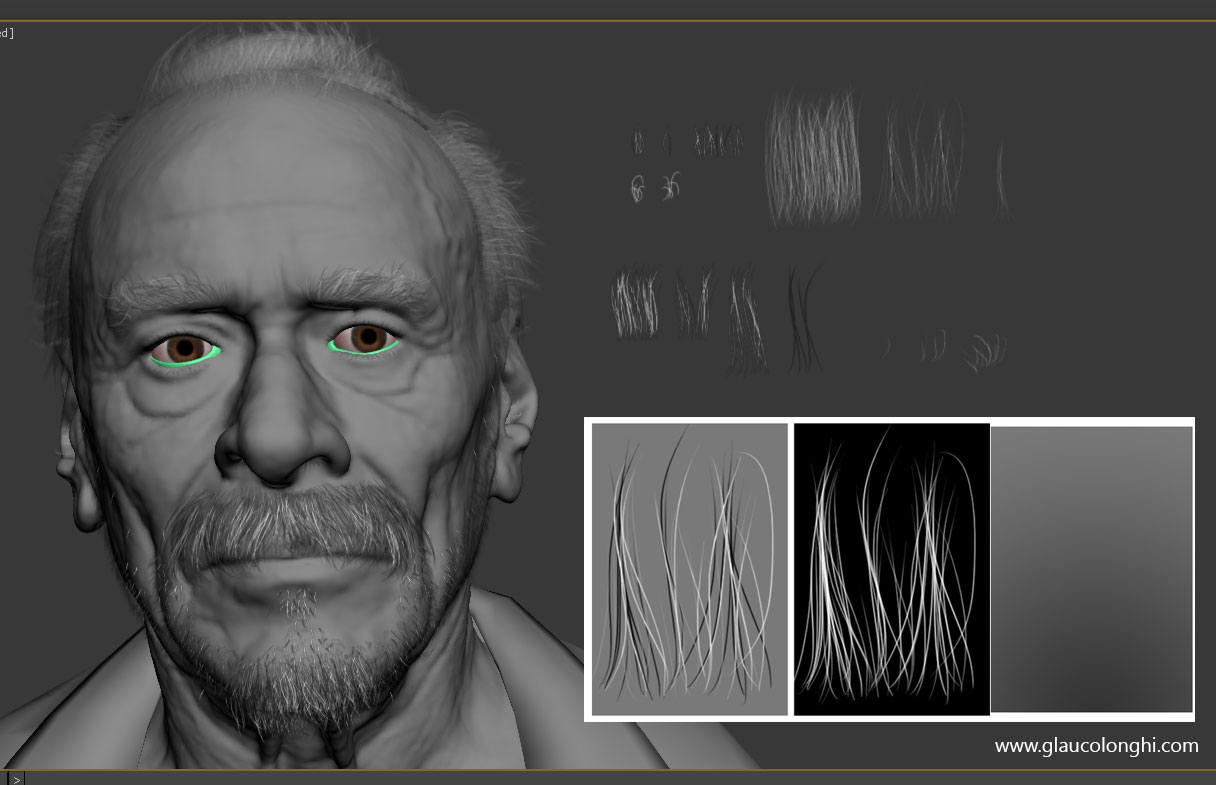
-Ive got many questions about the hair. Again, I tend to think like traditional, punching those hairs into a silicone head so I do it by hand, without plugins or scripts. It looks like would take forever to finish but you can place them faster than you think. Also, MUCH quicker than one by one with a needle. Having many variations as possible is key here. Also, single hairs black or white tend to make things pop as they contrast with the others. I paint my alpha cards on photoshop, duplicate it, boost the lightness and then copy to the alpha channel. Export them as TGA 32bits and you are ready to go. I place them inside 3ds max and constantly check rendering and going to marmoset on my pre-set lighting studio. Color, specular and shadows tend to vary in these conditions so Id do the hair by the end of the project.
If you are familiar with 3ds max, I use the bend and twist modifier to help me create directions for different hairs. I also use the layer system so I have more control for later adjustments.
For the difuse of those hairs, I use just a plain gradient or the painted hairs. Itll depend on the color and varitions/limitations Im going for.
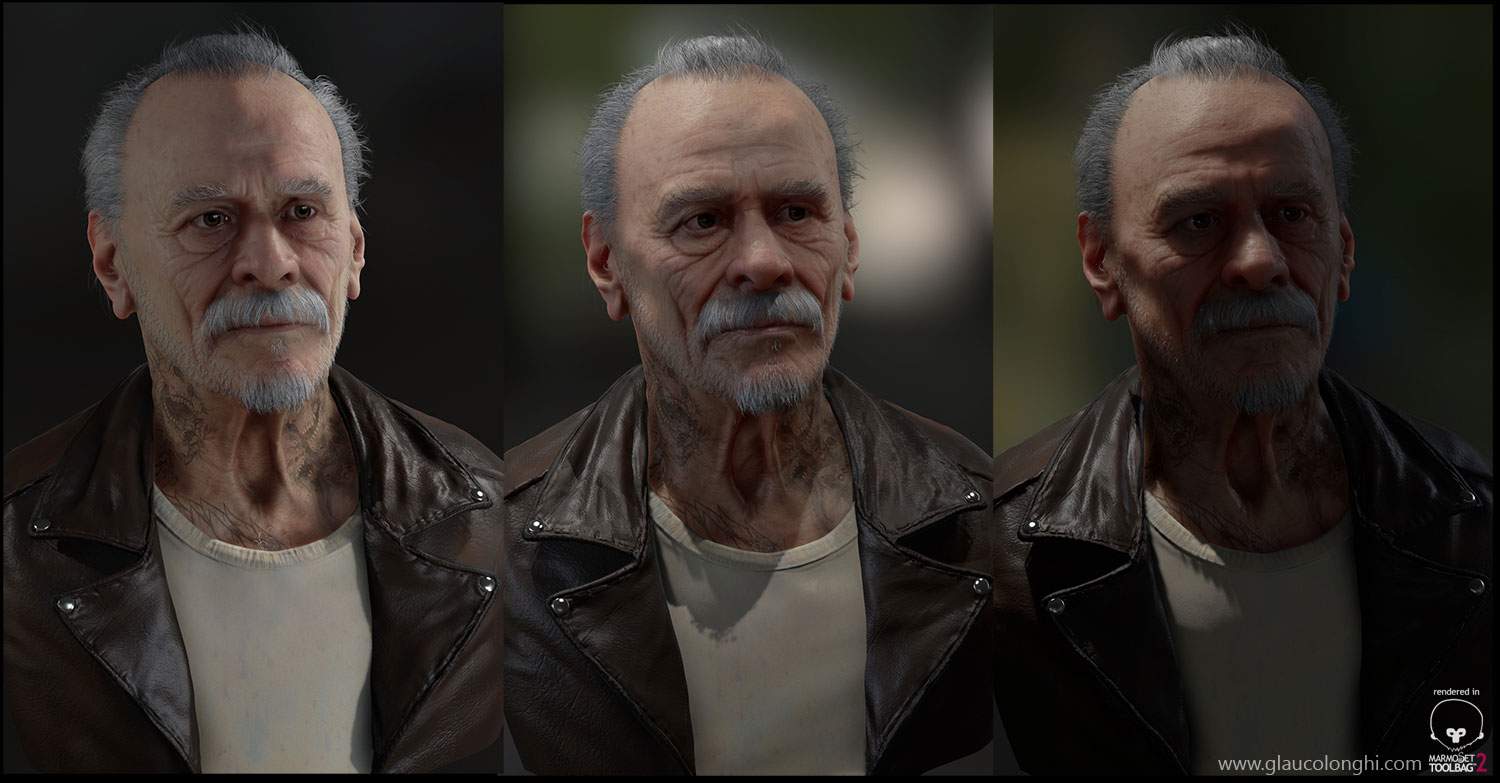
-Regarding the skin shader and marmoset rendering, no big deal.
Just playing with those values, always using real photo reference.
I find myself setting the shader using only the sky light and then tweaking with the lights on. I have a gloss map, normal map, normal detail map (generic noise), translucency map, and a cavity map to help me breaking the spec.
If you have any questions about the shader, let me know. Those values can vary from different scales and light conditions.
-The leather jacket was also a skin shader based material. The Subdermis Scatter helps to break down the shadows a bit and also give more of the leather look to it.
I`ve extracted the normals from zbrush, generated a generic noise to use as a detail normal map, painted some gloss based on the cavity extracted from zbrush.
The difuse/Albedo was painted in zbrush and tweaked in photoshop. I also painted some black and white masks in zbrush to create variations on difuse and reflection.
Thats it. Hope it helps you to understand a bit my process. Feel free to add or comment below. Id love to hear your thoughts.
My best,
Glauco Longhi
Attachments
3 Likes
thank you so much for the breakdown. again man, amazingly awesome work, huge fan.
Awesome work man.
It’s tricky getting that skin look in marmoset 2 but you got it.
(would prefer that skin looked a bit less fresh on that old timer and drop some of that saturation where the hairs are a bit more, might push it even further)
Still, super solid work.
Keep it up!
Thanks heap for this amazing TOP ROW tutorial :)
really nice job.
can you share your camera setting . f-number ,lens … . thank you .
I think it’s beyond words, thx for the breakdown once again.
Awesome Stuff !!
Thanks for sharing your Process !!
Awesome work and thanks for breakdown 
Massive, beautiful work! Thank you!
Amazing work !
Thanks for sharing !
Thank you so much for that tutorial man!!!
Amazing piece, thanks a lot for the tutorial. Top row for sure.
Great breakdown. Thank you!
man…this is helping me a lot on my current project. thank you very much Glauco! small_orange_diamondsmall_orange_diamondsmall_orange_diamondsmall_orange_diamond