ZBrushCentral

A head sculpt

could someone please tell me how luc rendered the shadows casted on mesh only? (he says hair as poly hidden), but hiding wont render shadows, and applying a matte material will render hair as alpha, instead of not rendering it at all.

thank you so much in advance

It can be done using render passes,since hair is a seperate render and there can be seperate shadow passes also…

thanks mohammed!
but take a look at his first render on page 14, he says “direct output render with hair in poly hidden just for shadow casting”
i wanted to know how he did that, as he used a single pass apparently

I wish I knew more about it. I understand that by rendering in passes things are rendered seperately, but how exactly do you go about it? And how do you put it all together? Is there any free online tutorials or forums where this is covered in detail?

hi big guns.

Do you work in a linear workflow? Is there any gamma correction being done?

Luc Begin, you are a great inspiration to me! My favorite CG artist! :+1:small_orange_diamond:+1:small_orange_diamond:+1:small_orange_diamond:+1:small_orange_diamond:+1:small_orange_diamond:+1:

Hey thank’s all for the kind comments!

o sakamoto : haha thank you great you like my work, by the way your jacky portrait look really good! I hope you will finish it with a nice render!

Goobatastic: Yes I always do.

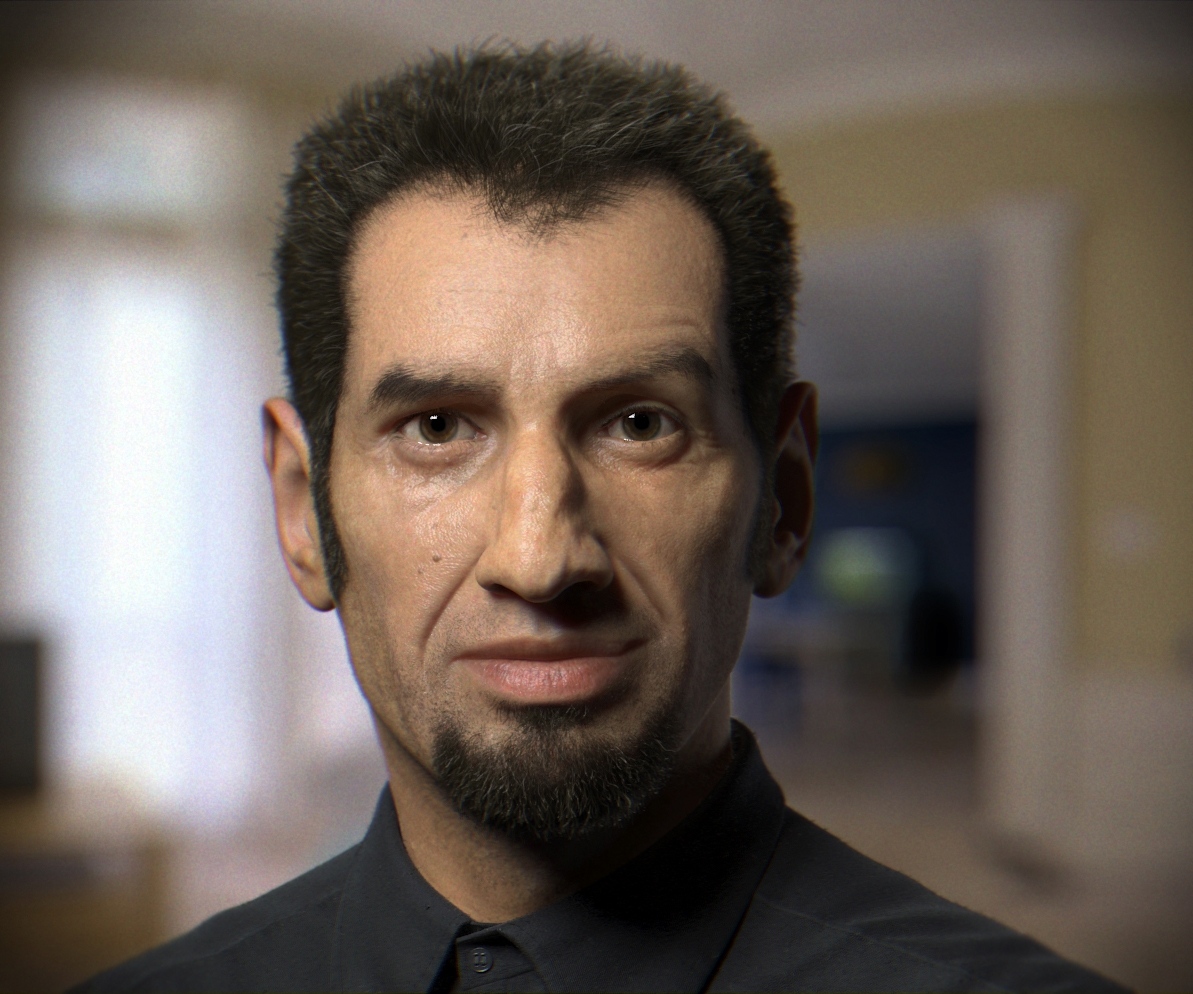
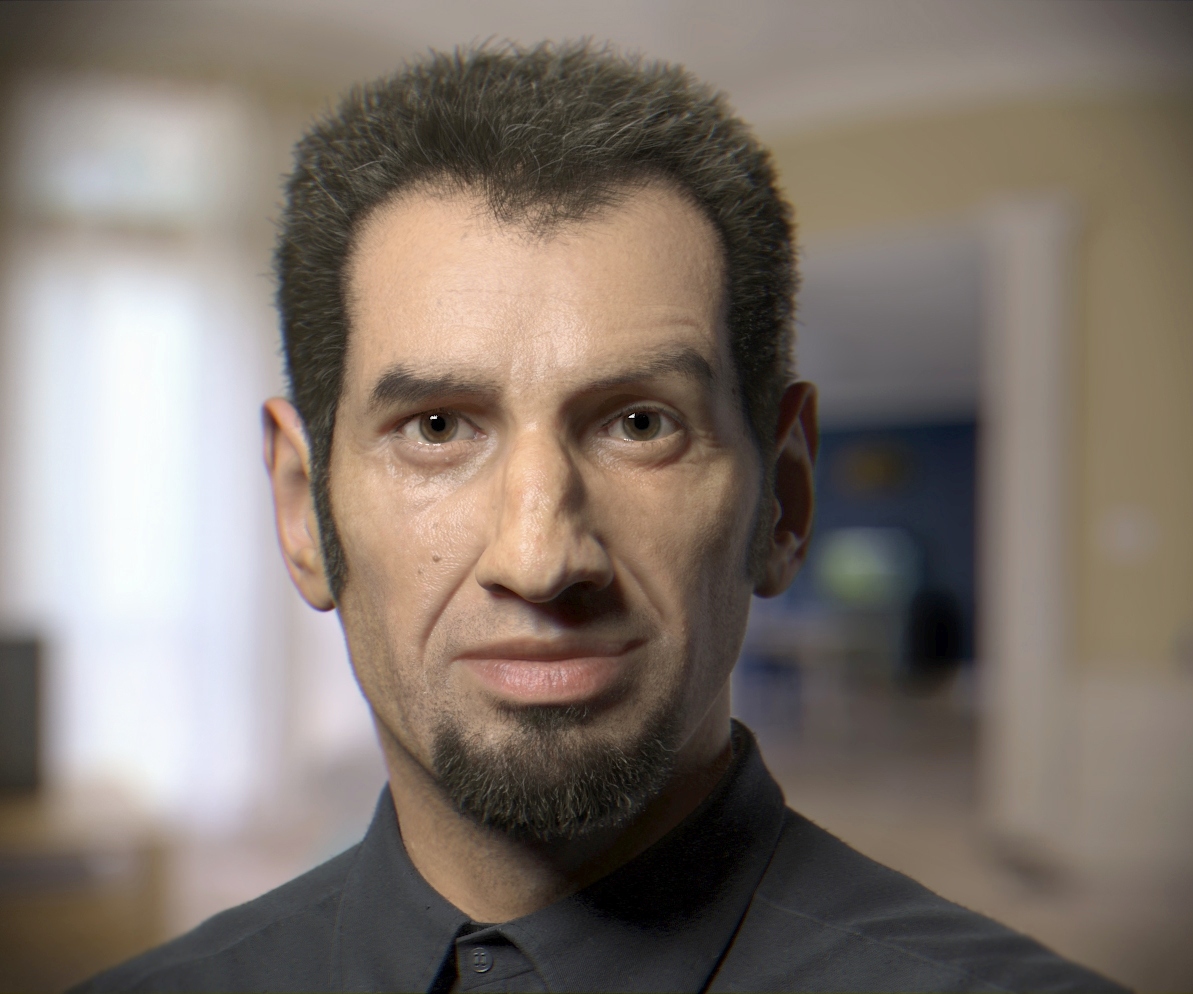
TrappedInFlesh: I just rendered in pass the hairs, all the skin and face is just a direct output of the renderer.

fael09 : that’s simple, in 3dsmax at least. You have to convert your hairs in splines, then go into the propertie of the object, and uncheak visible to camera. So that way you will just see his shadow casting shadow that scatter into the skin. You don’t need to do this for the shirt, since there is no sss occuring, so you can use the normal shadows pass of hairfarm.

ilusiondigital: I plan on doing a 360 render of the head ( but without hairs, so less realistic) but I think it will be interesting to see how the eyes react to light etc. I have a monster pc at job ( a dual i7 6 cores xeon hyperthreaded) so I will render it here.

stankovigorro : I added some maps and played with the absortion parameters etc.

by the way, I’m working slowly on a new portrait,this time a girl. I need a new pc, mine at home is outdated… only 4 gig of ram, I’m very limited to work on it…

Anyway, wish you all the best for 2011!

Just wanted to say I love the work, he has so much character and a confidence, especially the eyes and the way his left lip is slightly raised. I’m currently working on my very first portrait so will be using this as inspiration, I hope you don’t mind if I pick your brains sometime!.. I look forward to seeing your next project.

@Big guns,
From my tests with Vrayforc4d(possibly a little different to the Max version)I thought you had to be using 2 SSS2 mats(one for frontscatter,one for backscatter) in a blend material…as its the only way i can get any control over the back scatter without effecting the front as well…are you also using a weight map in the frontscatter or just setting a distance?

What intrigues me most with your skin shader is the Specular+reflection settings you’ve used in the Vray mats…is this all coming from another material/s layered in the blend material or are you using the spec/reflect settings in the SSS2?

Can’t wait to see your next work …sure its going to be great…but how do you get more real than this?:wink:

Cheers,
mala

Hi all!

Here’s a little change over the original image, I added a BG to hit. A friend of mine, Vimmy (Samuel Poirier) give me the idea and supply my the BG image that I found was matching not so bad my original lighting, so I did a little comp in photoshop with that.

Let me know hat you think and wich one you like the most, I found it add a little more humanism to him.

Here’s 2 version, one without noise and one with

[wiht%20noise%20low.jpg[/attach]-->%3C/font%3E"]<!--[attach=241883]wiht noise low.jpg[/attach]-->](http://%3Cfont%20color=%22#9A9A9A%22%3E<!--[attach=241883)

[without%20noise%20low.jpg[/attach]–>%3Cbr%20/%3E%0A%3Cbr%20/%3E%0A%3Cbr%20/%3E%0A%3C/font%3E"]

](http://%3Cfont%20color=%22#9A9A9A%22%3E<!–[attach=241885)

And here one gamma correct for those who have dark screen.(like me at job)

[gamma%20correct2%20low.jpg[/attach]–>%3C/font%3E"]](http://%3Cfont%20color=%22#9A9A9A%22%3Ewiht noise low.jpgwithout noise low.jpggamma correct2 low.jpg

Attachments

wiht noise low.jpg

without noise low.jpg

gamma correct2 low.jpg

I’ll give you my advice if you give me your shader setup :+1:

wow :smiley:

Hello Luc!

I thought this was excellent the first time I saw it and I still think it is excellent.

Edit: Oh! and I like the first of the three the best.

dude the render and model is superb!!!. I just think it still looks too 3d.
your soooo close to breaking the barrier between 3d and reality tho.
I dont think that the model itself or shader needs any work.
the render just looks too perfect. maybe adding some dust particles or a bit more noise.

also maybe some color balance in photoshop ?!?!?

p.s. the top render is my fav. your last one looks a little too bright :slight_smile:

I also edited your image in photoshop a little bit to try and add some camera effect. I hope you dont mind sir. I will remove it asap if you want to. :slight_smile:

![wiht-noise-low.jpg|885x1140](upload://2GmQTa4Y0na8I0mCgY7Qg2qemIs.jpeg)

Hey! Look who’s back!
Nice to see you again Big Guns.

it’s been a while since you made this masterpiece…
reading every single post, but still missing one point.

  • Would you like to show us a snapshot of the settings of your SSS Shader of the head as well as the shader of the eyes ?

that would be really fantastic - thank you so much !

Hi Luc. Really great work. :slight_smile: I got a question though.

Are those highlights or reflections?

[]

And, did you make them through VraMtl or SSS2 specular component? I mean, if those reflections are made with vray material than what’s the point of using sss2 specular?

Hope You'll answer. Thanks![lucbegin_render_marks.jpg|357x584](upload://3vgzwrLBncB82EGTAigHhgXlbRB.jpeg)

Hi,

make long time I did not post anything, was busy with work. I started a new character, it’s for a contract and I think it will be more real the this one, at least I guess :slight_smile:

I did a custom Vray hair shader wich I gonna use on him and I have enhanced the skin shader too, so I guess it will look more real, I will post when I have something to show if the client doesn’t mind.

On the other hand, here’s some new tests render of the eye of this character, with updated skin and little details in the eyes socket region.
Also, with Vray 2 you can put a prepass id wich is really cool, since when I did this project I was using Vray 1.5 sp3 I think and this option did not exist, so I had inconsistency between different element of the eye socket, like the lacrymal gland (because they were separated mesh), in some shot the sss was too strong etc. Now everything fit better togheter. I also did some work on the liquid shader,etc.

by the way the AA is low, it’s 1-2 instead of 1-4 for final rendering, it’s why the eyelashs are jagged…

[eye%20thumbnail.jpg[/attach]–>%3Cbr%20/%3E%0A%3Cbr%20/%3E%0A%3Cbr%20/%3E%0A%3C/font%3E"]

](http://%3Cfont%20color=%22#9a9a9a%22%3E%3C/font%3E"]](http://%3Cfont%20color=%22#9a9a9a%22%3Eeye thumbnail.jpgNew eyes test.jpg

Glad to see you posting again. I am excited to see what you have cooking up. Give us some updates! The eyes look great, VRay 2 definitely has some nice features. Are you still using hairfarm?

-DBriggs

www.3dbriggs.com

can you upload a image capture the material oh the eyes, it very realistic :+1: