ZBrushCentral

32bit Displacement Map showing seams in specific area.

Hello all,

I have this issue with my 32 bit displacement map being seamless between all my UV Sets except one.

Below you can see the image and the seam is on the hip of the creature where the thigh joins to it.
[[seam_overpaint02.jpg
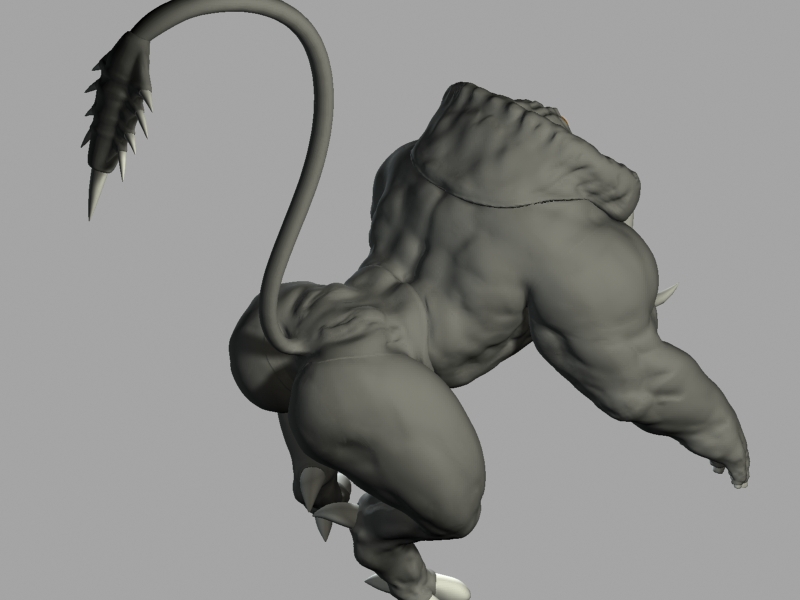
](javascript:zb_insimg(‘118746’,‘seam_overpaint08uvs.jpg’,1,0))

Im using Zbrush 3.1 and 3dsMax 9.

My workflow is as follows:

1: Import OBJ
2: SCulpt
3:Render displacements in DE3 R32 setting DE-LCGK-EAEAEA-R32 ,with DSubPix2, MAp adjust=0, Seam OVerpaint=2, Map size=2048
4: Export Base LEvel MEsh as OBj and import in MAx
5:Apply maps in Max with RGB Offset -0.5, Filtering set to none. ( With mental Ray as a renderer I’m using the 3d Displacement map for my displacements)
6:Renderer settings : Scan radius 1 pixel, Max Displace:20cm , Max Subdivision : 64 K.

What I don’t get is if the seams aren’t showing up between the torso and the arms, whya re they doign so between the torso and the legs?

Thanks you for takign the time to read this!

Cheers!

Attachments

seam_overpaint08uvs.jpg

I’m not sure why it’s happening to only part of the model either. But your steps are a little wrong. Here’s what you should be doing:


  1. Import
  2. Press Tool>Morph Target>StoreMT
  3. Divide and sculpt
  4. Return to level 1
  5. Press Tool>Morph Target>Switch
  6. Create and export the displacement map
These steps allow you to restore your base mesh before you create the displacement map. If you don’t do them, then your map is being created for a version of the model that has been affected by multi-resolution subdivision smoothing and not for the actual model that the map is to be applied to.

Hello Aurick,

Thank you for the reply. I guess I’ll just have to trial and error a few more times to see why this is happening.

I hear you about storing the morph target. But if I’m bringing my base level Zbrush mesh back into max to use as the new version of the model will this still apply?

You’ll still have problems because ZBrush’s displacement map calculations assume that the map will be applied to a model that is being subdivided. In short, it’s being created with a cage mesh in mind.

If you just export level 1 and apply the map to that, the map won’t be quite right. What you would want to do in this case is activate Tool>Geometry>Cage before you create the map. Then export the model while Cage is still active. This cage is created so that when it’s subdivided by your renderer it will come out to be as close as possible to the high res model. Then the displacement map takes care of the rest.

In short, any time you create a displacement map it needs to be created for a cage. The best solution is to use the morph target method that I previously described. If that’s not available you can store a morph target and then immediately import your original mesh again. If for some reason you don’t want to use your original mesh, then you need to create a cage mesh.

Hello Aurick,

Thanks! I tried it out and you’re right.

I initially thought that I was having problems with the Morph Target workflow but I was mistakened. My base mesh was a little too low in polycount so it deforms quite abit when subdivided in Zbrush or Max.

So I’m exporting my base mesh with the turbosmoothed modifier collapsed first.

I’m not sure if the rational I’m working on here is right. I’m thinking if the Base Mesh used to create the displacement map is too different from Subdivided Mesh (before sculpting) the results won’t be good?

PS: I forgot to add that I did a reset XForm on the turbosmoothed mesh before exporting to ZBrush. This will prevent the creation of displacement maps that look liek triangular mosaic.