ZBrushCentral

Zebulexis -The Assassin (w.i.p)

Demonite2.jpg

I’ve got around 40 hours in Zebulexis (so far). Of course, I was making a male android when I started and after some pushing and pulling, it became female. With my subconscious mind calling the shots, my conscious state got to concentrate on what it likes best, which is beer - :laughing:! Works out perfectly.

I had to rig / pose the character in Maya but the rest is entirely Zbrush. Took a little experimenting to see where I wanted to go with it. The image is missing a few colors due to JPEG compression. Maybe ZBC will up the jpeg max. and allow videos too? Nah, the Hentai submissions would get out of control. :laughing: :laughing: :laughing:

Pretty much everything I do - is a work in progress. Sometimes I wonder if I consider any of my work “completed” :smiley: - I appreciate the C & C.

I feel that I broke ground with this project from experimenting with numerous things (the cloth is a little tricky) and I have a few more ideas using the Mrgb grabber. I’ll be happy to answer questions, upload some images of the workflow, and take some pointers…

Happy Z-being…and take care. :+1:

Demonite3.jpg

This revision is focused on lighting. I was using an orange moon, which had some kind of a cool Phlebos texture thrown on it. The right curtain concealed it though. An orange alien moon will only seem like a sun so I changed the color to light blue.

I’m using 3 lights and experimenting around a bit. I’m also going into the material menu to fiddle with Ambient, HDRI, Diffuse, etc. for different results.

I didn’t add fog the first time around but Fog was added in this image…

Seems a little more chilling :eek:

Try a soft fill light from under the face to pull out some of the forms more. This will produces creepy shadows. Right now its way too dark to see much of anything. The lighting that illumniates the back could be stronger as well, or effect the character more. It would produce nice rim lighting.

Thanks Womball. Can lights be created only to effect the layer and not all layers?

That I do not know. I like to render outside of zbrush for scenes.

Thanks…seems I can’t turn them on and off for layers like I could in Maya, which may be where I end up after tooling around in ZB. :smiley:

Demonite5.jpg

Whoo hoo! Some anonymous ZB’er gave me 2 stars! Wow!!! :rolleyes:

I’ve been fumbling around with lots of lighting issues. Seems you can’t turn off lights on layers, so I messed with the Materials and played with their controls.

I added a little drama in the background, too.

Nice! Real nice!
I hope the assasin does not get the secret mad pepper recipe…

Rare and exclusive hint:

The first light has a special function. And that is the Backlight function!
As you have found out, it is difficult to get the elusive back lighting working. And to have it working with this, and unfortunately this single lightsource, you have to click onto the little square in the light position viewer. And voila, it lights from behind. The next light you have to switch to the function of the first so you have a regular key light. Then fill and whatever lights you need.
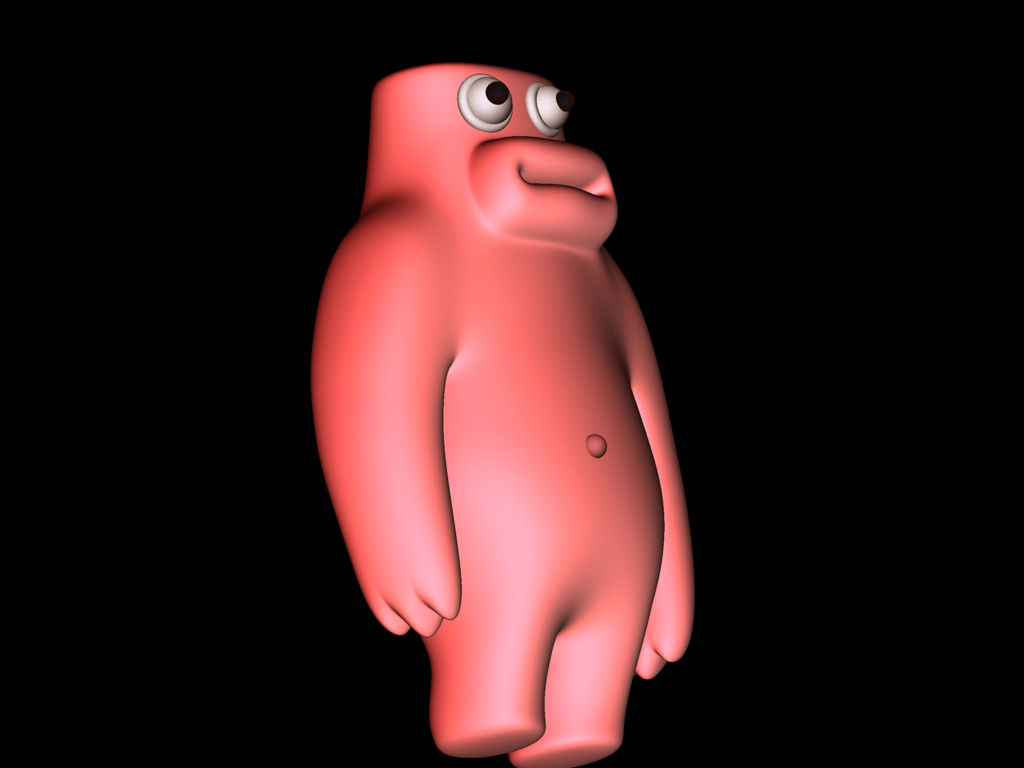
If the first light is set to ‘backlight’ it can also be used to create a great subsurface scattering effect. A real secret! [attach=44878]subsurface.jpg[/attach] This is made with one light and the sss backlight ‘trick’. The subsurface rubber monster.

Light on, light off grasshoppaaaaaaaaaaaaaa!

The other thing I’d try is to vary materials. Leave the texture. Drop the model into the projection master’s , only with the material switch on. then duplicate the main material you are using over some other materials you are not using. Gotta love that material slot system… I guess there was no space left for another list or reference tabel… The vary noise and specularity.

Another cool thing is to use the environment. HDRI for lazy bastards: You render your scene as it is now. Grab the picture with the MRGBZ Grabber (good Lord I got it right…) and open the render tab. In the render tab select environment=> Texture. And guess which one you should select!!!

Alright, you have 100 Lemo points for that… But nothing happened right…
Now go into the material and raise the slider of the environment reflection to about 10% and hit best render. Cool ehhh! Now, take a heart, have some gut’s! Raise the slider to 20 and try again… Interesting eh?! Like the subtle lighting hints of an HDRI map. Well… cough cough… HDRI for the poor…
In a strike of madness… raise it to 100! And wowzaaaaaaaaaaa cool but useless… (Except you wish to have the ultimate chrome texture!)

Enjoy!
Lemo

PS:I gave you three stars! Who’s next? 4 Stars? The Lady in the third row? Anyone 3.5 Stars??? Lol… the stars issue has been discussed quite a few times and I am happy that it seems that we at least the guy who flagged pretty much everything with one star has found a better use for that hand.

Attachments
subsurface.jpg

Looks pretty cool, and you’re working on the problems I can see. Lemo gave you a crapton of help I wouldn’t have been able to, cause I don’t use ZB to render anything. Listen to him, that’s my best advice for this one. :wink:

And the star thing is pretty stupid. Not the stars themselves, but the fact some ***s comes on here, thinking they know it all, and hit you with 2 stars, and no comments, thinking they “got” you. Just ignore those dips, and focus on making the best art you can.

Knew I could get some good pointers from you.

You said, “The next light you have to switch to the function of the first so you have a regular key light. Then fill and whatever lights you need.”

I’ve been moving the little squares around and hitting the Alt Key, which sends the light to the back or front. Is there something else I’m not aware of? :o

I’ll get to work on it…thanks again.

(And nope, the assassin is protecting the secret Mad Pepper recipe…) :lol:

Thanks for coming by and checking it out. As for the “2 Stars” I earned from the anonymous user :lol:, I was like…"DAMN!!! Tough crowd we have here today! :lol: "

I know my texturing is pretty straightforward and basic but I wanted just enough so I could concentrate on the lighting to see the variations.

Thanks again…much appreciated!

Alt? Only the small square pushes them to the background. But I noticed that not only the first light works like that. Hmmmm strange, tried that before and only the first one did what I wanted at that time. Well, time to play tug boat again: but but but but…

I used Maya a few times but got stuck with XSI as it can digest quite a bit more geometry (ZBrush models unchanged with the giga polygon core) and I actually fins a path through the UI. But that’s a personal preference.

Good luck with those peppers!
Lemo

Well I got an invite…

lemonnado, has as always provided some great information. Use it.

I think the whole thing has posibilities. The textures need work, on everything.

Your model doesn’t give the impression of a 'bot or female in any way.

Your first post had the most mystery.

The material (forget texture for now) is really hurting you.

The fingers on the right hand look a little stiff.

OK a suggested approach to see if you can pull this out.

  1. turn off all textures and materials, set the base colours to 50% grey.

  2. work on the character, make a robot, make it female if you want, but make it acceptable to the viewer.

  3. using lemo’s instructions follow your original lighting for the scene, how does it all look when rendered?

  4. If it’s good, continue, if not go back and begin again.

  5. now that you have propgress, apply the materials you think you want, no textures yet.

  6. render again, still working for you? Then continue. If not, then back to 5.

  7. Once all this is working you can start slipping textures in, reset the base colours to suit if they matter.

This is rough, but with what has been provided within and above you should be able to make a very nice scene.

The cloth is pretty good, especially in the first image. :wink:

Thanks for accepting the invite, Jason - and giving more pointers. I have been working on Lemonnado’s lighting tips.

I agree with your comments on the mystery aspect that’s why I wanted a darker scene with traces of light to bring out the character’s figure without giving it away.

I’ll see about removing all the materials and running some more “Lemonn lighting techniques.” :idea: :idea: :idea:

The right hand is stiff but I worked a little in Photoshop last night to fix a few things and play around with some additional lighting effects. I’ll post this progression for now…(progression - what a subjective statement.) :smiley: Demonite6.jpg