There are a number of quick and dirty ways to do this. Remember Dynamesh can create a simple shell. But you seemed mostly concerned with control, so this is how I’d go about doing in in R8 for a process that gave me the most control over thickness and rib placement.
You’re on the right track with the Boolean subtract. I would use the new live Boolean system like this.
-
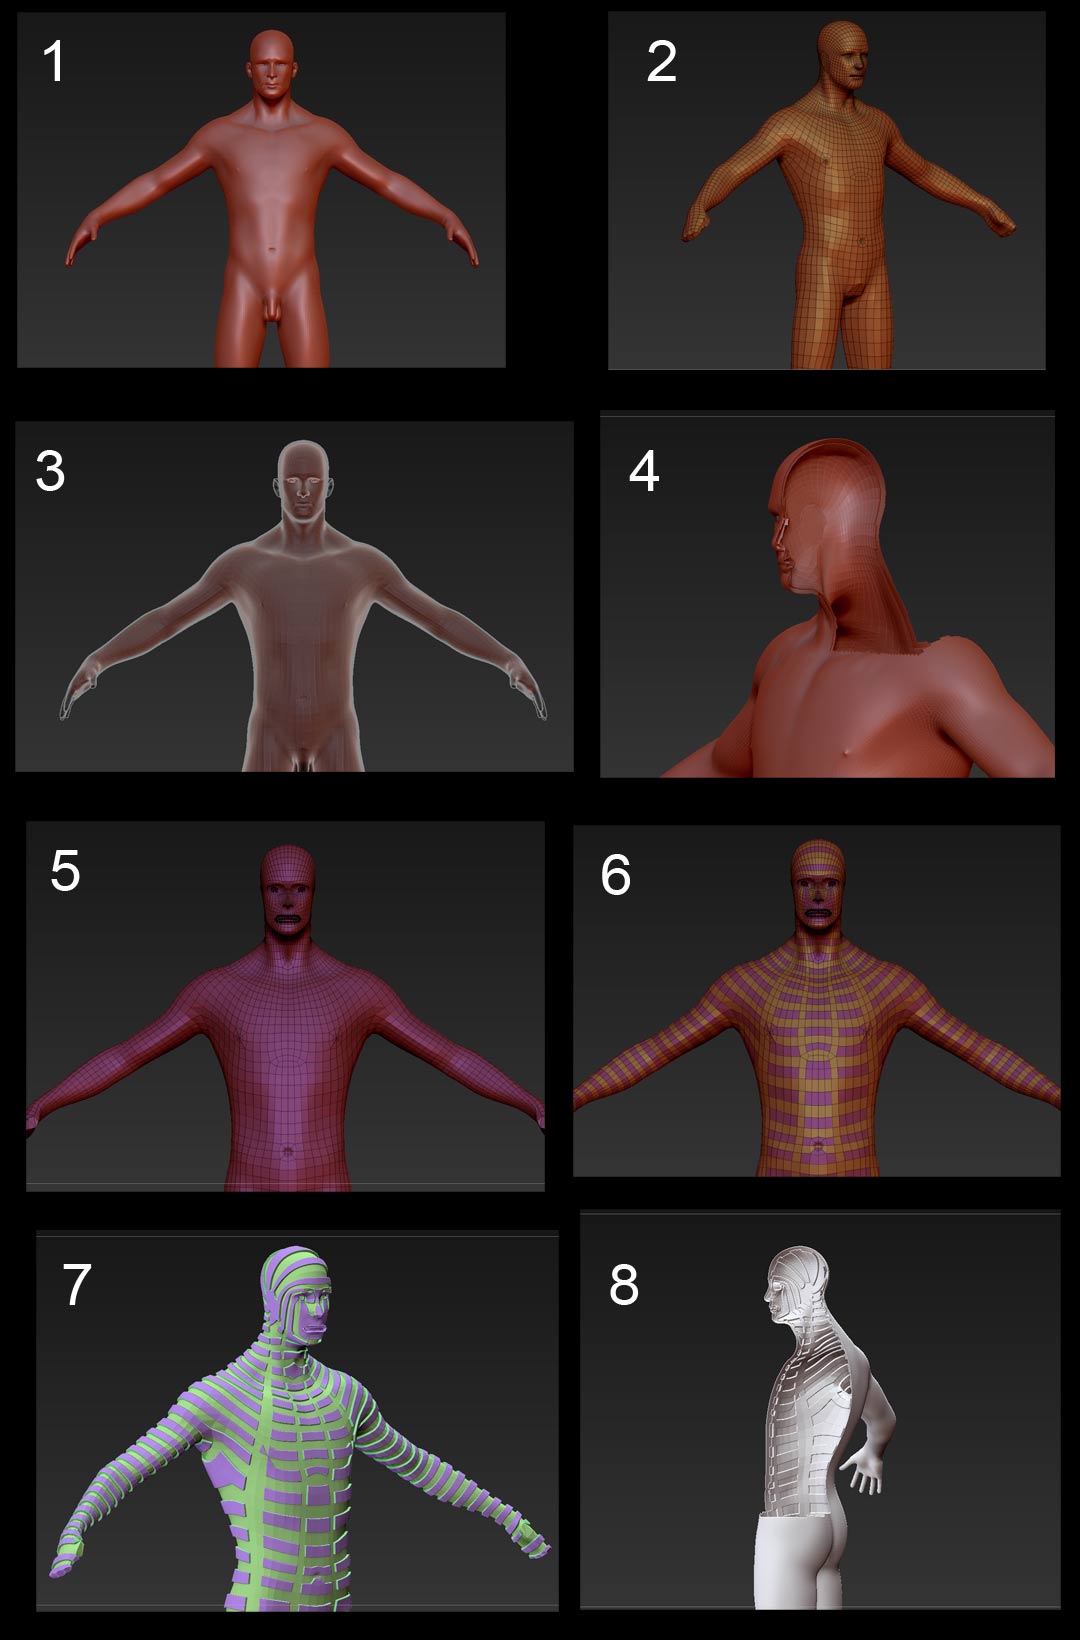
Duplicate your model. Reduce it to the lowest level of subdivision, or Zremesh to get a suitable low poly version with clean topology–you want nice clean loops.
-
Simplify the mesh. Remove all fine detail features like fingers, toes, ears, nostrils…fuse the mouth and eliminate lips altogether if possible. Close any holes. This will be your interior shell, so remove any geometry that would result in too thin a volume. (do a better job than the quick job I did here  )
)
-
Turn on Transparency. Using a negative Tool > Deformation > Inflate operation, shrink the interior geometry slightly towards the center, just enough to get the minimum thickness for the shell.
-
Turn transparency off, turn Live Boolean on, and set the interior shell subtool to subtract mode. Use “Make Boolean” to create a new Umesh in the tool palette. You can see the resulting shell.
-
It’s actually possible to do steps 6 and 7 before performing the subtraction. I’ve done it after here. There may be advantages to doing it one way or another, so experiment if you like.
Since I’ve done the subtraction this way, I must separate the interior shell from the outer skin. Polygroup > Groups by Normals did the trick for me here, allowing me to hide the outer skin and work directly on the interior. Make sure to turn “double sided” on in the visibility options.
-
Use the ZModeler set to Polygon > polygroup > Polyloops to start assigning loops to the same polygroup in whatever configuration you wish. You may have to use alt poly selection to create custom selections to get the selection you want.
-
Use ZModeler > Polygon > QMesh/Extrude > Polygroup all to extrude the rib polygroup inward to the desired thickness.
8 You can see the result here with the ribbed interior.
A Quick and dirty alternative would be to apply a striped noise pattern with noisemaker to the interior shell prior to subtracting, subdivide as necessary, then apply the pattern as displacement at the desired thickness, and subtract it from the exterior shell. You have much less control over rib placement and thickness doing this however.
Good luck!
Attachments

