ZBrushCentral

WIP - Tribute to Blizzard

Rexxar_Progress_005.jpg

Well, after I was a couple of hours into the sculpting I found some problem areas where I really did need additional geometry as well as some problems with the way my geometry flow was going so I went back into max and reworked the arms slightly so they would have the rotated forarm geometry (just overlooked this part previously), reworked the hands completely and added a few rings to the face and chest.

Will redo the UVs in the morning - might add another set of rings around the shoulder with a slight rework, but that will be under armor so I am might skip that like I did the feet since they will be covered as well.

Nite all.

Well, in between taking the kidoes to school and errands for the honey, I had a few minutes so I redid the UVs this morning. If I redo these enough I might actually learn how to do this right the first time … next time.

Now, if I can stay off that darn honey-do list, I might get the sculpting roughed in today:eek: .

Rexxar_Progress_006.jpg

Nice one hosch,you got the fantastic,unbeatable Headus uv layout and a copy of zbrush man just let your talent and immagination go wild bro.Hey I hope to see some amazing work from you in future,have loads of fun meantime and enjoy.Peace

Etched out a couple of hours today to work on the block in of the sculpt.

Image shown poly count is only 135,456.

Final ploly count will be 8,669,184 so there is plenty of room for details I am thinking. With that said, I might want to retop a few areas like the shoulders, ears, etc. when I finish - we will see.

This first pass is just the major muscle groups, form, expression, etc. Avoiding any real details at this stage.

As primarly a medical animator I rarely get a chance to exaggerate the features like this - great fun!

If all goes well I will have a few hours Saturday and can finish in the block in of the sculpt.

Cheers:).

Rexxar_Progress_007.jpg

Had a little time tonight so I did the bottom inside gums, tongue and bottom teeth.

I have done a number of dental animations and am obviously not going for any serious anatomical replication - it is a half orc / half ogre after all:). Also, I am taking a bit of liberty to give him very few teeth - even before he lost some - normally teeth are much more closeset in the mouth, but I liked this look better and the bad dental condition of the gums is because as a loner, I doubt he exactly has good dental care anyway:).

I am working to depict the teeth in the front somewhat like tusks with a feel of the base of an antler. The back teeth are much more traditional. Where teeth are missing the holes are at various stages of closure. When a tooth is pulled or knocked out it starts closing almost immediately so the one in the back top left of the screen was obviously the oldest lost tooth as it is has already started the bone loss process.

The tongue is a much more traditional type of tongue without fork, fissures, etc.

In the final scene of the animation I am planning will terminate in his mouth as he is yelling so I am putting a bit more than normal detail into this area.

[attach=172035]Rexxar_Progress_008.jpg[/attach]

Attachments

Rexxar_Progress_008.jpg

Bit more progress - roof of mouth, back of throat and top teeth.

[attach=172039]Rexxar_Progress_009.jpg[/attach]

Attachments

Rexxar_Progress_009.jpg

Here is the progress so far on the main muscle groups. Very rough block in with the clay brush just to ensure I have the positioning and mass basically correct before moving forward to the details.

Still need to do the hands and lower body before I get into individualizing him and adding details. I am not trying to be exactly perfect in my anatomy, but I am trying to be believable. There are a few known anatomy issues with the forarms and back, but they will be mostly covered with arm bands, gloves and cape so the form that will be displacing the armor is my biggest concern in those areas.

Rexxar_Progress_011.jpg

Be kind to your fellow artists! If you already have an image in the bottom row of thumbnails, please wait until it drops off before creating a new post. If you wish to show an update of your work before then, simply edit your previous post. That way you’ll still only take one thumbnail.

Thanks! :slight_smile:

My sincerest appologies - shant happen again:).

Well had a bit more time and finished out the blocking in of the character. From here I will do some smoothing to add the base for his skin then take it to HD for details. Reworked the back to a much more believable muscle structure. Still not accurate due to the fantasitically exaggerated shoulder/neck/undersized head set up, but more believable and functional.

My greatest challenge so far was finding a balance between the extremely exaggerated features of the inspiration piece and a level of exaggeration that is true to the spirit of the concept, but still something that I can animate. I hope I have achieved that. Would welcome any thoughts you guys might have before I start nailing down detail - still easy to manipulate the model’s mass at this level.

This is the first project that I have used 3.5 for and am learning a great deal about workflow - now that we can retopologize directly inside of ZB future projects should get to the creative part MUCH faster and not so much vertice manipulation in the future /blech, heh. Lessons learned.

Rexxar_Progress_012.jpg

Attachments

Rexxar_Progress_013.jpg

been enjoying seeing this come together, but I’ve got to say that the chin muscles/tendons/whatever those are really aren’t working for me. I’d also consider toning down the traps considerably as it kind of looks like someone just filled him up with helium instead of over exaggerated anatomy.

I will post a modified version taking into consideration the neck muscles (trapezius) being significantly toned down, but since I am still in the recent post headliner, I will put it in the post above - not sure how to do this properly otherwise to avoid bumping people like I accidentally did before:).

About the neck “tendons” those are meant to be large folds of skin that - like an old man would have, but now that you mention it, it does not “read” that way so I am going to rework them a bit so they are obvious as to what they are.

Looking for some good sources for how to make believable wrinkles - will tackle that tomorrow - thanks so much for taking interest in my work and giving me feedback - sometimes I get tunnel vision and it helps to have outside thoughts.

Ok - no time to really work on the model over the holidays - but I did get some time to experiment with various methods of making believable wrinkles - still working with it - hope it is helpful:

  1. Either freehand or use alpha from actual skin wrinkles to lay down pattern with alpha
  2. Inside of PM use the deco brush to lay down the creases
  3. Outside of PM use the inflate brush to put the fatty tissue between the creases
  4. Use the smooth brush to take down any areas that were too puffy
  5. Continue with your skin work such as pores, etc. like normal
  6. Lastly, I would suggest NOT using alpha maps as a final result - use them for a base to get your hand sculpting started - more of a guide - if all you use is alphas and then leave it be you will probably get too uniform of a feel no matter how many times you scale and flip the alpha - unless it is an area that will hardly be seen then it is probably fine

Also experimenting with the Slash brush instead of the deco brush - having promising results so far.

Hope this method is helpful to someone - will post if I change my approach to the wrinkles.

Merry Christmas if you celeberate it - I would say “Merry Hanaramaquanzmas” but that leaves some of them out :confused: - so, merry whatever and see you on the other side!

Really hoping to get some opinions, advice, critiques … really any feedback on my first stab at details on this guy. I have only done a small area of skin detail trying out various methods (this is my third or fourth method experiment).

I am going for an old, weathered, knobby skin that will be more tight in certain areas such as the cheeks, but even some knobbiness there as well. Am I achieving this with this approach or does it just come out like I am going wild with the brushes, heh? Thinking I am sort of in a tunnel vision here and would like feedback. Obviously, where I end the detail it will not necessarily “blend” in with the other unfinished area so please focus on the inner area around forhead, eyes, cheeks and nose. Thank:).

Thanks for your interest guys.

NOTE: On the ears - even though the skin detail is not completed - the form is basically there - the ridges inside the ear are my idea of glands that he has for picking up vibrations - like multiple mini-eardrums - I know sound is vibration - but this would be more for listening to the ground to hear if something is moving - and of course it would also enhance his hearing due to the relationship with vibrations. Feel I sort of have some leeway in character design since I have such a small amount of data on this character:).

Rexxar_Progress_014.jpg

Attachments

Rexxar_Progress_015.jpg

Hello Hosch…:slight_smile: …THANK YOU for the nice and very helpful contructive crit in my thread, really appreceated…:+1: :slight_smile:
I have been following your work on your character ever since you started it.
It’s coming along nicely…I especally like the ax…will look great with brown speckeled red tailed hawk tail feathers or maybe even golden eagle wing feathers…just my personal opinion and thought there.
About the figure,…The neck and the flow of the muscles conecting the head to the torso are in question…needes the vertical /diaginal . flow of the ones that conect to the collar bones and the skull behind the ear…These will give you the nice flow/rythum that happens in that neck area…especally pronounced with age.
There is a book that you can get on the internet…google…not very expensive ether.would make a nice Christmas present to yourself.:slight_smile: …It’s by a teacher that I once had many years ago at the Otis Parsons Art Institute in LA CA…Great teacher, and Great book…
DRAWING THE HUMAN HEAD by BURNE HOGARTH…lots of aged neck shots/drawings by him, and descritions of how the flow of muscles work in the neck area conecting the head to the torso ect.
He also has some other books…DYNAMIC FIGURE DRAWING being my favorite…A deffenite must have book for any artist doing action figures.
I’m still learning Z Brush myself as you know by now…but the best brush i’ve found so far for sculpting those wrinkles, is the clay tubes brush…set big in size…with a little smooth here and there after you block in the major muscles, it gives a nice aged and wrinkled skin effect.
Hope i’ve been of some help to you., and thanks again for being a help to me…:slight_smile:
ps…Can’t wait to see you do… BORIS…ONE OF MY ALL TIME FAVORITES.:+1:

SpiritDreamer - I agree about the direction the feather will go - did not want to take the time to do the texture work at that early concept stage - but I like the idea of having three completely different types of feathers even - each with a part of the story I am planning to write to go with each of my final tribute works to the art and artists that have inspired me in my life such as Boris, Rockwell and a number of others from past eras. About the wrinkles, thanks for the tips and I will look into better reference as soon as i get a chance and definitely before I do more work on the character.

Oh, and I wanted to say that concerning critiques - you are definitely welcome and I always try to critique work that people have spent obvious effort on if I can find anything to critique - good, great or less so - but it is always a risk as some do not understand the compliment it is for someone to take the time away from their own work (we artists tend to be a bit … self centered heh) and put sincere thought into someone elses work - so you never know if a thoughtful observation will be received or rejected as being rude. Some of my most valuable critiques for my work came from people that weren’t even artists - but then again everyone is an observer so are qualified for at least some level of critique - whether we agree or not it is valuable information on how our work is perceived:).

You should try working in another material. Something like gray would bring out the details more, I think.

SpiritDreamer - thanks for the tip - book is ordered:).
KillahPriest - thanks for the tip - been using different materials throughout the process since your tip:).

Well, I got a case of the piggy flu and got knocked off my feet for the duration of the holidays, but that gave me some much needed time to just research the tools. Initially, I had spent the time to really learn ZBrush when I started using it in 05, but have never really caught up with all the awesome tools that have been added over the years. After the education time I just invested in I hope to never ... EVER ... do a project with the workflow I dived into on this heh - There is simply no need for the headaches any more. This tool has really come full circle to where we can focus on creativity first and not the technical side of things. Well, I decided that I could be fairly true to the concept art and still have anatomy that I can live with so I reworked the anatomy to something that is actually believable. I broke the model up into three areas where armor will be covering the model so the seams will not be an issue and started working the basic detail pass. There is still one level of detail remaining (skin, scars and finer details) that I will end up with once I have all three sections at this level of detail. The bumps and scars on the beard area are just that - I have always thought of ogres as having the skin issues many of my brothers with black or darker skin had in the Corps - problems - some sever problems with shaving. I really felt for them - some of them were in absolute agony at times with their skin. I gave this skin problem to Rexxar in the areas where he would have shaved and carried that up to the top where his hair line is, but to a lesser degree on the head. I plan to give him a slight stubble on the beard area in Maya (I decided to export him to Maya for rigging and animation). May add a bit more work on the brow area where I am not happy, but this section is roughly completed minus the final level of detail pass (this pass is roughly 600k poly for this section). Crits and suggestions welcome as always:). ![Rexxar_Progress_016.jpg|1000x750](upload://axQG64Kq1IcTrlMtoQcNN0nbP0S.jpeg)

NOTE: If anyone from Pixologic is viewing this please look into the image insertion button on the forum - the last two images I have had to manually type in the code to get the image to show up. Thanks.

Attachments

Rexxar_Progress_017.jpg

Well, this process let me know very quickly that I had a great deal of learning to do so I took a pause and started studying everything I could about anatomy and zbrush as well as researched my character’s back story a bit more.

Of course, there were professional projects and other such things that delayed my progress (I even took time off to go back and audit a great class at my old college by Brett Briley), but I was able to start dabbling a bit more on the project a couple of weeks ago and have gotten to a point where at least all of my subtools are in place and I have started the sculpting again.

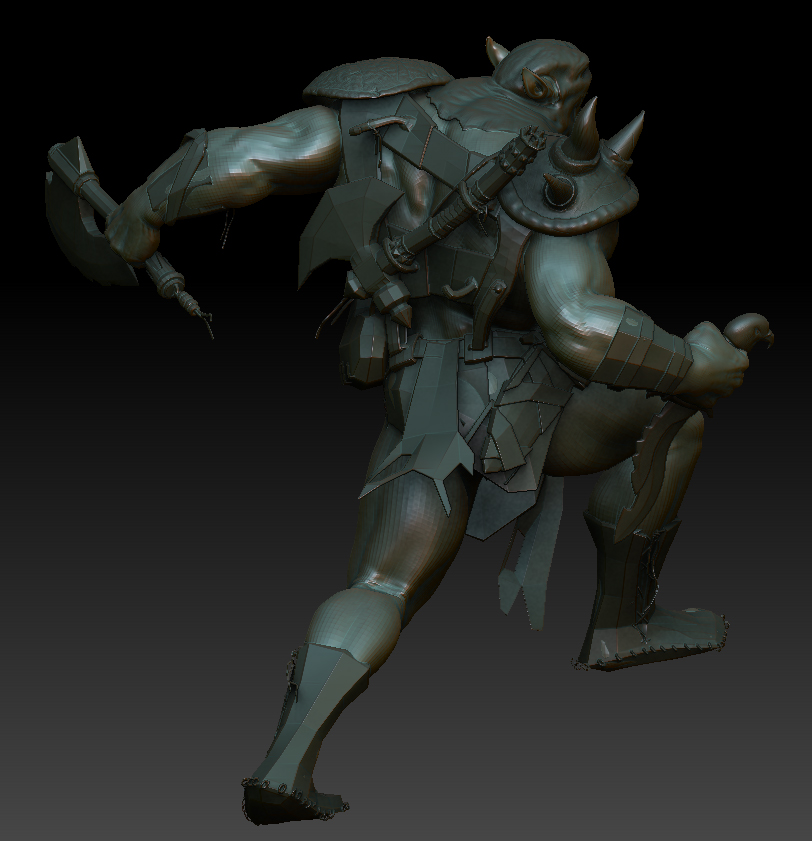
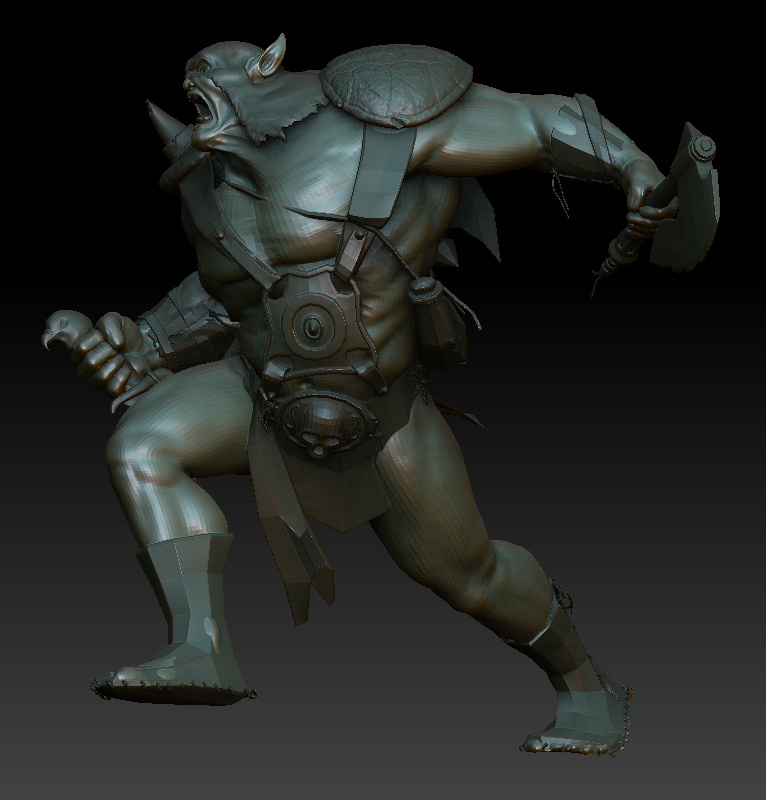
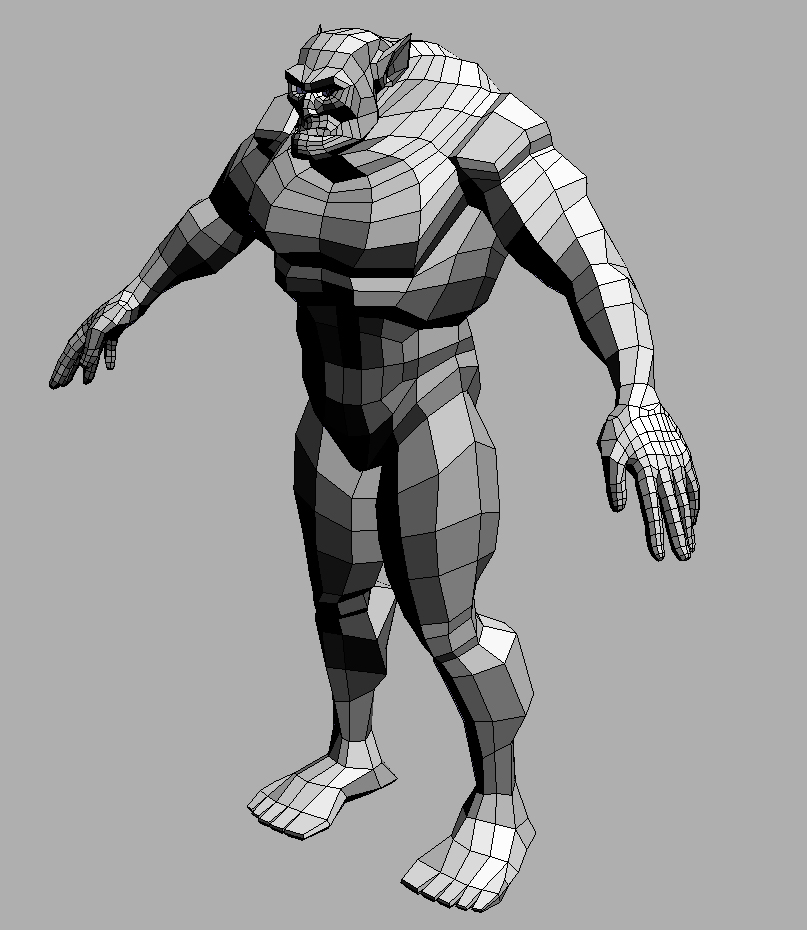
I attempted to make it obvious which subtools have not been touched by leaving all of the flat surfaces in place at division level 1.

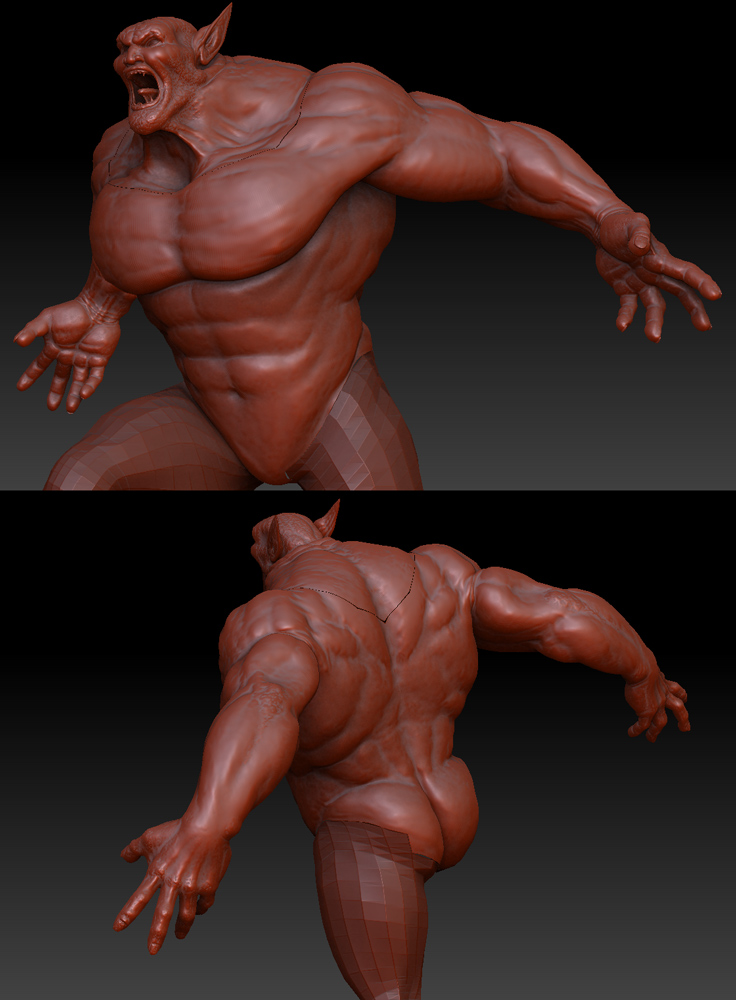
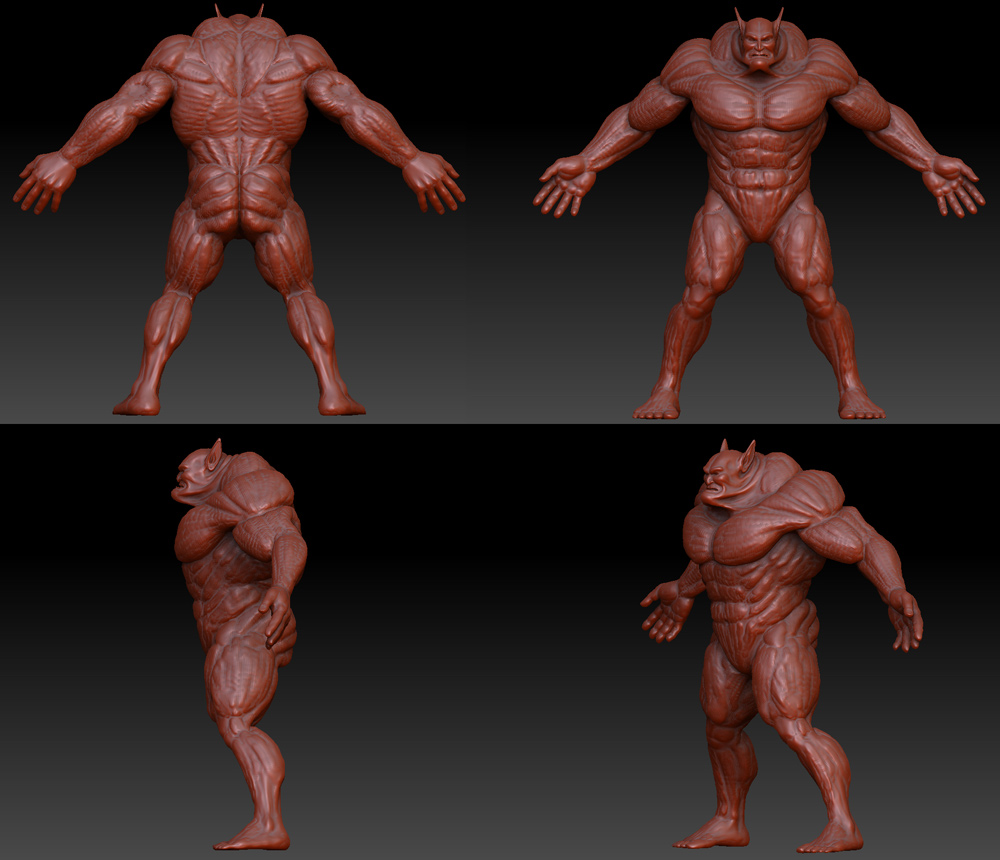
The body is at sub level 4 and has about 3 more levels before it will be finished I am thinking.

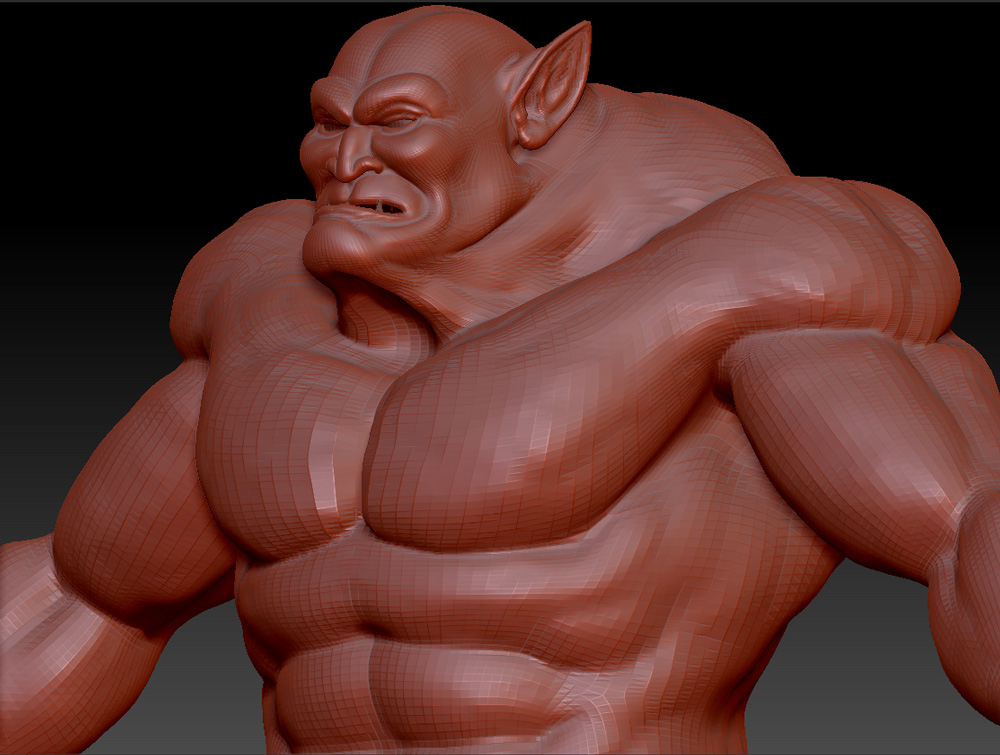
The subtools that have been detailed out are between level 4 and 7 so there is some more work on some of those to go.

Altogether I expect only about 15 more hours of sculpting, but finding the time is a challenge as it is for all of us:).

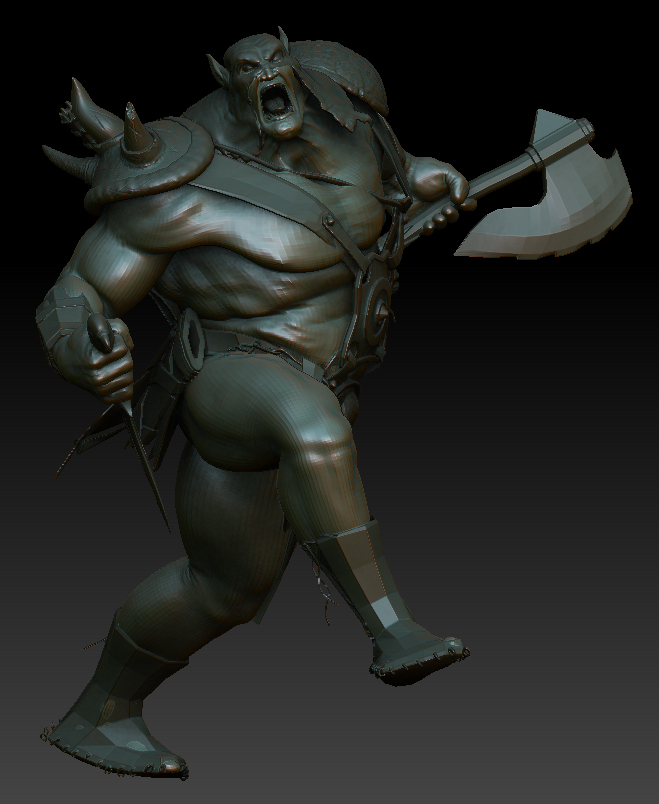
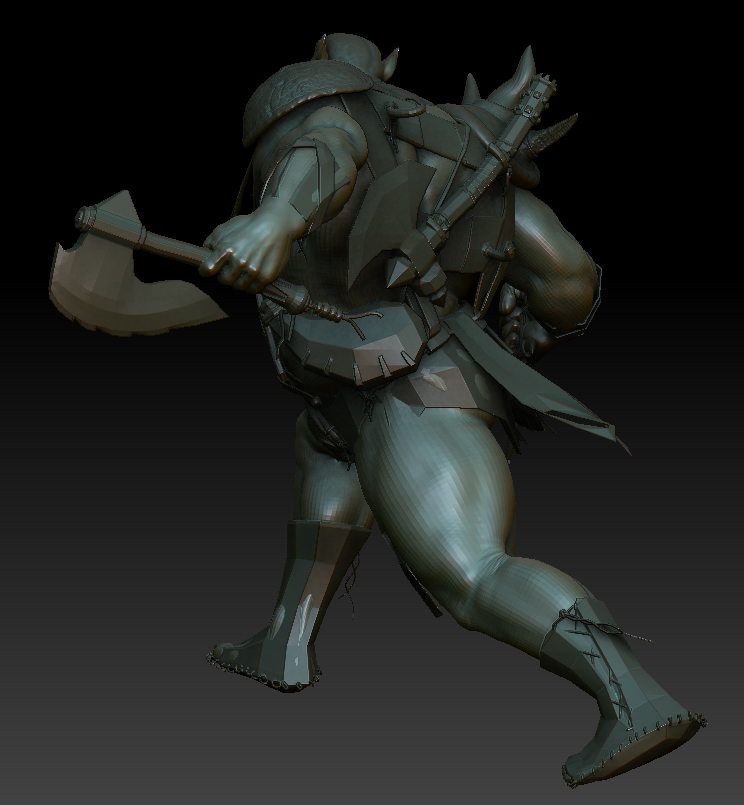
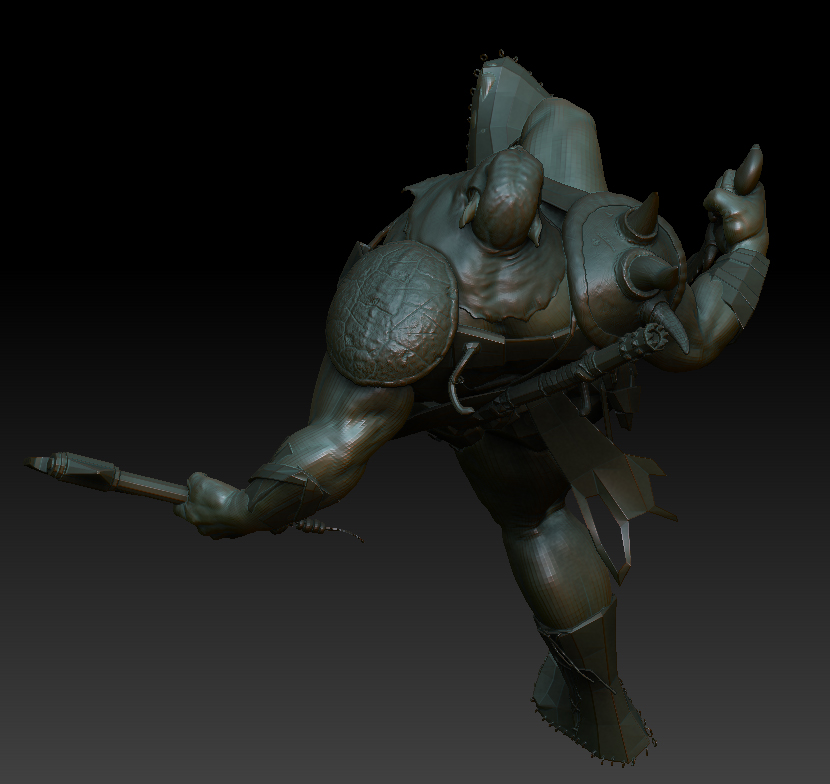
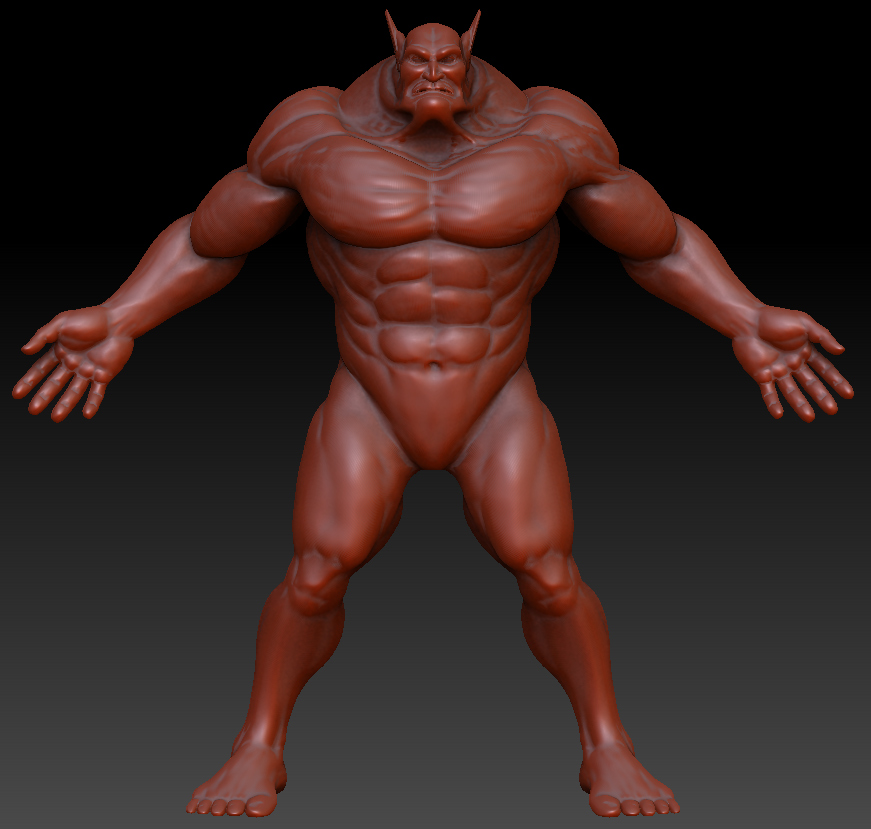
I placed the character in roughly the same elevation he will be in when I finish the final scene he will be in - rising from crouch and moving slightly upward on a cliff face - his pet bear will be beside him in a full lunge.

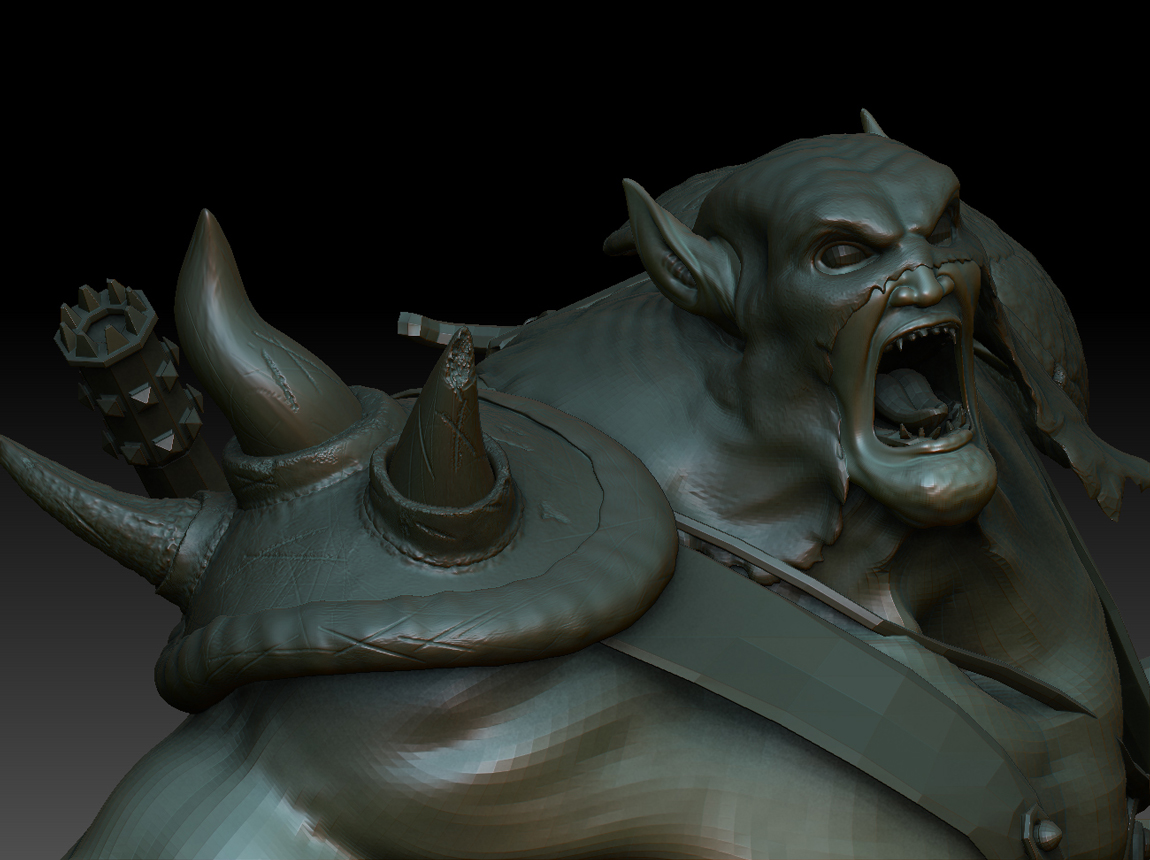
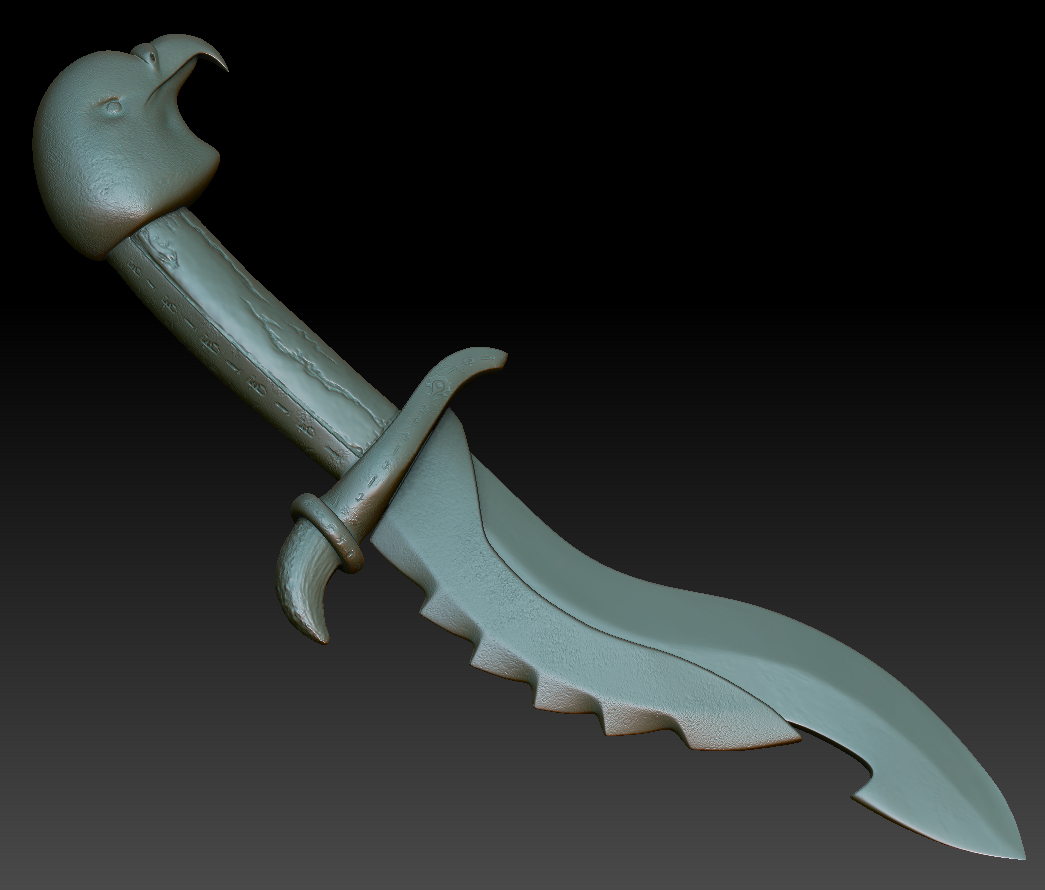
One item of note is the hands - they are both gloved, but the glove terminations will be under the armguards so they will not be visible. Lastly, there will be a great deal of fur trim on the items as indicated in the beginning of this thread. Oh, and the left shoulderguard is a sea turtle shell - he always marched around desolace and the sea turtles are in that area so it will be part of my “backstory” lol. And the knife has not been “weathered” yet - just got it blocked in for details for now - exploring how I can add more carvings beside the runes and glyphs.

Please be patient with the subtools that are going through other gemoetry - those will be fixed when I address those subtools - but I wanted any potential critiques with these in place before I dive into them all the way.

As always - critiques welcome:).

Rexxar_Progress_30a.jpg

Attachments

Rexxar_Progress_30b.jpg

Rexxar_Progress_30c.jpg

Rexxar_Progress_30d.jpg

Rexxar_Progress_30e.jpg

Rexxar_Progress_30f.jpg

Rexxar_Progress_30g.jpg

Rexxar_Progress_30h.jpg

I love this model you just did. Very interesting, can’t wait to see the final product.