I think he means you could cut from the chin to the bottom lip opening. It could give you some more room on the corners of the mouth, it could be nice if you know your character is going to open is mouth a lot.
I will be reworking the UVs this afternoon. Also, dsoellbuster pointed out to me in private chat that I had forgotten to use the smoothing brush in UVLayout (hence the “messy” part of his message) - will that done as well:). Thanks again for the pointers guys.
Not planning on reworking the back geometry though since it will be totally covered by cape and not planning on doing any animation that would remove that cover. According to the armor/fur on the concept piece I used for inspiration there are visible areas on the face, front/side torso, neck, arms and legs - hands and feet are covered.
This is already looking good Hosch. I’m enjoying following your process and workflow with this character immensely. I’m sure this is going to be outstanding when he’s done.
<input id=“gwProxy” type=“hidden”><!–Session data–><input onclick=“jsCall();” id=“jsProxy” type=“hidden”>
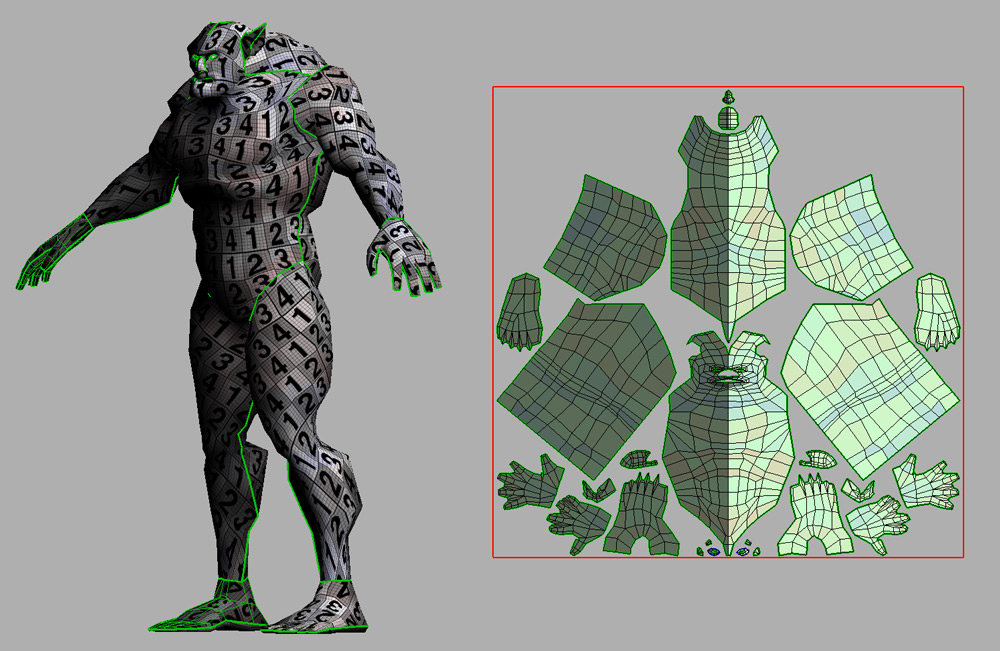
Based upon the items I completely missed as well as the suggestions by some of you guys I reworked the UV’s again. Here is the rework.
Next up will be my quick tests to see if I have the rest of the pipeline running smoothly in the new version of ZBrush before I do the detail work - will post my test results with settings.
WoodyLWG, I assume by your salutation that you too are a Tuefel Hunden. PM me some time.
Sorry - posted the wrong image - fixed link and reposted.
Here is the first test results - ran into a problem I have not experienced before ZB 3.5 R3 - researching now.
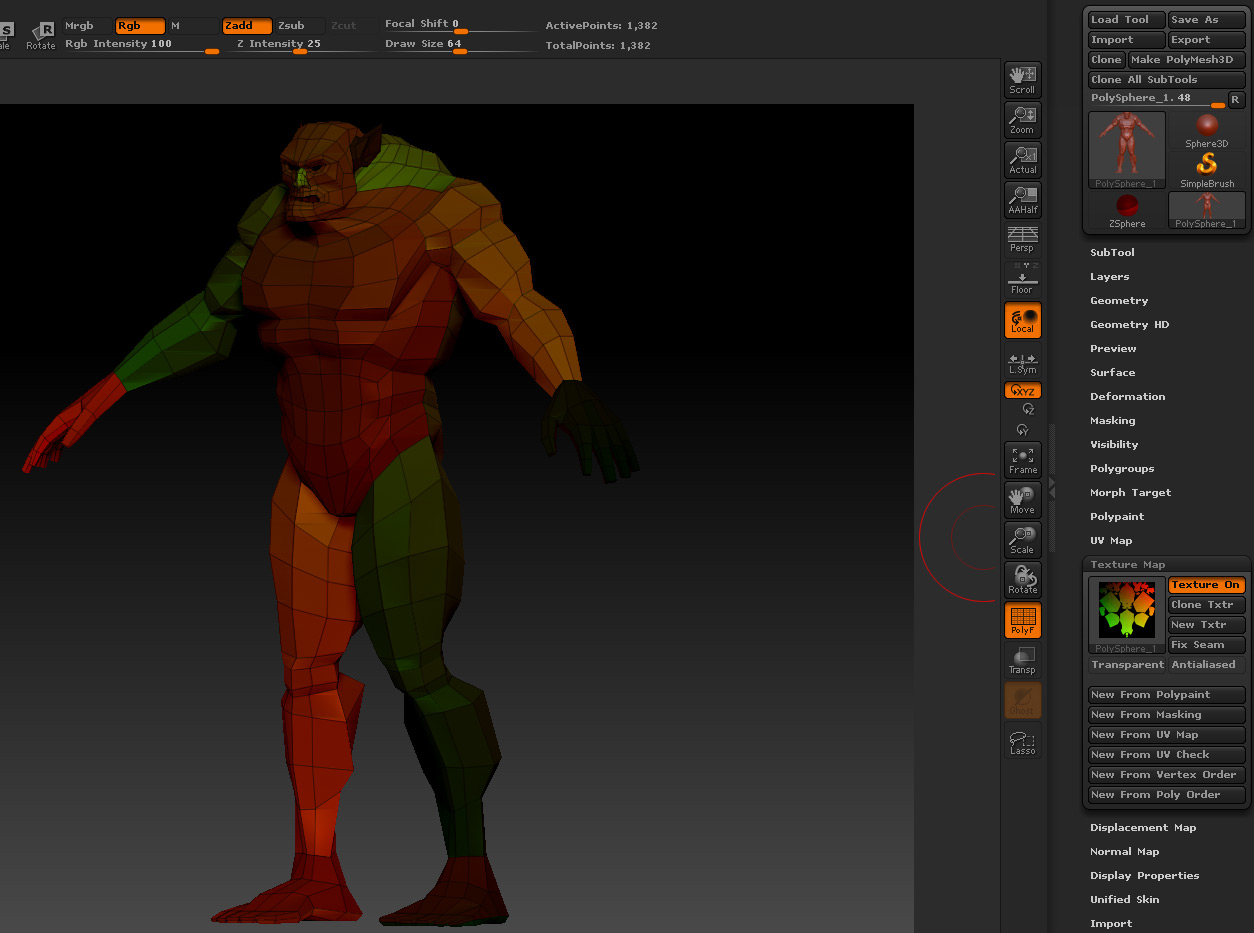
Here are all of the steps in my test (see images for reference)
- Take into ZBrush and apply new material from UV’s
- Export from ZBrush with texture button activated
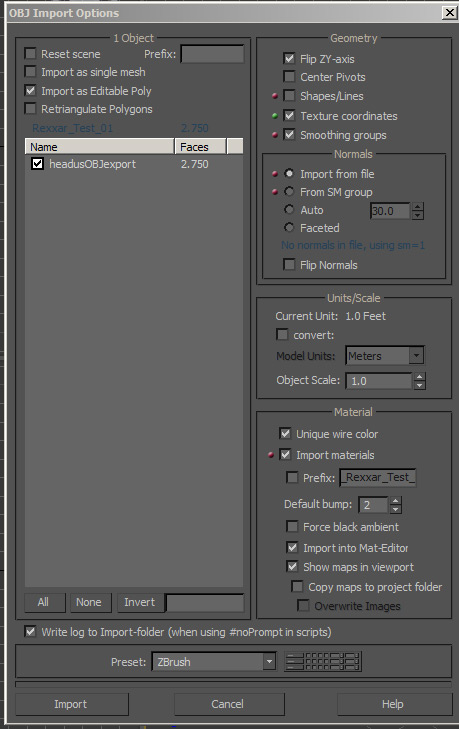
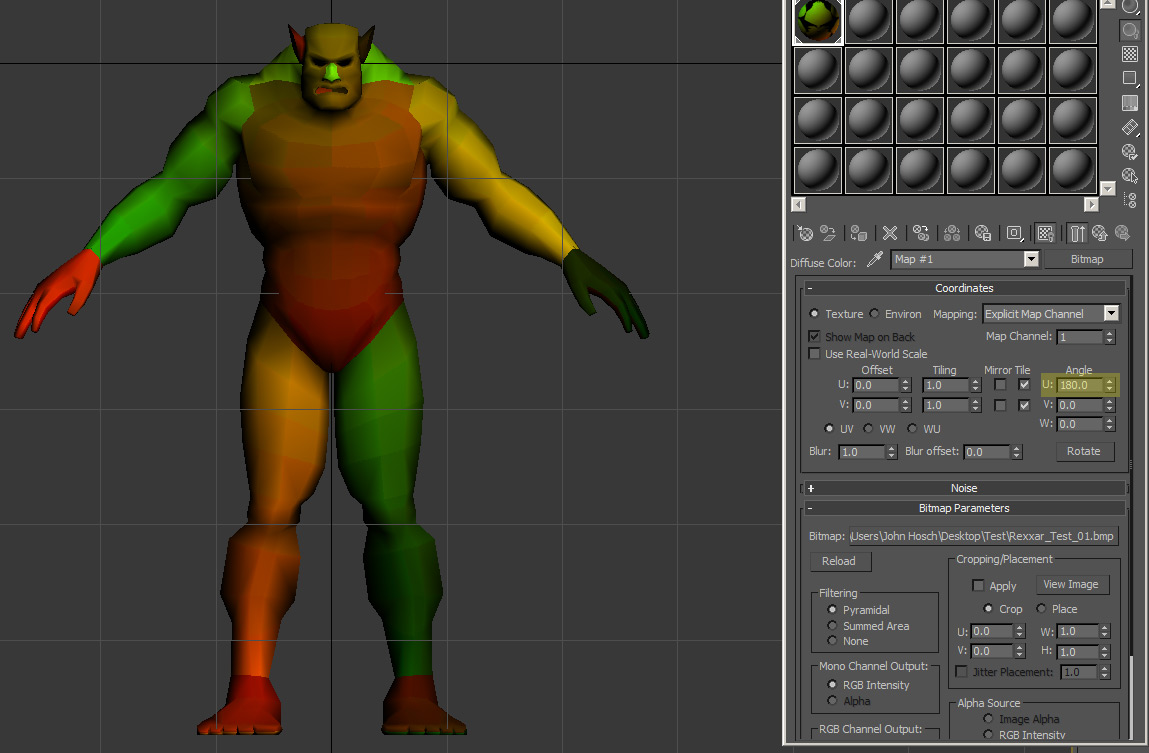
- Import into 3ds Max
- Adjust material settings for proper orientation
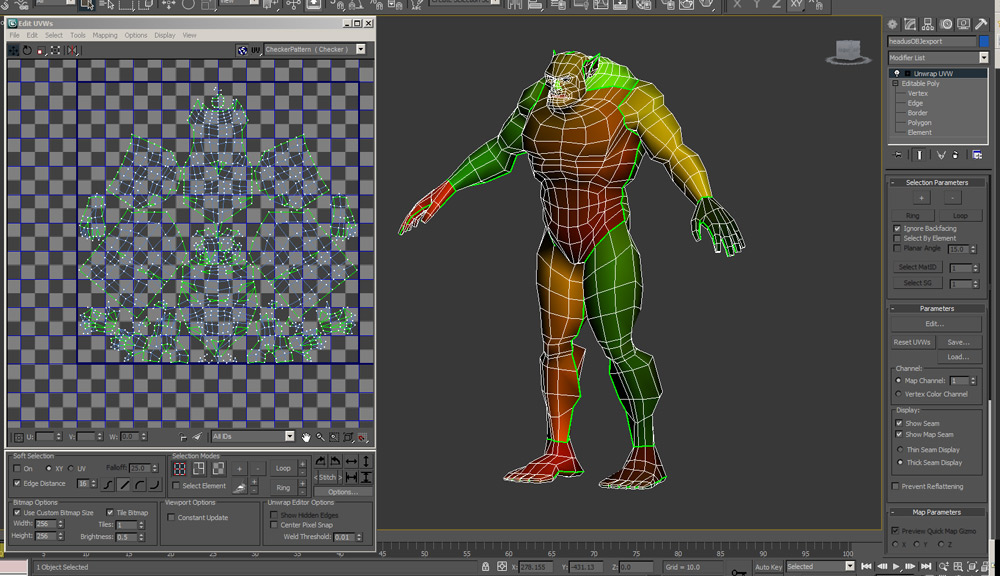
- Apply Unwrap UVW map (notice heavy grean lines indicate that all UV polys are separated - further note the UV edit screen on left that shows that polys are actually still in place but all verts are separated at poly level)
Never had this happen prior to ZBrush 3.5 R2 and now R3 - researching to see how to quickly weld all verts back together based upon a threshhold without having to do them all individually.
Note: this is NOT a vert problem at the OBJECT level so the subobject mode weld tool has no effect.
Image names coorespond with steps listed above.
[attach=171219]01_Step01.jpg[/attach]
[attach=171221]01_Step02.jpg[/attach]
[attach=171222]01_Step03.jpg[/attach]
[attach=171223]01_Step04.jpg[/attach]
[attach=171224]01_Step05.jpg[/attach]
Attachments

It was a very easy solution - just rusty with the native UV tools inside of max.
Inside of the max UVW Unwrap modifier I just selected all verts > selected options > set weld threshold to .01> right click > weld selected. Problem solved.
Not sure what caused it, but if I have learned anything working with these tools over the years - if you find a solution move on - don’t sweat it - could spend hours or even days researching something that is solved with a work around and delay a project:).
Well, as it turns out - there was an issue with doing it that way so I am researching it further, /sigh.
The threshold in Max will only go to .001 which is fine in all cases accept for a few areas inside the nose, ears and eye areas.
I looked into the System Unit Setup inside of Max, but so far have been unable to change the threshold max/min as desired.
I don’t want to have to manually weld these everytime I move from ZBrush to Max so I will attempt to locate the root problem.
UVLayout is a brilliant program, isn’t it? I used to /despise/ doing UVs, until I discovered that little gem.
Your project is looking good so far. I only have one crit, and maybe it’s a bit late for it at this point. But your UVs are a tad inefficient. You have /alot/ of empty space on your texture map. I’d recommend shifting the shells around to jam them in tighter, and scale everything up a bit to get more detail in there. Also, not sure exactly what you have in mind for the final model, but mirror everything you can possibly get away with. If this mesh is mainly gonna be anatomical detail, with armor and accessories over top, you could probably get away with mirroring the arms, hands, legs and feet. Depending on seams of course.
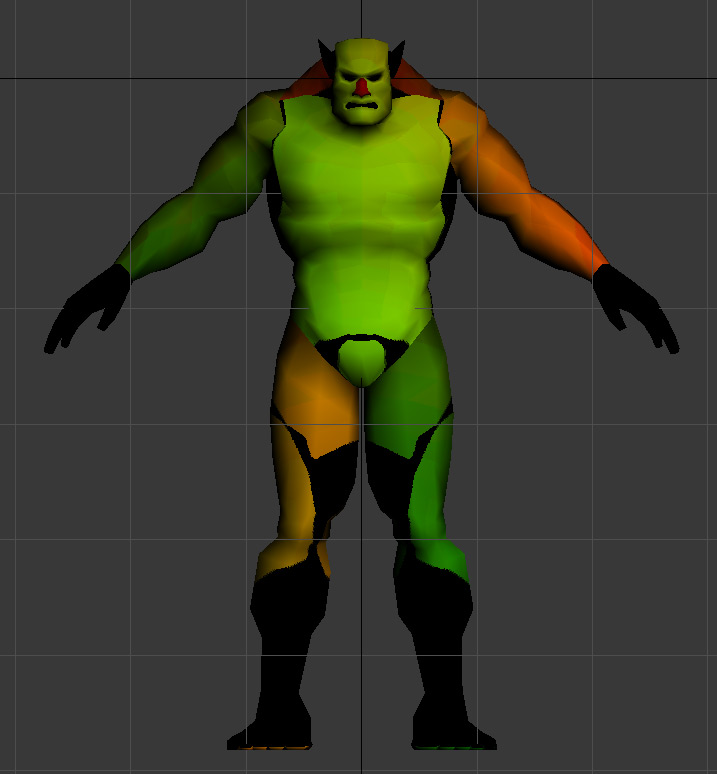
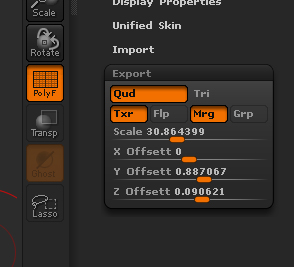
Glad I looked into it - problem solved.
Just needed to click the “Mrg” button (to merge the uvs) in the export rollout before I exported the model from ZBrush. I don’t remember ever having to do that before these last two versions /shrug. Moving onward with next tests:).
[attach=171232]01_Step07.jpg[/attach]
Attachments
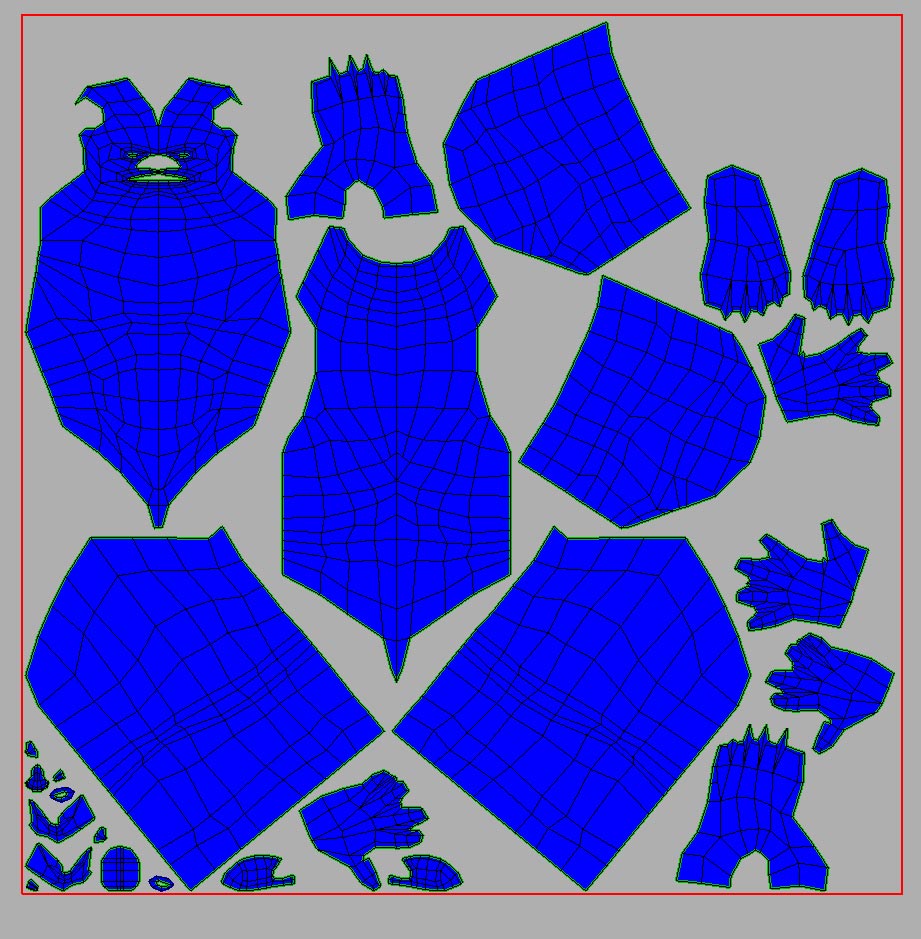
Count_Zero - I see the traditional wisdom in what you are saying as that was the way I was taught back in college. I was tempted to do that since the first pack in UVLayout, but was unsure if it would cause any issues. Considering they are ALL scaled uniformly, I am thinking it will cause no issues at all so I am going to try it. Here is the new map with much more efficient usage of the UV space - all polys are blue of course because of the compression occuring. Thanks for the tip. We shall see:).
[attach=171235]Rexxar_Progress_004.jpg[/attach]
Attachments
Wow well done Mr. Holmes. Funny though that this doesn’t happen to everyone …
Elementary, Watson … elementary:).
Running first displacement test now - doing it on DPSubPix 4 so it is taking a bit.
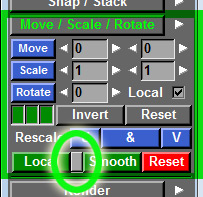
if you grow tired of the ‘all-blue’ scaled up colors, you can set them back
to local by selecting each shell you want to affect, and clicking the little
grey box in the ‘Move / Scale / Rotate’ panel.

[attach=171285]set-local-scale.jpg[/attach]
Attachments
Thanks for the tip - will do that when I go in to tweak my UVs a bit more.
Right now I am working on my settings for my displacement tests. I had all this worked out last year when I did a character, but now with everything being new versions it is back to the drawing board, heh.
Using VRay, Max 2010 and ZB.
Actually the program reset them when I reopened them, but its good to know how to do it without a close/reopen. Thanks.
Search as I may, I am not finding any proper displacement workflow settings between the ZB 3.5 R3 and Max or Max/VRay. Anyone found any links regarding this?
Well, after a number of hours researching displacement exports under the new version of ZBrush I have decided to crank up the toons and dive into some sculpting - enough tech stuff for today. Maybe I will get lucky and run accross a link that explains ZB > Max under the new versions by the time I need it /fingers crossed.
Ha ha ha you sir are a quitter … just like me, i gave up like 2 days ago.
Hope you are as lucky as me and you don’t have a deadline in the next 2 weeks for a finished max render of a ZB Model.
Well looks like ZBrush displaced us a little …
But hey sculpting is still a ton of fun!!!