ZBrushCentral

Warhammer Squig 'speed asset'(3-day challenge)

This was a project I did last weekend.

EDIT - Sketchfabs Added Below

The goal: create an animated character from scratch, from a single concept image to in-game(UE4), in 3 days.

Day 1 - sculpting in Zbrush(high-poly creation)

Day 2 - retopo/UVs/map baking/texturing

Day 3 - rigging(CatRig)/skinning/animation/in-game

Some breakdowns to follow…

Attachments

Title_zpsrjwu4djq.jpg

Title_zpsnjimueqp.jpg

Great job Danny:+1:

@boozy, Thanks Mark. nice to create squishy things after all those armour-y bits… :slight_smile:

Day 1 - Sculpting in Zbrush.

Everything starts in ZB…usually from a trusty sphere.

day1_wip1_zpskdudz63p.jpg

‘snakehooking’ the forms is always the first port of call. Clay Buildup and Dam Standard are then the 90% brushes. Zspheres, custom insert brushes, and dynameshing to augment the sculpt.

Cool:laughing:small_orange_diamond:laughing:

A few pleasant hours of sculpting later. Often-times Bob Dylan accompanies the proceedings…

day1_wip2_zpsrk6r5vzm.jpg

The aim here is speed to quality ratio. A trade-off between time spent(avoiding OCD noodling), and passable quality for the final in-game asset.

Day 2 - Retopo/UVs/Baking/Texturing

With the sculpting complete(this is still non-destructive and can be worked on all the way through the pipeline with only the need to re-bake the normal map is necessary) it’s on to the next stage: retopology. In keeping with the search for speed in the pipeline I decided to see how far I could push auto-topology for an organised [animatable/deforming]mesh.
Staying in Zbrush I used Zremesher in conjunction with its localised retopology feature using the topology brush.

Although the result isn’t ideal - high vert count and spiral loops - I could make it work and know that it wouldn’t be hard to rebuild and optimise if I chose to in future projects. Plus, as character tri/vert counts are constantly on the rise in modern engines this isn’t nearly as much of a problem as it used to be.

day2_wip4_zpstaejved8.jpg

Here’s a video I made recently demonstrating the technique:

<iframe src=“https://www.youtube.com/embed/FGYB9h9QhA8” allowfullscreen="" frameborder=“0” height=“315” width=“560”></iframe>

day2_wip1_zpskmnhsmj2.jpg

Nice! Also thank you so much for all the knowledge you share! (I love the Quickies videos!)

@mytholon, thanks, man. Glad you’re finding them useful.

Day 2 - Retopo/UVs/Baking/Texturing

For UVs I always use a combination of 3dsMax/Headus/Zbrush. Depending on the project I’ll use one or the other or all 3. With the Styx plugin jumping back and forth is so painless that it’s like having all the tools in a single application.

day2_wip2_zpse1giq7ah.jpg

Day 2 - Retopo/UVs/Baking/Texturing

Baking maps in Substance Painter is about as simple and straightforward as it gets. and because it’s synced(MikkT) to UE4(my destination engine) I don’t even have to spend time testing it out, I already know it will work.

Plus, for me, working in this way(WYSIWYG) in real-time, in the viewport, saves so much time by not jumping back and forth/importing/exporting. It’s the only way to work. :wink:

day2_wip3_zpsvjpwka9c.jpg

Great walk through Danny.:+1:
Anything that spares us ocd noodling is a fine thing.
Getting clean topo fast around eyes using zremesher is the Holy Grail with regard freedom from noodling.

Have you had good results with human eyes and getting crisp loops on lids?

@boozy, thanks Mark. Yes, indeed, the example above was around the eyes. It’s very quick to do and gives great results. :smiley:

Texturing was a very fast and simple process in Substance Painter: just painting several skin value variation layers and masking between them whilst building up the tones gradually. the same as what I’d usually do painting skin in ZB…but with layers and masks. :wink:

And that was day 2.

Day 3 - Rigging(CATRig)/Skinning/Animation/In-Engine(UE4)

day3Wip1_zpsvxc0a8us.jpg

day3Wip2_zpsnjevzuvd.jpg

Day 3 - Animation

As I only had a few hours to complete the animation it is far from polished. Animation usually takes the most time in the pipeline, but I got results that I considered acceptable in the time I had available, as I wanted to stick to my self-imposed deadline.

The cycles I created are: Idle1/Idle2/Walk/Jump/Attack/Taunt/Death

day3Wip3_zpsmeg23i3e.jpg

Anims_Board_zpsiaxbvfsa.jpg

<iframe src=“https://sketchfab.com/models/d4d8408216334a5b9907a904c6947c61/embed” allowfullscreen="" mozallowfullscreen=“true” webkitallowfullscreen=“true” onmousewheel="" frameborder=“0” height=“480” width=“640”></iframe>Warhammer Squig ***39;speed asset***39;
by musashidan
on Sketchfab

<iframe src=“https://sketchfab.com/models/034b1e01a6c84d7d894073a6d25eff0e/embed” allowfullscreen="" mozallowfullscreen=“true” webkitallowfullscreen=“true” onmousewheel="" frameborder=“0” height=“480” width=“640”></iframe>
Squig Animations
by musashidan
on Sketchfab

Day 3 - In-Engine(UE4)

With everything finally finished it’s time to bring the assets into UE4, a very smooth process in comparison to years past. :slight_smile: It’s just a matter of exporting the mesh and bone hierarchy(no controllers/helpers/constraints/etc), with animation unchecked, for the skeletal mesh. And the bone hierarchy alone with animation checked for the anim cycles.
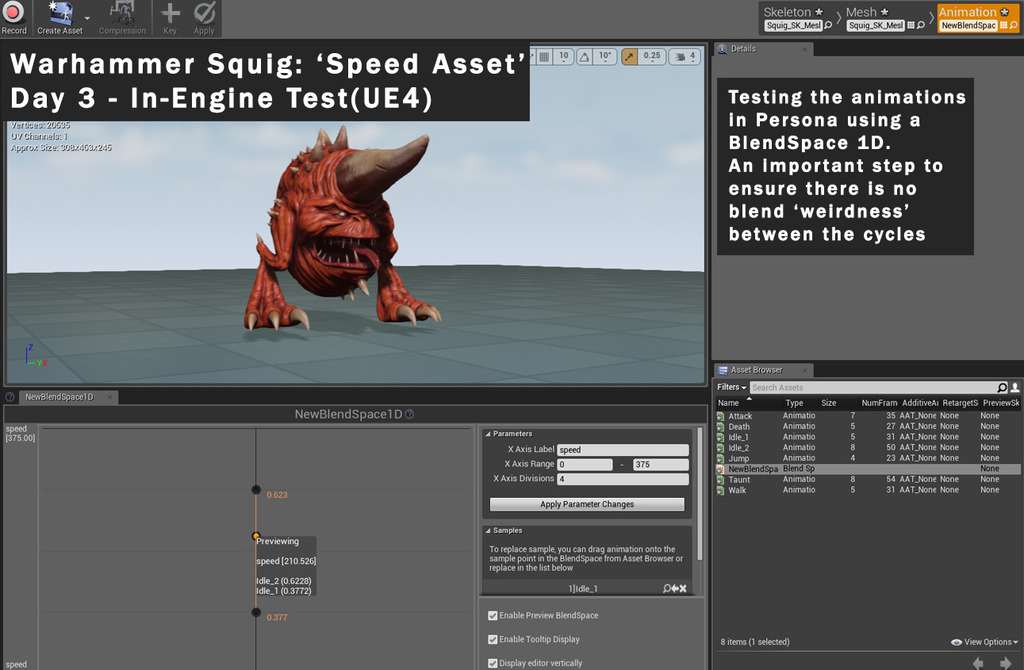
It’s important that the rig doesn’t contain multiple hierarchies(root nodes) as UE4 is looking for a single root. I like to export each cycle to its own .fbx file and test them out in Persona using a BlendSpace 1D to check the blending.

day3Wip7_zpsbximamug.jpg

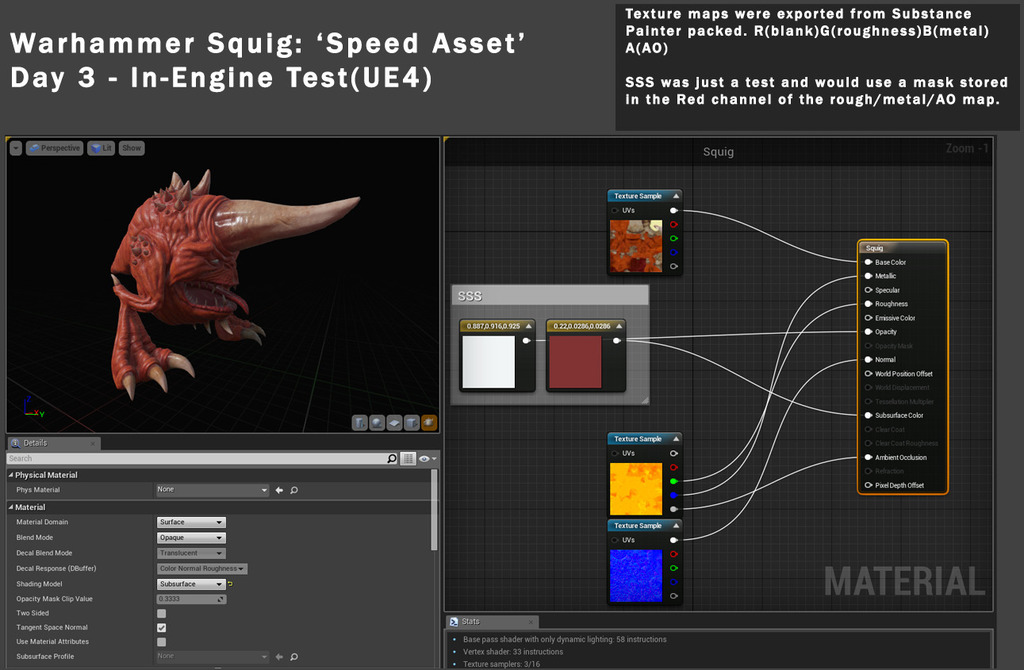
Then I import the texture maps and apply them to a new material. It’s important to uncheck sRGB in all linear maps(rough, metal, normal) and set roughness to linear colour. UE automatically detects the NM and sets up the gamma/compression on import. Then just plug them in using the packed channels from Painter. (channels can be viewed in UE4 or edited in PS if required)

day3Wip6_zpsxsyq2dvt.jpg

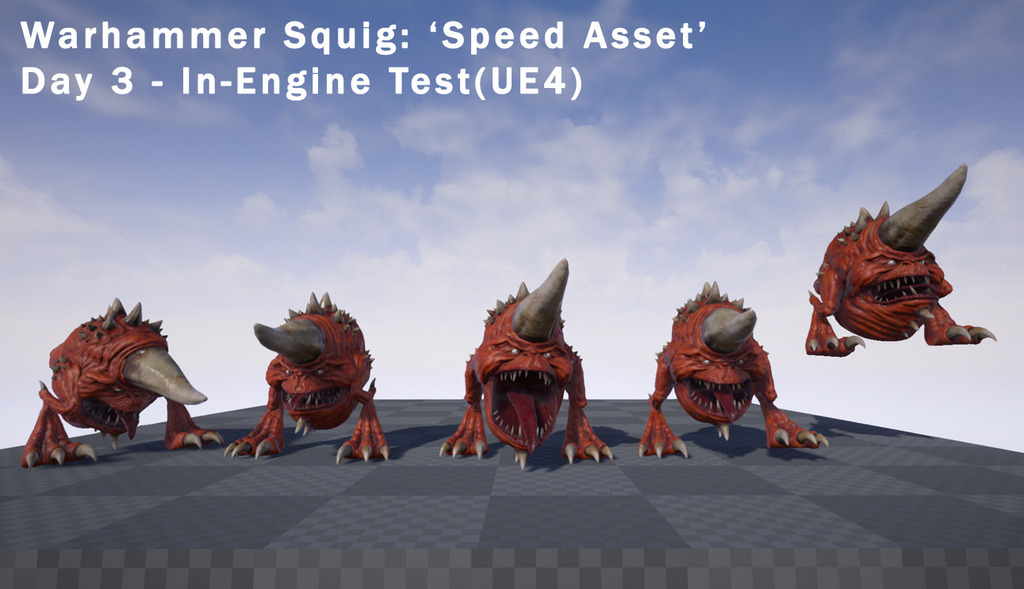
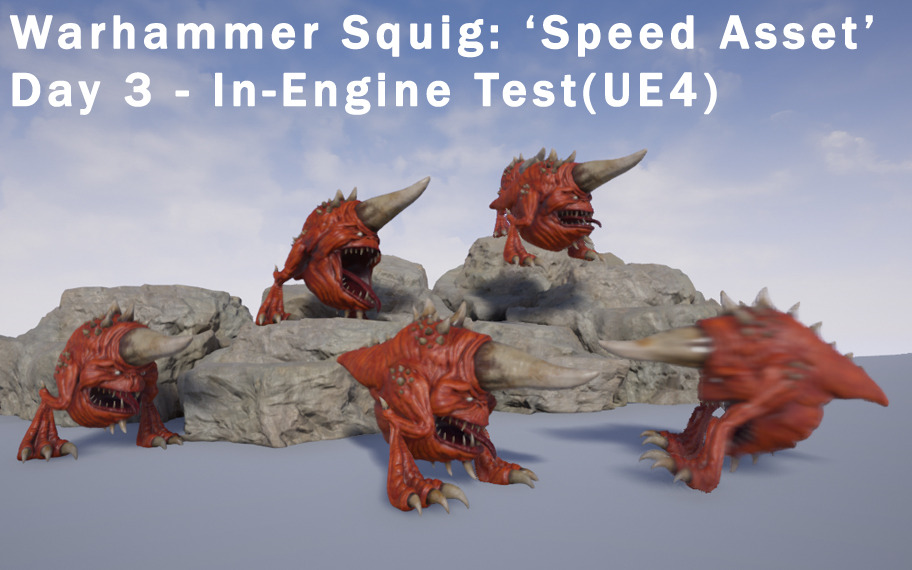
And the lads ‘acting the bollcks’ in-engine…

day3Wip4_zpsrjs3kx0l.jpg

day3Wip5_zpskyhrejrr.jpg

Hope this breakdown was helpful to beginners, lurkers, or the casual curious on-looker. It bloody better be because it took me longer to do this then the f**king asset!! :):slight_smile: