ZBrushCentral

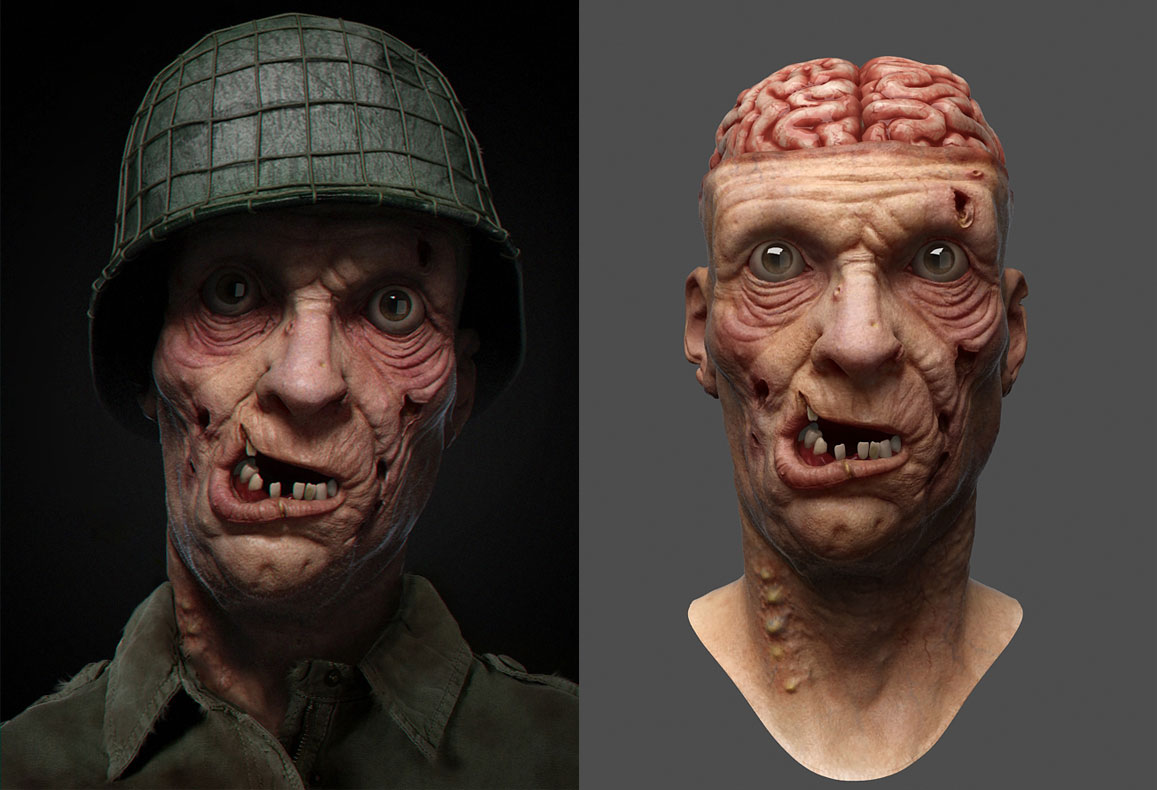
V-Ray skin setup

I started using displacement in '05 while working in the oil and gas industry for relief maps and it works great every time I use it … accept with maps exported out of ZB … so I am going to give this one more stab /bangs head, lol.

Using the exact set up you have I get a blown out model before I apply the map and a shrunken model after I apply my displacement map.

Upon creating my displacement map from ZB I am using the following settings:

  1. Adaptive
  2. 3 Channels
  3. 32 Bit

Exported as a TIF file - the only setting I am changing is that I selected V Tile Flip since I did not flip it upon export.

The only other setting I can think of that might be on the max side is in the VRay settings panels or with the unit set up, but I have tried all of the unit set ups so it is likely not that.

Any ideas on where I might be going wrong?

I’m not a Very user, but I really appreciate your spirit of sharing. Thanks buddy

Hosch i used all default setting both in zbrush and max vray.
My unit setup is generic.
Just copy my settings and i am sure it will work.

I really love your model here. even the low res one .
I got a problem .the big size of rendering casuse the result different. I rendered a 800x600 pic . the setting looks correct . but when I enlarge the size to 2048 plus , the setting looks wrong .it is like SSS scale changed . so I am comfused if there r some setting to control this .I used vray for rendering

Thanx Montyband for the displacement settings. although i found other tuto. bt thanx again… :slight_smile: :+1:

Montyband - just wanted to thank you for the thread - it gave me a great starting point for learning the VRay skin shaders on my project which is still a WIP, but getting there.

I never was able to get the displacement to work even with an experienced VRay professional assisting me so not sure what is going on there. Probably some small thing since my maps worked perfectly in Maya VRay, but not with Max VRay - so some small translation we are missing it seems.

Still, thanks so much for sharing.

I believe I have found how to get perfect displacement results with maps generated from ZBrush and used with Vray in Max. This is what I have found works:

The first thing to consider is the DispMap settings from ZBrush. The maps I created had adaptive, smoothUV, 3 channels and 32bit checked on.

The second thing to consider is the units you have chosen in the units setup within Max. This will affect how the AD factor is used. I will explain this more a little further down.

The next step is to generate the same displacement map in ZBrush, but not with the intent of exporting it. Instead, clone it and grab the AD factor from the Alpha palette.

Now in Max. Take your mesh and apply a turbosmooth to it, followed by a Vray Displacement Modifier. Here is where the units and AD factor will be important. If you use centimeters like I do, the conversion and settings are as follows:

Let’s say the AD factor is 0.0252. If using centimeters, the Vray amount would then be 2.52, and the ahift would be the negative half of the amount. When using centimeters, you must shift the decimal over 2 to the right. If you are using millimeters, then the above example would be 25.2 and would be 3 decimal places to the right. I suppose if you were using meters it would be the AD factor as is from ZBrush.

I would also like to note that I like to take the Tiff exported from ZBrush and bring it into Fusion and save it as an EXR with ZIP(16 lines) compression. It greatly reduces file size and has very little quality loss.

I hope this helps.

Thanks for those tips it’s definitely worth trying.

props for sharing this!:cool:

A lot of time i didn`t post here, but i need to thank you man! this is so cool :+1:

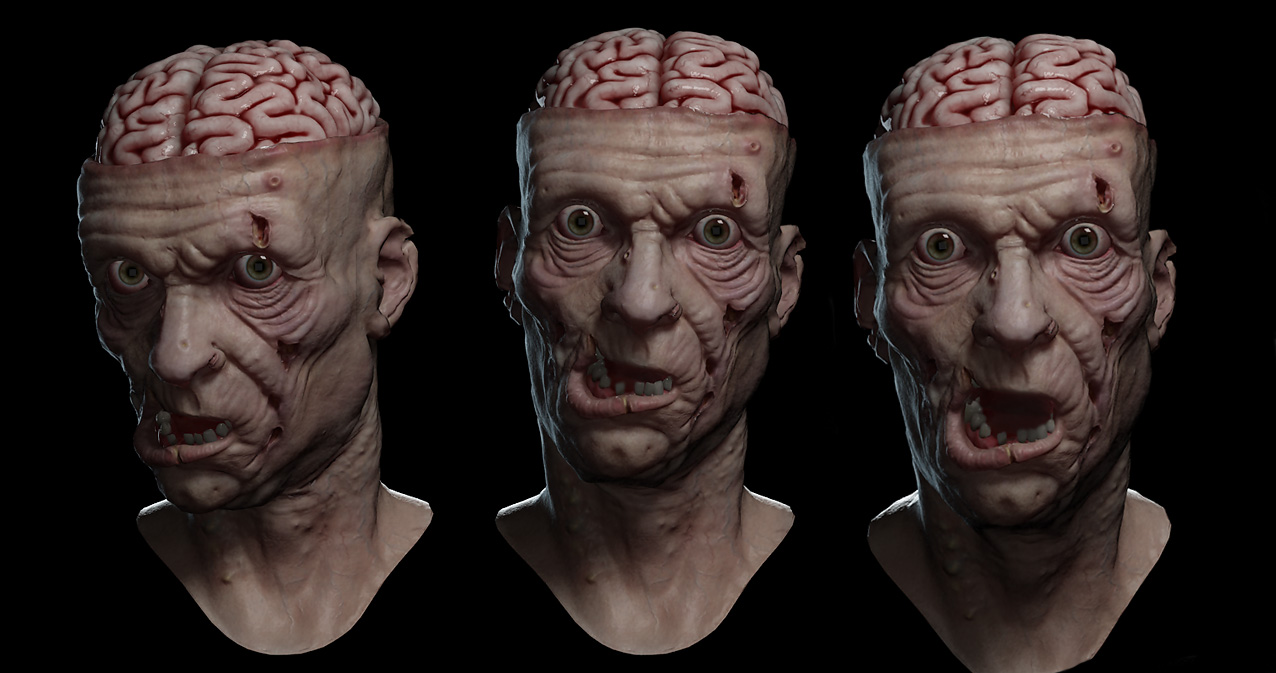
I am glad you like it here is few more variations.
thumb.jpg

Attachments

test.jpg

Great stuff! I would love to see some fluids in his eyes and maybe even add some drool but nitpicking aside it’s awesome!

Great Work man, which shader you used for Eyes?

love the detail in your model and maps.

Thanks once again, AR-MAN it same shader for both face and the eyes, it’s sss2.

thumb.jpg

Attachments

lineup.jpg

Awesome work my friend! It looks great and sss2 is just spot on. How long did it take to render this ? I also love the fact that the final image is colder then before!

Its good that you are updating this thread. 5*

o man, i don’t know how to thank you! i’ve started learning vray for my next character, i wanted to render it very realistic, but my time being very limited, i thought i’d never be able to achieve it…you just saved me soooo much time!!
THANK YOU SOOOO MUCH :slight_smile:
i’m still in the process of sculpting my character but tested just an export of my subdiv L3 without disp or colour or anything, just your shader and your settings, and already, im soo loving the result!
It gives me a great motivation to finish it!!
here is the quick test:
[matt_SSS_test1S.jpg]

THank you so much! it’s chrismas all over again haha

your work looks stunning by the way, but im sure it’s already very obvious to everyone haha
Abe

Fantastic work!!! :+1: :+1:

Wow man, awesome work!!! Congrats!