aahha!! it´s comming!! really great model!
Naaaw… it’s a big human with alien head and claws. 
Model looks fine
On your fishnet request:
How about using an alpha brush with the pattern. Sculpt it in a new layer on top of the torso and separate the mesh difference into a new subtool later. Just an idea.
Progress on this is cool to watch
A couple of things id point out based on your latest pics would be that he only has 4 toes, and his hands seem quite small in contrast to his muscular arms and body. Im no expert on the anatomy of a predator, so i dont know if they only have 4 toes or not. But they are only small crits, its coming along nicely.
The muscles and fishnet look great! I’m getting the feeling that the head is a bit on the small side though. In the movies their skulls are always pretty big.
On your fishnet creation method: I thought about it when planning my own predator model, and decided to make a tileable B&W texture in photoshop, import that als alpha, use that to mask the skin (that would give me the freedom to create non-symmetrical patterns) and then extrude the whole thing as a seperate subtool with depth. If you extract from a lower subdiv, and then subdivide that subtool again with smooth on you should get a nice rounded effect. Throw some tweaked surface noise over that and voila!
Thanks a bunch for the comments guys…
AndrewJarvis: Glad you could tell.
arthurduque: Thanks dude! Glad you’re enjoying it.
Suzume: I actually tried using the “make 3D” button on a layer trying to get the fishnet (I think that’s what you were talking about). The result almost worked, but the new mesh ended up being really flared out with a lot of aliasing, and it would have taken to long to accurately clean up.
If there is a way to increase the resolution of the new mesh, there may still be hope; but as of yet, I have found no way of doing it.
snakes23: The predators do only have four toes in the front. They also have a fifth toe on the inside of their feet, but I have’nt added that yet; because to do it well would require a change in the mesh, and I’m saving that for last.
dobbie + snakes23: The head and hands may be a tad on the small side. I will probably scale the hands up slightly, but I don’t know if I’ll do the head or not. I tried resizing the head before but when it got much bigger than it is it ended up looking awkward IMO. so… we’ll see.
dobbie: I tried your advice, and it got me pretty close. I’ll need to do a bit of playing around with the settings, but I think this might be the way to go.
Thanks a lot.
PS: that doesn’t mean that I don’t still want to hear any additional suggestions. So anyone else can still feel free to suggest away.
For the fishnet, I would go to a subdivision level on the body that has a lot of detail, but nothing too high, mask in the fish net and extract the mesh. Then I’d tool with it a bit and bring it out away from the body. At least that’s a way of doing it.
Sorry, Didn’t notice that Dobbie said practically the same thing, but with a more technical approach. Technical can be a very good thing.
Thanks a lot for all the praise and advice guys! I really appreciate it.
Here’s the latest update…
It’s a semi-rough knockout of the wrist computer. The lid/ cover was done very quickly after the rest of it had been finnished, so it doesn’t look quite as good.
Hope you like it.
[ ]
]

PREDATOR!!!
Love your model!
Nice shape and amazing detail!
Only one critique—I think the head is a little bit small, and hands are thin, just from my opinion.
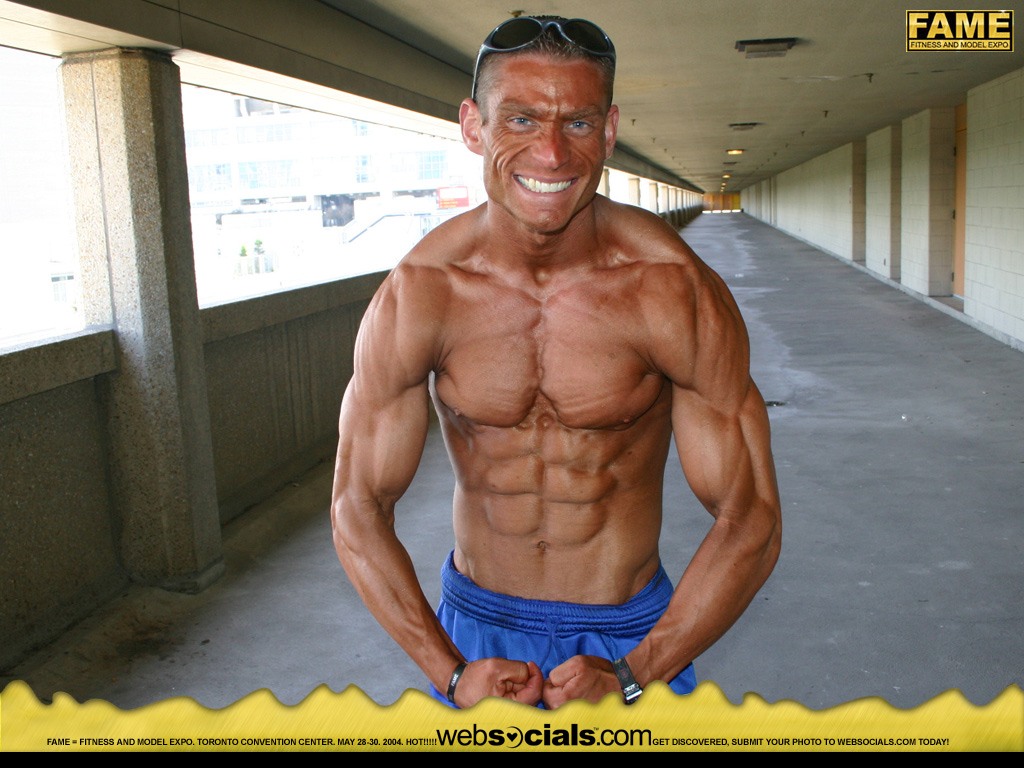
OK I have a suggestion about the forearms, but because it is hard to explain I have found a guy who has no fat and water and you actually see the muscles and where they start.
[[attach=206131]forearms.jpg[/attach]](javascript:zb_insimg(‘206131’,‘forearms.jpg’,1,0))
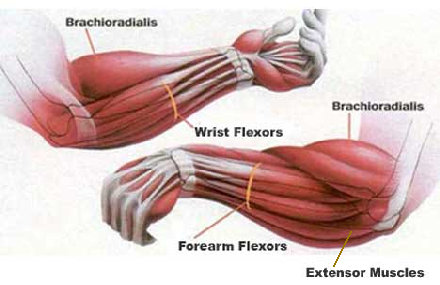
Look at his forearm muscles specifically, the one that makes the bulge on the outside: brachioradialis, attaches on the upper arm bone, quite high on it also.
[[attach=206132]major-forearm-muscles.jpg[/attach]](javascript:zb_insimg(‘206132’,‘major-forearm-muscles.jpg’,1,0))
I hope this helps.
I really like the way you have done the ribcage muscles.
Keep up the good work.
Kostas
Attachments
About the fish net request you have.
-
Create the initial repeating shape in your application of choice (mine is 3dsmax).
-
Duplicate and weld until you have a sheet of new pattern net (I would use the “Symmetry” modifier probably, depends on the pattern)
-
Two or three options here:
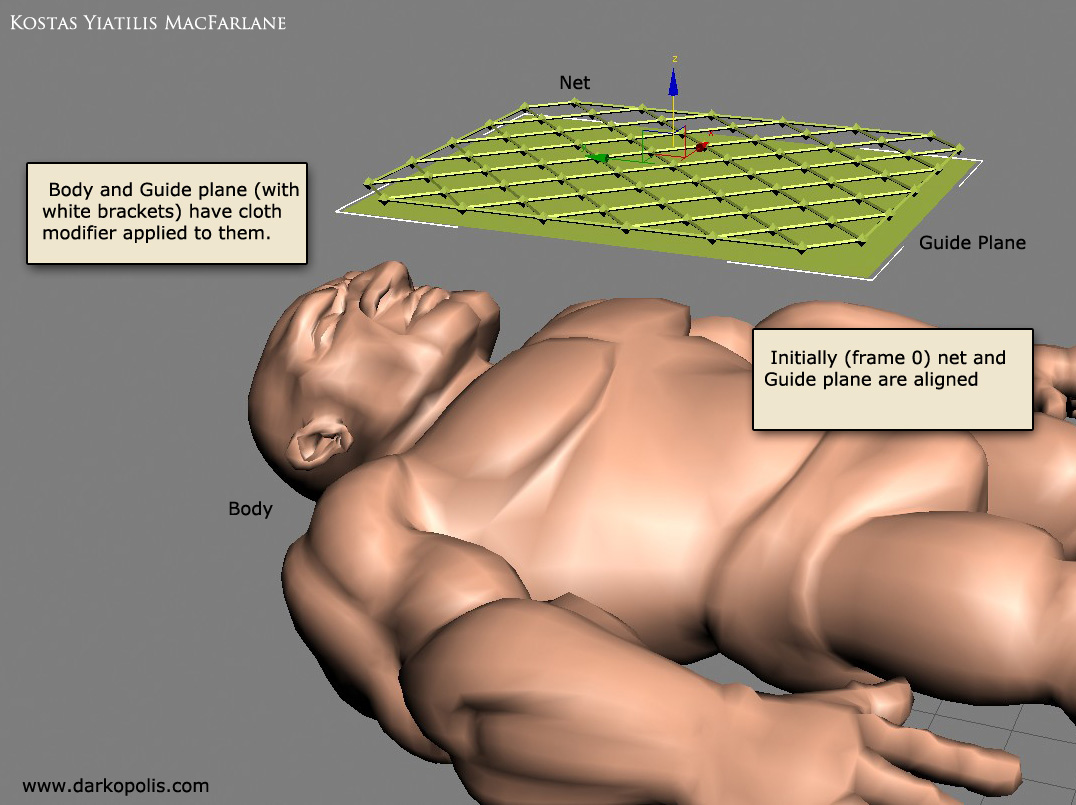
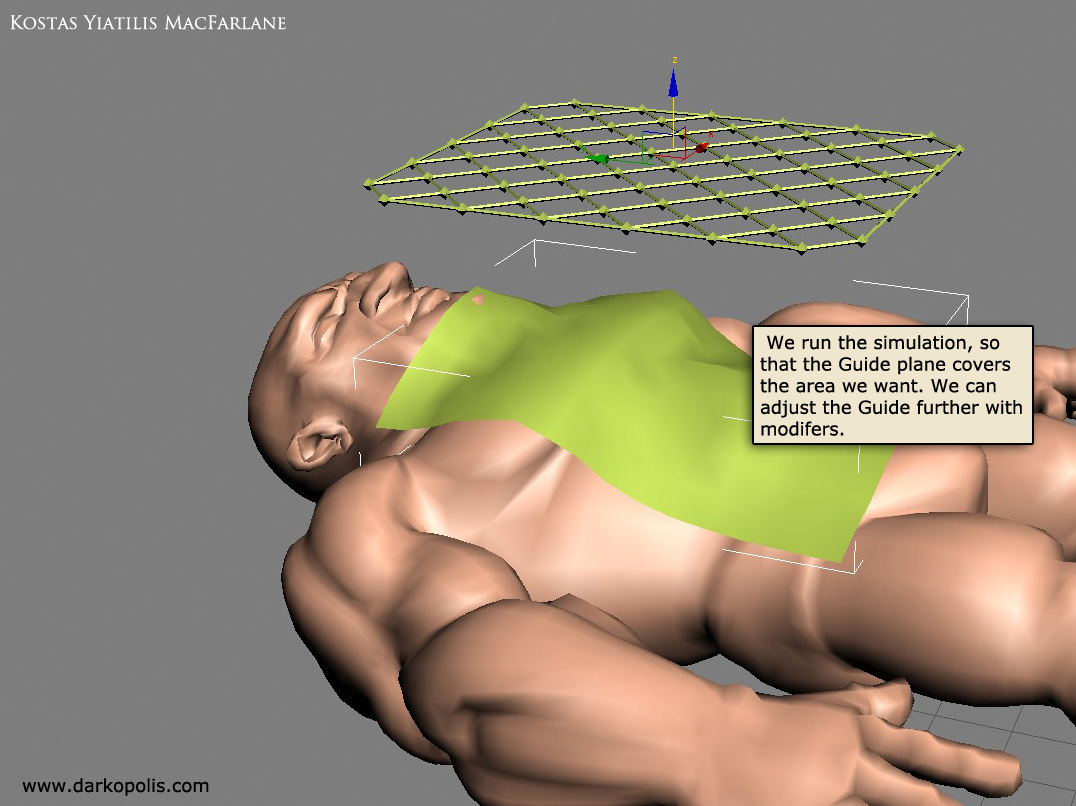
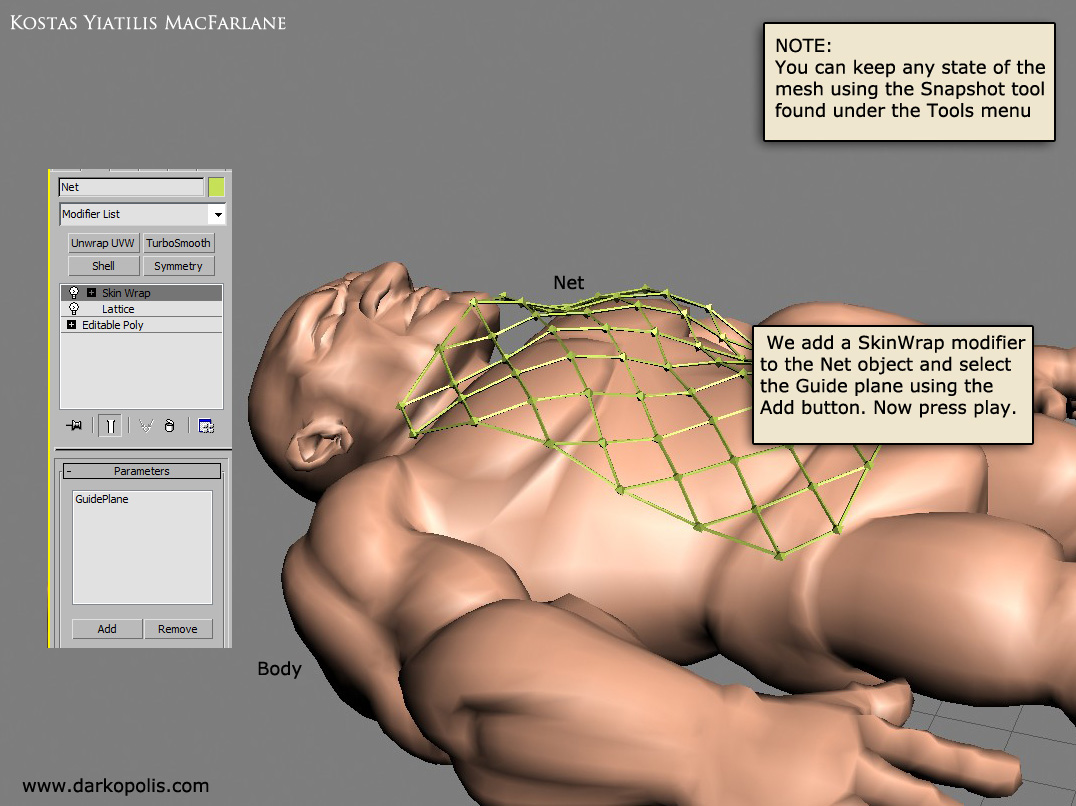
a) create a simple plane and use the Cloth modifier in 3dsmax to conform it to the base mesh of the predator, then use SkinWrap modifier to make the net follow, these are the steps:
[ ](javascript:zb_insimg(‘206135’,‘03.jpg’,1,0))
b) bring the net sheet into ZBrush and manually conform it onto the body or
c) which will probably produce more artifacts than required and a bunch of stray vertices, re-project the net onto the body in zbrush
In any instance, modeling the sheet outside ZBrush will be faster and hae less polygons, it will also be usable in the apps without a problem (even you conform it in ZBrush)
The final method which I will discuss is doing it in ZBrush, you just have to make the repeating pattern alpha, paint it on your model and then use the extract command.
The problem with the mesh is that the topology isn’t great, it has more polygons that will usually be required and the other downside is that it might bust your b@llz to make the pattern seamless.
Finally I will say which one I would use and why:
a) would be the best option, because once the nets (front and back have been welded at the sides) we can also weld the planes-guides and have the net and a “driver” object for cloth simulation in the case of animation or posing.
This method (pretty common in studios I would like to believe) was also used on a character here on ZBrush central (Golden Axe) in order to quickly make a chain male that conformed to the character.
Attachments
darkmummy: [sigh]:o Yes the hands and head are a little small. They will be re-sized in a future update. Probably the next one.
koyima A: Thanks for the pics. I added it to my anatomy ref folder.
koyima B: Thanks again for the suggested technique. It’s a pretty neat approach.
Hey all.
I just wanted to share a variation of the flatten brush that I made while doing the wrist-comp. Hopefully you guys can make use of it.
[ ]
]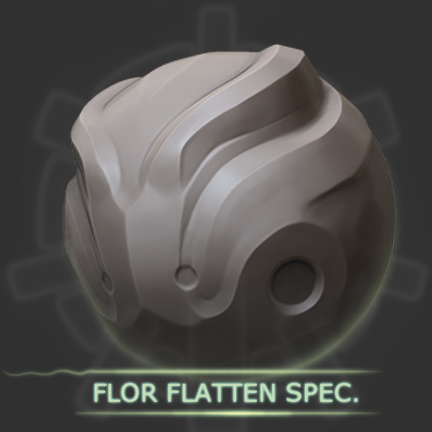 This Brush has depth and backface masking applied, in such a way that it preserves fine details, and avoids spilling over the most minute of edges, even when using a disproportionately large brush.
Also because the flatten brush both pushes the mesh down, and pulls it up at the same time; there is no need to worry about getting an unwanted concave/ convex effect, no matter how long you use it over a given area.
Thanks man, will test it out now.
Cheers
Kostas
pardon me for the noob question, but where do you install new brushes?
You add them here if you want them to load at startup:
Pixologic\ZBrush\ZStartup\BrushPresets
Works great, thanks!
thank you much!
Works great. Hard surface is easier to work with. It also gets rid of the surface uglies without smashing your sculpt all over the place. Thanks allot. Great work.
Much appreciated 
Thanks a lot guys.
Very glad everyone seems to be finding the brush useful so far.
From now on I think I’ll start posting more of the resources I use/ create. You guys can feel free to take anything that looks useful.