Alright you shameless plugger 8).
What are the rough figures you are talking about? How much would a piggy as depicted cost? Cost as in effort. Size like 3 feet long and proportions accordingly. Routed in wood and glued up in a similar process that beasty would be quite expensive. I’d say it would be a week project till it goes out of the door perfectly sanded and finished. How does that measure up to the casting effort?
Cheers
Lemo (taking cover)
Hi everyone,
It’s great to get feedback from people in so many different countries. It’s also amazing to see behind the scenes of works in progress.
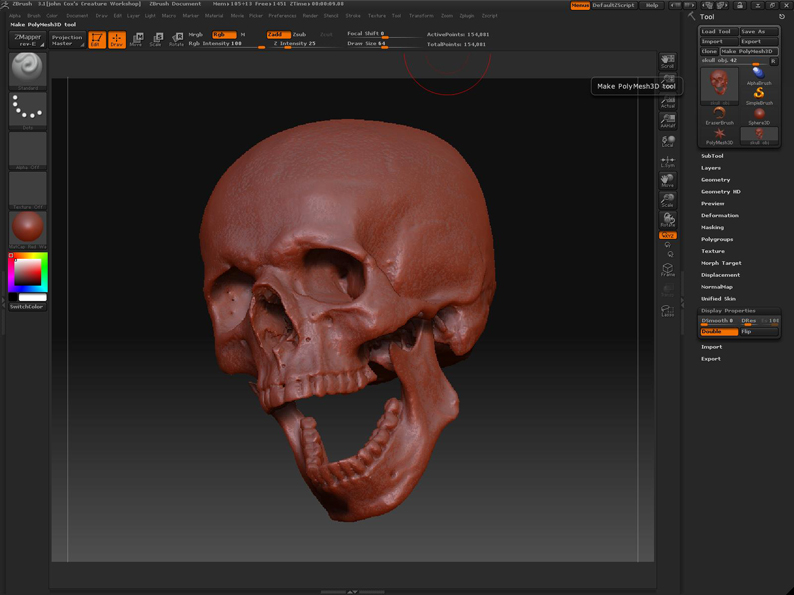
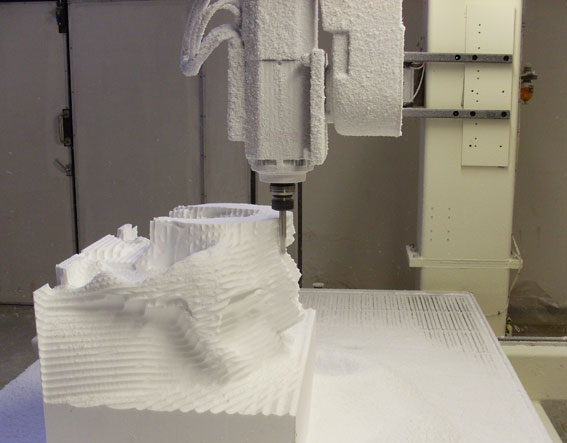
As promised Ziggy here are some screen shots of a project we are doing at the moment.
The first photo is an imported scan of a skull. We used zbrush to clean up some bumps and to smooth over a join line in the top of the replica skull.
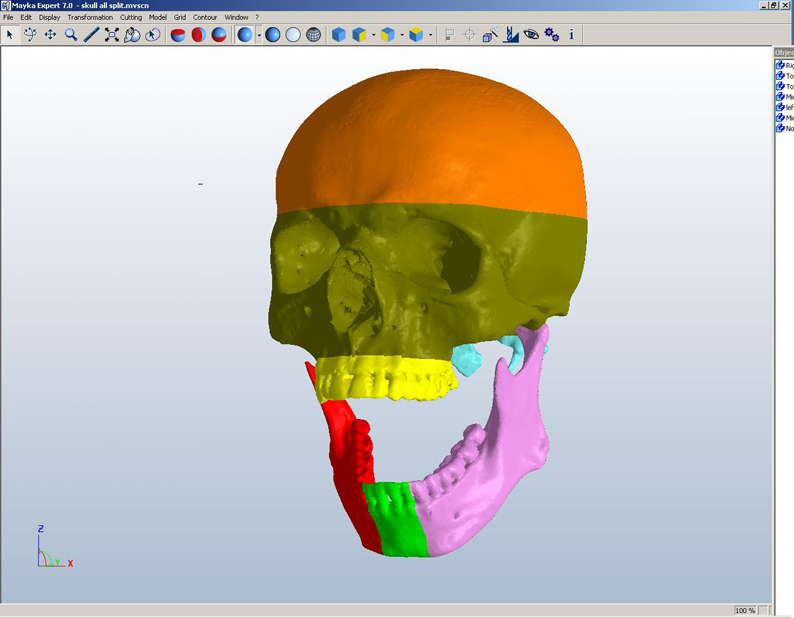
The second shot is the skull segmented up in Mayka.
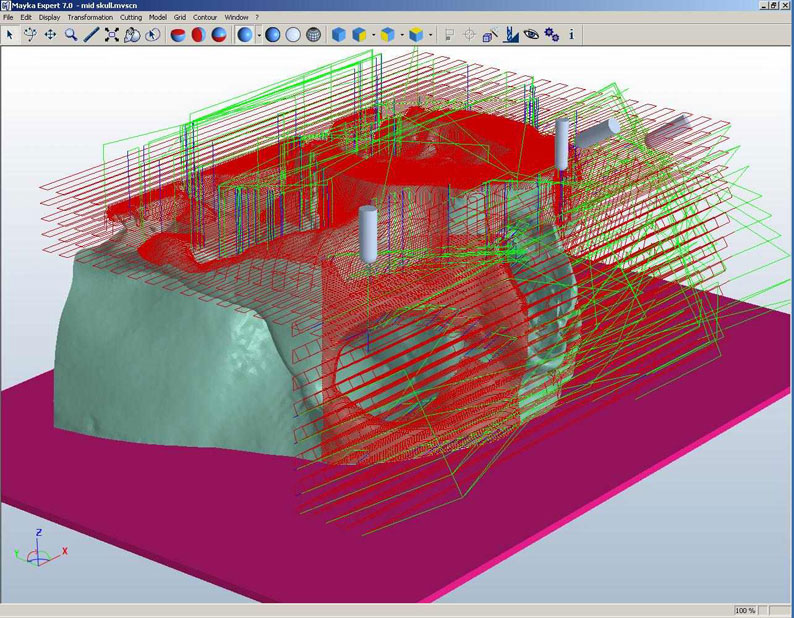
The third is some of the cutting paths Mayka generated to cut the skull.
Total height of the skull with open lower jaw is 42 inches or 1100mm.
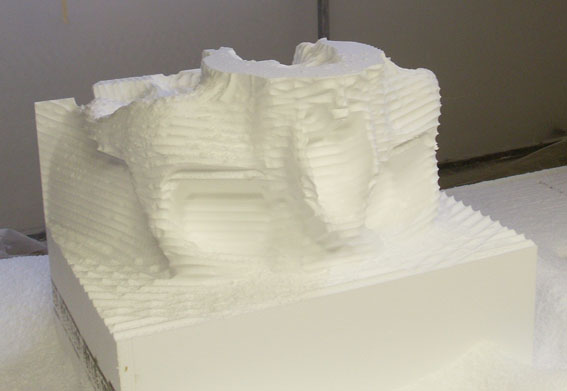
The machine is cutting away at the moment, here’s a shot of where we are up to.
I’ll post the finished piece tomorrow along with cutting times to give you an idea of how long (or short) these sculptures take.
The thing is, this skull is 99.9% accurate to the original cast. That’s one of the nice things about having scanning as an option, you can reverse engineer very easily.
I look forward to more behind the scenes,
John
Attachments
Wow that’s amazing stuff.
I wish I would have my own work 10 foot high in my garden.
WHat’s that foam you are using? I did not spend any time researching foam, I use the common insulation foam or if detail is required precision foam which is very expensive and only available as 4’x8’x1" sheet for me. I usually use wood for my sand casting molds. Dense and even woods like Mahogany are working great.
Cheers
Lemo
Hi Lemo,
If the final finish is the polyfoam surface then we use VH ( very hard) grade poly. This can then be hardcoated, which I don’t like doing as the hardcoat gun operators can be less than perfect. The type of polyurethane hardcoat material used is also a major factor. Most places use the cheapest brand which can go on very wet and drip all over the sculpture.
If we are to cover the poly with chavant clay or an epoxy paste/putty we use a standard display grade (M).
There are 2 grades in between the VH and the M grades.
The VH grade can be sanded and not produce a furry finish. It’s about 3 times as expensive as the M grade. It is also 3 times as dense as the M grade foam.
As you know the final surface of the foam will dictate what types of moulding materials can be used against it, and this is an issue in itself.
I hope this helps,
John
John, could you stick a manufacturer name to the polyfoam term. It seems that polyfoam in Google is like looking for ‘Polygon’ and trying to find Zbrush…
How fast is the Thermwood moving? Our self build with the 200KRpm air spindle has not been measured yet as we are still tweaking it. But it already makes kung fu swooosh noises while flying through EPS haha. And it’s faster than I can press an e-stop button. We hope that our 2ft Z-axis are enough for slicing and dicing.
Cheers
Lemo
Awsome… Can’t wait to see the result and how the pieces are goint to match together…
lemonnado,
Here in the states polyfoam is styrofoam, and the insulation foams are generally urethane. I work in the movie industry and we buy the stuff by the semi load. Styrofoam block generally comes in one, one and a half and two pound densities. A block of one pound foam is 2’x4’x8’ and weighs 64 lbs. You can get foam pre cut to any thickness. One pound styrofoam mills ok, one and a half mills very well, and two lb mills like wood. As you might guess a block of two lb costs twice as much as a block of one lb. Oil prices are causing foam prices to soar. A 2’x4’x8’ block of one lb is hovering between 150 - 200 bucks a block.
Urethane foams are now insanely expensive. We generally use one 2 lb for large(set pieces) work. It is very soft, very messy, and a health concern. When we are creating orament, statuary, close up props, we use four-twelve pound foam. It is sublime. It mills like butter and holds fine detail. IT CAN NOT BE BURNED OUT, unless you want a trip to the morgue. It is full of cyanide. The biggest brand name I recall is Trymer. Very expensive. A two lb block is close to $600.00. Balsa foam is great for small, high detail stuff…Way expensive for what you get. It is a phenolic foam sold in hobby stores. Likewise can not be burned out, mills like a dream, but will rust steel in a heartbeat. I left a block sitting on a bandsaw for an hour, came back from lunch and the saw table had rusted.
Lemonnado, carving takes a couple days to go from start to finish. The molding/casting process is fairly involved, about an eight week turn around time. Its a lot of work, but the bronze is a really beautiful product.
:eek: *GULP! no words.
johncox85, Your work is simply amazing.
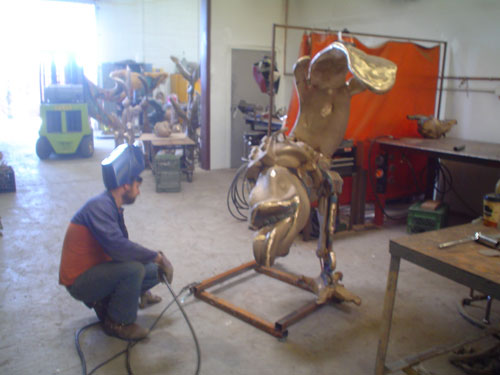
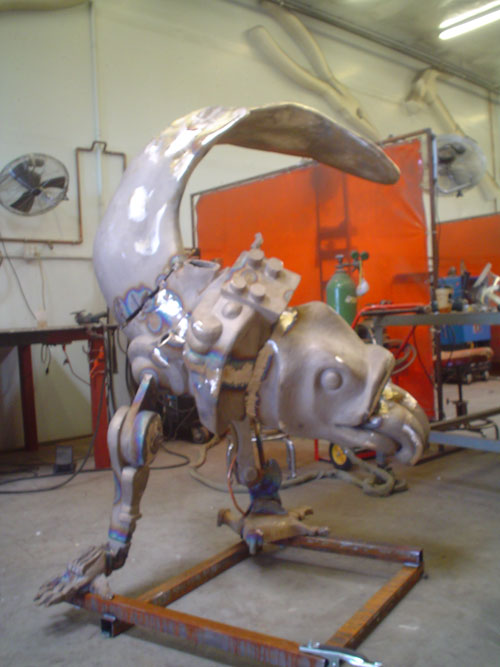
Wednesday’s progress on the fish fountain.
[attach=94382]coelo_process_02.jpg[/attach] [attach=94383]coelo_process_03.jpg[/attach]
Attachments
Good morning,
well it is down here.
Lemo, I should have written EPS instead of polyfoam as that is its correct name. Expanded Poly Styrofoam.
The exact density of the VH grade is 2lbs per sq ft or 28kgs per sq metre
The speed of the spindle is approx. 20,000rpm when cutting through EPS.
We slow it down to around 8,000rpm when cutting the epoxy machine boards.
The traverse speed of each axis is determined by the thermwood software and is dependent on the size and contour of the cutting path. In straight lines when it is just shaving of material in the rough cut it moves pretty fast, makes a lot of noise and sprays EPS shavings around like snow. We are lucky in that the company who supplies us with the EPS, R Max, also pick up the clean shavings for free and recycle it into another form of plastic.
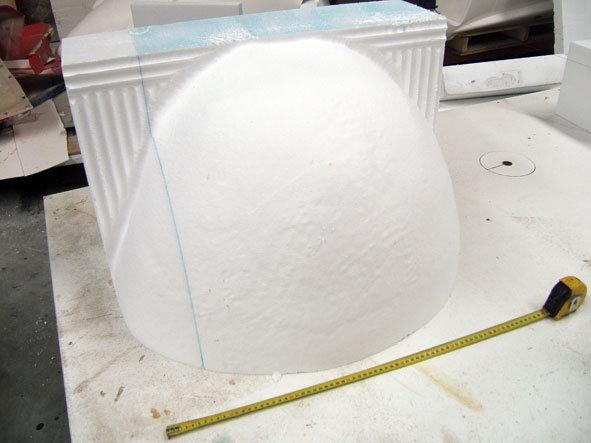
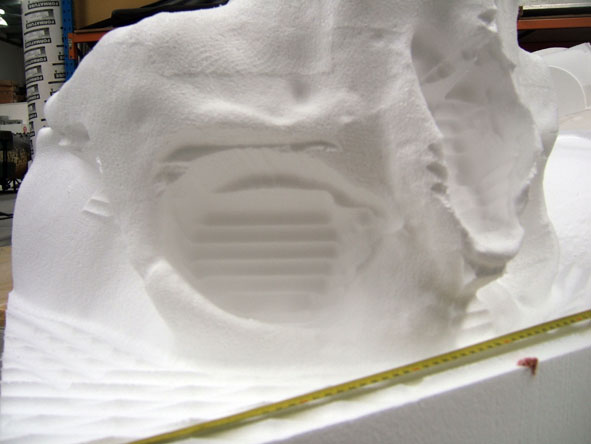
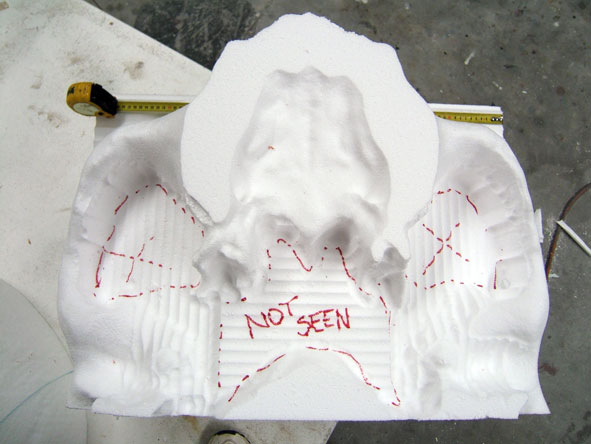
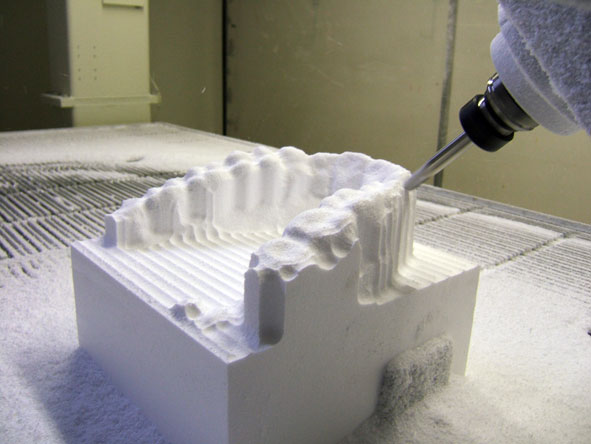
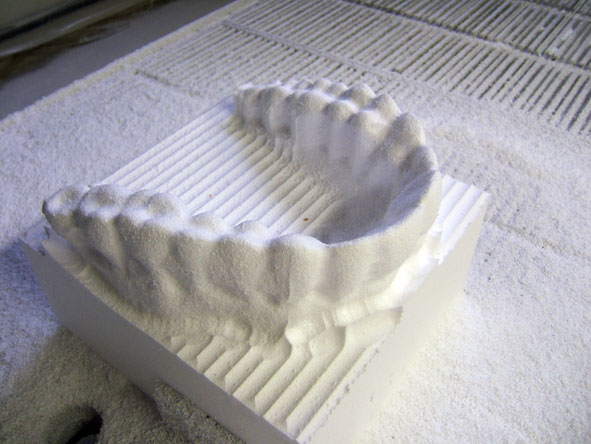
attached are photos of some machined skull pieces. As this is a theme park job we are only using a 12mm or half inch ball nosed tool. The level of detail is in the mid range. We can go down to a 3mm tool if we are doing fine work like around the eyes of an animal or person. Usually we use a 20mm or 16mm tool to rough and then a 12mm or 6mm tool to finish.
The top of the skull needs about 5 minutes of sanding, if that. It took 1 hr 10 min to rough and 1 hr 50 min to finish.
The front of the skull has a couple of deep spots that we need to hand carve. The eye sockets are 4 inches deep at this stage and need to be deeper however a 4 inch tool is the longest tool length we should use. A longer tool was once used but was very unstable and deemed unsafe. We will also cut out the pieces behind the cheekbones. They are about half and inch thick so it won’t take too long to completely remove them.
It took 1 hr 40 to rough and 2 hr 20 to finish.
The upper teeth took 18 min to rough and 39 min to finish.
I’ll send more photos later.
Arbayne, thanks for your kind words, the bronze work you are doing is truly superb.
John
Attachments
johncox85, Have you found someone to take your EPS waste? Here in Tucson, we have a company that is making an EPS, concrete product (Rastrablock) for building that takes all our carving scrap. They come and pick it up…great for us…an upside to using EPS rather than polyurethane foam (other than cost and annoyance). Quick question…your carves seem pretty fast, are you wearing through the bits. Also, What size for finishing bit? Did you but your CNC new? What’s the review on your CNC…1 to 10…Happy with the performance? I would like to purchace a 5axis (currently have a 4axis) but am unsure about a used machine’s feeds and speeds.
Great to see some large scale hard-copy of digital sculpture…It is an amazing use of computer tech. Let’s keep this thread going.
Hi Arbayne,
Just call me john.
All of our tools are normal machine grade steel bits. We have some tungsten bits but don’t really use them.
The EPS really doesn’t wear down the bits however the Chavant clay blunts them very quickly due to a filler in the clay that acts as an abrasive.
Finishing bit size on the skull is half inch. We could go to quarter inch but on this job it’s not worth it.
I bought the thermwood new. I give it a 9.8. There is a minute alignment issue that keeps me from giving it a perfect 10. Everything else about the machine is faultless.
Can’t give you any advice on second hand machines.
John
John, Are you using the RSI microscribe laser scanner? If so, are you satisfied with it’s post processing software (ie. stitching scans, hole filling, re-meshing,etc.)? I have a Scantech and a Nextengine and was wondering about a hand-held.—Tony
This has turned out to be a very interesting post, thanks to all.
John, no matter how much I may dream of doing all this, it will always be one, a dream, as there is virtualy no 3D being done in our country, only a few architecs here and there, but no art scene…
I have one question, would this whole Mayka process work in the Rapid Proyotype industry eg. slicing the image up and sticking the whole lot together once ABS plastic parts are printed? As I can have my prints done in South Africa, but might be a bit expensive this just to kill my curiosity.
Thanks again, what would life be without dreams…
Ziggy.
Check out this software. It will also slice. But it won’t generate a toolpath for a 5 axis machine like the Thermwood.
To slice geometry, you can use any 3D application like Rhino, Cinema 4D, Max, Maya, Modo, which offers a knife tool. I know for a fact that I can create slices easily in XSI and C4D. Then export the slice I wish to have 3D printed or milled and later assemble all the parts.
Also keep in mind that 3D printers (ABS) create support structures IN the objects. Like a honeycomb which can be utilised later while putting things together. You will not end up with ‘only’ the skin. Good thing!
Lemo
Hi Guys,
Arbayne- the microscan software is great. However! Sometimes when we import into zbrush the object looks like it has been inverted in places. We checked this using zbrush and inverting the standard brush and it put things right so we knew we were on the right track. For instance a left leg was inverted but the right leg wasn’t. Why, who knows?
Through trial and error we have found that these abnormalities can be easily fixed with Rapidform. You import into Rapidform and ‘fix bad normals’ and other one click operations. This tends to fix them everytime. The microscan software is really easy and going from scans to pointcloud to 3D is simple and has proven to be the way we process all of our scans.
more photos of the skulls on the way tonight.
Ziggy- lemo seems to be able to answer your question better than me. For small parts maybe this will work but the reason I bought the machine in the first place was to do BIG things.
I’ll post again soon.
John
Hi all,
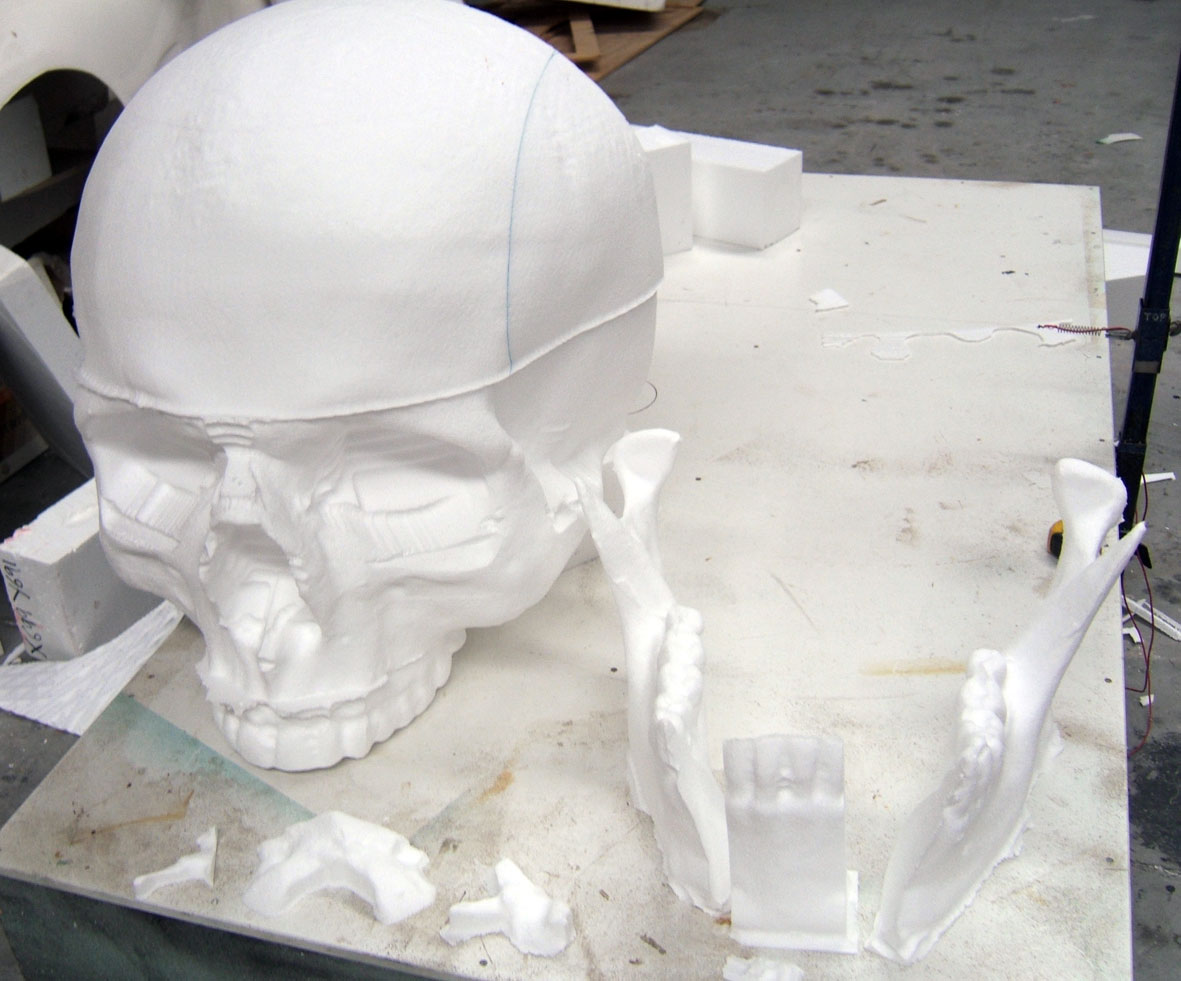
here are the finished pieces for the skull @ 1100mm high. This piece is to be mounted flat onto a vertical column so the back of the skull was left out of the cut.
The first photo shows the pieces as they came off the machine bed.
The second shows the pieces after they have been hot wired off their residual foam blocks and then roughly assembled.
Total cutting time was about 10hrs.
We’ll be gluing it together on Monday and trimming off the final bits of excess foam. We’ll then give the skull a slight sanding then it’s off to be hardcoated!
We have come across a water-borne enamel paint that we will be using to colour the skull. Less toxicity makes us all a lot happier.
More pics next week.
If there is anyone reading this post in the St Louis area I have just set up my travelling museum exhibition called ‘How to make a Monster- the art and technology of animatronics’ at the St Louis Science center. If you want to see any of my work close up there’s 42 pieces there. The exhibition is also previewed on the website www.johncox.net.
The exhibition will be travelling to Anaheim, Wichita and Ft Lauderdale from Feb 09 until May 2010.
John

Attachments
this is great!
can’t wait to see final result!