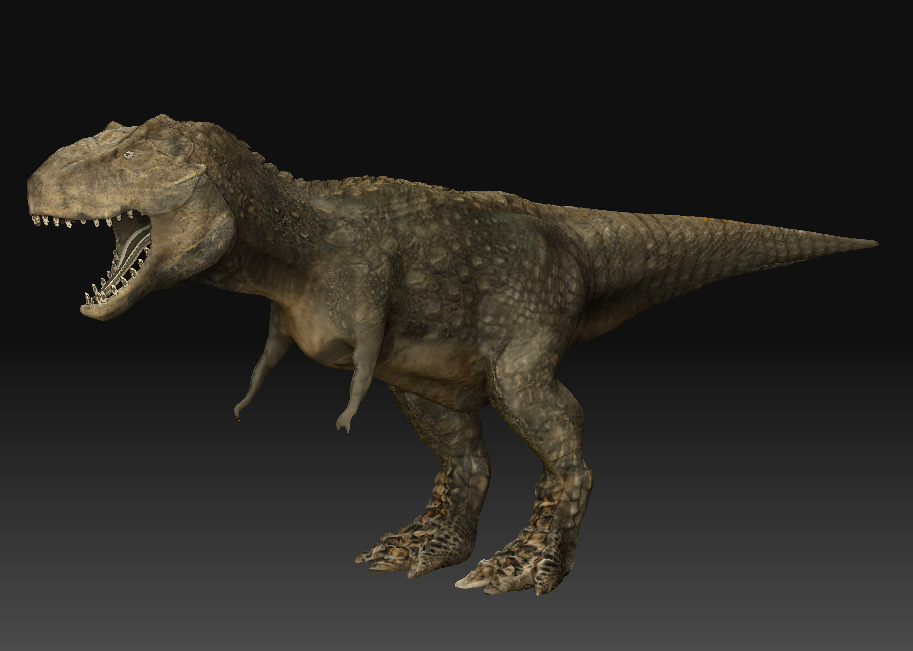
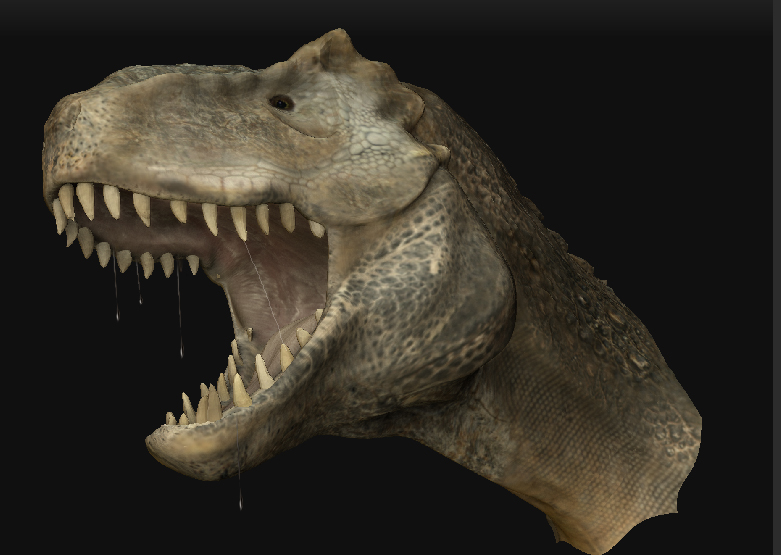
Here is T-Rex I’ve Started. I referenced ja_popov’s “dinner time” T-rex. Still a work in progress. Let me know what needs work. Thanks
[ ]
]
Here is T-Rex I’ve Started. I referenced ja_popov’s “dinner time” T-rex. Still a work in progress. Let me know what needs work. Thanks
[]
the details look very flat and hard to notice. the texture looks okay, but the areas down at the feet needs to be re-done. good start, keep at it
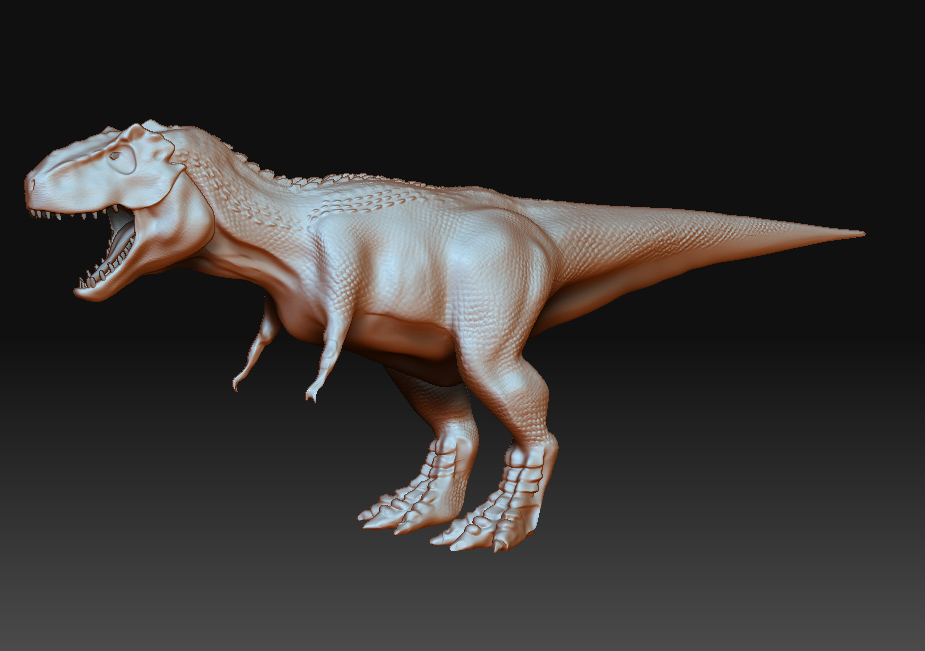
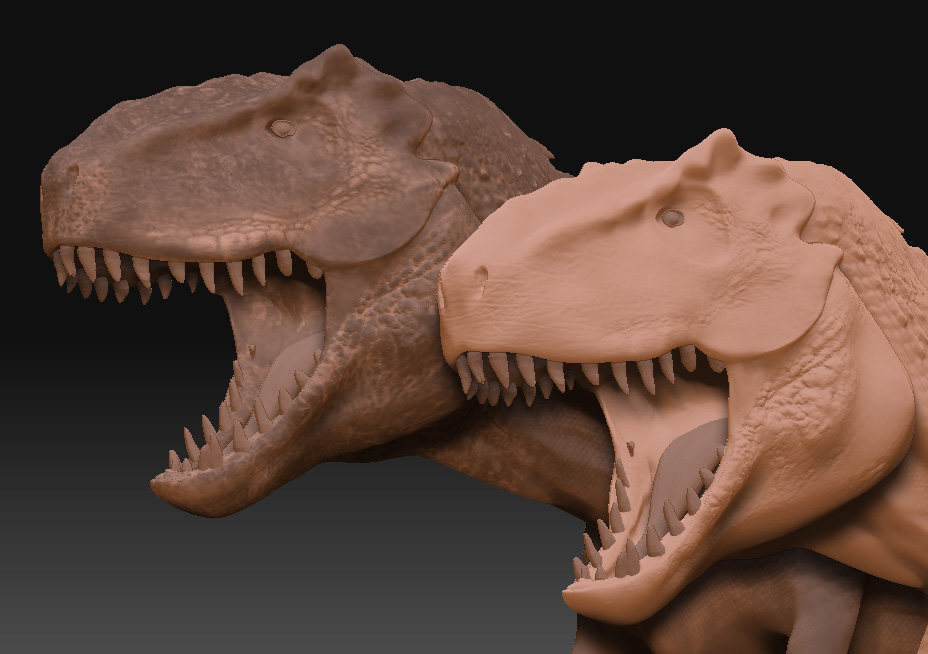
I just did a quick project for the textures. Here is a view of just the model. I was thinking of getting the texture correct then conforming the model to the textures rather then the other way around. (Right now the texture doesn’t really have much to do with the model)
[ ]
]
great start…take a llok at the teeth and the arms. there is something funny about the arms…are you missing some fingers?
I didn’t create any “fingers” in the base mesh so the wire on the hands is bit messed up. I think I used the “snake hook” tool to pull out the fingers - I should have really taken more time with him.
gabo1991: Thanks for the critique - yeah, I agree he looks a bit flat. I’ll keep working on him.
mdale13: Thanks for the critique. I agree he looks a bit flat and the textures aren’t too exciting yet.
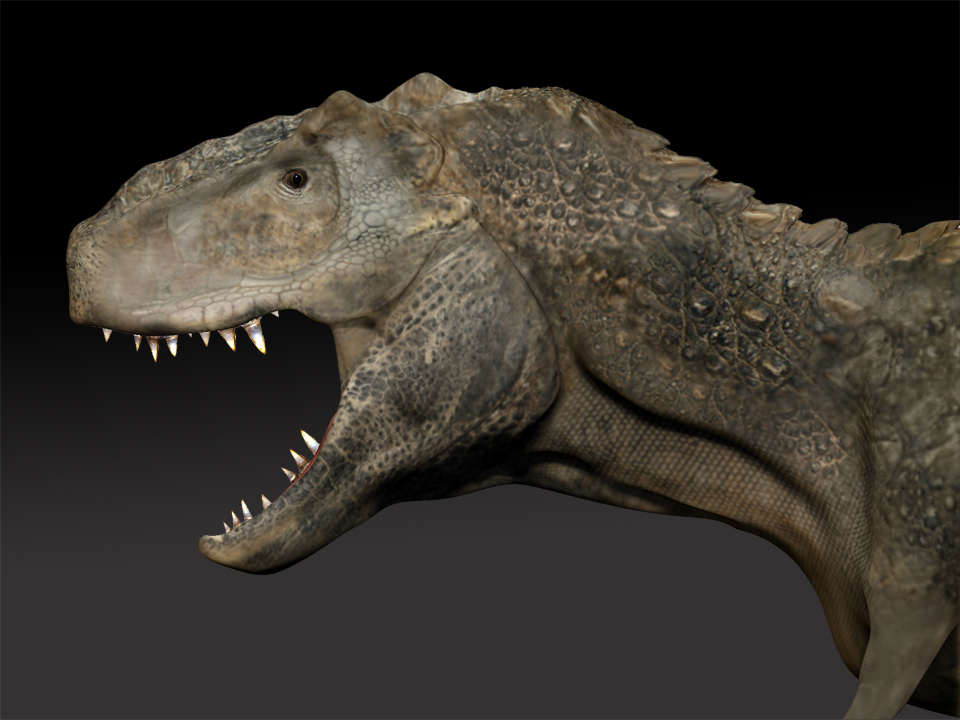
i would kick back those scale layers on the feet, they look a little too exaggerated. i can see the textures much better now.
looks pretty decent.
Thanks for the comment V-Rex Freak! I’ll try to post some updates soon.
update:
[ ]
]
update:
[ ]
]
hand part, lose the part that is attaching the two fingers.
— hand part, lose the part that is attaching the two fingers.
OK - I thought that looked kinda weird. I used the snake hook to drag out the fingers so the mesh is a little messed up. Perhaps I could insert some edgeloops so I could have a better mesh to pull from. Would inserting edgeloops screw up my UV’s??
Update:
[ ]
]
i don’t kinow but i’m just suggesting that it look better, i just getting to used to do 3d.
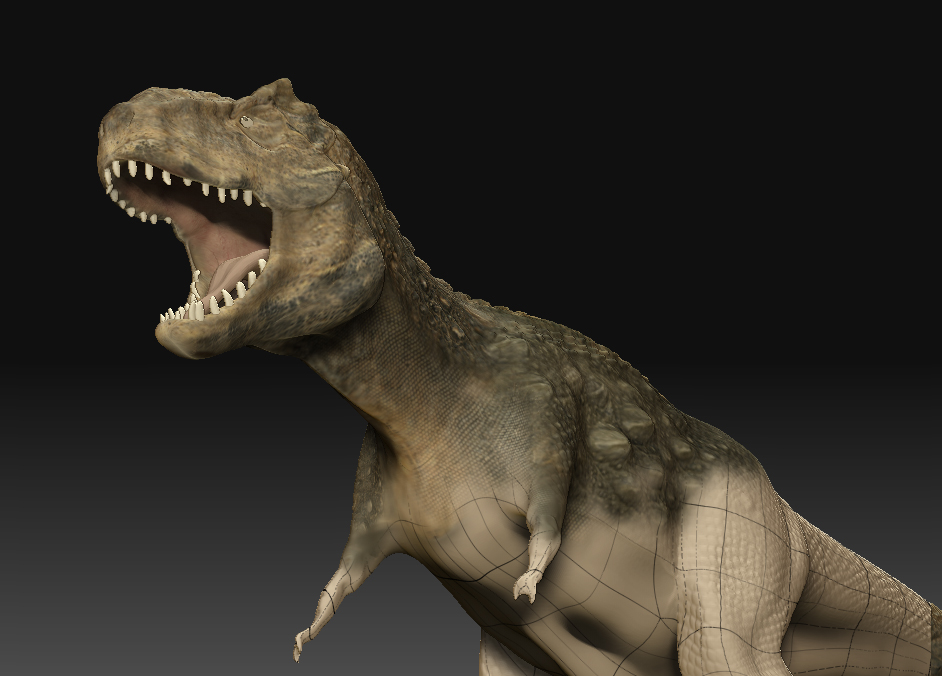
Here is a render in Maya. This is the full zbrush mesh (360,000 polygons) brought into Maya with no displacement.
The icon of this always looks great and then I click to see the image and then eveything is flat.
If I may, could I suggest this? Your color map looks very cool for your sulpt, there is an easy trick that you could use to bring some of that detail in as a true sculpt an not just a texture.
Take your color map in Photoshop, desaturate it so it is grey scale, then play with the level or the curves to seperate the craks out from the scales. Try to get the scales to be white and get the cracks to push toward black. If you can get any other details to show up in there then great.
Now take that image and import it into ZBrush as an alpha. Once the alpha is loaded then go to the masking section and then “mask by alpha” Now hide your mask (ctrl h) and then start to paint in some of your scales. When you are done pulling out the detail, deselect your mask and very, very lightly use the smooth brush to smooth out any stair stepping along the edges of your newly raised scales.
I think this will really help with the look of your beast.
Also spend a little more time on how the eye lid meets the eye ball. A good looking eye will bring your character to life.
Hope you know that I like this piece, I just want to see you push it more.
Great work, keep it up!
NickZ. 
Thanks for the tips nickz! That was very helpful. I’ll post some updates as soon as I give that a try. BTW - I was looking at your posts and your work is quite impressive.
I’m attempting to bring out some detail via the alpha mask: Here is an update: (left: no change / right: detail pulled out
You might want to bump up the contrast in your alpha map in photoshop, I think you can even do it in ZBrush in the alpha section using the curve that adjust levels.
YOu should also be able to update UV’s at will. Drop down to lowest sub D level, export as an obj, do edits in other app (In maya make sure to import with “create multiple objects” set to FALSE.) then export the changes as an obj, then reimport the obj model back in using the import buton in the tool section.
Hope this helps - NickZ.