really a cool work man!
Wow, excellent work on everything here, Modeling/Polypaint/Render, all awesome! I would love to get a little insight on your shader creation and possibly other bpr settings. Thanks!
Thanks guys, I’m very happy that you appreciated my stuff!
I put together a little documentation about the shaders i made for this piece, really nothing special, but was a bit tricky to find a nice balance playing with all those tiny sliders in Zbrush interface 
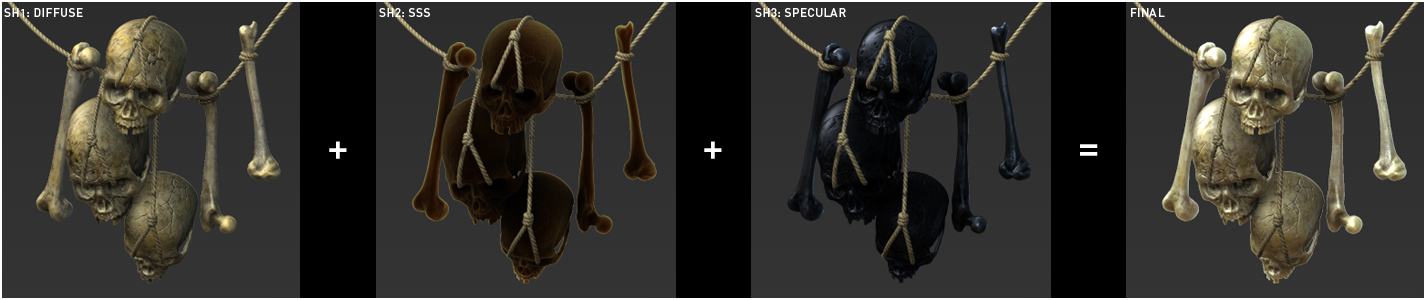
Skin shader

This shader is based on the one found in the SSS_Rhino project present in Zbrush 4.0.
There is one diffuse shader, one reddish SSS and one specular; I added one more SSS shader on the fourth slot to give the skin a greenish hue in some parts.
I created a duplicated shader with increased specularity and I applied it to the oily parts of the face and body, like the forehead and shoulders; I created one more duplicated shader, with “gel shading” turned on, applied on the lips.
I set the Material Blend Radius to 10 to hide the transition between materials.
Painted metal
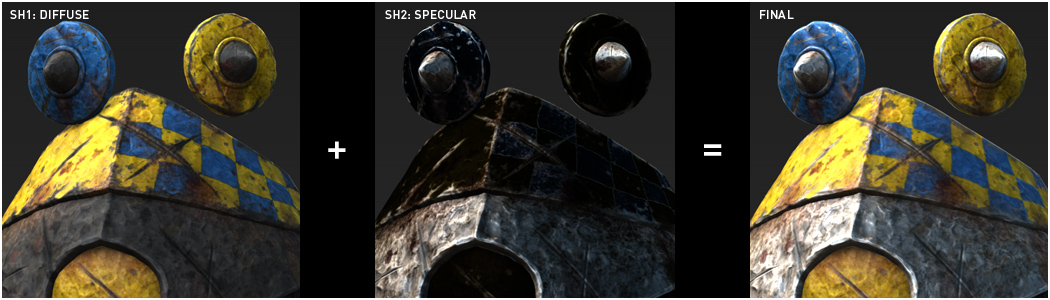
This one was a bit tricky to setup correctly… I created a double shader to simulate the effect of a shiny piece of metal painted with opaque paint.
the first shader has a high diffuse value and simulates the paint layer. The second shader has a high specularity and is visible only in where the polypaint has a low saturation: for this reason this shader works well if the paint layer has very saturated colors, but it won’t work with white paint
A trick to get nice looking armor parts is to bevel every edge with TrimDynamic Brush to get a nice highlight.
Bone shader
I used this shader for the teeth, nails and bones. I created it using the skin shader as a base; maybe it’s a bit too shiny, but I tuned it to give the teeth a wet look.
Leather
This is a really simple double shader with a subtle specularity on the second shader.
I used also another metal shader for the bronze parts, but it’s almost identical to the Painted Metal shader, with slighly different mixer settings.
I created a zip file with these shaders, if you want to try them out you can download them here:
SB_Shaders.zip (34.4 KB)
The skin shader is tuned for the skin of the troll, but I think it could work quite well even for human skin
Regarding render settings, I used the tips given by Pstchoart regarding SSS and AO settings.
I used a standard three light setup with only the main light casting shadows and SSS turned on for the main and the rim light. The render turned out a bit dark, so I added a fourth light near the main light to get a stronger specular highlight, and created a lightcap with the default canyon texture to brighten the scene.
I hope you can find useful these infos, thanks for watching!SB_Shaders.zip (34.4 KB)
Attachments
This is awesome! Thank you for the hard work on this. I really enjoyed following the progress of this piece. I especially appreciate you sharing a bit of your workflow awesome job all around!
Turned out great and thanks for sharing
any way to bake this stuff to UV maps yet?
great piece and thanks for sharing !
great work! and nice tut thanks you
Thanks!
Thank you so much for sharing your knowledge!
Thanks so much Master!
Now, all I really need, is learn how to use shaders… haha
Does someone knows a good tutorial?
render turned out great man, thanks for sharing your passes including the shader. Highly appreciatedsmall_orange_diamond:)
This is great, thanks a lot! 
Thank you guys, if someone makes something cool with those shaders or has some advice about how improve them let me know!
Epiginosis, here you can see a tutorial about baking material attributes from Zbrush: http://www.youtube.com/watch?v=aJj4sLtp9tA
I think however that apart from baking polypaint for diffuse map, is best to paint by hand all the other maps like specularity.
Lonn, unfortunately I couldn’t find any good tutorial about Zbrush shaders; the documentation is also really poor, so I had to discover things just testing and scrubbing through this forum looking for tips 
Here is a good tutorial about SSS rendering in Zbrush that helped me understanding multi-shaders in Zbrush: http://eat3d.com/free/zbrush_sss
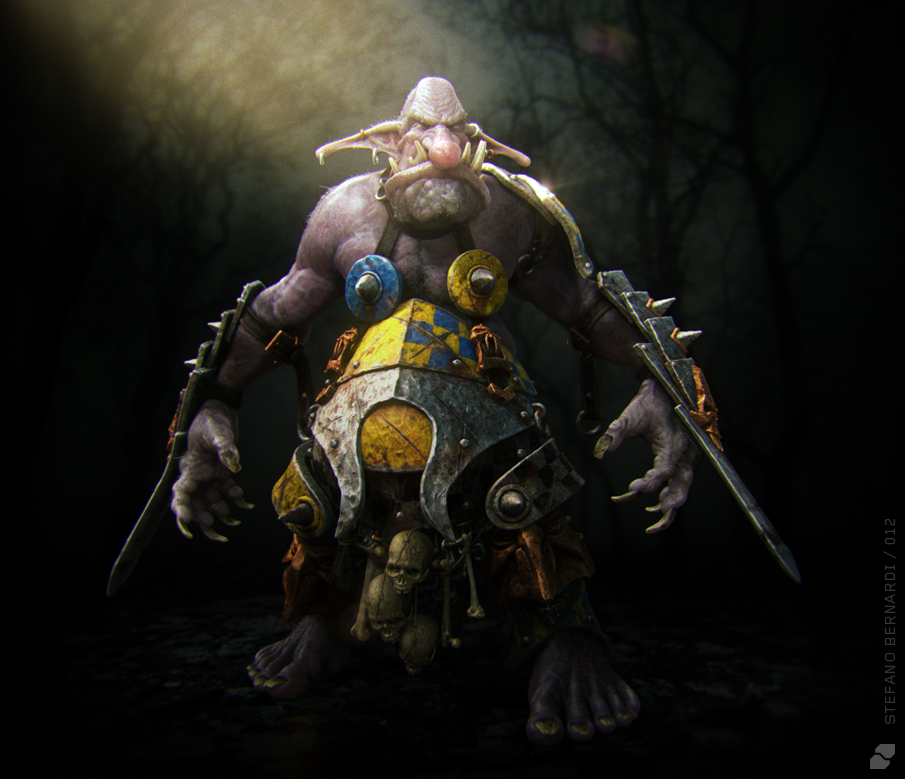
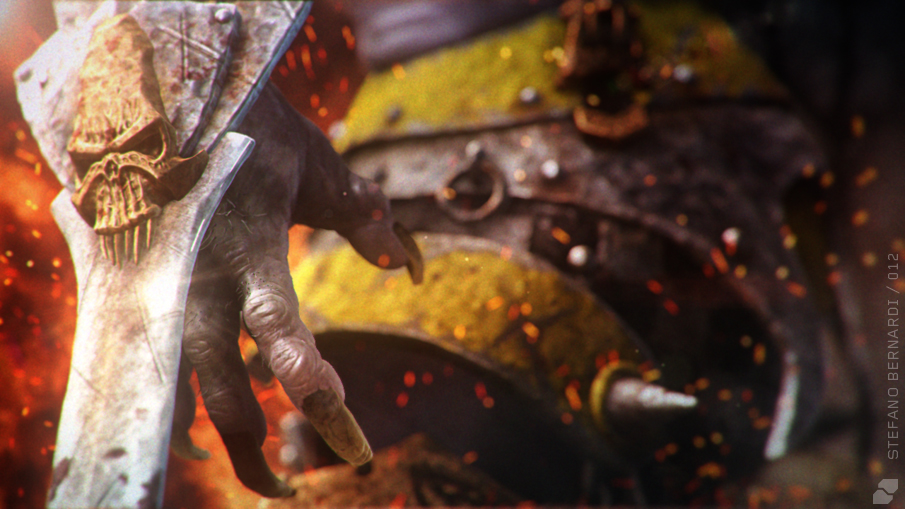
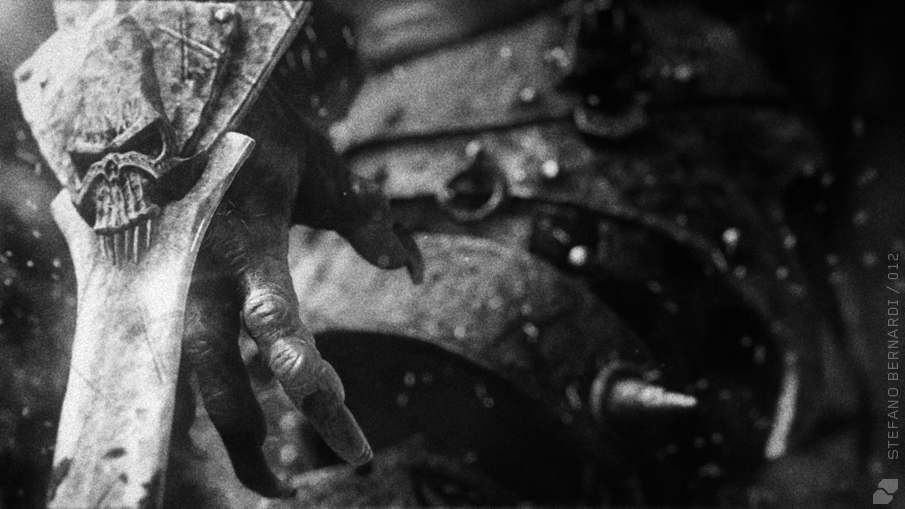
Last update, then I’ll stop spamming with this model!
I had some fun compositing with photoshop and after effects, I made a pair of images as if they were taken from a CG cinematic.
I was inspired by the closeup in the Darksiders 2 cinematic.
I like a lot the black and white version!
Thanks for watching!


Stefano, this entire project turned out perfect. On top of your generous step by step run through, you also shared your shaders AND took the time to explain them in detail! Thank you. I checked out your Chaos Warrior Bust on your website, you’ve already been making collectibles, it’s a small step to making toys. They’re pretty much the same thing around here. Drop me a line anytime if you’re looking to try something out, I’d be happy to help walk you through the process.
Top row already!
these render are awesome!
Great render!
do you mind sharing with us how you made this fire effect?
thanks!
Thank you so much, Master!
You dont have idea of how much you are helping me.
It’s awesome, that I can share information with Great Artists like you, by using this forum.
Haha, this is incredible!
*ps: This model\rendering exturing\etc is just… AMAZING. o_o
Really great! It was fun watching this from start to finish, thanks again for sharing!