Hmm. I think with one front and one back leg not bearing any real weight, you lose some of the mass of the animal. I think (not knowing much about Rhino’s) maybe the two rear legs planted solidly on the ground, possibly slightly further apart. Put a bit more twist in the abdomen/chest and have the supporting front leg a little more underneath the beast, and a slightly more exaggerated head/neck pose. The bamboo/grass/mound should look cool once rendered.
Great work so far. Try using your texture as a stencil and then inflate like this
http://www.pixologic.com/zbrush/education/zclassroom/texturing-with-photo-ref.html
cheers
looks nice, what its going to come down to is the materials/textures, you will have to make sure you make shiny things look shiny, dull more dull, mud look more like mud ect. also dont be afraid to make him look dusty, muddy, or peices of grass or pooh stuck on him, after all he is a wild animal, for ref look at PJs king kong!
First render pass with displacement and SSS shader in maya. I don’t think it is nearly done, but I’m happy with the progress. Things I feel I need to work on are the texture stretching (I think this might be the rig… I didn’t see it before), adding a little more asymetry as suggested, adding more “crap” (mud, twigs, leaves) stuck to him, and finishing the background. Please let me know your thoughts, critiques, comments: they are always helpful.
Moochie: Thank you for the advice. I did alter the pose a bit- but it might be hard to see from just this one angle. I’ll post again at some point multiple angles.
Justinlewers: Actually- the link brought me to Antropus’s tutorial on texture painting. I did, however, already use my color map as a stencil for pulling out the high frequency detail. Please feel free to direct me to tutorials on this if you think I missed something.
zeke3d: I totally agree. I still have more work to do, but I am happier that the latest render looks a bit more rich and dirty. I think the plan will be to keep pushing it.
More updates eventually. Thank you for your patience.
Craig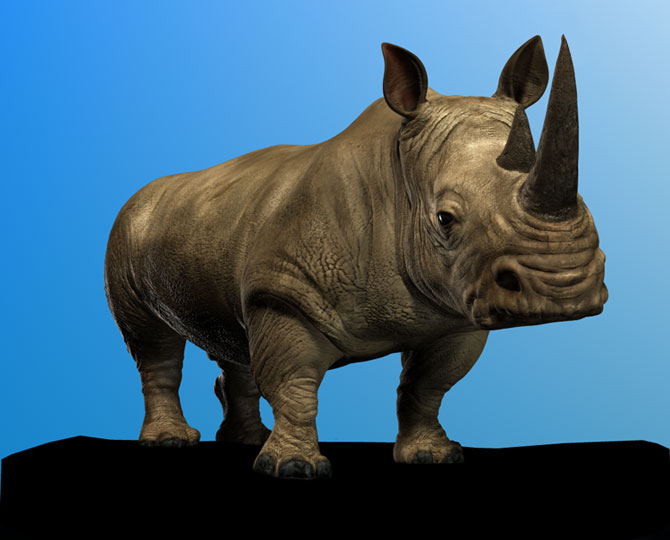
 Work has really picked up- so my time on this side piece has really suffered. Finally, a little free time has opened up, and I’ve done a little more work. I have a few more things I want to do- I need a better BG image, more mud/character intergration, and maybe some comp work. Please let me know what you think- I appreciate any feed back, but constructive critiques are always the best.
Thank you
Craig
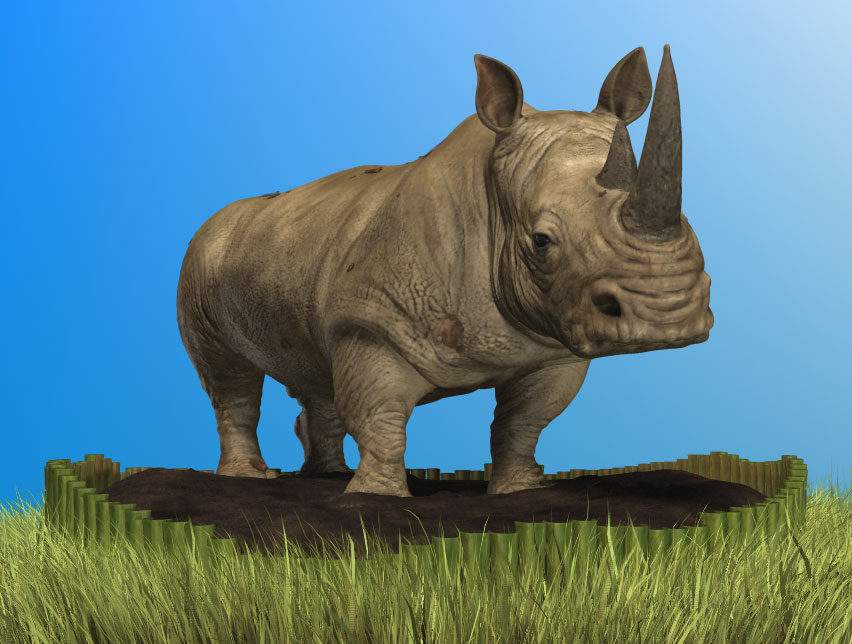
So- I added some mud, played with the lighting a bit more, and took out some of the old leaves/crud. Next on my list is still the BG. Let me know what you think.
Craig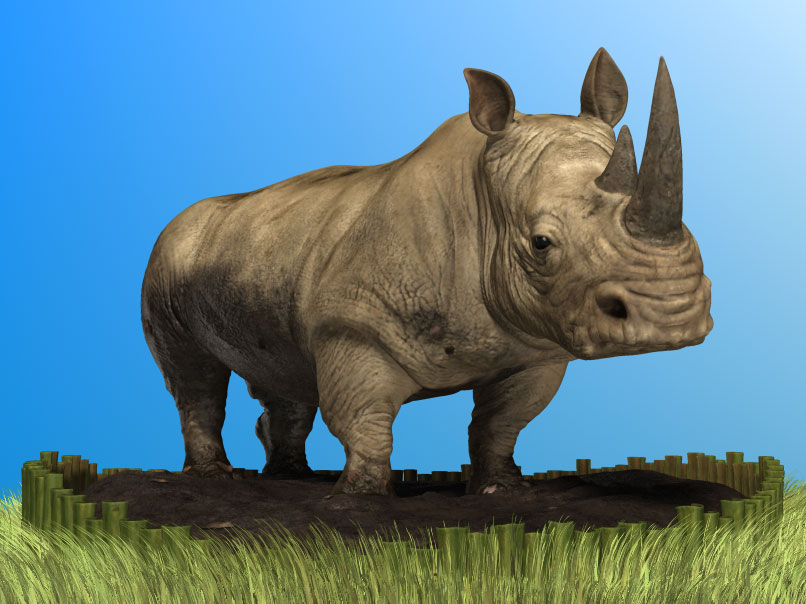
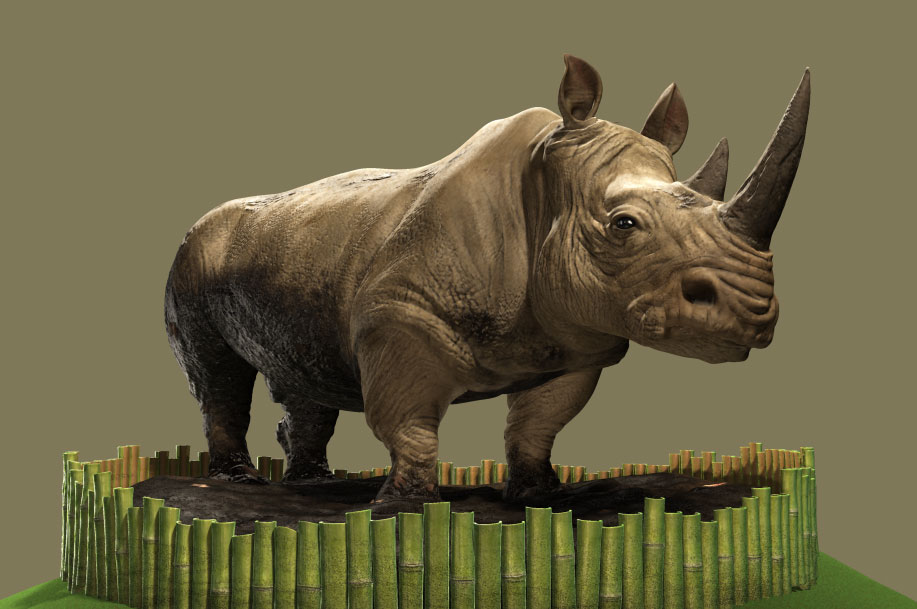
The image is looking good. The rhino has nice overall shape and volume.
Here are some areas that I think could use modifications:
-The horn and ears could use some texture work. It looks like there is some texture stretching happening.
-The cavity areas on the skin need to look more recessed.
-I also think that the skin shader could use some tweaks, maybe play with the specular or diffuse.
-Not sure, but it looks like your focal length on the camera is too low
-If possible I would add to the bulk of the folds around the neck and legs area to give the creature more weight. I would also tilt the head down, although this is very dependent on the mood you want to set.
So, this is just my 2 cents, keep up the good work.
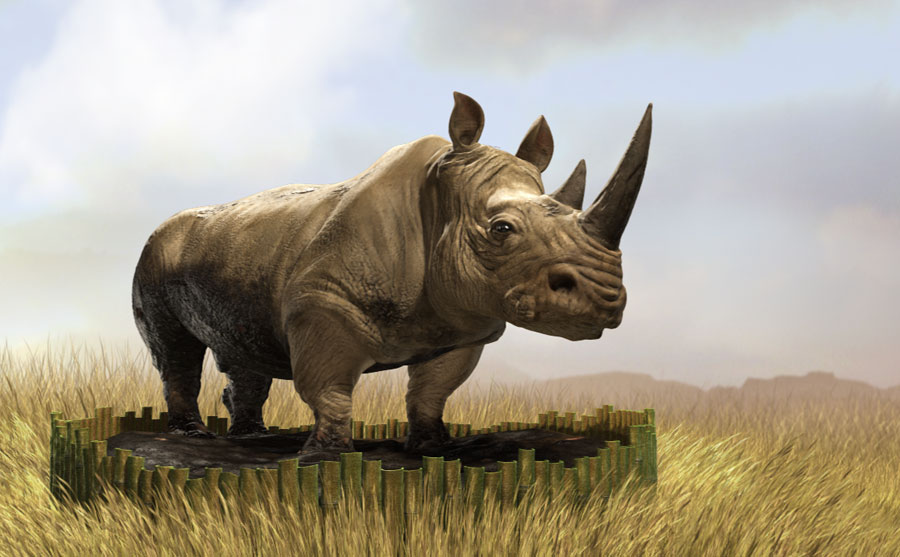
I added a new BG. This piece is for a model turntable- the actual composition on my demo will be more cental- but I wanted to do also a seperate version with more breathing room.
tripnfall- Crap! Where were you 15 posts ago? Just kidding around- but as you probably know- its kind of hard to go back to the modeling stage when I’m finishing up the render. I’d like to think I would revisit the model- but since its rigged and textured, probably I will file that under “good advice for my next rhino model”. Thanks for the advice- I will look into making the edits you suggested.
Craig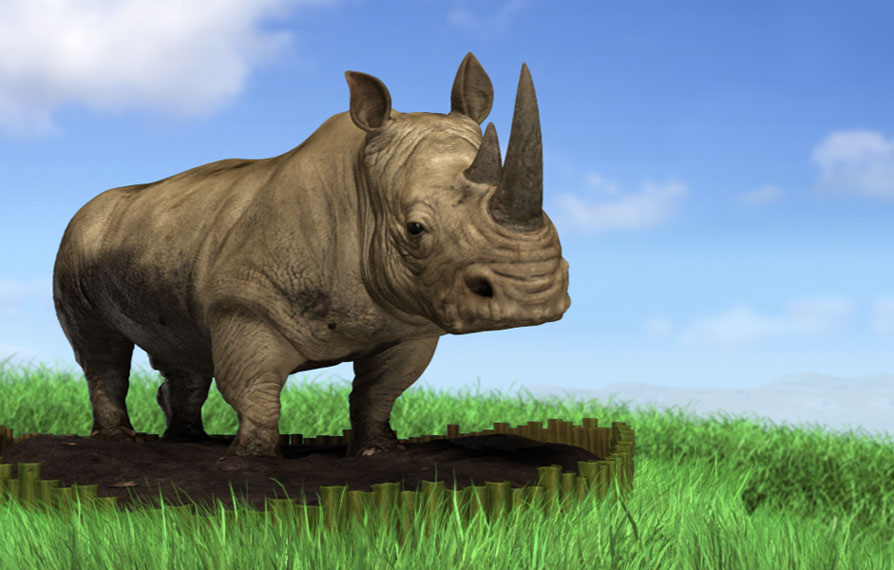
I’ve changed the lighting- a little less flat. I’m not happy with the blue high lights on the feet- that will be changed. Please let me know your thoughts
Craig
looking good man
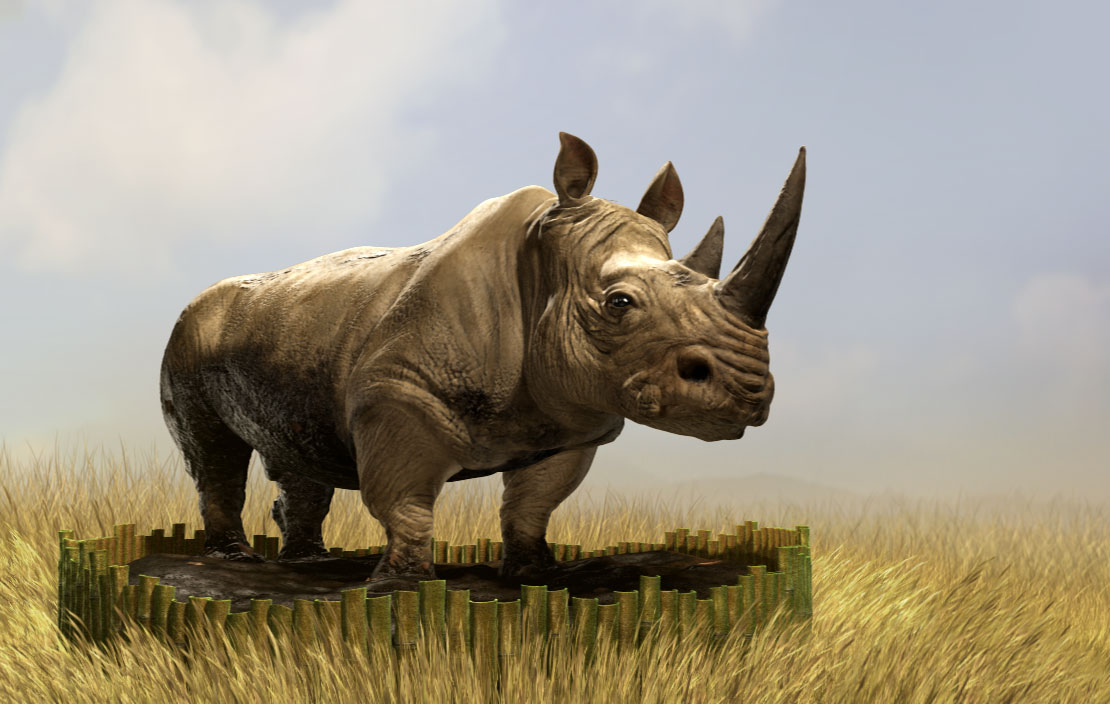
brown looking grass might give it a better natural look - since it’s natural habitat is the african savanna.
yeah, I agree. the rhino looks kinda out of place with that grass. I’d change it to more of a yellow/brown. plus I’d work on the bamboo and mud a little. the bamboo is a little too clean looking, and the mud doesnt really match the dirt on the rhino. its close, but its a little awkward. oh, plus the back light on the rhino is a little awkward given the scene. I’m not sure how your lights are set up, but I’d try casting shadows from all the other objects. oh, plus did you put some sss in? I’m not sure how much light would shine through rhino ears, they seem a bit thick for that.
Very nice model, thing is the lighting is off. The sky is pratically clear so the sun will be bearing down alot. I would try using a hdri and sky globe + area lights to pick up some bounce lighting and give some nice strong smooth shadows.
The lighting on the feet definitely looks wierd. Also consider solomons’ suggestion about the grass. 
Some examples


Cool. Thank you all for the critique. I thought I was doing okay- but I think I needed to hear what was wrong. I’ll give the HDRI a shot though, see if that works. I tried a yellow grass earlier, but I was not happy with the color- it lost its appeal to me, but maybe I can try again.
Thank you guys again- I’m leaving town tonight, so my update will come after the weekend.
Craig
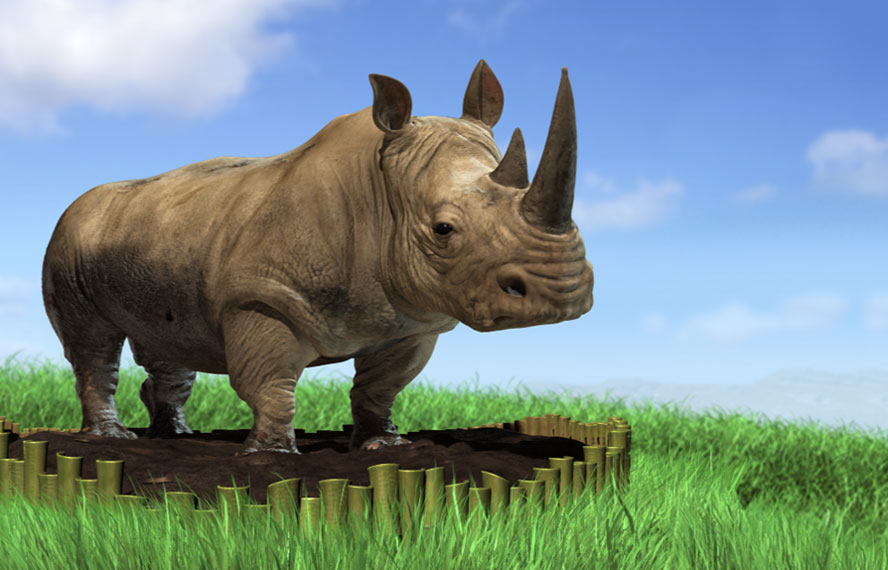
So here is an update of the rhino with new lighting and work done on the bamboo- I’ll comp in the grass/sky soon. I’m thinking I will try to keep the color palette more simple- green/yellow/brown. I tried both using IBL with light emission and also using it for FG, but the render times were too long. With the current shaders and displacement, I prefer to stick to lighting with MR Area lights. I’ve changed the light direction to be coming from behind and over, and I’ll change the sky to match. Please let me know your thoughts. I don’t know if this is working, but I feel its going in the right direction.
Craig
Any chance you can do another creature like this rhino but capture work and post a tutorial? I have to model, rig, texture, and animate about 20 different prehistoric beasts and the area that I need help in is texturing. Modeling, rigging, and animating are a breeze (I have a bout half of them done to this stage), but texturing is my next hurdle to jump over. Seeing as how I have to do similar creatures to the one you have done, boy would I like to see your workflow. The result you obtained is exactly what I am going to have to achieve. Very nicely done.
Thanks
Allen
Yeah much better The bounce light underneath that’s hitting the mud is a bit distracting tho. Try to subtract the light intensity there. Add maybe a negative light?
Cheers,
~t
Thank you for the response to my work, and the critiques.
Lildragon- I will consider removing the bounce on the back after another render – but probably I will keep it - I actually enjoy it. It is not there by accident and would be simple to remove- but I feel it would make the image more flat.
alecorre
I will see if I ever get a chance to put a tutorial together for this piece. While I hope I do, I would recommend that you proceed without out me. Feel free to ask myself and others on the site questions as they come up. The good news is that most of everything I’ve done can be learned from other tutorials:
http://www.pixologic.com/zbrush/education/zclassroom/class.php
For a brief run down of my basic process:
-
I start off my model extremely lo rez- usually 975 polys (because that will up rez to about 4 million, a large but stable number) I do this in Maya- then export to Zbrush an obj -
I model in Zbrush the basic model- get the form and proportion down, no details, and I output for UV maping back in Maya (lowest level) -
After a basic UV setup using Maya’s Unfold feature, I’m back to Zbrush to use Zbrush Zapplink (Check out the demo by Caroline on the above page). -
I will struggle to create a clean diffuse color map- no shadow or highlight information (I put that into the shader) -
After the diffuse is made, I create an alpha from it to use as a mask for further modeling- the higher rez details -
I output from Zbrush a Cavity map Using Zmapper and a 32 bit displacement map using Multi Displace 2. You can download the plugins and docs here:
http://www.pixologic.com/zbrush/download-center/download-center.php
-
Back into maya with a lo-rez version of my model. I create an SSS Fast Skin shader (or any material you like) and using the color map, I generate the remaining maps (like spec color map to make some parts look wet, back scatter color, etc….). I use the cavity map for my bump, and I use the displacement Map + Maya’s Approximation Editor to create the displacement. Creating displacement proper in a separate app can be difficult- expect to spend some time here if you haven’t done it before. There should be some good tutorials online on how to do this (I know Meats Meier put out a pretty good one). -
I render in Mental Ray, I rig and pose the mode, I light using mental ray area lights. I created the grass using paint effects and comped in After Effects.
Okay- I hope that helps…. But probably is does not. I have to say- the coolest thing I’ve found about Zbrush is that there is plenty of info/tutorials online. I’m glad you liked what you see- I’ll see what I can do about posting more relevant info in the future.
Craig
Well- my posts come out slowly- but I hope you will critique them anyways. I reworked the BG and did a little comping. I’m hoping to have this done by Friday so I can render a turn table and put together a new demo to send out by Monday (Yep, I’m looking for work- gotta any leads?) I’m pretty happy the direction this piece has gone- and I really appreciate all the feedback I’ve gotten- i think this piece would have ended at the model stage if I hadn’t recieved the encouragement here. So- please don’t stop now. If you have any more crits- let me know, and I’ll see what I can fit in this week.
Craig
Hey nice job. I like that you are constantly improving it. Honestly I think the strongest image of your Rhino is the 2nd to last with the brown background. With that you can see the form of the animal better. Don’t wash out all your hard work with a bright white sky . . .
Other than that I’d like to see tighter wrinkles/texture around his mouth/eyes/horns. Its a strong piece.
Well- I’m getting down to the wire of my due date that I’ve given myself for this piece. I might revisit it after this weekend, but my free time only comes in small bits.
MouthforWar- thanks for your critique. Good call- I think I might make the BG even less bright- its an issue of realism vs. design (I’m not sure if I can claim either) and I think the model is more appealing on this darker BG. I added a few more wrinkles to break up the mouth/nose/eye area… I might have to revisit the horn again too. Thanks for your insight.
So- If anybody else sees something I’m not seeing- let me know (I think I’ve been staring at this rhino too long, its hard to remain objective)
Craig