Lil’sister thnx for ur grate comments ya u r 100% right neck has problem i will redo ur tutriol again i have ur all vedios thay they all are help full i got them from veoh.com
regards
MSM
Lil’sister thnx for ur grate comments ya u r 100% right neck has problem i will redo ur tutriol again i have ur all vedios thay they all are help full i got them from veoh.com
regards
MSM
great inspiration works here buddy!
Alex Oliver
Lil’sister - Great videos! I featured them at Sculpt.Paint.Create. Thanks for sharing your knowledge! 
By the way, what brush did you use to sculpt your hair?
Ryan
Thank you very much Alex!
Thanks a lot Ryan  I used the standard brush at 8 mouse average with the alpha 39 and I use LazyMouse for the long strokes. I made a really quick script again (this time I didn’t change the material)simple_Hair_brushes.TXT (213 KB)
cool script David … thanks for sharing
This thread was around 3 stars before I vote. What’s the problem ? This is a really cool stuff ! Is there any person here who are such dulled that they vote wrong ? I can’t understand…
I keep getting a interface item error saying I don’t have the matcapgray material when I try to run the hair tutorial zscripts! I thought It was a standard default material! How can I fix this? I tried the new scripts you posted as well and I get the same error.
open up the text file in a text editor. search for the following lines:
[IPress,Material:MatCap Red Wax]
[IPress,Material:MatCap Gray]
[IPress,Tool:Geometry:Divide]
change them to this:
[IPress,Material:MatCap Red Wax]
//[IPress,Material:MatCap Gray]
[IPress,Tool:Geometry:Divide]
Save it with a different name and then play it again in ZBrush.
r
I downloaded the 3.1 update and that fixed it! Thanks Ryan
Thank you for sharing all your knoledge and experience its very apreciated .
Perhaps I am actualy studiying at ubisoft campus in modeling and just want to say thank you for your conference you did few weeks ago and we looking forward for your second visit at campus. I know it sonds like deja entendu but your stuff is amazing .
incredible.amazing.super.wonderful
Thanks guys for the kind words!
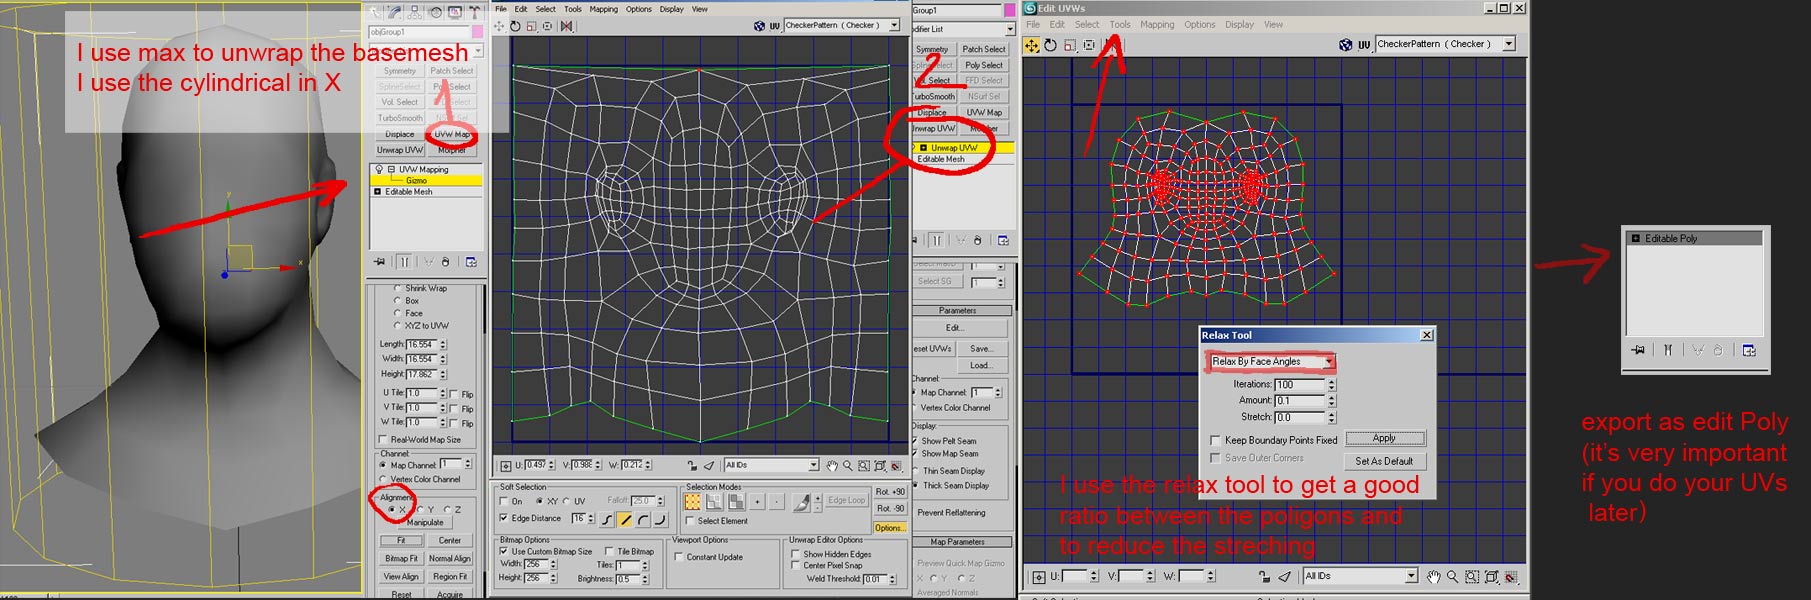
So I made a simple tutorial in image
This is The unwrap and UVW unwrap tutorial (If you don’t know how to unwrap)
[]
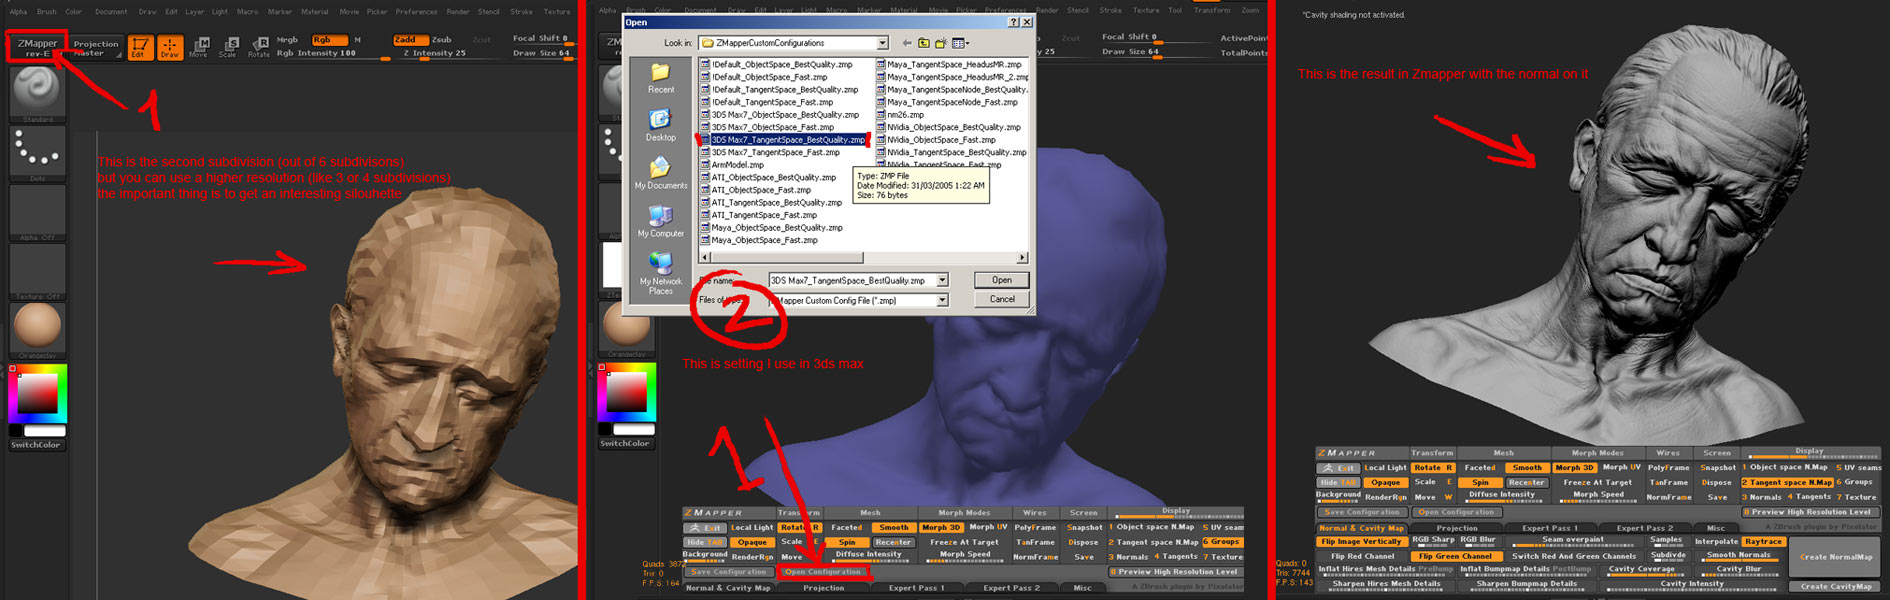
Inside Zbrush (once your model is done go back to a lower subdivision)
[]
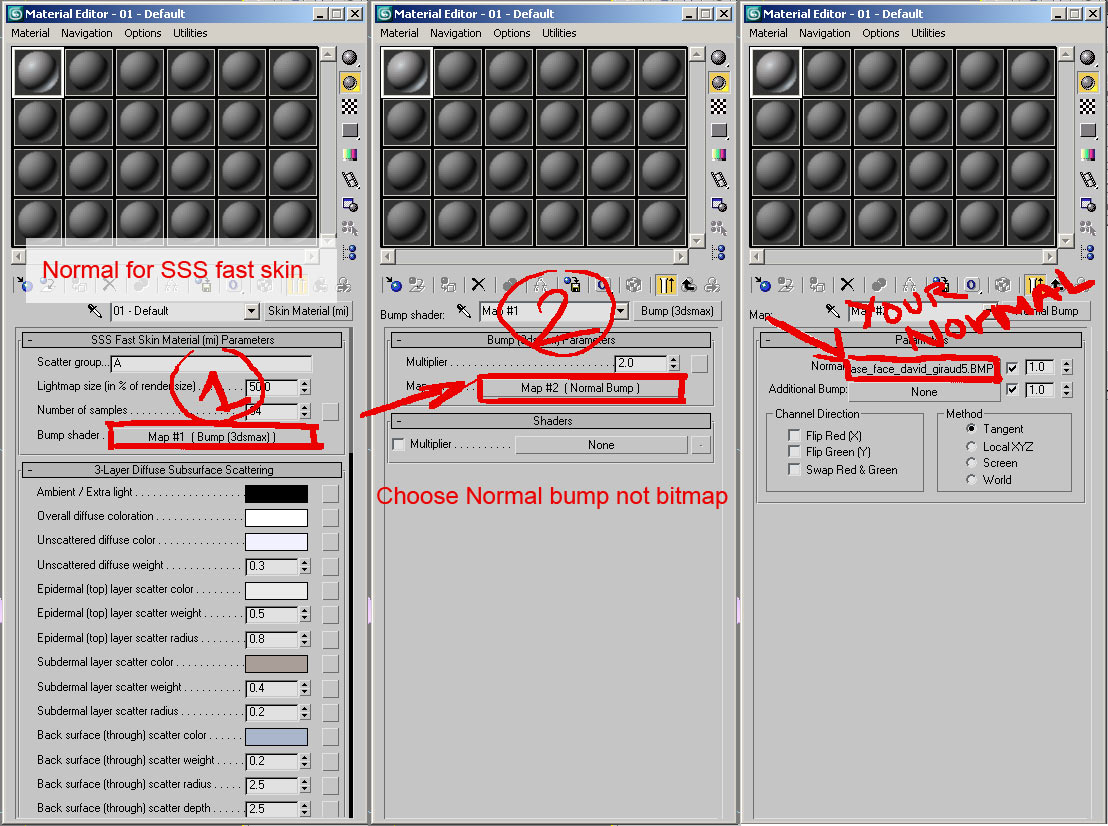
This is how to set the normal map in Mental ray SSS fast skin shader (for standard material place a normal bump in your bump slot and make sure it’s at 100 (it’s 30 by default)
[]
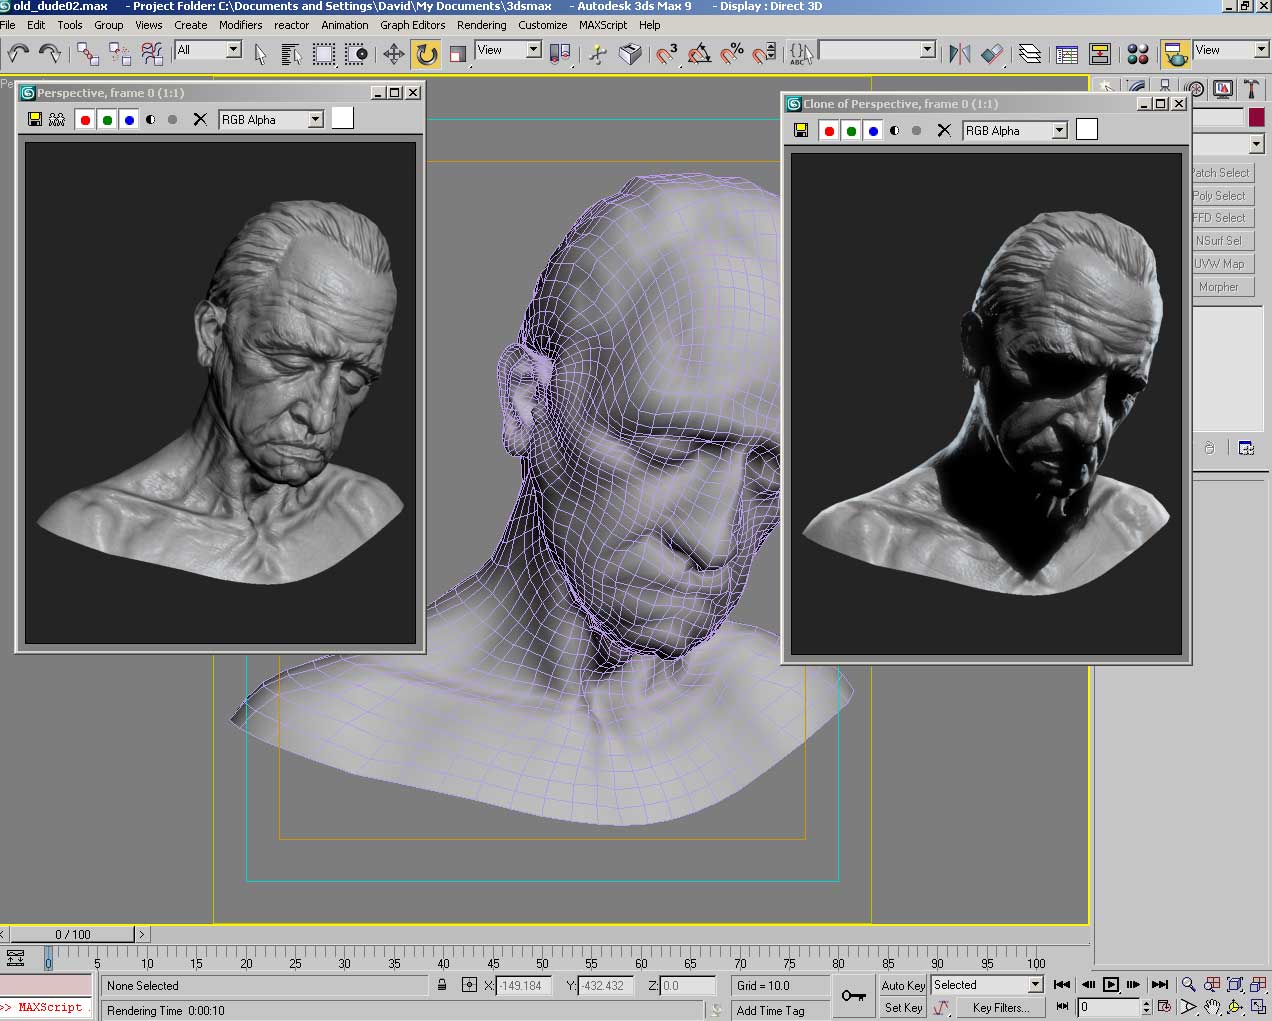
The render in max no lights on the left and lights on the right
[]
thanks share !
Beautiful… Lil’sister
very cool ! and thanks for the script/tutorial
thank you Lil’sister
Lil’ Sis, your like a Zbrush Superhero. Saving us from medioce models one mini-tut at a time. Thanks for sharing the knowledge.
Thanks for your useful tuto David!!! 
One word: Awesome!
Thank you for nice tutorial David,
I always wondered why do you guys unwrap model before going to Zbrush, 'cause you will change silouethe and that will distort UV cordinates on your model. Am I right?
Could I do my basemesh in Max(without UVs) then import in ZBrush, do it highres sculpting, export level one, in Max do UVs and import back to ZBrush(vertex order will not change) and generate normal map?
Basicaly, unwrap my model after highres sculpting.
What do you think about that “pipeline”? Should I get same results?
Yep! it will work if your export/import at level 1 but make sure that you convert to edit poly before you export! the only risk is to have your mesh exploding in some cases that’s why I make my UVs first. if you don’t want to make your UVs you can also use GUV in Zbrush but to me it`s a last resort type of thing.