Hi everyone,
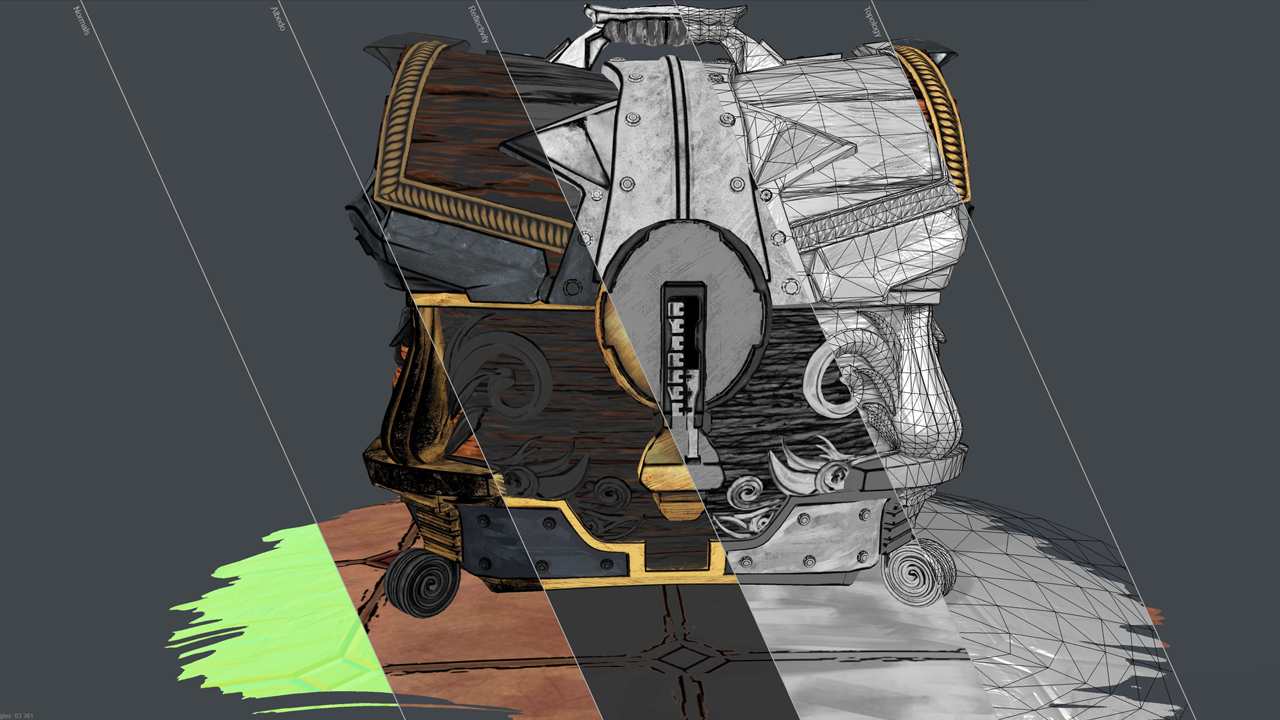
I’ve been working on a personal project of mine the last couple of weeks on a chest. Yes sounds like something boring to do but I wanted to have that brush stroke feel on the texture and the black strokes on the edges like a comic book. So I went on the adventure trying to make one and using tools and options inside Zbrush I’m not used to ; as well trying how to manage UDIM. OK so this is what I finally got going from the sculpt to Substance (bake & textures) and Marmoset for the final renders.

What’s funny is the translation from the original (VERY quick) concept to the final product. Let’s say it: the original one was pretty boring. I wanted something with more “cachet” without complicating too much the visuals. I kept the main volumes ans kept tweaking everything around it until I got what I was searching for.

The 2D concept was my starting phase then all the work would be inside Zbrush only. I went rough at the begining with no definitive and crisp details. Too bad I didn’t keep any previous screenshot works of this piece. On the top of the chest some sculpted guides that will help me the position the wood planks how I intended to.

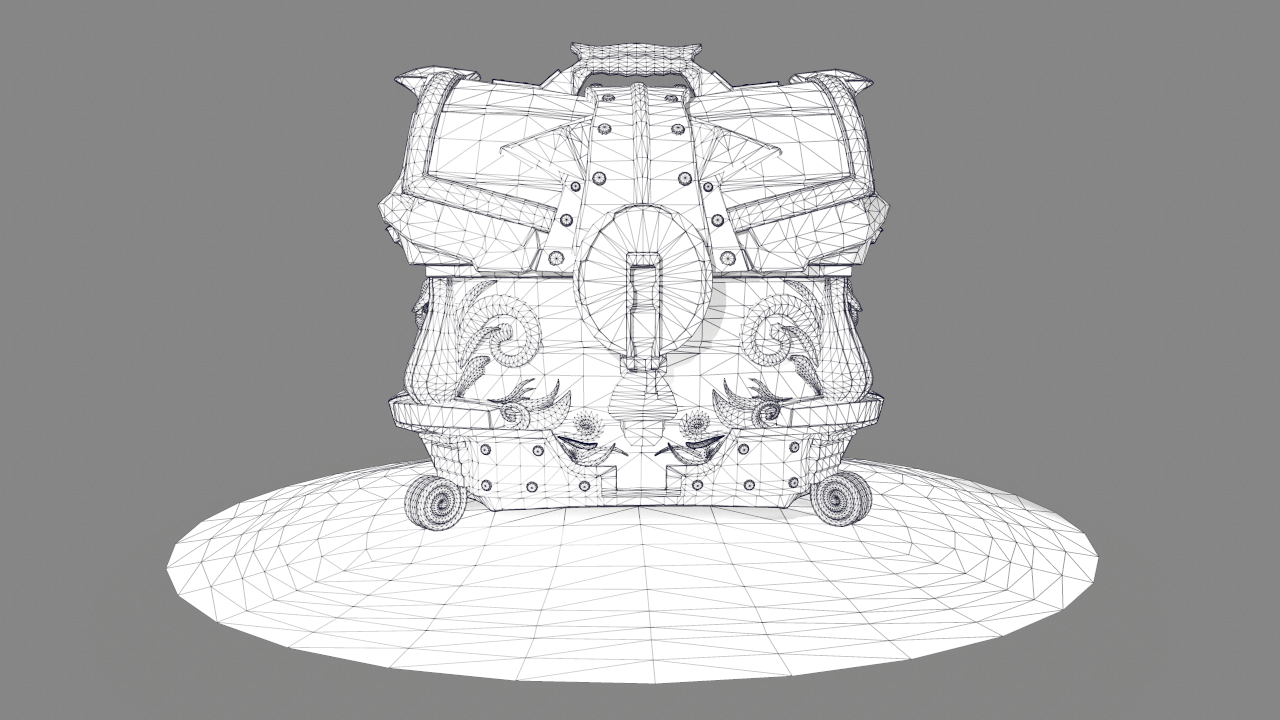
It took me quite a while create my brushes, exploring nanomesh functions and array mesh but finally I created the chest I wanted and I was happy to have achieved the highpoly… but now the fun start retopologizing everything and using UDIM textures the best I could for my first try ! Though I would have done things differently (UV organisation & empty spaces), now that my project is finished. Maybe more compact UV sets. Some UV are simply overlaping (ornaments and metal pieces) others don’t to give variety and avoid the symmetrical feel of things.

Substance was formidable for the baking process but some artefacts were present, especially on the ornements so I had to correct the normals, ambient occlusion maps for some of the chest parts by painting over them with the correct colors to mask out the oddnesses.
The first result was pretty close to what I wanted to achieve, with that pixelated texture nostalgia but there was too much detail resolution in the modeling so something didn’t quite match with texture intentions, besides the colors were faded… Well I could’ve stepped down one knotch more for pixelating my textures but my spider-senses told me not to!
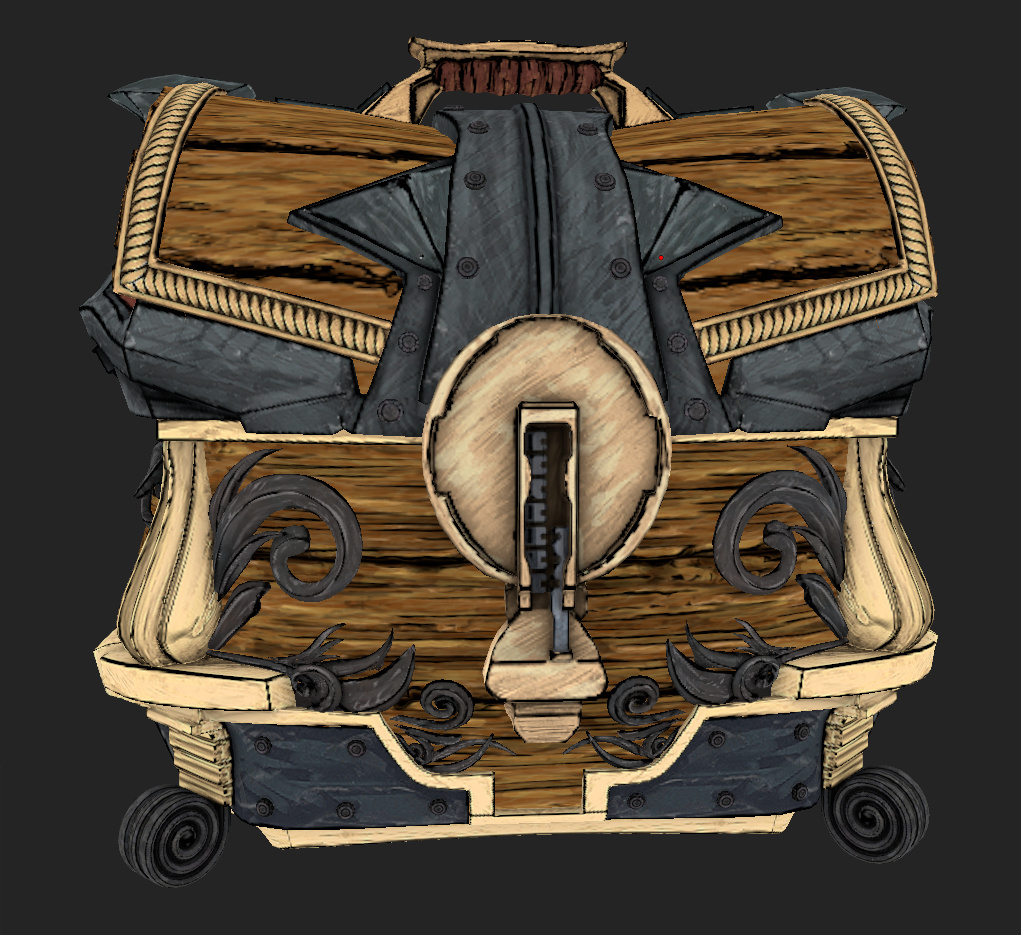
Slowly I’ve been adding more Roughness, Metalness and lastly Height details to obtain correct PBR (well almost, I tweaked that a bit too) and those paint strokes effect I really wanted to see on my textures !

The last important step was to color correct my Albedo in a neutral environment to make it pop more, make it more vibrant and alive. I had a hard time make the black strokes pop ou correctly as they seemed faded out sometimes. I didn’t want to use any special shaders to make that effect so my solution was to crank up the roughness and metalness sliders. It worked like a charm.

I went a bit crazy but in total I have 12 UDIM textures set (maybe I could’ve done only 8 ; what a noob you may say). I separated the wood material from the bronze/metal ones and kept the ornements on four different set instead of one but I was loosing too much texel resolution… the small screws are on their own separate layer too and not overlaping… haha!

So here it is my lovely Chest in all its glory. I learned so much on this personal project of mine. I’ll keep trying to develop someting similar now I understood my mistakes ! 
I hope you guys like it, see you soon for my next piece ! Happy Zbrushing !
Marmoset Viewer : https://drive.google.com/open?id=1VhuDl_0suVQcfBglf7EPSo4GllbKukE8

