ZBrushCentral

Maya/Zbrush Question

Hello All,

I’m only starting this thread for a question that has been bothering me for a while now. I have tried to ask that same question in somebody else’s thread but i guess no one bothered at all…

The question is if you want to animate some facial/eyes expressions for a character. Would it be better to have the eyeballs of a character combined together with the body/head mesh before exporting to Zbrush? or Left seperated?

I have tried to leave the eyeballs seperated once but the thing is that you can’t tell where the eyeballs lay within Zbrush. So, you may be sculpting over the eyeballs area and would only see the problem once imported back into Maya.

What if you have the eyeballs combined? Would you need to seperated them again once imported back into Maya? If no, then…you wouldn’t be able to animate each eye individually…right?

So, what’s the best way to sculpt and detail a maya base mesh? having the eyeballs seperated or combined?

Please… Let me know what you think and how you would usually proceed in doing so…coz this has been my main issue for a while now!

Thanks for answering my question…

Cheers,

Kevin

Importing a model with or without eyes are both viable modeling options for animation as well as still images. The benefit you get from including eyes probably outweighs the cons.

Pros :

  • Helps you visualise an expression.
  • Ensures modeling of the eyelids fit the eyes.
  • Looks better when you do a test render in ZBrush.
  • Helps keep an expression within the physical limitations of the face (visualisation).

Cons :

  • Contributes towards your polygon limit. A set of 60 polygon eyes is over 60000 polygons at subdivision level 6.
  • Although the eyes can be easily hidden they should be masked if you wish to model the rest of the head with the eyes visible.

There are other pros and cons in ZBrush but they come into effect if you UV the eyes and how you UV them. I can go into more detail on the issue of UVs if you want but I am on the way out the door right now.

In Maya there should be no problem in seperating the eyes from the body and being able to animate them afterwards (with displacement/normal maps on the body).

I am not sure what is described in the ZPipeline Guide for Maya but maybe there is something there to help you further.

Oh, I nearly forgot. Do not poke your eyeballs. It hurts. I am speaking from experience.

TVeyes,

Really appreciate your prompt reply to my question…
For the pros and cons, i totally agree with you…

In other terms, it’s better to have them combined… But wouldn’t it be a problem when applying all your displacement/normal maps?

TVeyes: Oh, I nearly forgot. Do not poke your eyeballs. It hurts. I am speaking from experience.

What do u mean by that…?

Thanks again TV eyes and thanks for the link :wink:

Kevin

In other terms, it’s better to have them combined… But wouldn’t it be a problem when applying all your displacement/normal maps?
Rendering of the displacement maps should not be a problem with multiple or merged geometry as long as each has its own set of UVs. I think you are getting confused by the general idea of displacement/normal map creation.

As of Zbrush 2 you can have UVs assigned to 1 or more UV regions, the regions being 1 * 1 units in UV space. So you could for example have your head model mapped to 0,0 to 1,1 and your eyes mapped to 1,0 to 2,1. If you wanted to create a displacement map from a multi UV region mesh you would then use the Multi Displacement 2 plugin. The plugin will examine the UV space and automatically calculate a displacement map for the head (0,0 to 1,1) while disregarding the eyes. Next it would do the same for the eyes (1,0 to 2,1) while disregarding the head. Unfortunately multi UV regions are not supported throughout ZBrush 2. When texturing using Projection Master each UV region is treated as if they lay within the 0,0 to 1,1 UV space. This of course results in overlapping UVs during the Projection Master calculations and leads to undesirable results. The same goes for Normal map creation. The simplest way to solve this is to only work on 1 UV region at a time when texturing or before creating a normal map. To do that press Tool > Polygroups > UV Groups which will asign polygroupings according to the UV regions. You can then Ctrl + Shift click to hide all but that area of the model and texture or calculate a Normal map. Ctrl + Shift click an empty part of the canvas to view the entire model again and select the next UV region. As far as I can see ZBrush 2.5 will take care of multiple meshes while modeling (your eyes + head) with Sub Tool modeling and I would be very surprised if the multiple UV regions was not extended to cover all facets of texture/normal/displacement mapping. So no reason, in my mind, to stop including those pesky eyeballs ;)
TVeyes: Oh, I nearly forgot. Do not poke your eyeballs. It hurts. I am speaking from experience. What do u mean by that...?

Stop doing it. Trust me. Next you will be picking your nose :wink:

ps. I am crap at jokes.

Cool…
I never read through the Multidisplacement Doc before. I think i will have to go through it again and again to really understand the use of it until i can juggle with it. It sort of making more sense to me now.

So, basically it’s just a matter of choice! whether you want to add those eye balls or not :confused: 
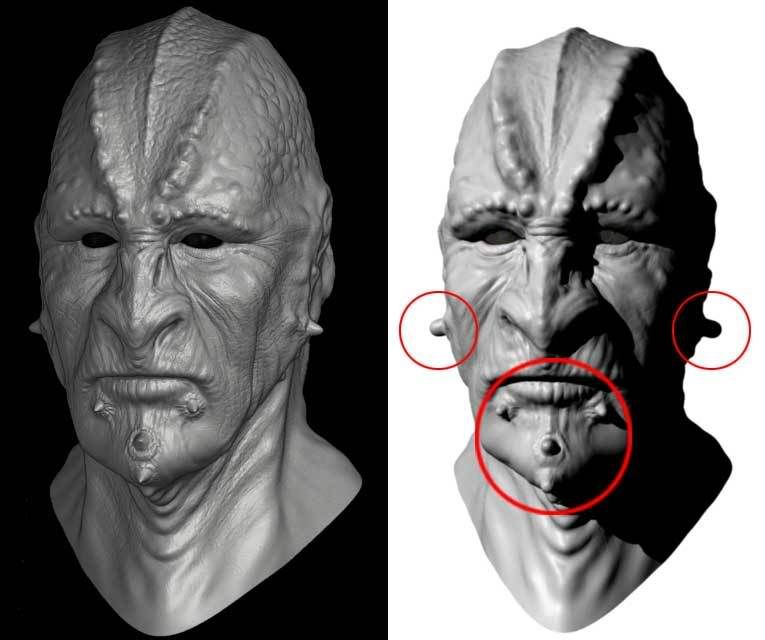
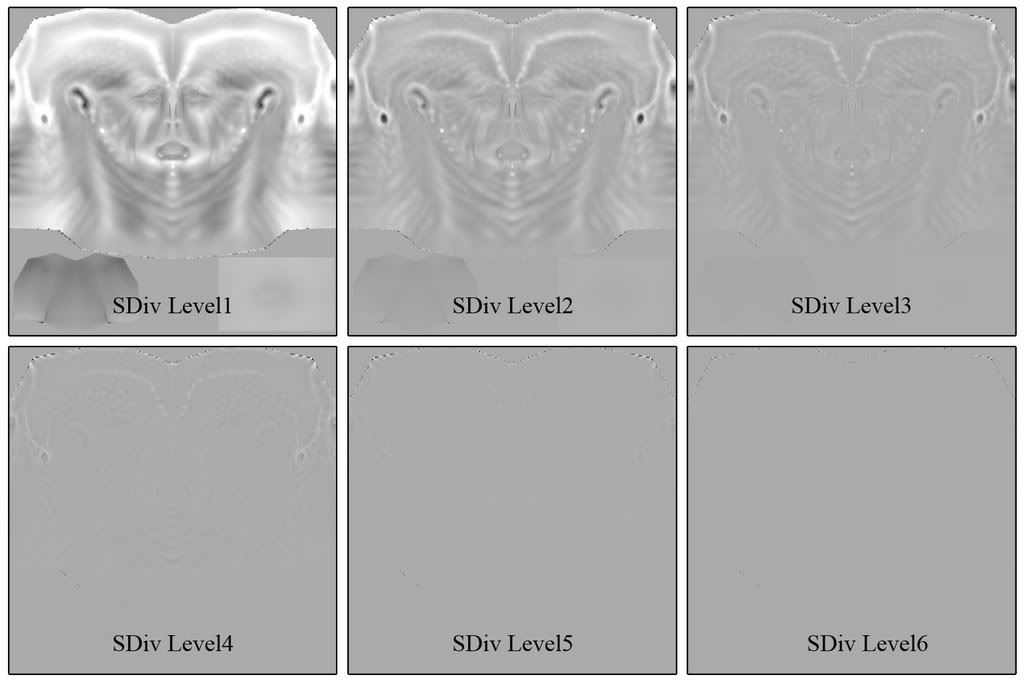
60000 polys at Sub Div level 6! :laughing:

Ok, i will try not poke those eyes balls! :laughing:

p.s: I will eventually start a new thread as soon as i start working on my character… Will keep you posted!

Thanks again TVeyes! :+1:

Kevin

Hi weyvin
Thought I’d chip in here and mention that I’ve taken to importing halved
‘proxy’ eyeballs so as to reduce the overhead on the subdivision count…

This is usually sufficient to aid in getting the eyelids to cling tightly to
the eyeballs contours; (it helps to mask the proxies prior to starting the lid-editing also)

Once you’re happy with the lids’ shapes, the proxies can be deleted, and
the ‘proper’ eyeballs substituted later on…

– These are poke-able eyeballs, btw :smiley:

C.

Attachments

proxy_eyeballs.jpg

Good point Atwooki :+1: Eyeballs seldom have a need for displacement so proxy geometry you can remove, before calculating a displacement/normal map, can be an ideal solution.

In regards to the Multi UV region selectioning in ZBrush I just wanted to add it helps being comfortable in the selection of polygroups. You can find that info in the Zbrush inline Help under Modeling 3D Objects > Partial Mesh Visibility, there is also a zscript tutorial included.

Haha! :smiley: 
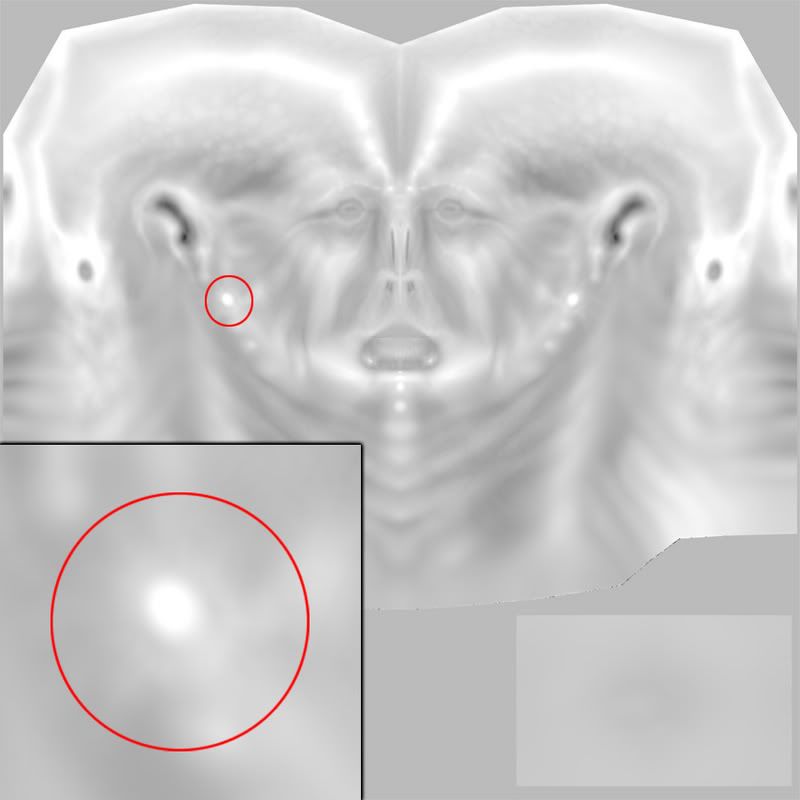
Now i get the point of those poke-able eyeballs! :+1:

Atwooki,

Thanks for posting the illustration! It does make more sense using half ‘proxy’ to limit the number polygon count at subdivisin level 6.
I think that’s the method i might be using for the project.

TVeyes, will check the Zbrush inline help asap :wink:

I really appreciate your help guys… Makes me feel like i am not left alone with my issues!
I hope you guys will help me throughout my project as well… :slight_smile:

Thanks again for all your help guys!

Kevin

Hello People,

Since this is a Maya/Zbrush thread i’m gona use this to ask further questions about issues i have come across lately.

I have recently done a character, base mesh (Maya) and detailing in Zbrush.
Everything went well until i re-import the mesh into Maya to apply the Displacement map. Here’s a picture to show what i mean.
The left render is from Zbrush and the other in Maya (Right). Circled in red are the issues! (Though it looks all blobby)

I’m thinking maybe there’s a problem with the Displacement Map because it looks very smooth in those places.

I have used the MultiDisplacement Plug-in and the code

“DE-HAEK-EAEAEA-d32” to generate the Displacement Map

and in Maya, the AlphaGain had to be cranked up to 4 to see a big change and to get what u see on the picture(right).

That’d be cool if anyone can help me on this.

I conclude that it’s best to have the mesh modeled instead of having everything Displaced? Am i right?

Thanks for your time!

Kevin

Hi Kevin

I think this is the code you should try with Maya displacements:

DE-LBEK-EAEAEA-R32

good luck :slight_smile:

Thanks a lot Atwooki! :+1:
I’m gona try it straight away!

Cheers!

Kevin

The Displacement Map generated looks so much better than the previous ones i have used.
However, there’s no much change in the render itself.
The result is rather similar to the ones i had before but with some minor improvement in the details but not on the spikes…

I have tried to apply the Displacement Map to different Zbrush exported .OBJ (Level 1-5) but with no much luck at all. The mesh i used in that image was a Level 4 exported mesh.

I think i will just put him on the side and not to worry about him since he’s only a side project even though i planned to animate him :cry:
I even had him textured :cry:

Kevin

Try these settings, weyvin:

‘Feature Displacement’ - OFF in the shape node;

and the settings as high/close as possible to those in the SubDivApprox window…

Your alpha Gain should be at 1 and alpha Offset -0.5 (if generated from the ‘Multi Disp’ plug in in ZB)

C.

Attachments

mr_approx.jpg

Chris,

Thanks for helping me out Man! :+1: I really appreciate your help and your prompt replies! :+1:

I always have ‘Feature Displacement’ off
But never used to change those values underneath it i.e: Initial/Extra Sample Rate etc or even the Bounding Box Scale…coz since ‘Feature Displacement’ is turned off…

Should i change those settings though?

My Alpha Offset always equals to -0.5 and my Alpha Gain always equals to 1.
Not sure why though but with this mesh, i had to crank the Alpha Gain up to see the change/difference.

Will do a render and post it asap!

Thanks a lot Chris!

Kevin

Ok, i gave it another go and these are the results i got…

This one had the Alpha Gain set to 0.5

and this one set to 1

Notice how blobby it gets?

I am guessing that the problem should come from the Displacement Map itself…coz i am pretty sure that i have set everything up corrently in Maya.

The reason why i think all these problems come from the Displacement is only because on the Displacement Map, the “Spikes” are shown by a flat white spot instead of a gradual black to white.

Check the image below to have see what i mean…

I don’t think the white area should be that flat white coz then, that would explain why the spikes look like nipples! :lol:

Kevin

I also tried to experiment something with that character, generating Displacement Maps at different Subdivision Levels at 0 DpSub Pix

Here’s the result


In my opinion, i think (from this character) generating a Displacement Map at Level 2 looks neater… Only did this to experiment :wink:

Kevin

i think u modelled the spikes smooth in maya and then done the zbrush.
i this case ur geometry will not be affected my the map
it will not change the silhouette of the model
sorry if i m wrong :confused: