Matte painting ZBrush 2D -
Very nice Spaceman. I have been using Z for mattes over the last few weeks. I like adding a little 3D to play with lights and get a better matte, and I’m still experimenting with techniques. I’ve been planning a tut as I can’t show production stuff.
I really like this matte.
very cool! I have been wondering if this program gets much use for matte painting. even though it is not the tool but the artists eye that creates art there seems so many possabilities.
would u be willing to share your method? I really love the palette and the sense of movement. Very well done! 
r
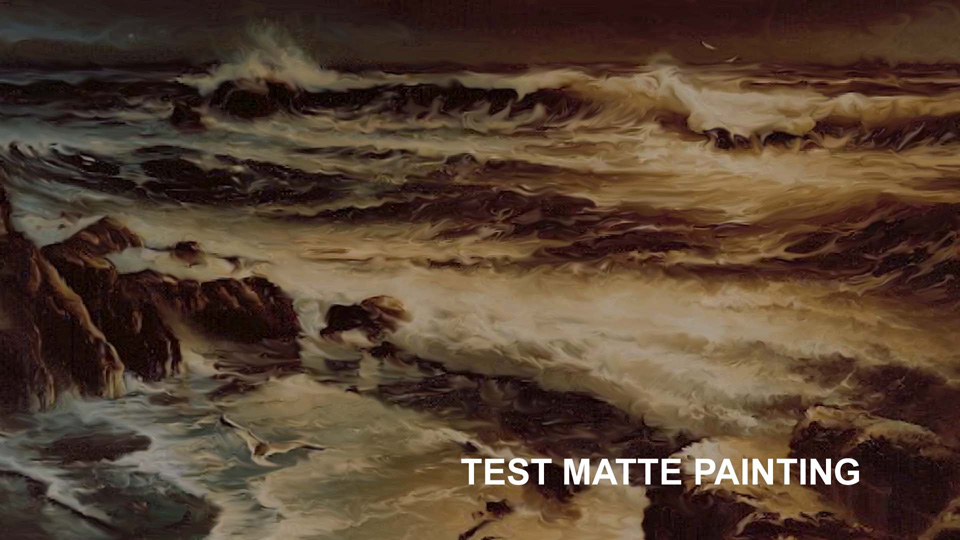
very cool spaceman…reminds me of California’s northern coastline during some wicked winter storms.
Jason
Thanks
Your tut on matte painting sounds good. And.your ideal “adding a little 3D to play with lights and get a better matte” alone is an excellent ideal for a tut
Ryan
I used the smudge tool Note: you can add colors by adding dabs of color with the simple brush- might have to change the brush depth some
aminuts
Highlights and shadows I think would make it into a moonlite brighter look
One of the cool things Aurick taught me several months back, is you can add or subtract depth along an axis, just turn the others off. This way you can pull the objects in foreground forward, push tose way in the painting backwards, etc. You can give relief to a tree, yadda yadda.
The reason I explored this was to replicate what we do with projections from the camera on simple geometry. I wantedd to be able to take a matte and move the camera if necessary (always asked that) and have a little leeway to work.
I’ll try to fulfill a tut on this soon and post it.
Cool “Test Matte Painting”, really great work, I like it a lot!
Matt 
Jason :" I’ll try to fulfill a tut on this soon and post it."
BTW a tip about making a fade in or out of the matte at this light level of the matte I posted using Z2-
render with best and shadows save
change render to preview leave shadows on save
change render to fast leave shadows on save
change render to flat leave shadows on save
Download the matte I posted if you want to (it’s a jpeg but should work when you resave it to psd) and let me know if you are getting the lighting with the four files for a fade in or out of the matte
Thanks mmbenya
Here is a quick example. I’ve pushed the sky into the background into Z depth. Then I inserted an object, then just for fun rendered shadows to show the newly added depth to the image. This really opens up many possibilities. If I use Multimarker, I can then have some real fun. 
Jason
Thanks for thr preview of the matte painting tut.I think it will be a cool tut - the depth looks like it will allow vanishing point walks to the horzion and spaceships vanishing into the horizion or vise versa and “This really opens up many possibilities”
BTW did you use your toon shader on the 3d objects
I am new to using ZBrush so when you say Z depth- lost me - I do not know where it is in Z2
I have been trying to get Multimarker alignments for some time - they go all over the place when I try to align them - for me not the easiest Z2 tool to use.
Hey Spaceman,
No toon shader on that one, just a texture from the default palette.
x axis, Y axis, Z axis (depth) - you find this control under Transform.
(see atached jpg)
As for multimarker, some tricks make it easier. I know of a script in development that makes it really easy for anyone. I’ll check to see how far along it is.
To show a little more about why the control of xyz axis is important.
I started by turning z axis on and pulling the main towers amd hills up from a plane. Then turn off Z, turn on x an y - all done witht the standrad brush (under Transform). Then subdivide, and move to the Inflate (under Transform) add more detail, then subdivide. I usually smooth all (Tool, Deformations) several times and use the Smooth brush (under Transfrom) for nasty areas. The continue inflating, turning x and y on or off randomly, you can even play with Z a bit to work the gravity aspect of rock growth.
This is a great way to use the tools you need to do the matte painting trick I’ve been implementing.
More to follow.


Jason
“As for multimarker, some tricks make it easier. I know of a script in development that makes it really easy for anyone. I’ll check to see how far along it is.” Thanks
I added some objects with a default Z2 material then used your toon shader - which changed the light to a brighter light on the matte- I then used the smudge to start blending the objects to the matte painting.
Note: If the brighter light of colors is not the effect you want - use matte on 1st layer then add the objects etc on second layer delete the 1st layer then render best render with shadows then save as psd and use another program to open the objects image and change the gray background of the image transparent and and place onto the matte trough a layer and save as a psd then bring back into ZBrush and start using the smudge tool, etc.
“x axis, Y axis, Z axis (depth) - you find this control under Transform.” Thanks - edit mode -Transform xyz
Nice Spaceman. Now for a little info to make your scene POP!
Here is the start of some work I recently did. When I’ve finished pulling the things I want I’ll even show an animation with mist, running water and sparkling light and perhaps a small camera movement. Just because I can.
In essence, mask out what is in the foreground, set Z as the only axis for now - you can push back with the displacement tool (crosshair) or use the Deformation tools under Tool, offset in Z - I usually work in increments of 10 and try to guess the necessary depth of objects.
Keep adding to your mask and push everything a little farther.
As you can see ny the second image, it starts to look real cool, and we have barely begun.


BTW - How do you apply the matte painting (or other image) to the plane3D tool (so you can scuplt the plane3d) to an 16 : 9 ratio or is their an plane3d tool for this (BTW a plane3d tool set for the ratios of different video’s and film’s ratio’s would be useful- the Z2 ZTools Filmmakers RatioTool Kit)
“In essence, mask out what is in the foreground , set Z as the only axis for now - you can push back with the displacement tool (crosshair) or use the Deformation tools under Tool, offset in Z - I usually work in increments of 10 and try to guess the necessary depth of objects.”
I need some more info on how to “mask out what is the foreground” - use which Ztools
Can Z2 conform the plane3D tool to the doc size or ratio?
Yes. You can make several defaults.Hold the Ctrl-key and paint, it will paint the mask - controlled under Tool>Mask.
…sea landscape
Cool Smudging work 
Little trick with the smudge tool : Ctrl = put a color
And C = Eye dropper color !
With that you can paint any thing
Have happy painting!
Pilou
Jason
“Yes. You can make several defaults.Hold the Ctrl-key and paint, it will paint the mask - controlled under Tool>Mask.”
This works for the plane3D tool and other 3d models - however, the matte is an Z2 doc and the masking does not work on the doc that I know of - I can bring in the matte into Z2 as a texture and use it as a texture onto the plane3D tool this however brings me back to the question-
Can you conform the plane3D tool to doc size or to a ratio - if not - can it be done with a zscript or would a a plane3d tool set for the ratios of different video’s and film’s ratio’s work better- the Z2 ZTools Filmmakers RatioTool Kit
In other words - How are matte painters to bring in their existing matte work images onto a plane3D tool in the proper different video’s and film’s ratio’s so they can use the Z2 3d tools to enhance their mattes
Anyway, Jason do not let this question distract you from your excellent matte painting with 3d tools tut
Pilou
Excellent tips
“Little trick with the smudge tool : Ctrl = put a color And C = Eye dropper color !”
“In other words - How are matte painters to bring in their existing matte work images onto a plane3D tool in the proper different video’s and film’s ratio’s so they can use the Z2 3d tools to enhance their mattes…”
Yes Spaceman, you can have the mesh match what you like. Change the info in Initialize under Tools. Then create a Polymesh if you like, and save several. A script can be used to set any size you want repeatedly.
If you bring in an existing one, Zbrush will tell you it’s size, you can then hit Crop&Fill under Texture. Then draw the Plane tool to the appropriate size and apply the texture, or use 3DCopy or ProjectionMaster, and at least 2 other approaches I’m sure…