ZBrushCentral

Joints for a figurine and matching the pieces after boolean cut?

Hi! I’m a newbie with ZBrush and this is my first post here, so I hope my question isn’t too dumb.

I’m currently making an articulated figurine to be 3D printed. The character itself is complete and now I’m trying to create joints for the limbs and head. I made a separate joint piece which I’m using to boolean cut matching parts. Here’s an image of what I’m doing:

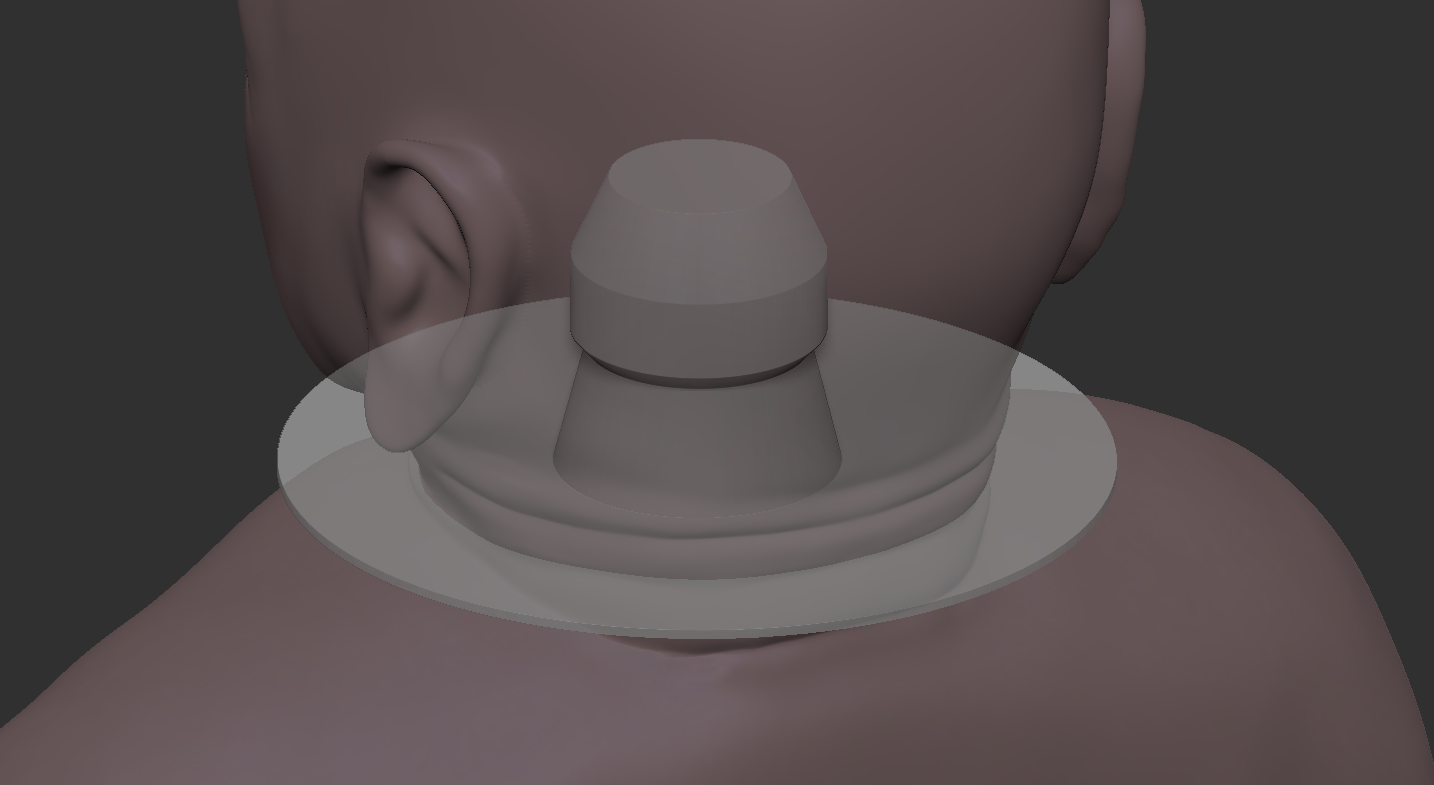
What I don’t know how to do is how I could make the touching surfaces of cut pieces perfectly circular (while keeping them flat after the cut), so that when I turn the limbs/head, there’s no extra overlap in some parts. Here’s the problem and intended result crudely illustrated: https://www.dropbox.com/s/t6wvo3cp84i0s5e/example.png?dl=0 The parts that I’m cutting are not obviously perfectly round at the places where I’m cutting them, so I’m wondering if there’s a smart way to do this.

I’ve tried looking for a solution, but I’m stuck because I’m not sure what might be even possible in ZBrush in this kind of situation, and even though I’ve tried I seem to not know all the needed terminology and words for googling effectively. So far I’ve tried using a separate cylinder object as a kind of marker while manually moving the surface-to-be-cut along the cylinder but the result isn’t even close to perfect. I also tried masking the flat surface areas after cutting and moving the edges into a more circular shape by hand, but the topology change after boolean makes the results really ugly. Needless to say the joint parts should match properly, which isn’t happening with this. Any ideas on how this could be made?

Thanks!

Hello @hanshans

If I understand your concerns correctly, it would be physically impossible to prevent some degree of mismatch/overlap as long as the joining pieces are sculpted realistically. It seems to me your main options are to:


1). Manipulate the surface of the model so that it perfectly round in that area. This would, of course, sacrifice realism. It will be obviously artificial looking. A couple ways to do this would be:

  • Use the Project Primitve gizmo deformer to force that area of the neck into Into a perfect cylinder.

  • Position a cylinder in the correct location, and use Live Boolean or dynamesh to fuse the meshes together. It may be useful to do a little preliminary sculpitng while the pieces are still separate in order to make it easier to completely envelop the neck.

Once the join area is perfectly cylindrical, mask the middle portion where the cut will be made to protect it and keep it perfectly round, then start sculpting and smoothing the transition into the cylinder from both ends as best as possible. Then perform your live boolean cut.


2.) Recess the Cut first.

  • Perform a boolean cut with another subtool with enough thickness that results in a bit of a gap between the two pieces, so the pieces don’t quite align perfectly. Then insert a cylinder into that gap so that it is completely enveloped by the character mesh. Merge that cylinder to the main body and cut THAT cylinder straight across.

This will result in the two joined surfaces being perfectly round and flush, but it will leave a visible notch in the surface of the character mesh. Otherwise, there would be no discernible difference between the character surface and the join.