Awesome work, Joel!!
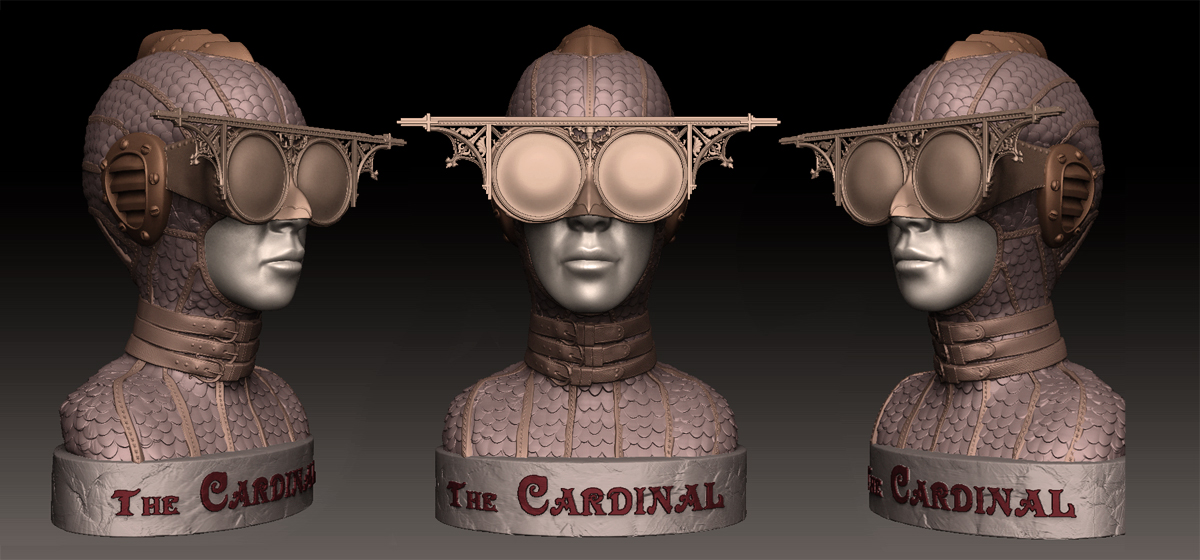
My only critique would be that the face looks too clean now. Would love to see some color variation and some darkening in the deeper wrinkles.
Looking great so far… keep going!
How did you create your skin texture in Zbrush? I mean what’s the type of brush ,what’s the alpha you use to create skin texture.
Fantastic work there dude. Love the mage ( kinda reminds me of Balrog from Street fighter 4 ).
How do you like the new hair system in Modo 401?
Ken
Just starting my own digital Ecorche. I’ve always wanted to complete one as a personal study. So far I’ve laid out the major muscles and tendons of the arm. No surface detailing and I will still need to work more on making the muscles work together.
I’ve not set a time limit on this project as I have other projects I want to work on before completing my Ecorche. This will be on the backburner for when I’m bored and need something else to work on.
Thanks for all the nice comments here.
Arabas, Mage’s skin texture was a combination of using the rake brush, a modified rake brush (Ryan Kingsling’s Rasp brush) and high resolution photographs projected onto the surface of the model. Although if I was working on him today I’d probably be looking at the new Skin brush to do a lot of the detailing.
Kenmasters, Modo’s hair looks great, but I find it is currently a pain in the ass to actually work with. Although to be fair it was really meant to be a fur and grass system so I’ll wait till they update the system for that use before bashing anything. I still love using modo for rendering and base models.
Thanks Anand! I agree I could have added more variation to the skin colour. I’ll be paying much more attention on my next model. 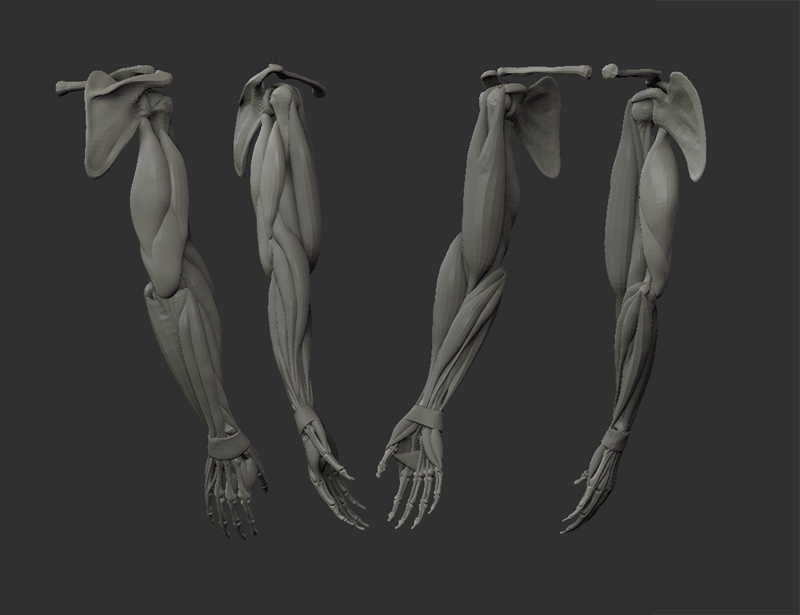
Very nice digital Ecorche… great study…and great sculpt!
Looking forward to seeing the écorché updates (even if it’s only 1 update each year… how many muscles/tendons for the whole human body…  ). Did you model the skeleton too?
Plunq: Excellent job, I’ve learned a lot just by viewing what you got so far. Looking forward to more. small_orange_diamond
Thanks guys. I consider this part of the Ecorche just the initial foundation. It consisted of 30 subtools, each one was laid over each other and the skeleton. There is not much sculpting going on yet.
Etcher: Yep, I had sculpted the complete skeleton earlier this year while taking some sculpting and anatomy classes. I posted this months ago but here it is again. I also made a chart labelling all of the bones for easy reference. If you want I can post that again as well.
These are great, Plunq; definitely post again with labels!
thnx H
I looked up the skeleton thread; great stuff! Where did you find the patience… .
RawSunlight, here is the labeled version, you can get a higher resolution version of it here: http://features.cgsociety.org/newgallerycrits/g92/10292/10292_1232474274_large.jpg
Etcher, thanks buddy. it’s one of those things that I always wanted to do. Thankfully now that I’ve done it, I’ll never have to do one again. I’d say going to an Atelier and learning how to work on one drawing for months at a time develops a sense of patience 
Cool Skeleton!
Thanks Plunq, have books, but it’s nice to have this one a sheet!
Great work; let’s hope humans don’t evolve to cope with global warming or you’ll have to start again
Thanks friend
H
OK, now I have useful desktop background:)
Thanks
my first reaction was is that Jayzee, then where’s Conyay and Rhianna. then their song played for me in my head. Who’s Gonna Run this town tonite. I think you are running it! Excellent work
very very nice and cool work
Hi everyone,
Since R3 is now out I can show some of the images I created while beta testing. R3 has so many new powerful tools in it, hard to image it is still considered a 3rd point release of a half release! Thanks again to the Pixologic team for having me as a beta tester and using my images in the docs and promo material.
Some really cool new features that I think some might find useful:
New Smoothing brushes and new Smoothing algorithm.
Try out smoothGroups brush in conjunction with new polygroup by polypaint.
smoothDirection brush, name says it all. Works great with Rake brush!
To try out the new smoothing algorithm, press SHIFT, start to smooth, then let go of Shift while still smoothing. A new smoothing algorithm will kick in which works fantastic on unified meshes with triangles.
Gestural navigation. Hold Shift and move your mouse cursor up and down over an area you would like to zoom into. Do not mouse click, just hover. After moving your cursor up and down a few times, Zbrush will frame the area you were moving over. To Zoom out, hold SHIFT and make circles with your cursor. Zbrush will also align your tool to the orientation you move your cursor. So if you hold SHIFT and move from side to side, it will frame your model to that area but also orient your model sideways. Give it a shot!
Hopefully you find those tips useful, I know I did.
A ZSphere, Surface Noise, HD Geo test I did:
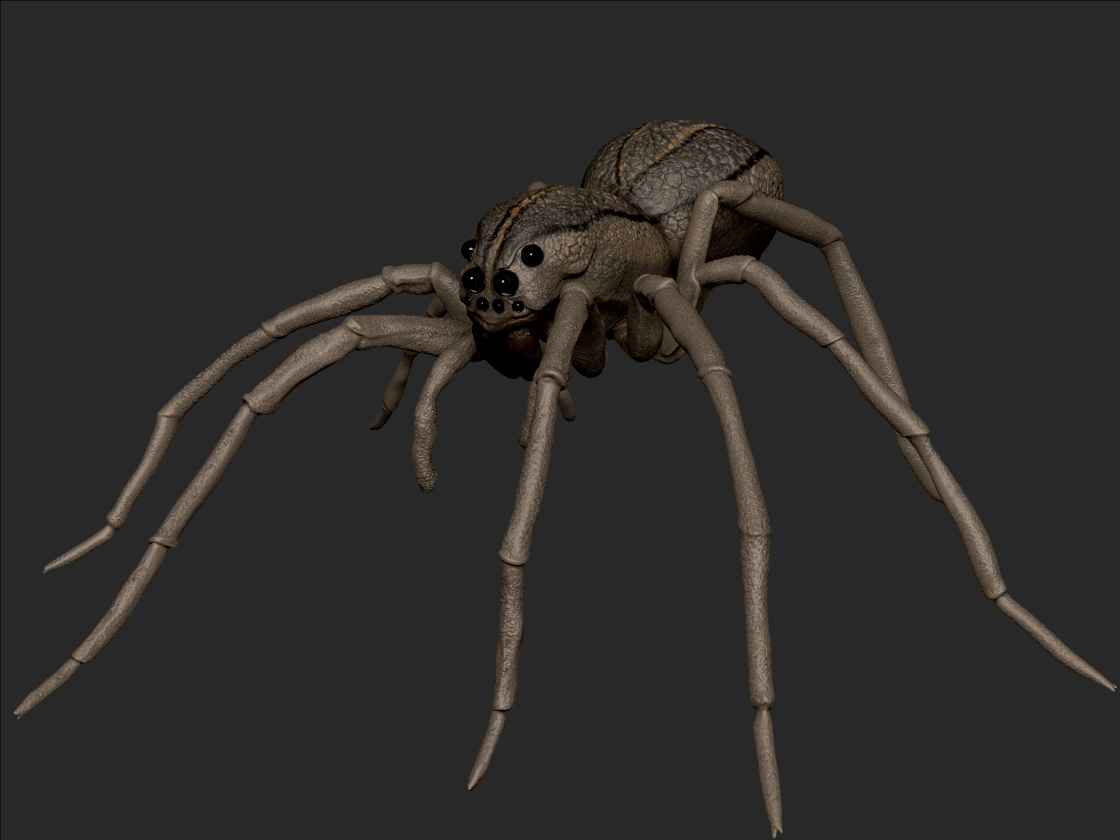
A Zsketch, Noise and new brush test after seeing Joseph Drust’s awesome wasp:
A character that I am developing. The body is still being worked on. Everything was done within Zbrush. Zsketching, polish brushes and new scale brushes:
Finally a hard surface test using new zsketching, unified skinning and polish brushes.
Attachments
Nice stuff dude. Do you have any wip pics of the gun. Or maybe give us a bit of a breakdown of your workflow.
Thanks Pencil_head,
I did not record my work but I did save often, so I was able to make this animated Gif.
Basic workflow is the same shown in the new 3.5 overview video.
I created a concept with quicksketch, color coded the separate subtools I would create.
Each subtool was created using Zsketching and a unified skin.
I would then rough out the shape with the mPolish brush (B,M,P).
Once I was happy with the overall shapes I used the claytubes brush (B,C,T) to define secondary forms.
Next, I would subdivide my mesh and go back to mPolish to refine my planes.
To get the real hard edges the hPolish brush was used (B,H).
The details were a combo of planarCut (B,P,R) and TrimDynamic (B,T,D).
There was some exploration of forms and details, some worked and some didn’t. Another useful tip is if you cannot get the detail from your current subtool, try running a unified skin from it. It gave me great results and allowed me to continue in some troublesome areas. This was before Pixologic implemented the ReMesh All tool which would have made things even easier!
http://www.joelmongeon.com/videos/projects/Zbrush3_5/GunSteps.gif