Hello,
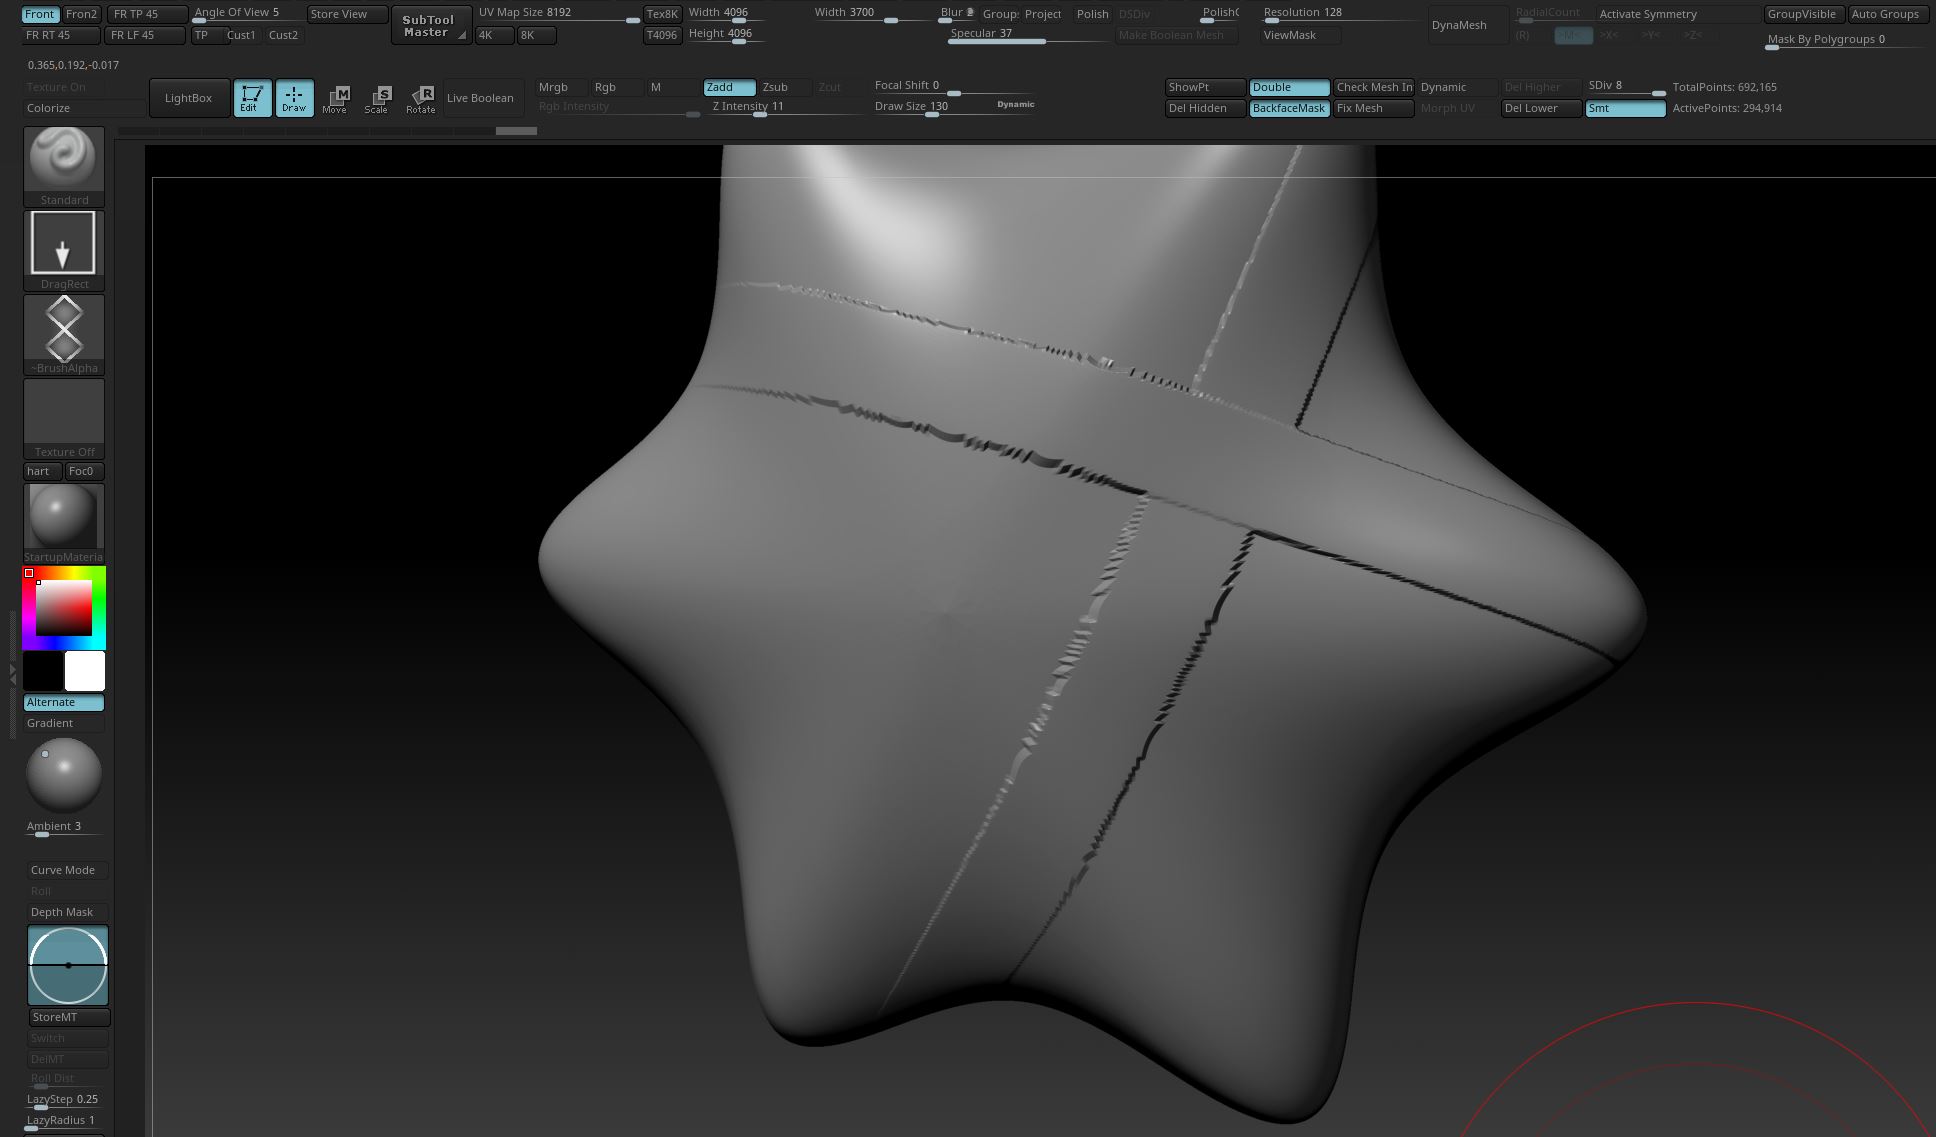
I am wondering, why I get hard jagged edges from smooth alphas on hres mesh 300-400K polys.
Thanks for help…


(zbrush2018)
Hello,
I am wondering, why I get hard jagged edges from smooth alphas on hres mesh 300-400K polys.
Thanks for help…
Mostly because 300k isn’t really very high resolution in Zbrush terms. Subdivide your subtool again once or twice, so that the polygons are in the millions.
The topology flow is a bit haphazard with a lot of circles, which results in those curved serrated teeth along the edges. If your mesh is high enough resolution this wont be especially noticeable, but for best results consider remeshing with Zremesher for more evenly distributed square polygons, then re-subdivide.
The transitions in your alpha may be a bit abrupt. I like to apply just the smallest bit of Gaussian Blur when creating my alphas, to soften the transitions a bit. A bit of blur can also be added in the alpha palette.
Thank you Spyndel,
I was assuming this, I just wanted to be sure.
It’s only strange, that a small cross on a (clothing) button, needs the button to have more than a million polygons.
If I imagine a dress with lot of details, I need to figure out which is a proper way.
In my special case I have rigged lowpoly object, so there is no possibility to change the topology or edge flow, because it would destroy the skinning.
Hopefully it works with highres normal maps.
All the best
Subd sculpting at millions of polys is great for baking out HD displacement maps that you render “over” your low poly models it’s kind of the purpose behind this whole thing, (barring 3d printing needs). So it’s ok to go to millions of polys to get smooth deformation and projection, then render your maps out to use over your low poly base for use in games/rendering/movies whatever. The models themselves stay at low poly and it’s the maps where all the magic happens, but for those maps you need millions of polys. The model is subdivided up as high as it needs to go to get crisp and sharp detail, then either a map is generated, an alpha or VDM is made from the high density mesh or the mesh is decimated down for printing. So nothing strange about it at all it’s the entire purpose of this link in the pipeline and part of the day to day workflow. Hope that helps get over the mental hurdle in the philosophy part you may be struggling with, but that being said none of this is necessary at all if you just start small and stay small, making the button have the detail you need when creating the basemesh in low poly. In my philosophy no need to go to millions of polys when 20 polygons will do the same thing, but also there’s no harm in going big since the purpose is to generate a displacement map from that detail for use on the low poly model anyway, either way multiple paths to the same destination.
And you’re right figuring out which way to go is a big part of the game and using all the tools and means to the end is part of that planning stage. What parts of my model are going to need subd or HD geometry for baking maps? What parts will work as simple low poly geo, what parts are going to need to be alpha planes to simulate loads of detail for next to no cost in the renderer and how do I put it all together to get what I’m after etc…common concerns for us all 
It’s only strange, that a small cross on a (clothing) button, needs the button to have more than a million polygons.
If I imagine a dress with lot of details, I need to figure out which is a proper way.
In my special case I have rigged lowpoly object, so there is no possibility to change the topology or edge flow, because it would destroy the skinning.
If rigged, I assume output for animation or digital render? From the example, it doesn’t appear to have that much elevation. A render-time textural solution like an old fashioned bump map could achieve mostly the same effect, independent of topology or polycount.
Many thanks,
yes, a Normal Map worked in a test quite good for this task…
Actually I should know these things, I just have been the last months completely been trapped in Maya and wasn’t sure,
if I have forgotten anything 
So good to get it refreshed thanks again