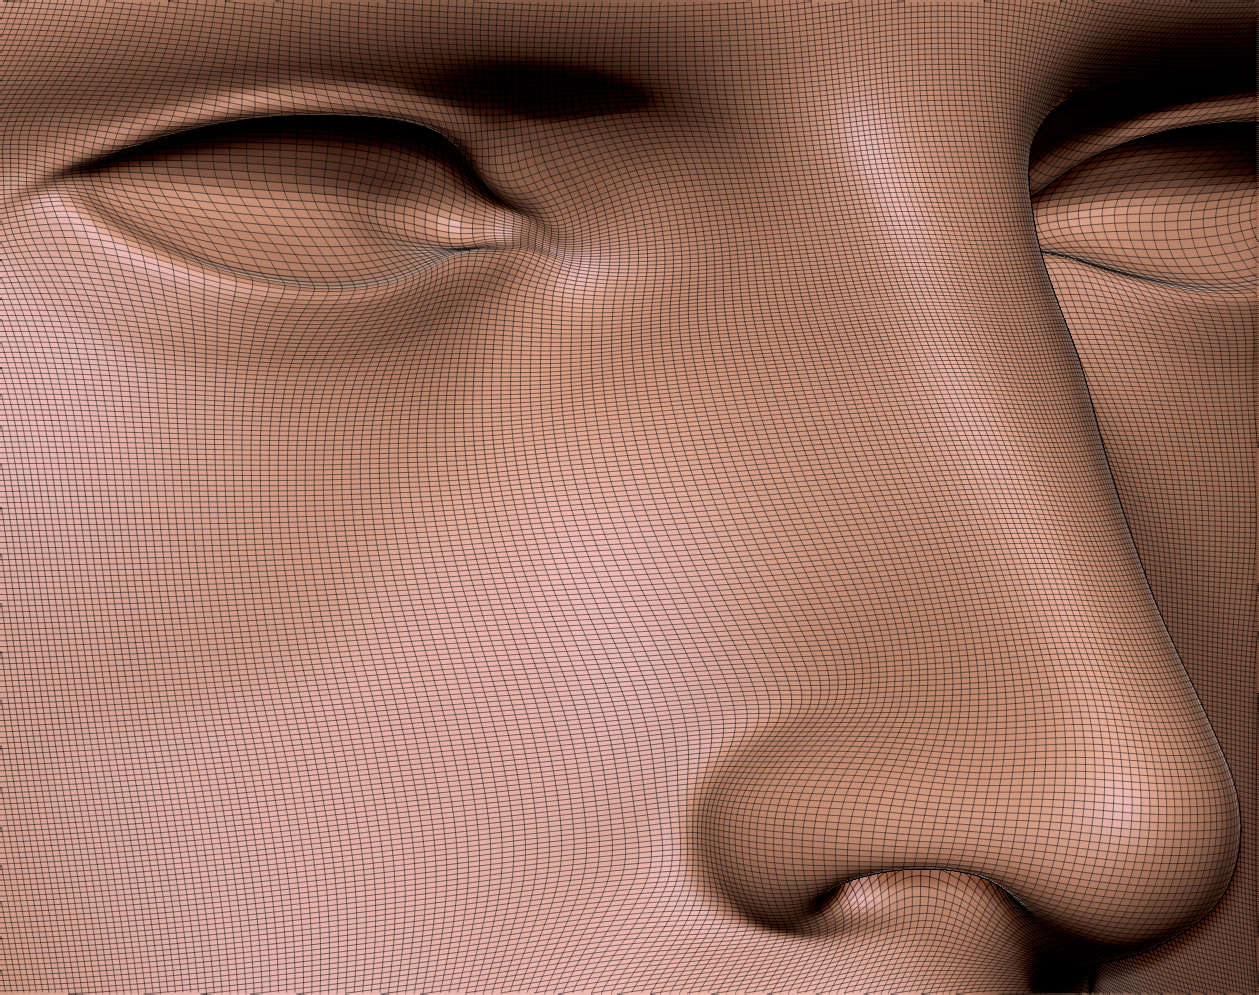
Hello, I am trying to increase the subdivision levels on my character model which currently stands at 16973824 polygons. I am getting an error message while working on Zbrush 4R8 application.
the error message is “Note: Subdividing the current mesh will produce a mesh with polygons count larger than can be supported by the available amount of memory. Decrease the number of subdiv levels or increase the amount of RAM which is available to Zbrush.”
I have gone across some forums and the fix is to increase the vitual memory on the machine.
Current configration on the machine is 64GB RAM.
Can someone please provide me with the information of the recommended virtual memory number or with the walkaround for this error as the free space on my C-drive right now 30GB and vtual memory is set to automatic.
Thank you very much for your time.
As you didn’t mention it, I am going to assume you have your compact memory set to 4096.
There are a couple of things that stand out to me in your post, and none of them have to do with memory allocation.
You’re asking how to get a mesh to ~68 million points. This will crush every program I can think of. Zbrush can handle it though, you just have to play nice with it.
- Have you tried working with Geometry HD yet?
- Have you tried breaking the mesh into smaller more manageable parts?
- Have you tried reworking your topology to have a more even distribution of geometry or at the least focusing the density of your mesh into the areas that actually require that much geometry.
- What is the end goal of what you're working on? Movies, Games, 3D Printing, etc.
Basically I’m asking these questions because I have never actually needed a mesh that dense.
Hello and thank you for your response. I am trying to create a video game character and I am not too sure how it is done. I am currently working on the 3D sculpture.
The main body is one whole mesh. I have created it this way because the character is wearing a skin tight outfit. And the highest polygon count I can reach so far is 16973824. I am crossing over from Mudbox and with Mudbox I was able to reach one higher level at 67895296. I did this specifically for the creating realistic lines and pores in the face.
But you said that you have never had to go this high with your own sculptures.
I have included two images of my sculpture. One is a close up view of the head in wireframe so as you can see the polygons distributed around the face area. Are you able to tell me if this looks like an appropriate polygon count for a professional mesh.
The second image is a basic example that I have created of lines and pores sculpted in to the face of the character and how it looks at 16973824 polys. Do you think that current subdivision level is good enough for professionals, or do you think that I definitely need to go one higher level to 67895296.
One more issue that I have is that in Mudbox I could smooth the mesh with ‘Smooth Highlights’ which works in the same way as smoothing groups in 3D Studio Max (creating a smooth look for any mesh with a low polygon count). Zbrush 4R8 does not seem to have the ability to do this, so you can see the individual polygons and all the detail that I have sculpted into the face looks faceted.
Really what I need to know is am I doing it correctly so far (like a professional would) or do I need a higher polygon count to make my work more professional?
Thank you for your time.
These are the two images.


Attachments


There are a couple things that stand out to me from your post.
- Break your mesh apart. Skin isn't the same as the suit and you're going to have a natural break in your mesh from skin to suit so you already have a perfect place to do this.
- You need to think about what is wasted detail and what isn't. If this is a game character your textures can only hold so much information. If you're making details smaller than your textures can hold then you're wasting time and energy.
- You need to think about your edge flow to help you get the most out of your meshes. Zremesher typically does a great job of generating good topology while you're in the sculpting phase of your work. Zremesher Guides will help you out here as well.
- Your skin tight outfit can probably be broken into different pieces as well. There are probably natural seams on that which will allow you to break up your mesh in to smaller chunks as well.
- Remember each subtool in your mesh can support huge tri counts, but that doesn't mean a belt buckle needs 16 million points. You should break your meshes up where at all possible.
- A texture of 1024x1024 can really only hold on to 1 million points of detail, 2k = 4mil, 4k=16mil, etc. This is assuming you're using 100% of your UV space, which you never will.
- Don't worry about the facets on your mesh, when you bake your textures down you'll smooth the vertex normals in another application. You can render a smoothed mesh in Zbrush (Render>Render Properties>Smooth Normals). It's not really needed in your case though.
- Checking your work against professional work is super easy. Go look at Artstation and Polycount. If your work stand up against art from people working as artists in the industry then you'll know.
Here is an example of a mesh for a game that is around 4.3 million for just the head. It could be higher to get those micro details in the skin, but it isn’t needed as the texture won’t support details of that level. The micro details come in from texture blending of detail maps in the engine.

Hope this helps.
Thank you for letting me know. Breaking my mesh apart seems to be an important factor according to you. However I am not too sure how to do this. I have looked for appropriate tutorials on YouTube, but I can not find anything that gives me these details. Do you know a good YouTube tutorial that could teach me how to do this? Thank you.
Group Split is your friend.
Also just duplicating meshes and deleting unwanted areas is a good way.