ZBrushCentral

Hard edges show in the normal map baked of a model in Zbrush 4R6

Hi friends,

I have an issue with my 3D asset here. Let me explain what I did before I faced the issue…

  1. I made a 3D asset (A stylized axe in 3Ds Max with 872 quads)
  2. Then I did the smoothing groups and the unwrap for all the sub objects of the model before taking the object in Zbrush.
  3. I installed a plugin called smoothing groups plugin in ZBrush so that the smoothing groups which I made in 3Ds Max can be imported in Zbrush with the model.
  4. I split the object into sub parts like the way they were categorized in 3Ds Max.
  5. I did the polypaint and sculpting by increasing the divisions.
  6. Now when I generated the normal maps and texture maps, I noticed that the normal maps have also baked the hard edges which were showing softened in 3Ds Max by smooting groups. The texture maps generated from the polypaint are fine though.

When I checked the low poly sub tools of the axe in Zbrush after bringing it to the lowest subdivisions, I noticed that the all the subobjects have hard edges along the mesh flow of the model, around almost each polygon, even where the mesh was with the same smoothing groups to be smooth. However those edges which were supposed to be smooth by the smoothing groups, after subdivision of the model in Zbrush become smooth again. This explains why I got faceted baked normals. I tried Xnormals but the maps are not coming out properly, even when I set the cage properly and covered both the high and low poly meshes properly with it.

I don’t understand why the imported objects in Zbrush, before subdivision, show hard edges all along the places where the mesh was supposed to be smooth, especially when I had imported the smoothing groups. The mesh was in fact imported with smoothing groups because I can also see the creases (because of the smoothing groups) on the imported low poly model of the axe in Zbrush from 3Ds Max when I turn on ‘Draw poly frame’ in Zbrush. I rechecked the smoothing groups on the model in 3Ds Max and everything is fine.

I just need the normals to come out the way the model shows as sculpted in Zbrush.

I have imported all the necessary files and screenshots (of one of the sub tools of the main model) as an example, for a better explanation of my problem…

Please help,

Thanks in advance!

Axe Blade-NM.jpgAxe lp uv.JPGAxe lp faceted edges.JPG

Attachments

Axe lp faceted edges.JPG

Axe Blade-NM.jpg

A couple of things.

Zbrush does not in anyway have a soft normal. It does not have understand smoothing groups the way you think of them in max.

My main concern is that you’re saying you can’t bake your maps correctly in Zbrush, or Xnormal. Have you tried Max? What are your actual settings for your normal map in Zbrush. What are your maps looking like out of Xnormal?

The way your UVs appear to be unwrapped it looks like you want to be using hard normals on your low and soft edges on your cage. Correct? Are you ensuring you have your settings set up this way in xNormal?

Yes, I noticed that as well that Zbrush doesn’t recognize the smoothing groups which were created in 3Ds max. Even then I imported the low poly mesh with the smoothing groups as I wanted creasing on certain parts of my model when I subdivide in Zbrush.
You’re also right that I want to preserve the hard edges from the soft edges and that’s the reason why I broke the uvs and did smoothing groups on the low poly asset in 3Ds Max.

I edited the cage in Xnormals before baking and I made sure that it covers both the high and the low poly meshes. I also rechecked all the settings in the import mesh for the high and the low poly.

Also, as you can see in the normals
Rubber Grip_1.jpg
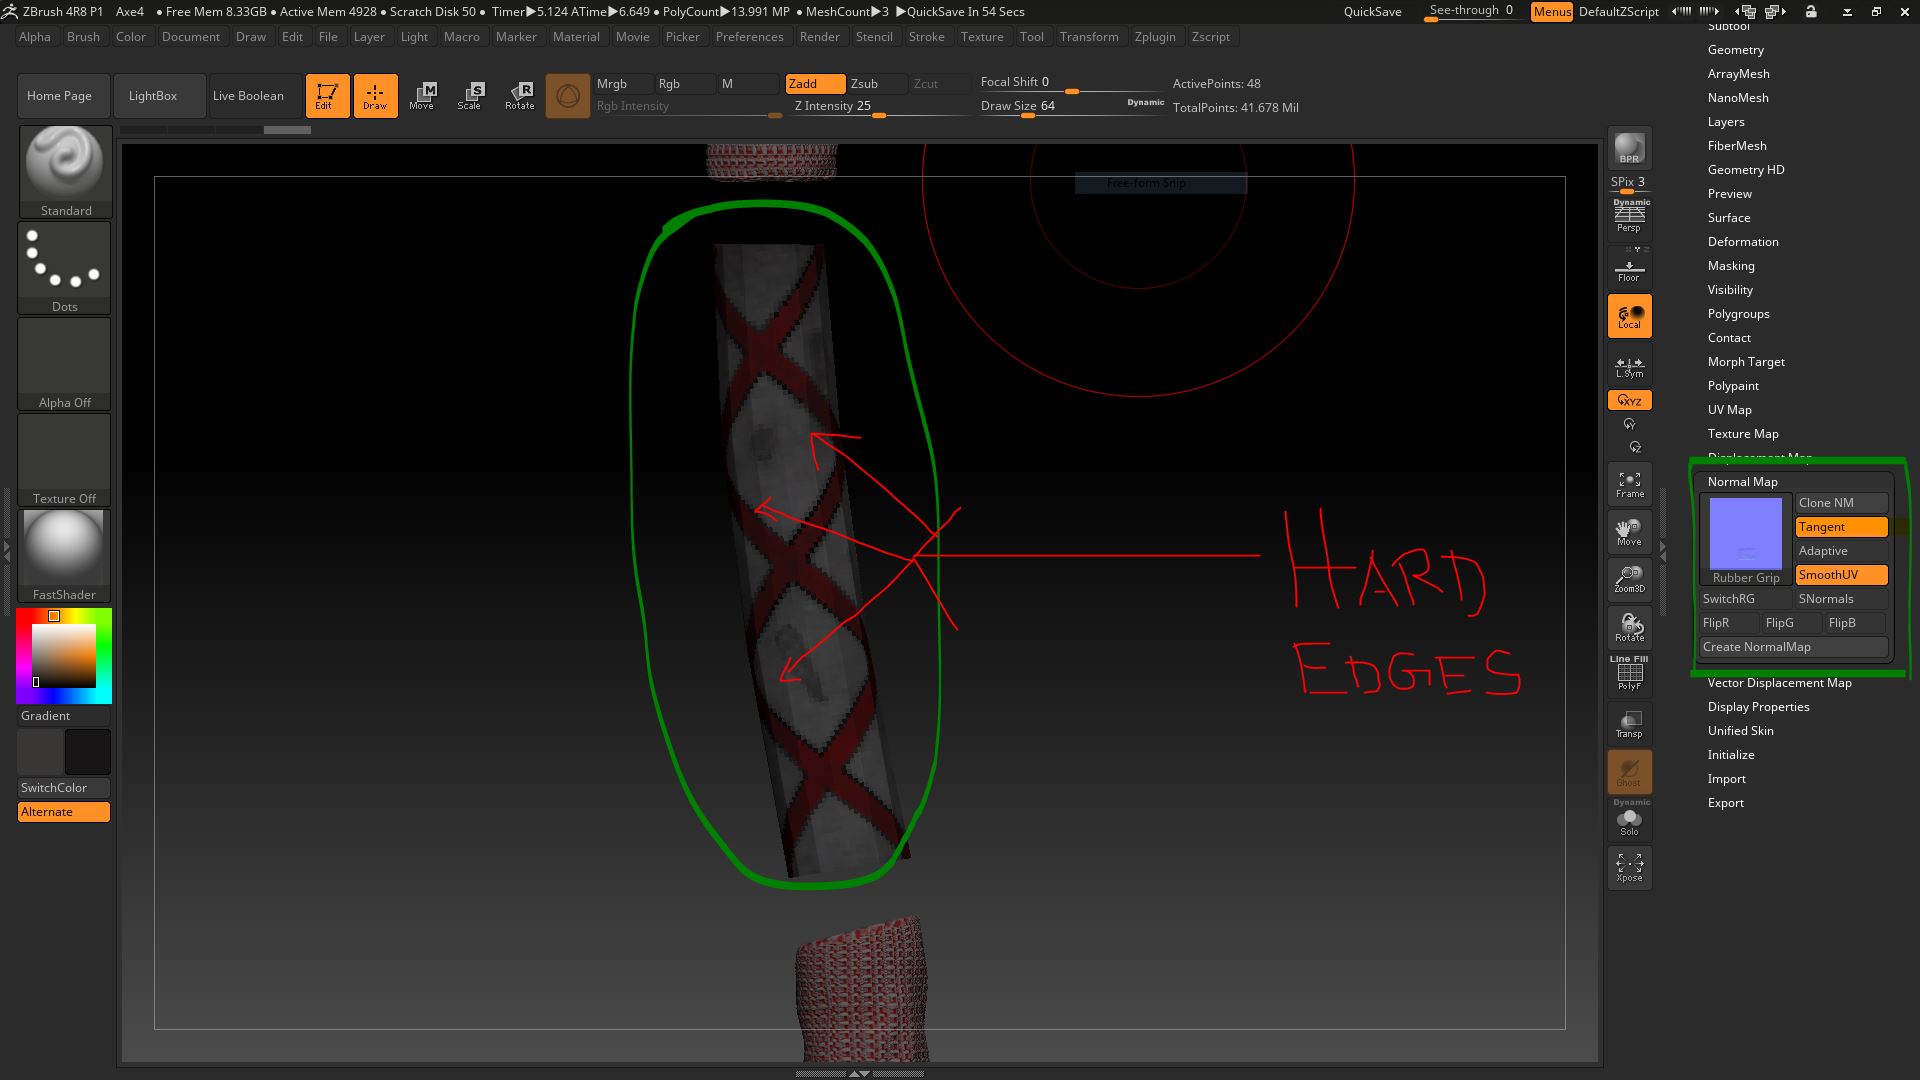
generated by Zbrush, it gives the sculpted details fine, but along with that it also bakes out the hard edges which show on the asset at the lowest subdivision in Zbrush.The settings in Zbrush normals button are as follows in the attached image.
Capture.JPG
I also pointed out in the image as of how the marked hard edges in the low poly sub tool of my model are exactly the ones showing up in my normals, along with the actually baked normals.

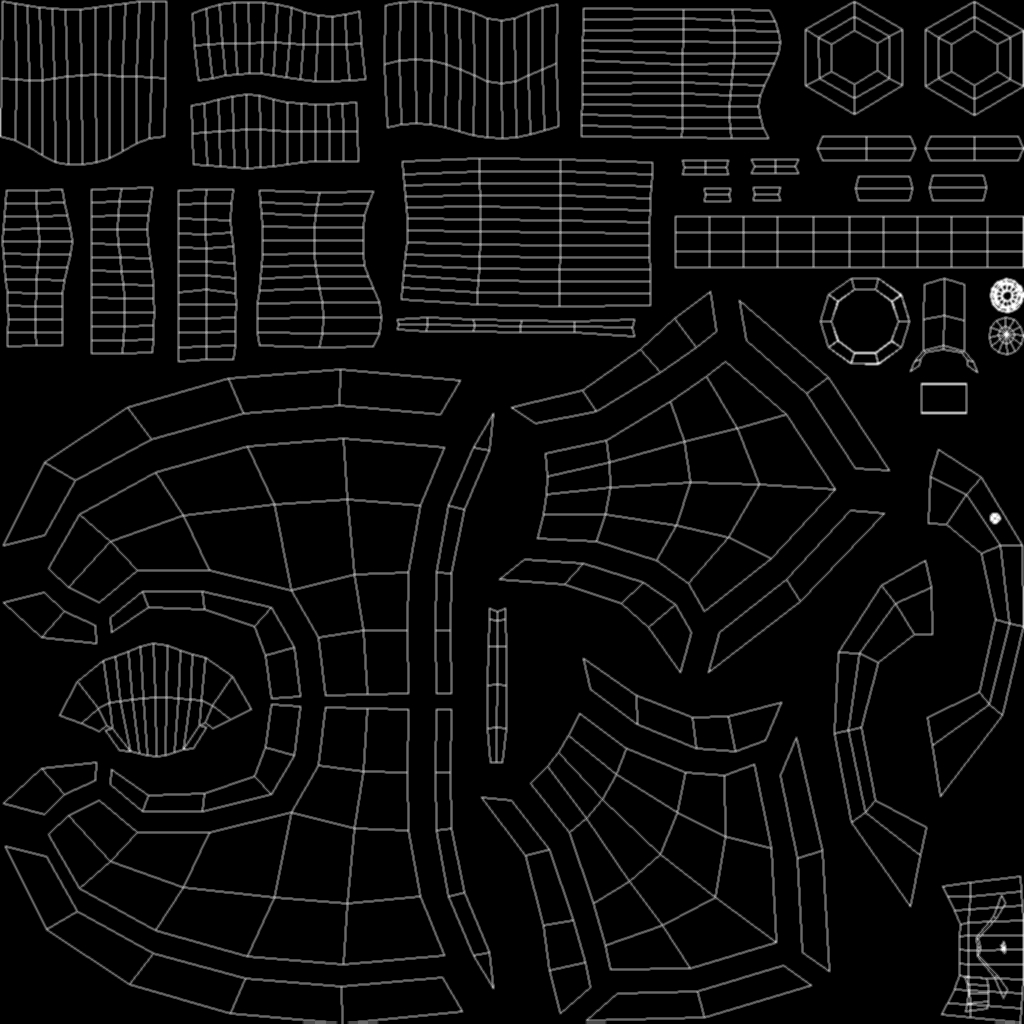
Let me do one thing, let me combine all the texture files in one sheet and show you. You’ll see that the hard edges from the low poly are showing baked on all the uv clusters. I will also re-bake the normals in Xnormals today and show you what I am getting.

P.S: After you asked in your post, I tried baking this in 3Ds Max. The viewport lags a lot, so I split the model into elements and then did the bake to normal. One element of my asset gave pretty neat normals with no hard edges
Rubber_Grip NM.jpg
like it did when I tried baking the normals in Zbrush. I will try the same with the other larger parts of my model to see they go along well like this one.

But does this mean that when I sculpt a game character, like a human, I to bake all the body parts and accessories individually in 3Ds Max as well? Because then, the character will have more sub objects and it will be a heavier file in terms of polygon count. Is there any other software than Zbrush and Xnormals which can bake out normals properly? I would still like to sculpt the details in Zbrush though as it’s a wonderful sculpting software. I need your advice, please!

Sorry, I am typing a lot. I am a bit tired of working on the asset for a longer time than usual.

Anyways I will catch up with you tomorrow after rendering the rest of the subobjects of my asset.

See ya and thanks for your help.

Attachments

Capture.JPG

Rubber Grip_1.jpg

Alright.

In Zbrush in the normal map panel you’ll want to turn on SNormals. This will only get you part of the way there though. This sets all your smoothing angles to 180°, which you don’t want, you actually want hard and soft edges, which zbrush can’t do.
In order for you to get the proper normals you’re going to have to bake in another software.

Things to note for Xnormal. You can’t just export out your lowpoly from Zbrush. It doesn’t understand smoothing groups so you will either export out either hard face normals, or all soft edges. Again, this isn’t what you want to do. So what you really need to do is ensure your mesh is coming from max, or another 3d application that does support custom vertex normals.
You can bake in max, but like you said, a heavy mesh will really start to bog down your system. For what it’s worth. I never bake in Zbrush…well, not never, but very rarely and only for certain things where raycasting causes more problems than it fixes. From what I can tell, this is the main issue you’re having. It’s probably why xNormal is giving you hard edges.

Anyway. I personally use Substance for all my baking now. I used Xnormal for years prior as it allows for you to offset your meshes without ever having to actually see them. This is just a way to help you ensure clean bakes. Anyway, Substance does the same thing but with just following a naming structure. It also allows for low poly meshes with hard edges to raycast from a smoothed mesh without a custom cage file. Super useful.

Hope this helps.

So if I take the low poly model from 3Ds Max with the smoothing groups and use it as the low poly in Xnormals and the high poly from Zbrush, will that do the trick?
I am sorry for my stupid questions, but this is my first bake which I will put in my job portfolio, so I want to be precise in my work.

I also have one extra question for you, as you seem to be a very kind person to help.

Say I have 5 sub objects one single model in Max that was split into 5 sub objects in Zbrush. Although they share the same 0-1 uv space, since they were split, they have separate uv clusters for the moment. Now once I am done baking separate normals for all the 5 subtools, Can I combine them again in the same texture sheet in Photoshop so that the final texture is one 2048x2048 file? I don’t remember the type of blending mode used in photoshop. I tried ‘overlay’ and ‘screen’ blending mode but I see a loss in some of the details in the normal map. Or do I make selections from each layer and copy/paste it in one 2048x2048 file? That gives me the extra flexibility to make changes (if any) to each cluster in 5 different layers in photoshop. I want to create a Specular map in Photoshop and AO and Cavity maps in Quixel Suite NDO.

Thanks for being so kind to help, again.

Yep. Lowpoly from Max, Highpoly from Zbrush and you should be all set.

As for your meshes, you should be able to bake them all at the same time, that way you don’t have to mess with combining your textures later. But whatever works for you is probably good.
If you’re going to be using Quixel you should use their baker as well. It will ensure that the inputs that Quixel is expecting are correct as it was baked directly in their software.

Thanks, I will try these methods including the Substance Painter baking you mentioned. I found that method very efficient as the only thing you have to be careful about is the naming.

However, do you know what blending mode I need to apply if I have to combine all the separate uv clusters in one file?

You would use masks. Not blending modes.