Thanks for taking the time to comment on my thread!
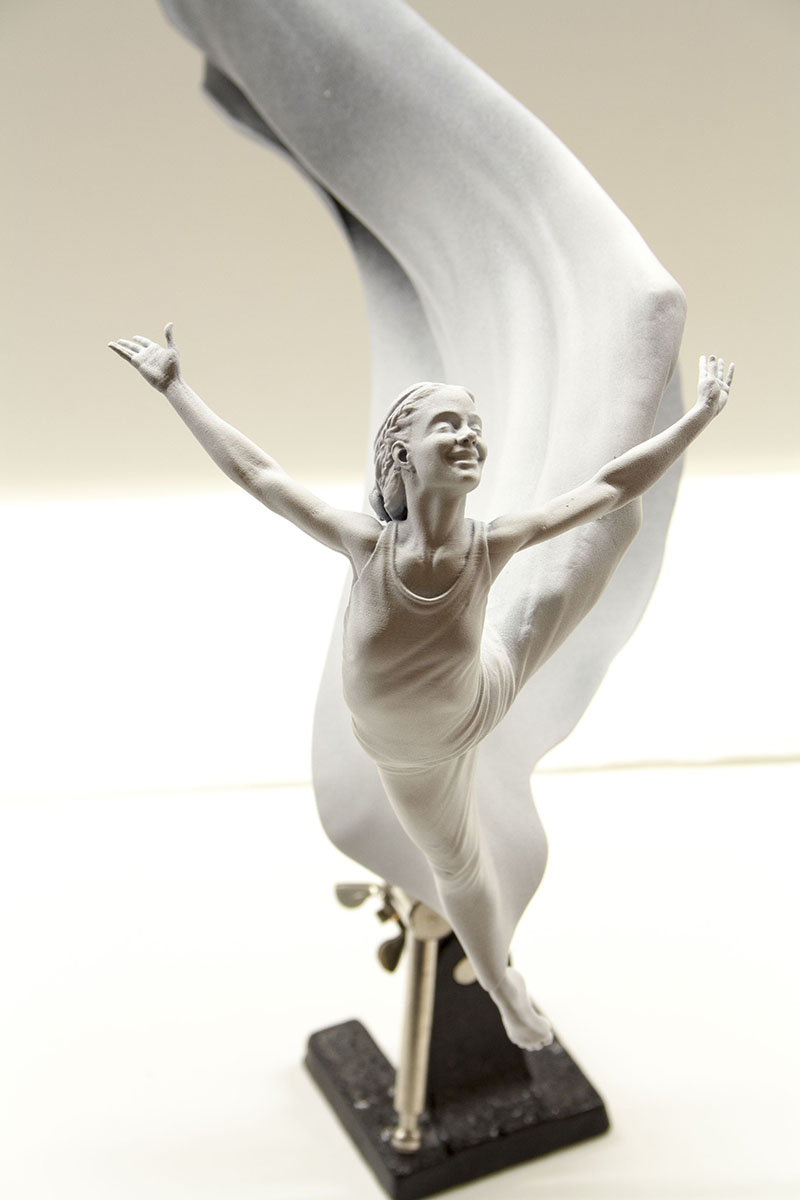
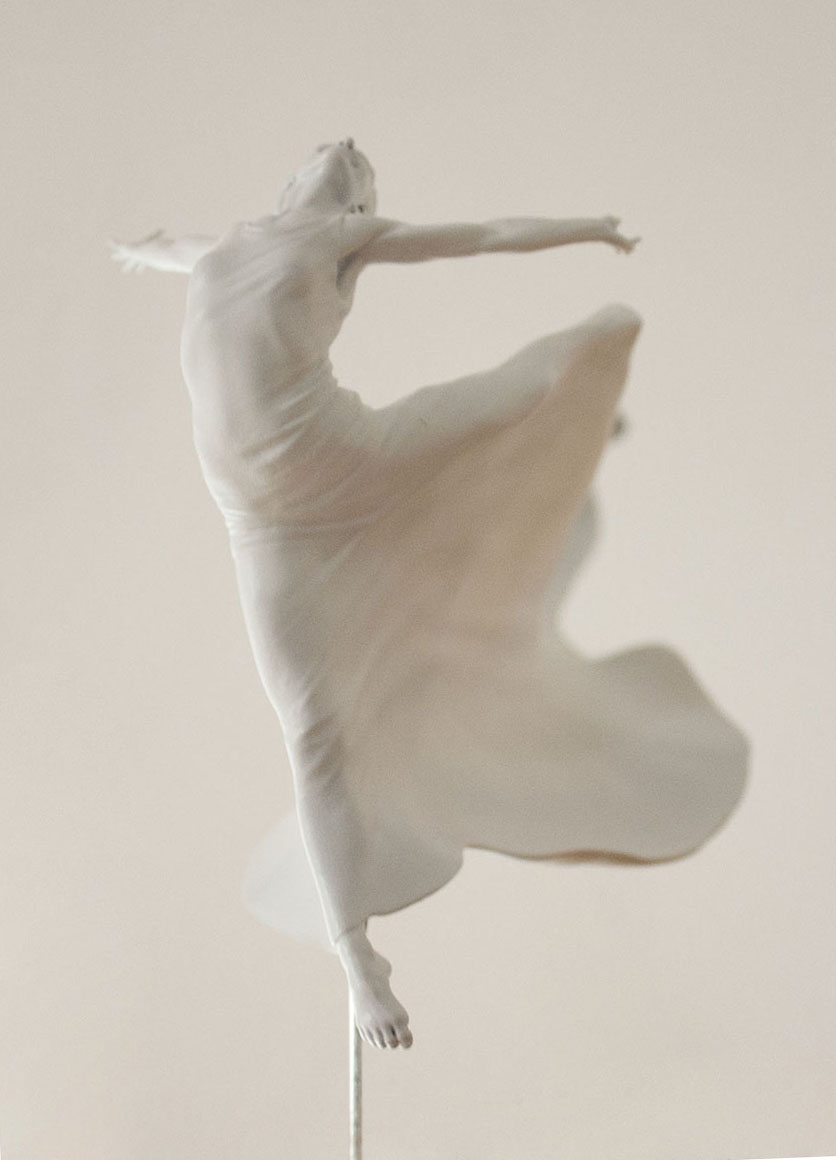
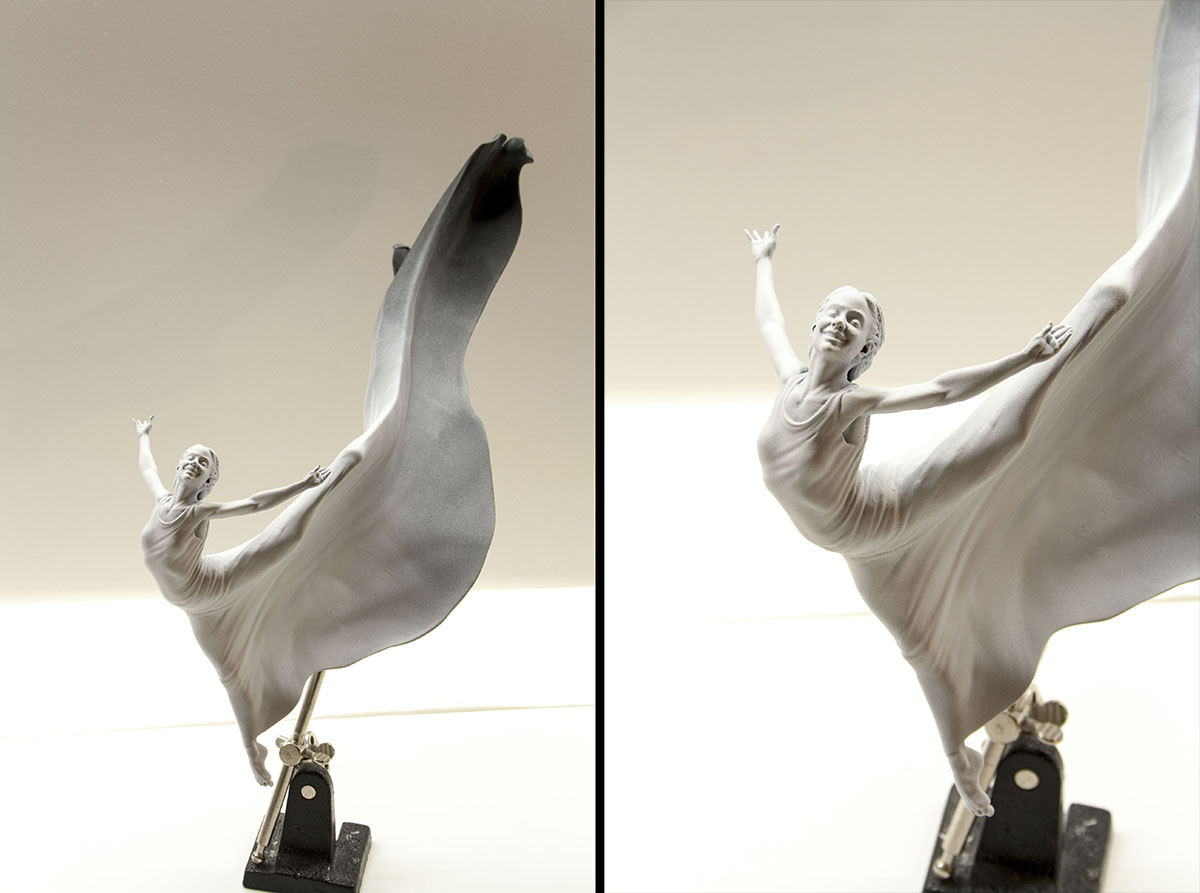
I was just looking at the winged statue - love the hands and feet, very natural. I also like her hair, that’s something I always struggle with.
Thanks for taking the time to comment on my thread!
I was just looking at the winged statue - love the hands and feet, very natural. I also like her hair, that’s something I always struggle with.
Hello,
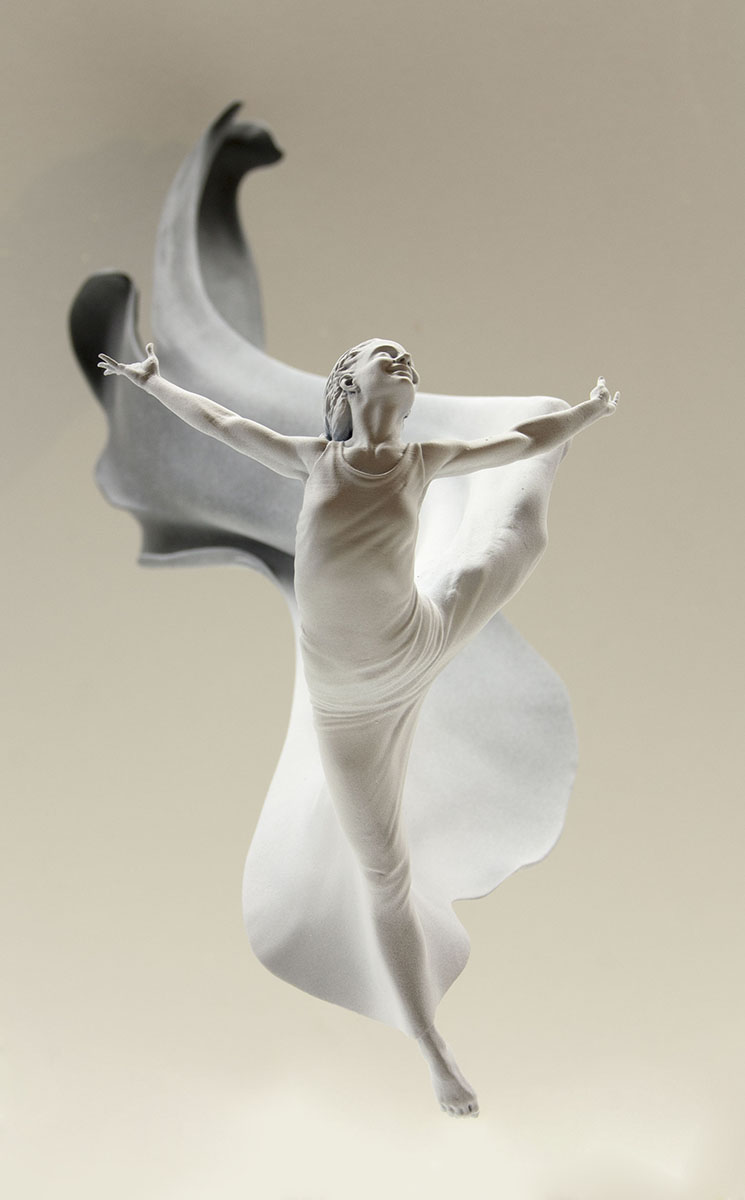
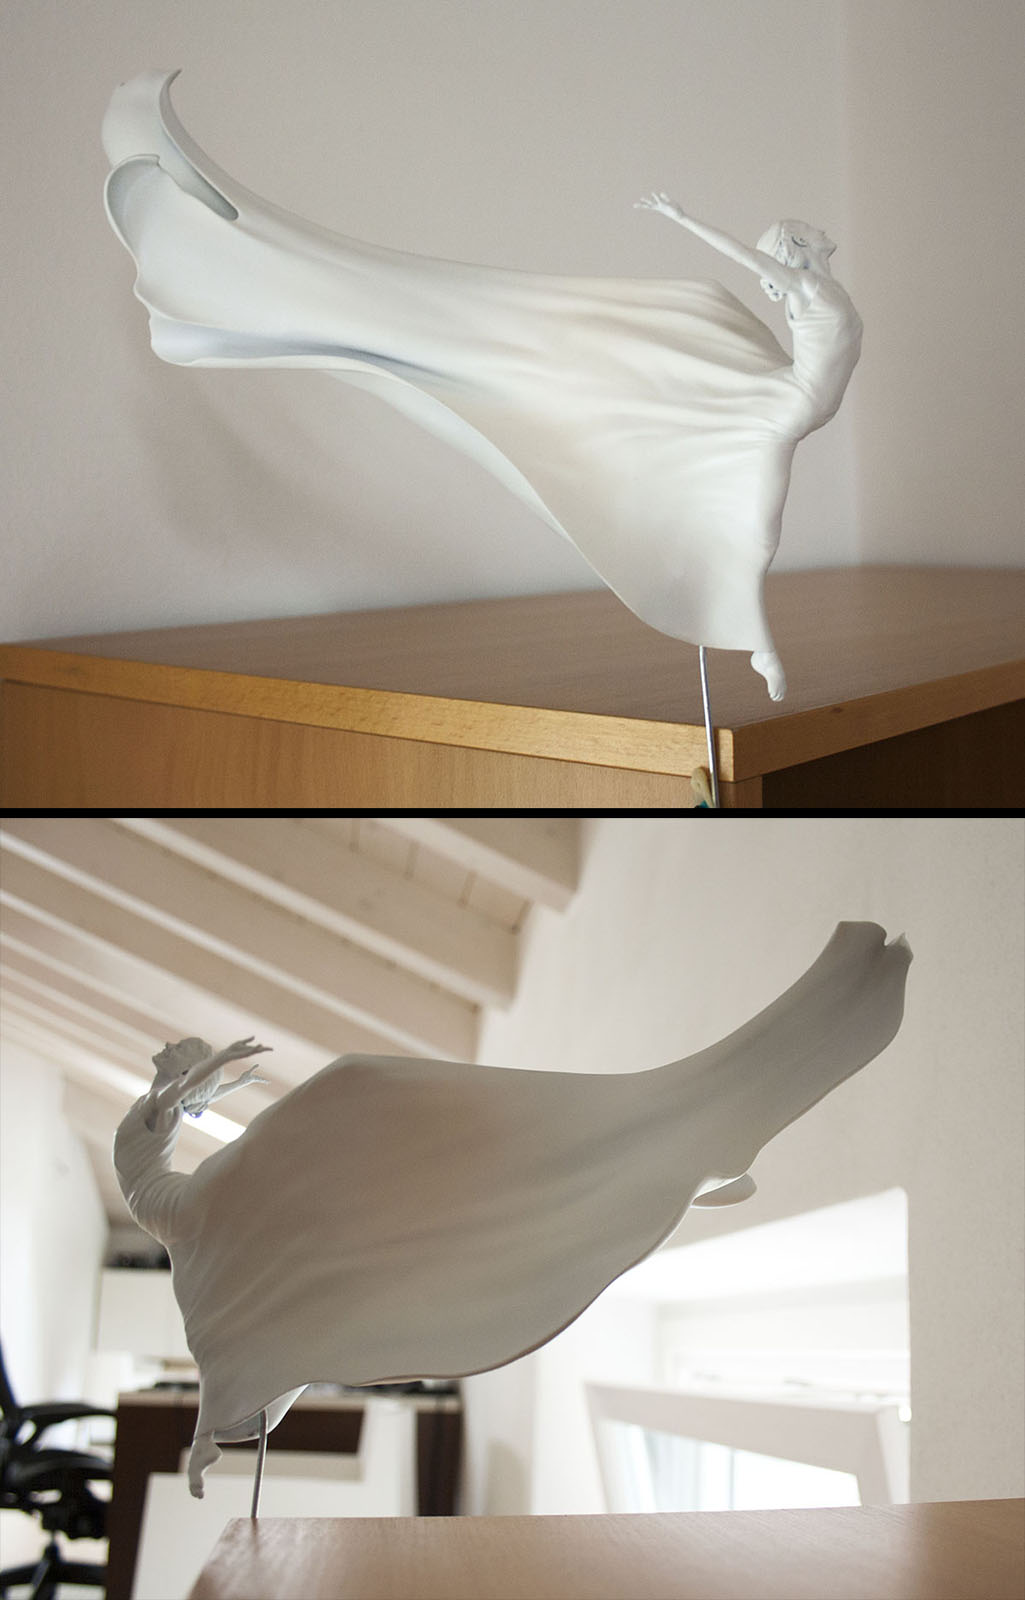
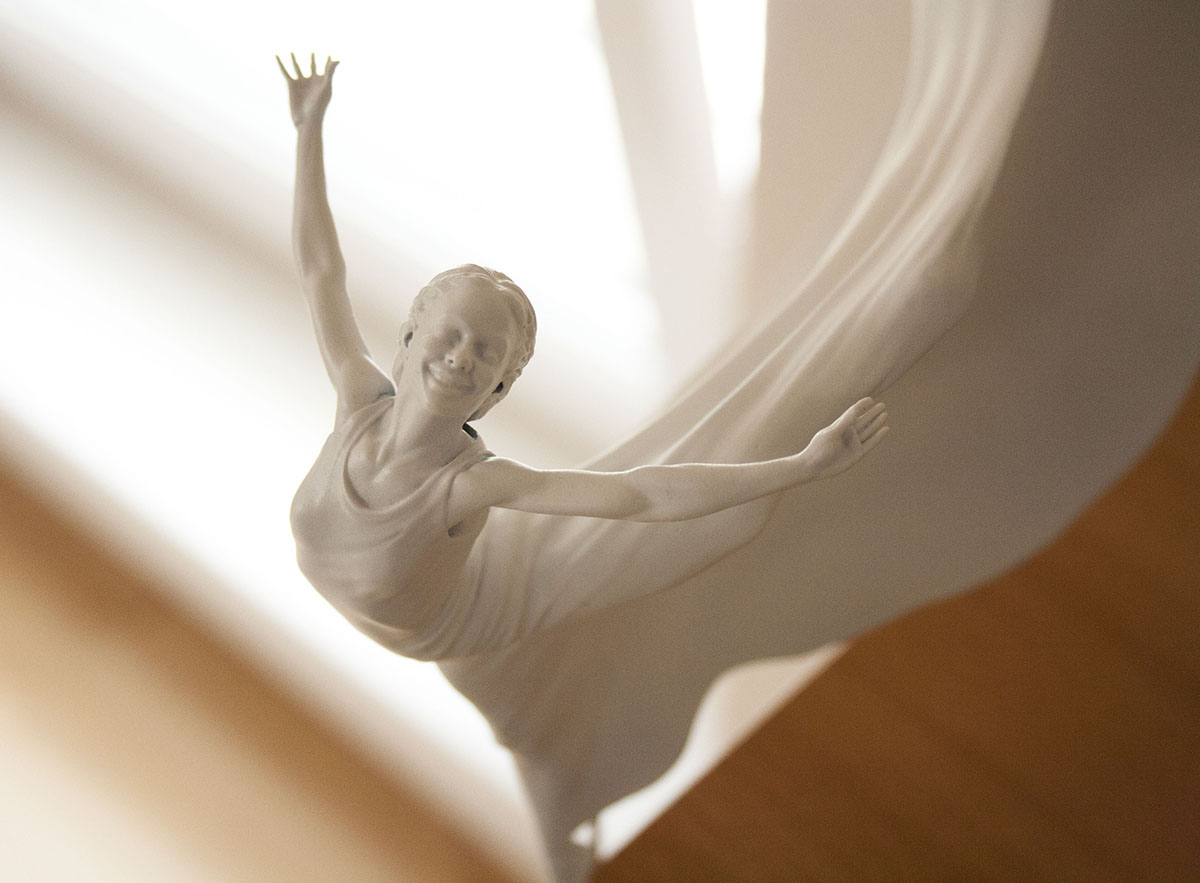
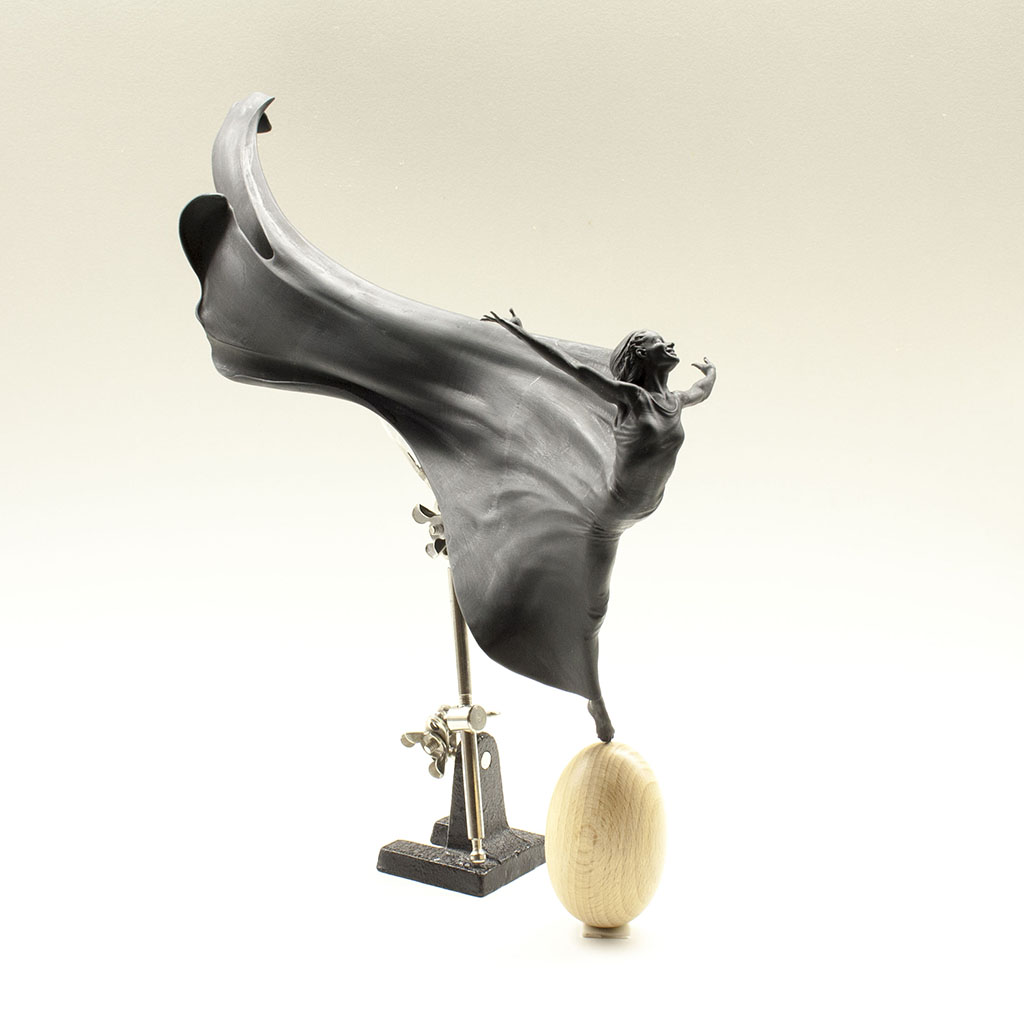
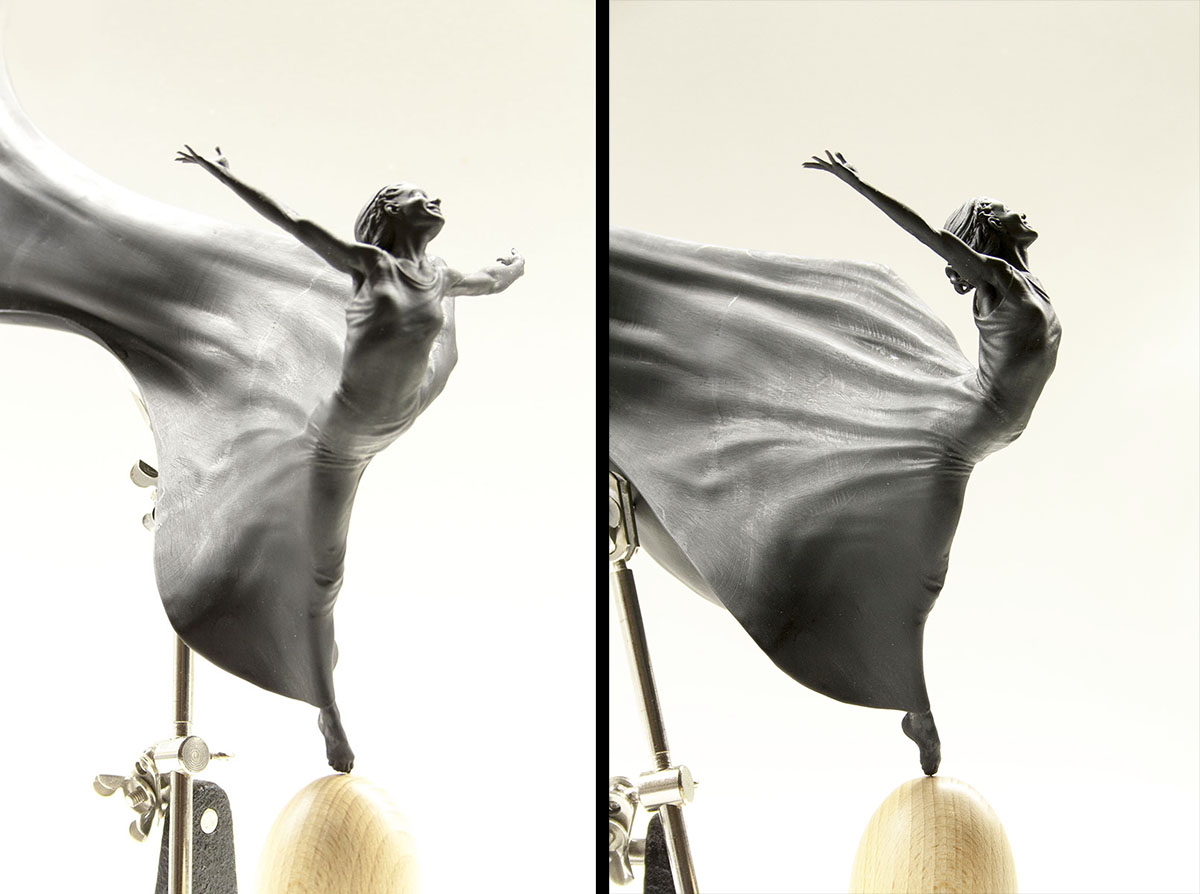
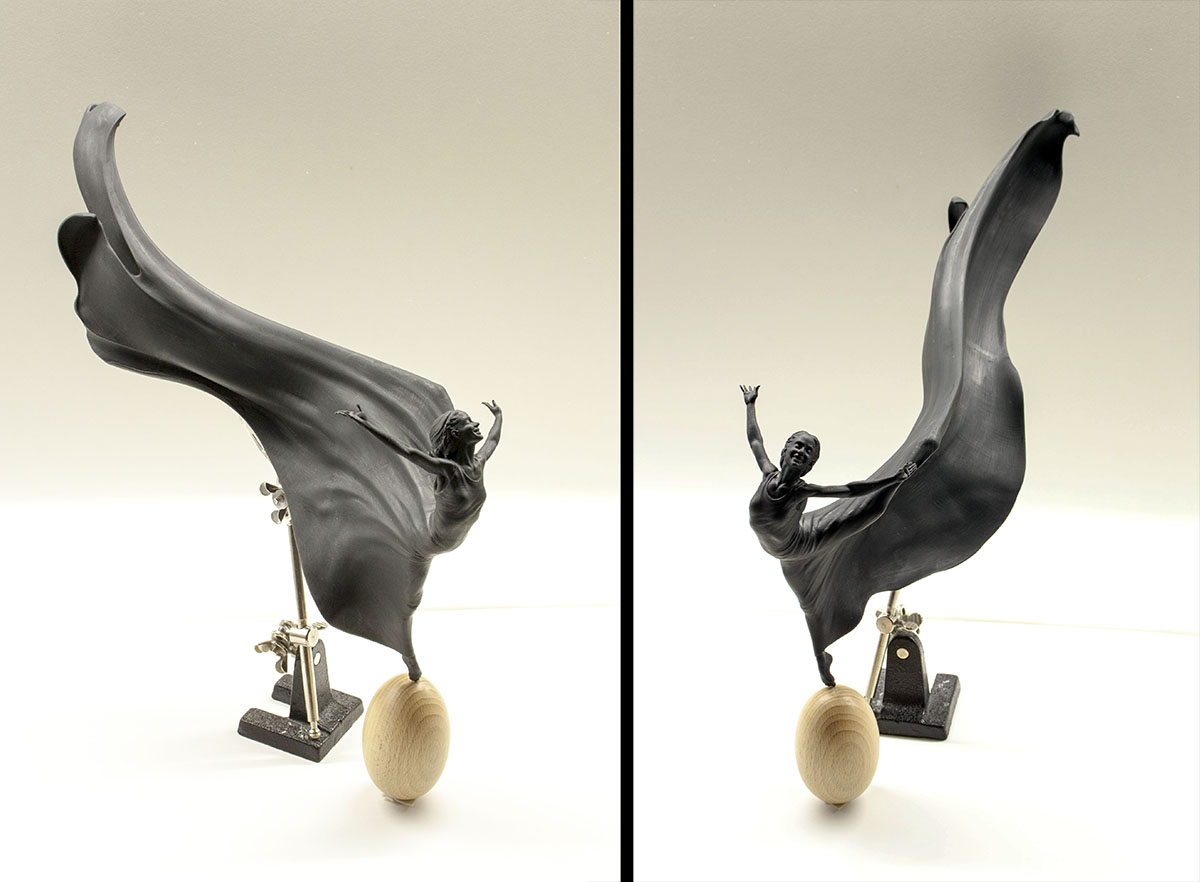
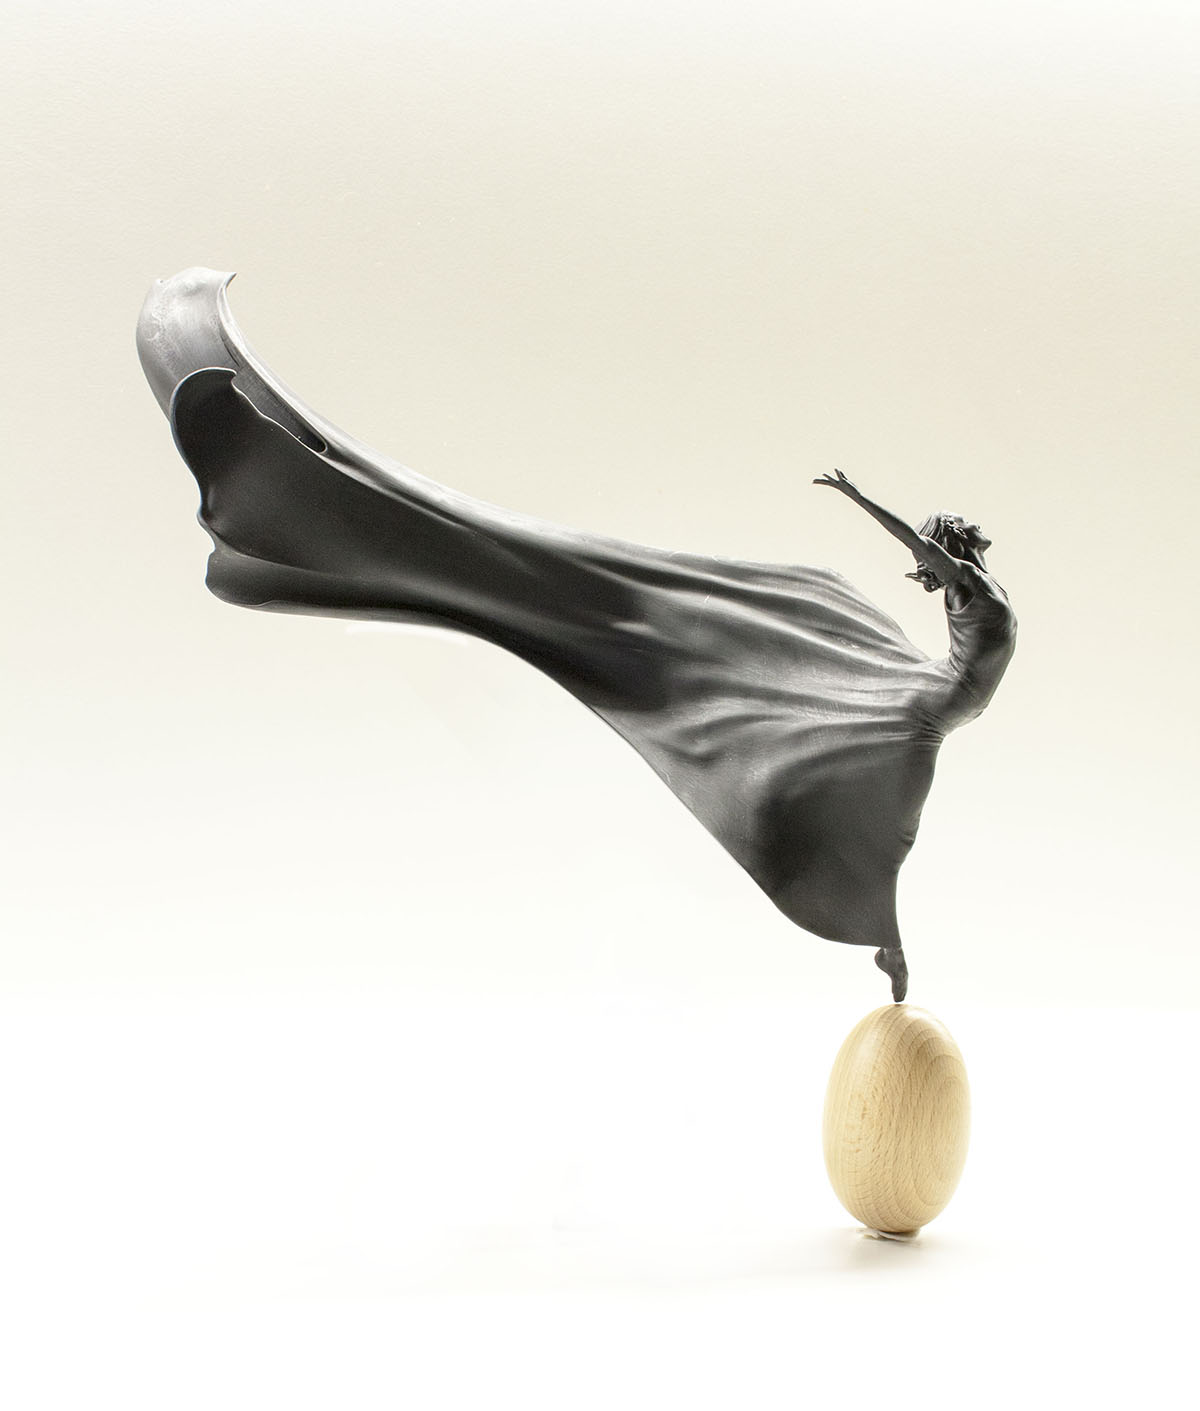
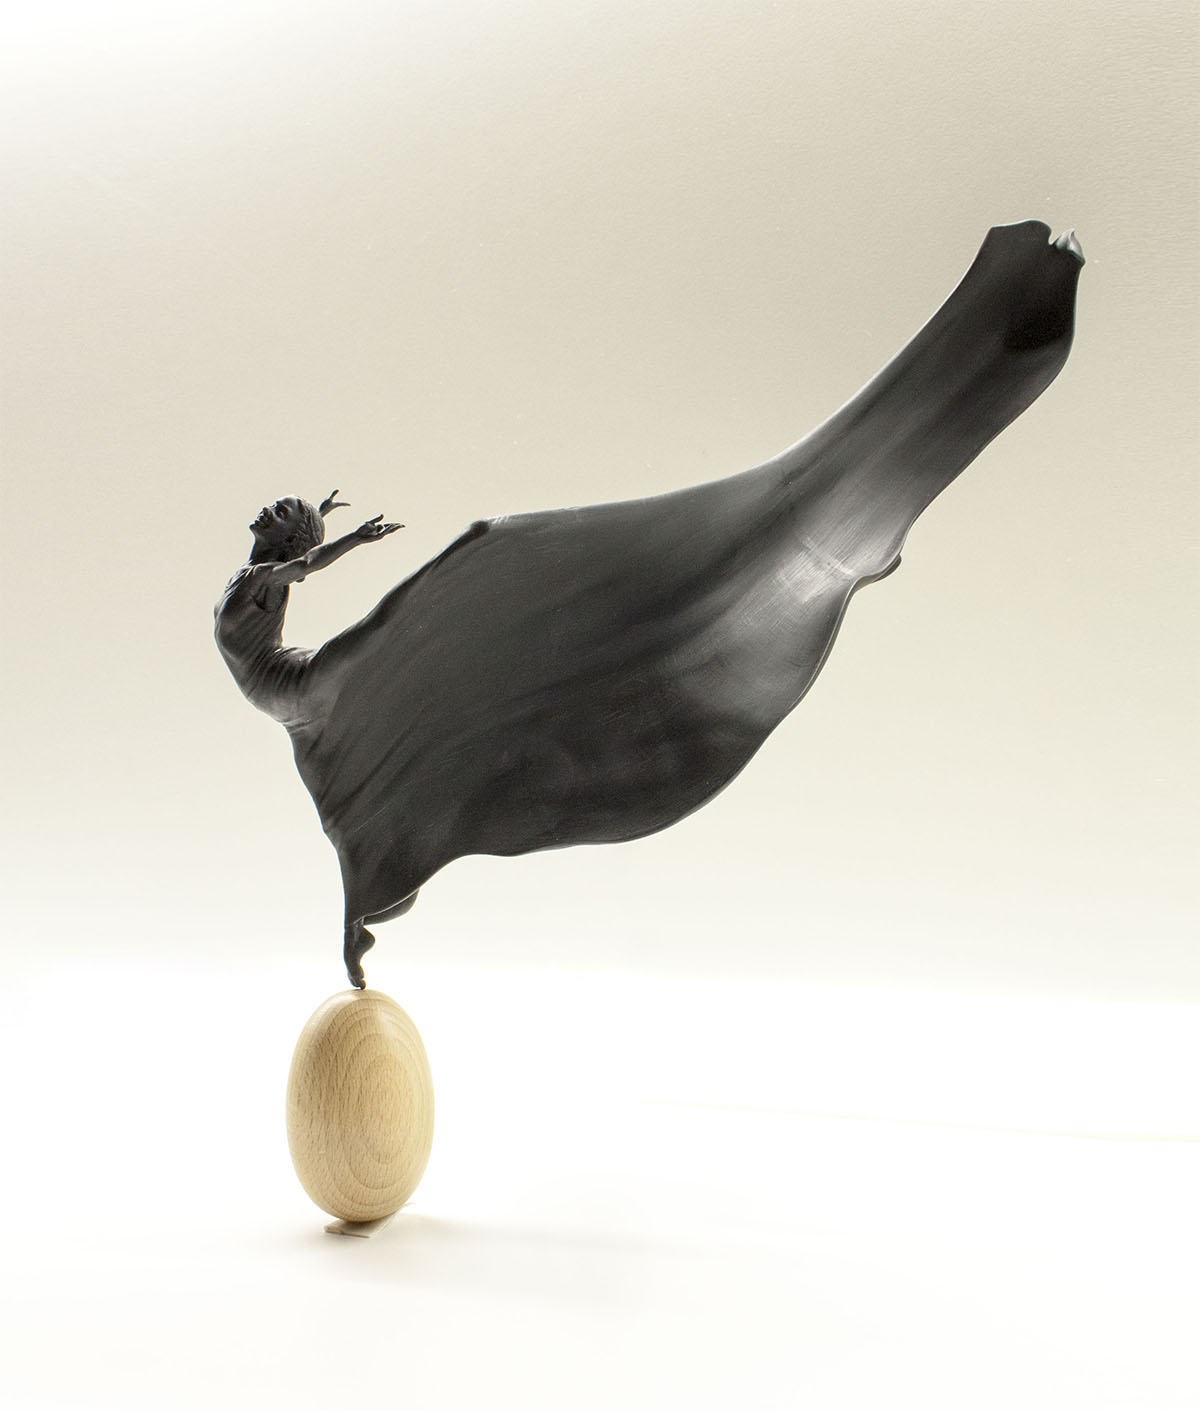
here some pics of the attempt to print the woderful Francis’ dancer. I am still thinking how to solve the ball-stand and how to connect and hold the figure in order to don’t make the junction too visible.
Printed with SLS printer 32 cm long and 15 cm tall (the female figure).
Hope you like it 
Thanks for putting this up Mattias. It’s cool to see:)
I’ve recently returned to an old project and thought I should try posting my progress on it as a way to engage more with the online community and keep myself motivated. So, here we go.
I’ll post more about this guy later, giving background on how he got started etc, and showing more of the model, but for now I’ll just show a bit of the head.
Zbrush sculpt:
Test Render:
It’s very early days for the skin. The texture is being created from scratch in Mari. I’m using Vray 3 in Maya 2016 to render. I’m currenlty using the shader setup from the Digital Emily 2.1 project (http://www.wikihuman.org/index.php/off-topic/emily-2-1/). I learned about it shortly before starting this and thought I should give it a try. I’ll probably try remaking their setup using standard vray shaders at some point just for the knowledge, but for now…
This is the first time I’ve used Vray for a character, and along the way I’ve discovered some quirks about doing displacements in Vray. If you are interested in seeing what I encountered and learned check out the following thread I started on CG feedback: http://www.cgfeedback.com/cgfeedback/showthread.php?p=66003&posted=1#post66003
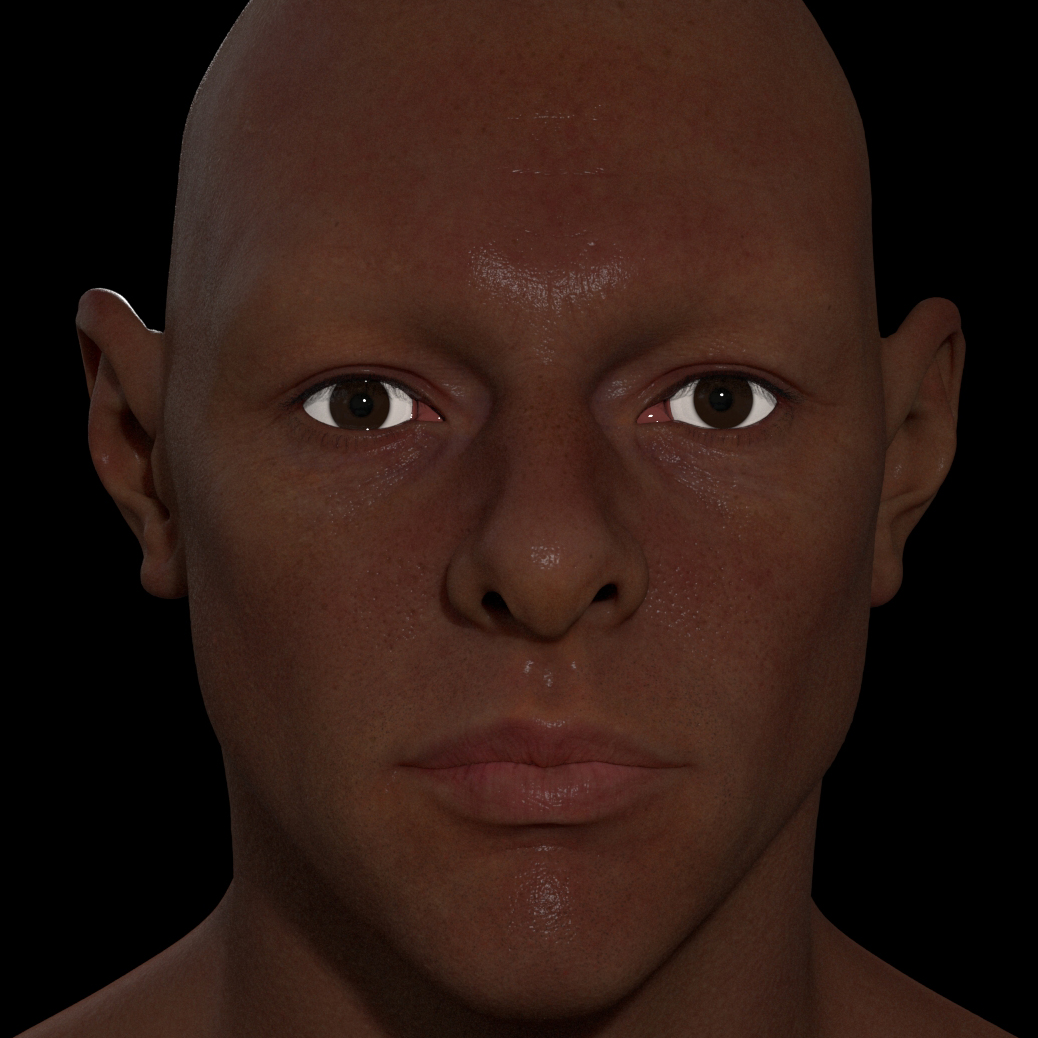
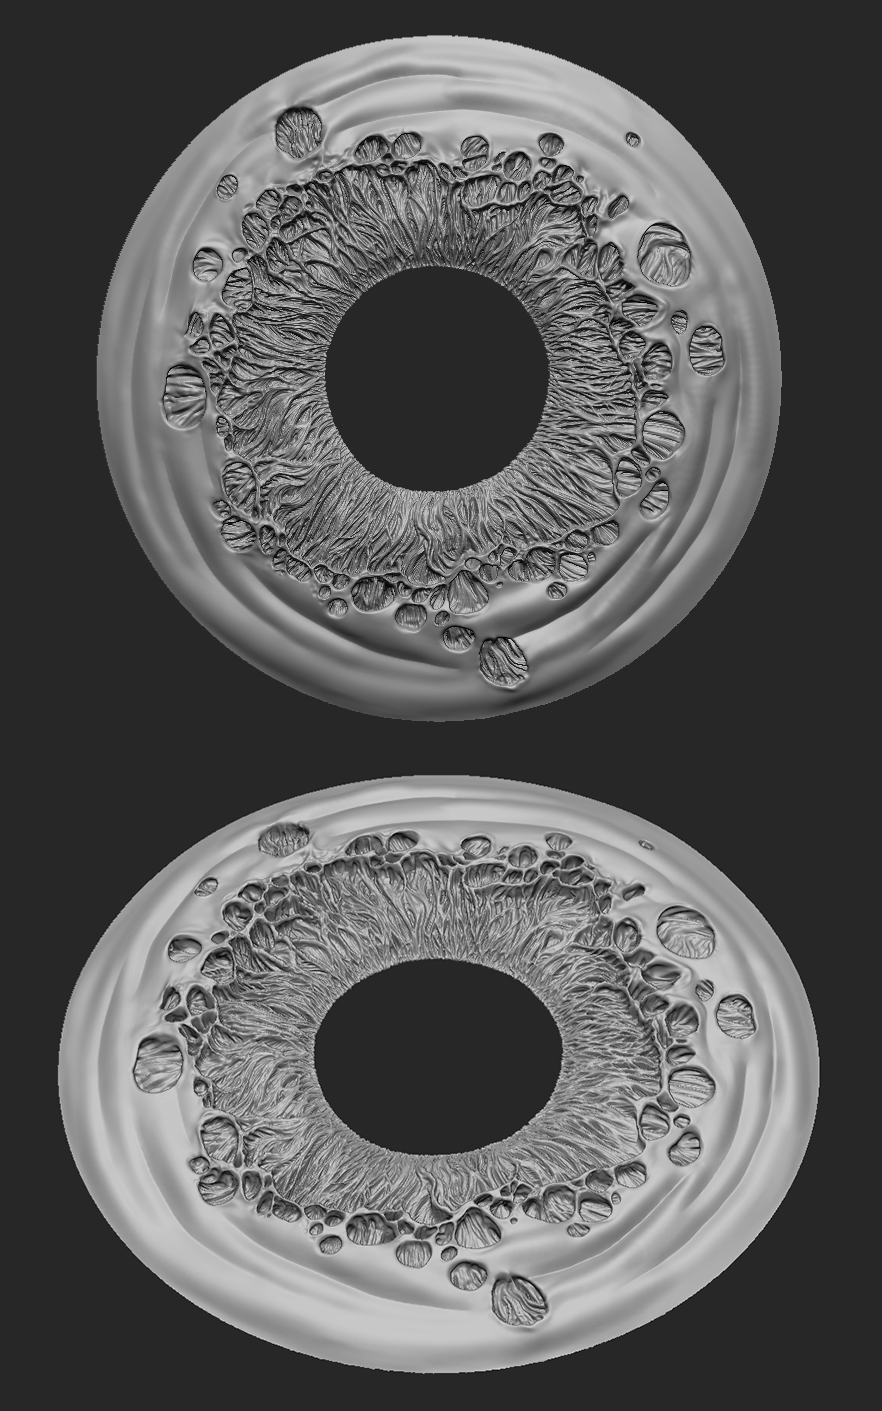
Since doing the above render I’ve shifted focus to this character’s eyes (will return to the skin later), and decided to do something I’ve been wanting to try for a while now, namely create an extra-high-res iris with much more of it’s 3 dimensional form captured, especially overhangs and possibly (though not in this case) undercuts. The rational is that this approach will result in more realistic lighting of the iris, in terms of sss, shadows and highlights. Both sculpting and retopo have been tedious and made me question whether this was really a good idea but… below is a screengrab of the zbrush sculpt of the right-side iris:
Impressive iris sculpt.A pleasure to look at.
What kind of reference did you use?
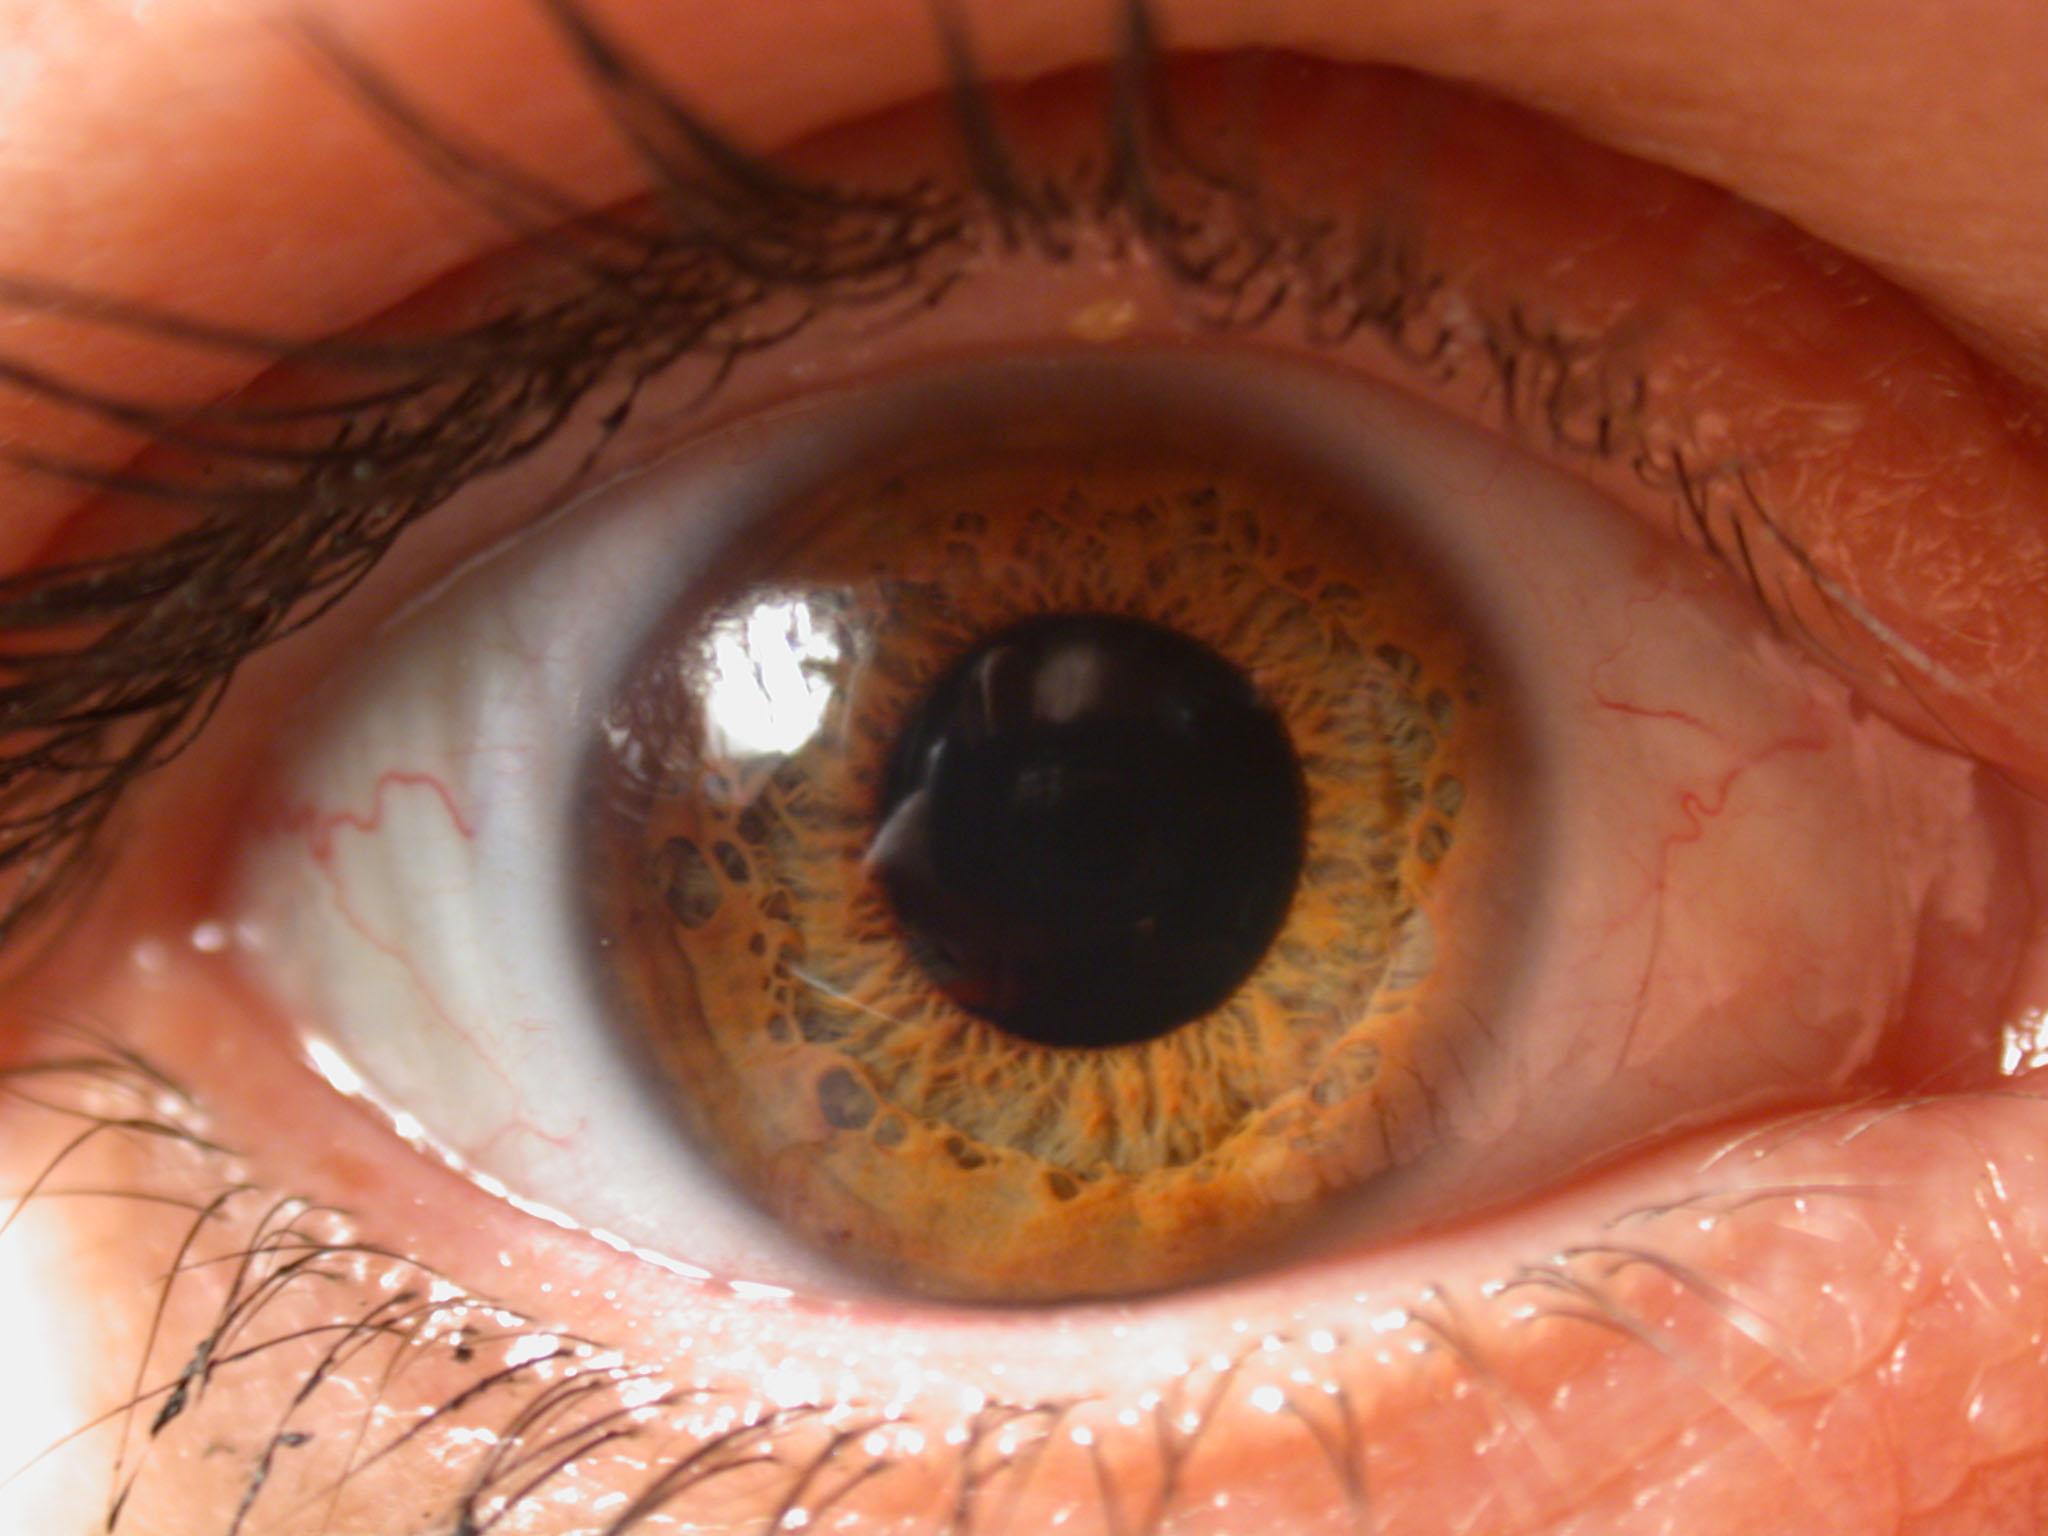
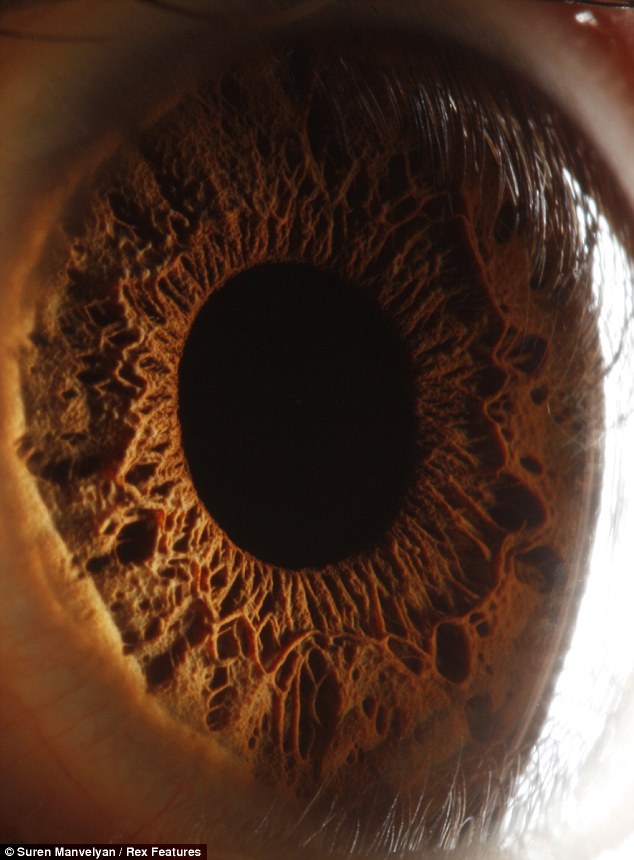
Thanks jmeyer. Here are the two main iris ref photos I used:
As you can see, there is room for still more detail, a general sort of noise which I will probably add later.
The Manvelyan pics are the ones I was reminded of immidiately when I saw your
sculpt.Really fascinating.
Keep it up man!
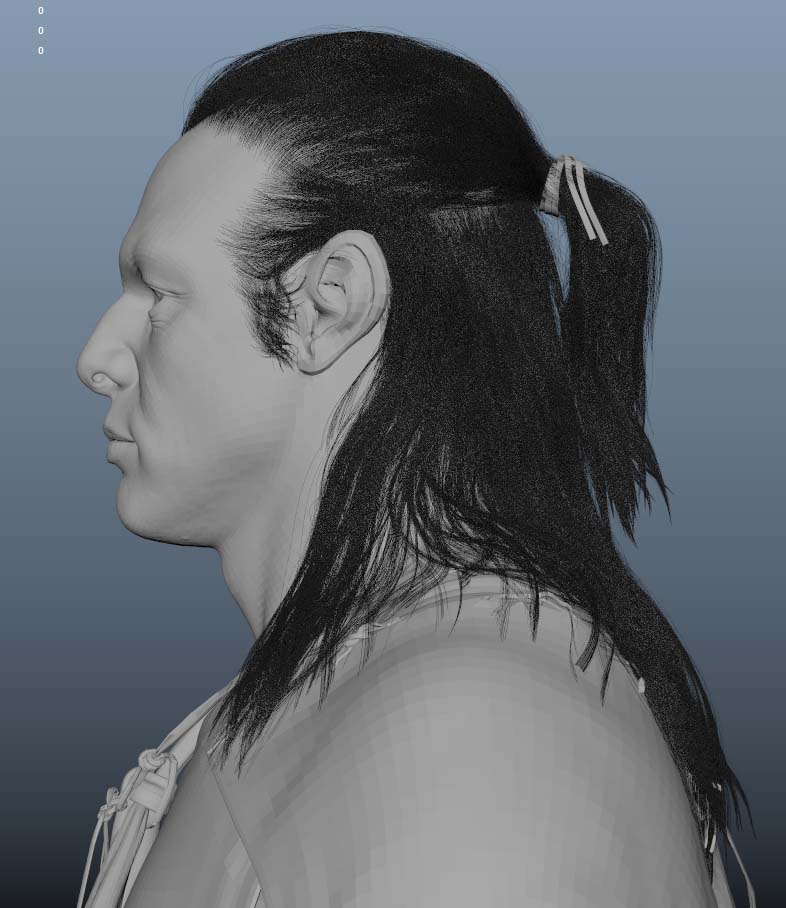
I finally managed to get back to this guy. Here’s an update. There’s lot’s more to do, but crits and comments are very much welcome. FYI - the color chart on the left is a textured poly plane. I put it in the scene to help me gauge the light. Renders are with Vray 3.1 for Maya:
Beautiful sculpted skin detail on him Francis! Did you create various custom alphas, paint custom displacement detail in Mari, or use other methods for creating it in Zbrush? With options like texturing.xyz out there now, it’s always interesting to understand an artist’s process with that type of thing. Looking very nice! Thanks for any info!
John
Thanks jderiggi. In this case I opted to fully sculpt the details in Zbrush using several custom alphas that I’ve created and a lot of hand sculpting. The fine detailing in the lips and lower eyelids for example are all fully hand-sculpted. I wanted to challenge myself to take the details a little further than I have on previous hand sculpted models in part because, while there are fantastic displacements available from places like texturingXYZ and surface mimic, the fact is that you can’t entirely rely upon such resources, such as when doing a non-human character or any time you want a very particular look, and in this case I wasn’t entirely sure what kind of surface character I wanted. By sculpting it I felt I could more easily explore possibilities. Having said that, now that I’ve finished this sculpt I find that I can’t escape the fact that with the displacement resources available from the aforementioned sources I could get better details in several places and I’m considering the idea of touching up the exported displacement maps of the sculpt with displacement maps from one of those other two sources. It feels a bit like cheating to do it that way, but I think it’s the right choice when the primary concern is getting the best details possible, and I’ll probably use more of that method in other area’s of the body.
FYI - the following will give you an idea of where this guy is headed:
Thanks very much for the info Francis! I certainly understand the thoughts about sculpted detail versus photo/scanned detail. Looking forward to seeing more development of the mountain man!
John
I’m looking for some suggestions.
I’ve started on the hair for which I’ve decided to use Xgen (would’ve chosen Yeti, but it’s not an option for me right now). I think I’ve got Xgen figured out for the most part but I’m having a problem at the back of the head where all of this character’s hair is being drawn back into a kind of ponytail that folds under itself and back through the hairtie then out again at the bottom. I’m controlling the clumping magnitude via the Clump Scale curve in order to pull all the hairs within the hairtie, however, what appears to be interpolation is causing many hairs to pull out of place where the hairs curve back on themselves.
I’ve tried using a collision modifier to force the primitives within it’s bounds but that doesn’t seem to make a difference (used an alembic cache of a proxy version of the hairtie for a single frame if that helps anyone think of why it wouldn’t work).
As you can see in the far-right of the image below there is lots of room between the guides and the hairtie geo. I’ve tried squeezing it much more which has some effect but not nearly enough.
I’ve also looked for a way to control the interpolation along the length of the curves (I seem to recall being able to do that with nhair), but no luck.
Can anyone suggest a solution? FYI - I’m specifically seeking a solution that does not involve the old hack of using a completely different set of hairs for the ponytail with their roots hidden within the Hairtie. Also, I’ve requested a trial of Yeti to determine whether that package might have a means of resolving this problem. If you know of a way to do it in that software, please let me know.
Update: I’ve tested out the hair in nHair. Turning on interpolation there gives similar results, where as without I don’t have such a problem (though I’m then lacking many of the advantages of xgen), so interpolation is definitely the problem. Unfortunately there does not appear to be a way to control the interpolation strength along the guide hairs… unless there is some way to plug a ramp into it or do it via an expression… I’ll have to look into that.
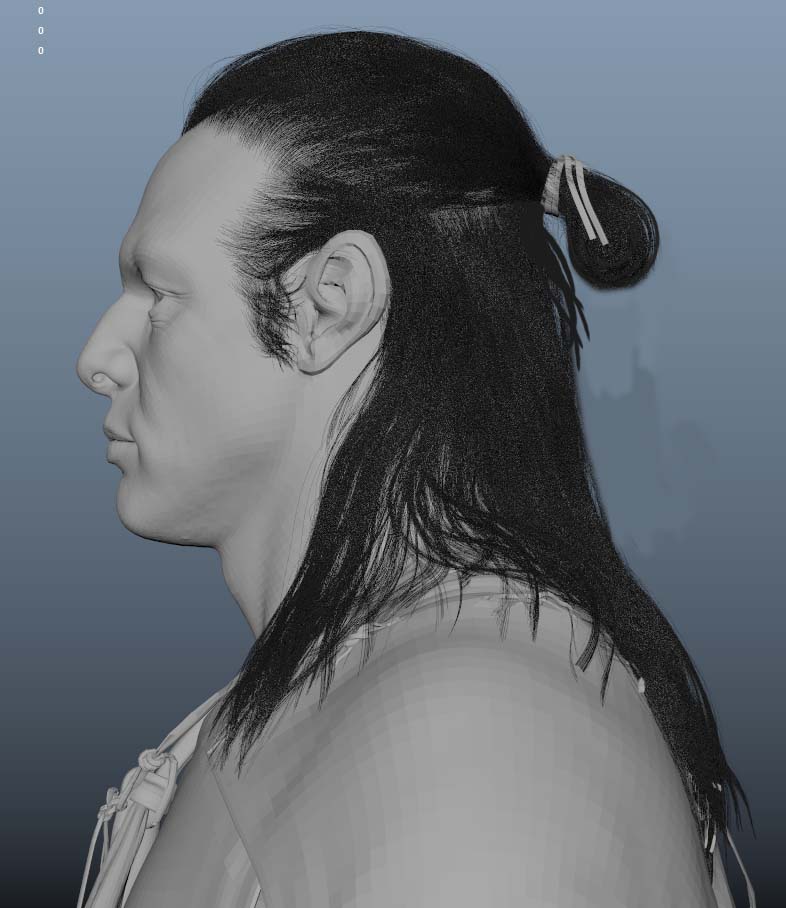
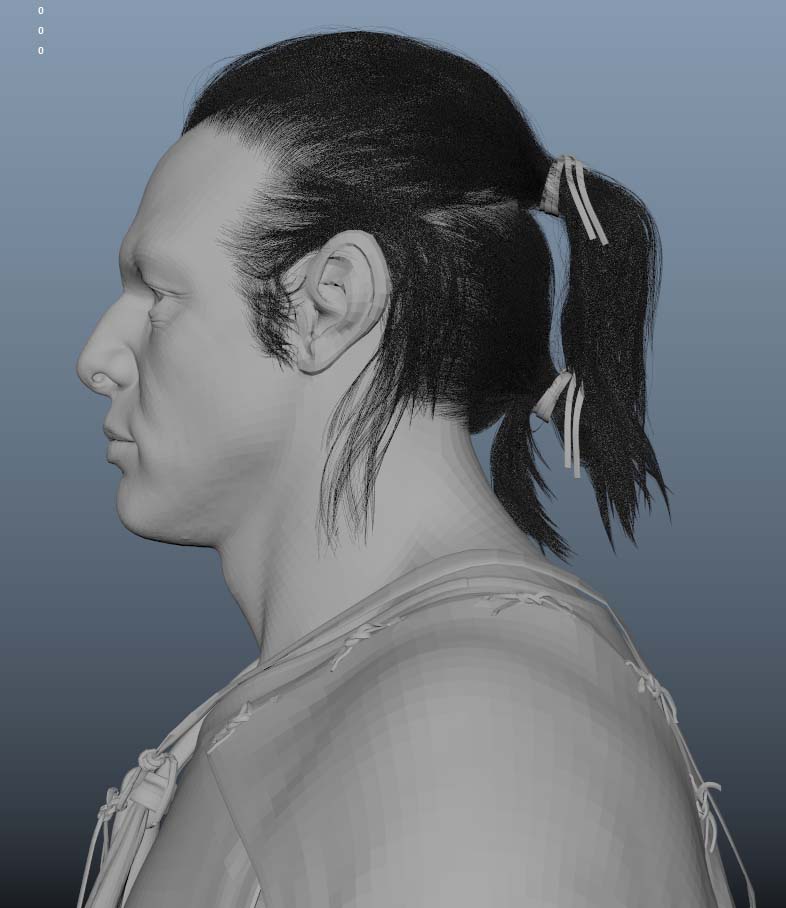
Anyone want to offer an opinion about these potential hairstyles? Feel free to suggest alternate variations.
I was sent a private message asking about how I generated the head hair for this character shown in my last post. For other’s benefit I will answer the question here.
The image below shows work I did on the fur for the legs using fibermesh. At the time I just wanted to see if fibermesh would be a good way to go for this task. I like the result, but since there does not appear to be a way to convert these curves to xgen groomable splines (the preferred method for much of the leg hair), I’m not sure how much of that work I will be able to actually use.
I LIke the 1st and 2nd one  this is looking so cool man ! cheers!
great progress here. those last profile pics looks really good.
i think the first one is the best suited for that character.
looking forward for more.
-r
I like what I am seeing with these hair/fur tests.
With regards to your Fibermesh tests for the furry legs, have you tried to export the Fibermesh as Maya curves, and then use the XGen Utility Convert Curves to Guides in order to bring your Fibermesh groom to XGen?