ZBrushCentral

Diary of a VSWIP (Very Slow Work in Progress)

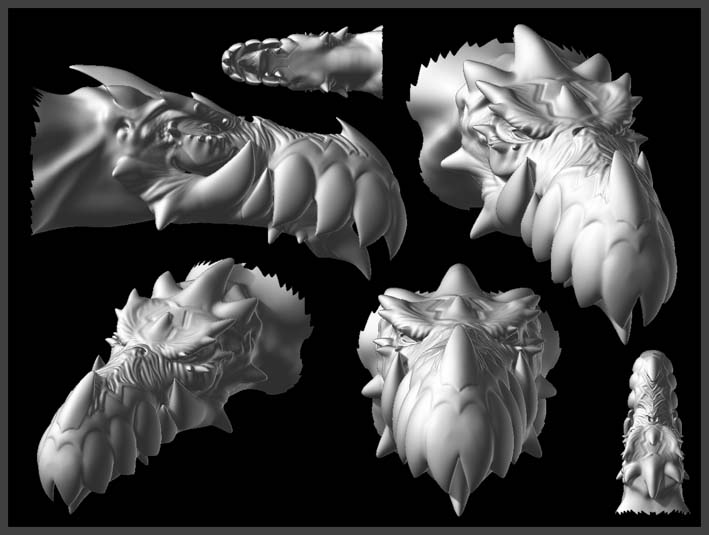
Ah yes, the notorious run away vertice syndrum.
This has happend to me a few times. Normally the offending vertice is only dissplaced at the highest sub d level. I have noticed that there are usually 2 reasons why this happens. One is that you have subdivided the model way beyond what your system can handle ( happens to me sometimes at around 4 to 6 million polys ), or you’ve saved your model at a sub d level other than level one.

There are many ways to fix this such as using smart resym, which however may not work because the vertice is too dissplaced.
You could try moving it manually to get it as close to the original position then mask off the good side then try smart resym.
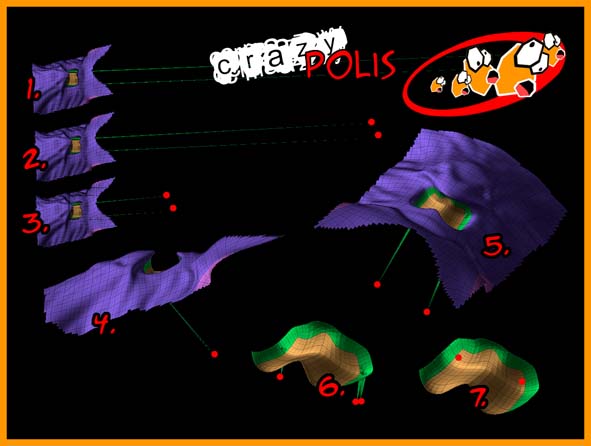
You can do this by hiding the faces around the vertice until it is clear of any obstruction then hiding the rest of the faces in your model until you are left with the face that the vertice originates from. you can then use the move tool to nudge the vertice back into place as close as you can.

I have tried the same thing myself, but have noticed that even though I fixed the problem, it often reoccurs again. I think that it may be becuase the file itself has become corrupted in which case there’s not much you can do except maybe delete the highest sub d level that the problem is at and detail it over, or just start from scratch.
Sorry, I know that this does not sound too incouraging. Unless someone else has a better solution.

Woody:

or you’ve saved your model at a sub d level other than level one

Now this is one of the reasons I started this thread… It would have never ocurred to me that you had to save the model at the lowest level -there is no smiley that could express my feelings right now!.. well, this one is pretty close except that he’s on the top of a building ready to jump-

I’ll try to deleting the SubDiv that has the problem… let’s see…

Thanks Woody

Your welcome.

It is a very cool model and I would hate for you to lose all of your work. Please try the first method by moving the vertice back into place. If you still have problems like the vertice moving again or a different vertice moving out of place, then try deleting the highest sub d level then detailing it over again.

hi,

alot of times this will also happen from using the hide mesh feature at higher subd levels…it’s really really important when select hiding to make sure double sided is turned on, spin that model around, zoom in, especially at higher subd’s when using hide select…cuz it’s really easy to miss a point.

in my links…first one to get is PSnap …the beauty of this plugin is the latest version allows you to not only save your model in incremental file numbers at a whim…but it now saves them in the lowest subd level automatically for you. Please give a big thank you to Svengali in that thread after you download it and see that there really is a god!

There are many more that one shouldn’t live without either…check em out.

model on…

Think about it this way. Each polygon requires a little bit of memory, and then every time you want to do something to the model, like look at it (i.e. render it), it requires a little bit of math to be done. Your computer is pretty good at doing math very fast, but when you ask it to do that math 7 million times over you may start to notice that seems kind of slow, and if you exceed your main memory then you’ll experience a whole other level of pain when your system starts thrashing, which can happen when you’ve asked it to keep more in memory than it actually has. So it does some work with virtual memory to keep you happy, but at a very severe performance penalty.

Now, if you hop down a couple of sub-division levels to say 437500 polygons your computer will have to do about 16 times less work to make your wishes come true, and you’ll be a happier guy, and since the memory requirements go way down too you will be less likely to end up thrashing as well.

Keep up the good work.

Hey! Seems that everybodies at home on Memorial weekend! -good for me -

Woody:
Thanks man for your concern… but now that I think of it… it’s probably because you nor nobody wants to see that awfull first zsphere mesh again! hahahahaha
I’m trying to find that crazy poly

Aminuts:
That’s exactly what I was doing, hiding the mesh at the highest level! I’ll try out Svengali’s plug-in and of course I’ll thank him and you for it

billrobertson42:
Thanks for the explanation man! I was just re-reading the thread and saw that that was still unanswered

Huh… just two more questions before Aurick kicks my thread into the lonely forum:


  • As I mentioned, I have 1G of ram and the settings in the Preferences/Compact Mem are at 700MB… is that ok?
  • Displacement maps are only to be used after doing all the modeling or could you use it as you sculpt your way on?
Thanks guys… This is what makes this community so AWESOME! -not my thread of course -

As I mentioned, I have 1G of ram and the settings in the Preferences/Compact Mem are at 700MB… is that ok?

That sounds about right. Normally you would set that to about 50 to 75% of your amount of ram. If you can afford it, 2 gigs of ram would be better. There’s no such thing as too much ram.

Displacement maps are only to be used after doing all the modeling or could you use it as you sculpt your way on?

That is only used at the end of your modeling session before you export your model out to another program.

Life is Good and the Sun’s shining over here -literary speaking-… so there are good news … well… for me anyway

First of all I want to give a BIG round of applause to Woody. He insisted that I should find those crazy poligons instead of deleting the highest level… so I did and finally with a lot of caution I found them and pushed them back into “sanity”
Thanks Steve, now I know where “Grandpa Teenywink” comes from … and no hammer was needed

Well, this one’s for newbees out there -I’m included-

Basic Structure 8-1.jpg

So my fellow newbees… save a lot. I didn’t lose too much because I’m used to save the same model with different names as I work -just in case things like this happens-

Another related tip would be if you have an undo restriction as I do, is to save in the same file the model until you are going to try something radical or new. Before doing that, save and then do the risky thing and if you’re happy with it or you’re not too sure about it, save it with another name like: Model1, model2, model3, etc

And yes, Svengali’s PSnap does this easier and also as Aminut explained, it saves the model on it’s lowest level… which means it saves A LOT of space on yor hard drive… Thank Aminuts -already thanked Svengali -

Thanks everybody for their interest and support in answering my basic questions

Attachments

Basic Structure 8-2.jpg

yep, i also had a problem like this, sometimes the poligons seem to go tarvel somewhere far away :confused: 
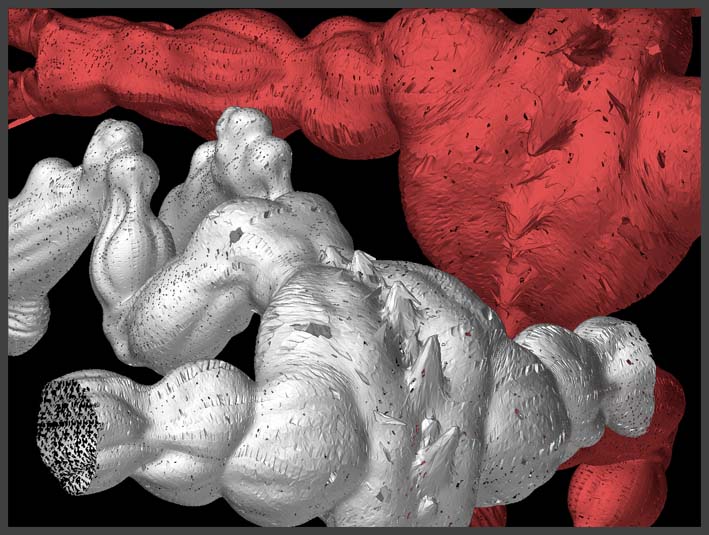
sometimes it is really hard to find them and move them back in place :confused:

Yep! Been working on the head. My biggest problem is struggling with expanded polys -I’ve already mentioned this -

Basic Structure 8.jpg

My buddy Ezequiel’s getting a bit “horny”
-Man! what on old joke -

I’m Tempted to SubDiv even more… but I’ll detail the rest first and then take a decesion -from general to specific -

Woody: There’s no such thing as too much ram

How about questions?


  • Is a displacement map proportionally as big as it’s original mesh?
  • Colors are also affected by a low poligon count or where the they have been too expanded?
Thanks gang

I wouln’t subdivide more unless absolutely necessary. You should have more than enough detail capability here.

As for your other questions, displacement: not sure what you are asking and in realtion to what… In most apps that handle displacement it’s called at time of render to free up the animators from having to be burdened. The maps are what the maps are in size for time of render (some control can be exercised depending on applications involved).

As for colour, the map is what you set, doesn’t matter what geometry, if you set a 2048x2048, that is the size. I am tired, so I may have misunderstood. :wink:

Hey what’s up the model is looking good, I dig the head. The dark spot on the front toothe looks a little weird to me. Im a noob myself too, going to have to check out that psnap plugin sounds usefull =P. I had a file go corrupt on me too =/, not sure what its deal is, may try sending it to someone with more ram to see if thats the problem. It dies everytime I try to open it, except for once which then died shortly after haha. Only have 512 ram atm, im super poor tho so gonna be a bit till I can get more.

One thing I see that you may have missed in all of this - To see what you truly have you need to turn of the “Quick 3D Edit” button on the top labeled quick.

Then you need to go to Tool>Display Properties> and set the smoothing. Those nasty little facets will disappear. What you are seeing with quick enabled is not what it will render out to be. I misunderstood that at first and kept going to far. If your head is around 1.5 million polys, you should be seeing detail down to nearly the pore level.

Smart way to start out. I used the beat my head against the wall before I ask anyone method. I got a sore head for my trouble:o

Hi guys

Jason Belec:
Thanks for the answer with the color question -now I get it… I think so What I meant is if there’s a difference between a displacement map made from a mesh with 500.000 polys and one with 2.000.000 polys. There probably are differences… but just want to be sure what are the differences
Personal note Don’t over do it man, get some rest

cspalak:
Glad you “dig it” There’s still a lot to refine in the head, but it’ll do for now… off to another part -and the black hole is just 2 little bumps together between the teeth-

Blaine91555:
Its funny because your signature is one of the first of many things that made me laugh in this community I’ve always wonder how Alaska really is
Yeah, I’ve tried moving the smooth slider, but as you can see in the image, there’s not much of a difference because it’s already at 0.5 and yes, I do turn off the quick button off. I just turn it on with the Frame button so you can see how the polys are aligned

So I hope this images makes the issue a bit clearer

Basic Structure 9.jpg

The whole model has at this level 2.568.512 but the head alone has 305.664 and as you can see with the “expanded polys” the level of details are a bit limited, but I think that as I gain experience I’ll coe around with some solution.

And yes, I’m making up the questions as I go… because as I mentioned before… I know squat about any 3D related issues and if someone can learn from my mistakes, that would be great… take it as a legacy from a clumsy Zbrusher

PS.
I write with a bit bigger letter just to make it easier to read… but at this rate this thread will have 56 pages of my own nonesense

Again, thanks everybody

Hi Elarcano

I have to agree with Santis it a great looking monster and very different from the norm…Wish my imagination was as good as yours.

I hope you get your problem sorted

Dreamreef

The style is awsome…

Is it a custom design?
I love the mix of very precise and fine details, and cartoon proportions…

Hi gang -again-

Dreamreef:
Thanks for the compliment! But as we say over here: “There’s nothing new under the sun” -it makes more sense in spanish-
Once I had a “Theory of Art” class and we tried to find a concrete definition to what Art is -the oldest question… well, maybe the who was first-chicken-egg question beats it
And we couldn’t find it because there was so much to take in consideration… but one of the things that we could point out is that there’s some kind of succession of ideas. As you can see, nobody went from Early Renaissance Painting (Jan van Eyck, Piero della Francesca, etc) to Conceptual Art (Joseph Beuys, Joseph Kosuth, Piero Manzoni, etc)
To some point -in shorter terms- there has always something that has influenced artist. It’s like with Exquisite Corpes, you start with one thing and end up with another… but there’s something that links them… … ok ok… I’m boring everybody -or whomever is still reading this -… What I wanted to say is that I’m sure there are a Lot of images, ideas, artists, etc that may have influenced me on “creating” Ezequiel… but thanks anyway for the compliments on that I really really apreciate it

Sebcesoir:
Hey! Aren’t you one of the guys I look up to!!!
It’s Soooo cool that you say that about it Sebastien!
Ezequiel’s one of many characters for a personal artsy farty project -it taking forever!- My local colleagues think that I’m already artistically dead

Thanks everybody for taking the time to read this thread and to the ones who post on it.

I have just a small request… I’d like to know you first names -just to make it a bit friendly-… I wonder what’s Jason Belecs real first name?

PS.
No comments on the big letters? So I see nobody’s complaining, good

[Sebcesoir]Is it a custom design?
Oh! I misunderstood that one
Yes, I did designed it

Here’s a little update… not much, just detailed the back, the shoulders and some flirting with wrinkles on the neck

Basic Structure 9..jpg

5:13 am… need… to… sleep… zzzzzzzzzzzzzzzzB

:wink:

Watching with interest. Looking very promising. Got to love those early morning modeling sessions … no interruptions, no distractions.