ZBrushCentral

Create solid base from topographic photogrammetry model

I have a photogrammetry model of a ground surface that I wish to add a base to. I have seen several tutorials for other softwares, but as it is a high poly count model it is dificult to use these (blender etc). I am somewhat familiar with Zbrush, but can’t seem to find the right method for this. I have tried adding a cube subtool and using boolean functions, but nothing seems to be happening. Are there any tutorials for this kind of operation?

To be clear; my mesh has 0 thicknes to begin with, i.e a single sided plane.

I made a fake terrain at 16M polys by spraying the standard brush on a 3D plane (zero thickness) and enhancing details. Then I did the following:

  1. Duplicate the original
  2. ZRemesh the duplicate (Adapt off, defaults otherwise) - leave you with about 5k polys
  3. Subdivide the ZRemeshed version to high poly count to capture the detail (I went to 20M)
  4. With ZRemeshed duplicate selected and the original visible Subtool:Project All
  5. Drop to the lowest subdivision and Freeze Subdivisions
  6. Zmodeler Brush (BZM) Extrude:All Polygons to give it some thickness.
  7. Unfreeze Subdivisions - detail will be restore to the thickened model

You’re left with a solid with the upper , side and bottom surfaces with different polygroups so you can easily thicken further, boolean or whatever.

There are probably other ways 'coz it’s Zbrush!

hth

Thank you for the suggestion but it did not work for me.

Before:


After:

What I want it to look like is this:
image_2021-09-03_083713

The last image is taken from a tutorial for blender, but my high poly count made it impossible, and although it work when reducing poly count, the end result mesh had strange artefacts on the edges which made the model unusable.

“After” is when, after projection (step 4)? If so the projection looks weird. Can’t see how your before would not project.

I don’t know the scale of your original but perhaps I should have added a step 0 Tool:Deformation:Unify. For best results start with a Polystar3D. Then import your mesh (obj/stl?) into it. The polystar3D will be replaced and your model will take it’s place with the correct scale settings for subsequent export.

How many verts/polys in your original? Since the source is photogrammetry I assume it’s a triangle mesh. Are the vertices welded? Try Tool:Geometry:Modify Topology:Weld Points before trying to subdivide.

Are you sure your mesh is single sided? If you look from the bottom or do Tool"Display:Flip does it disappear? Perhaps run Tool:Geometry:Mesh Integrity:Check and/or Fix before trying.

Having said all this, I just thought of a much easier way. Assuming your mesh is contiguous i.e. vertex welded, with no holes in the interior then:

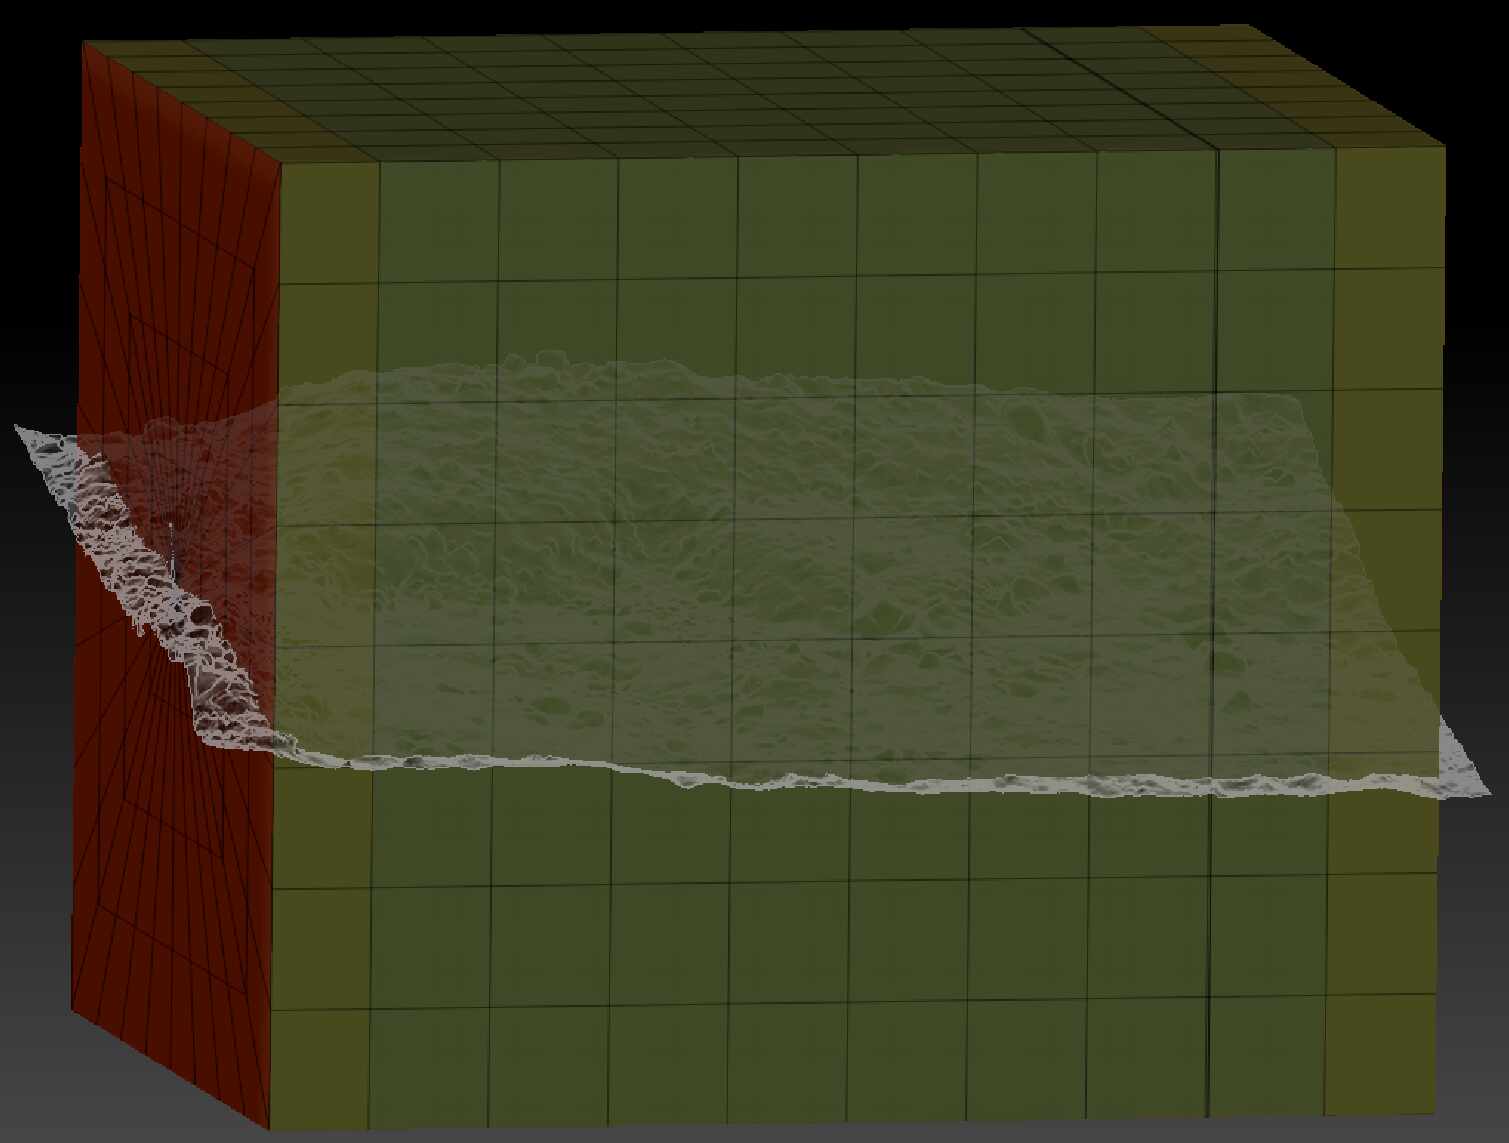
  1. Masking:Mask by Feature:Border (deselect polygroup & crease) - outer edge verts will be masked.
  2. Invert the mask - all verts except the outer edge will be masked.
  3. Gizmo:Unmasked Mesh Center
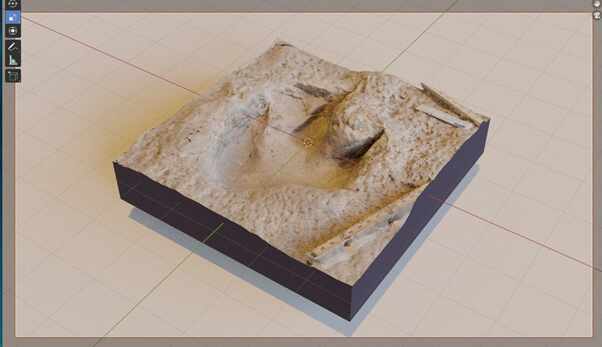
  4. Gizmo drag in the downward direction - you’ll get a “5-sided-box terrain”
  5. Unmask all
  6. Knife Curve brush - cut of the bottom of the walls dragged down by Gizmo. Knife will close the bottom of the “5-sided-box terrain” with neat topology. Knife is a new feature in 2021.7. Use Trim Curve if you haven’t upgraded yet.

@Kjellis85 - stumbled across a video that does exactly this. Check it out. Zbrush Boolean Photogrammetry

Good Luck

Great stuff, I got it working now :smile:

I also had to delete the new polygroups made from the cut and close the hole, but it all worked well.

I’ll test this in combination with the tutorial you posted.