ZBrushCentral

CGS Modeling Challenge: Conan the Barbarian

Great work Kraken.

Good to see you post early models. Too often it seems people just post final images, which makes me think they are posting for praise rather than constructive critisism. Not that some of those images are not spectacular… they are.

Anyway I look forward to seeing your updates.

5 from me.:+1: :+1: :+1: :+1: :+1:

Looks great, muscled but not overdone.

I hope I’m not going too off-topic, but is this the zbrush 3 material? And if so, is there a link for it for use in zbrush 2? Thanks a lot.

I uploaded this before to Mahlikus the Black’s cool material thread, but here it is again. Basically it was my own attempt to recreate the material in the ZB3 video.

Been working on making it into a better skin material. I’ll upload that onewhen I get it finished.

hey mate, im really looking forward to seeing how this turns out… still would love to see him in his black and white warpaint though

That’s about the 20th time I’ve had people mention the warpaint look. I think I might just do that! :lol:

Plus I think it will add more power to the rendering.

i think it was me that first mentioned it over on cgtalk, sorry

any texturing is going to look good on your model, i i think your in a good chance to win the comp, as its one of the strongest entries i seen so far

keep it up

Another head update with displacement test in Lightwave.

ConanDispTest1.jpg

Thats looking real good. Im very interested in seing what happens with this as iv just taken on Lightwave as my new and finnal application.

this is looking really good so far, my only critique is that to me his face was not so lean/old in the first conan movie as you have made your model.

Here’s a much cleaner version of the displacement map. The previous displacement render used a base mesh of about 2800 poly’s. This one uses the next level up with about 11000 polys.

I worked on the poly hair last night and failed miserably. I tried using a lot of thin strips and placed them over the dome of the head. The idea was to get Lightwave’s Motion Designer gravity to let them fall loosely into place, then export the shape to work on it and fine tune it. The result was horrendus though. I’ll try a different approach tonight.

I also continued work on the skin shader.

Conan1Render.jpg

Kraken,
The skin shader looks pretty good as well as the SSS. Have you already applied the UV maps yet? On the hair especially on the “Barbarian” you might try using Sasquatch lite, by using hair “zones” with distribution weight maps. I too have seen outstanding Poly hair that moves naturally and looks natural. I’ve never personally tried it but I remember a tutorial going over both Poly hair creation and movement. If I remember rightly they used a weight map on it to stiffen it at the roots and then used “cloth” to Motion design. I know that many on this board sneer at Poser, but there has been a lot of work done with poly hair on the various forums and I know there are many tutorials on the subject, although most have to do with Anime hair. I’ll look around and see if I can locate the LW poly hair tutorial that I remember.

Hyper,

I haven’t applied any UV’s yet. I’m thinking that since I do most of my texturing with ZBrush and ZAppLink that I’ll just use the AUV tiles. I did that for my frog and it seemed to work pretty well.

Also, I found a tut here for the hair guides. This is what I got so far. I need to go back and do some adjusting, but I think Saslite will do just fine. :smiley:

Almost forgot to mention that these are Conan’s wrapped leather bracers. Sculpted and textured in ZB. Test rendered in ZB.

WristLeathers.jpg

Attachments

hair.jpg

Looking great man . I can’t wait to see it all as one. Are you still modelling The Governator or are you starting to texture him now?

Things are going a bit slow this week, Jesse. I had to finish a couple other design projects (my recent bunny being one of them) before getting back to this.

I still have to do the pants, boots, belt buckle, and a couple other props. Then I’ll texture him up. Once I get him rigged and posed properly, I’ll sculpt some finer details in him to solidify the pose. Flex muscles that need flexing… that sort of thing.

Kraken,

Yeah, I haven’t used Sas Lite for some time, and I hadn’t seen that little tutorial. Your hair looks pretty good so far. Sas Lite’s hair is already a little course, so it just right for Conan! I can tell that lighting is going to be the money maker on this project. I found the Anime hair tutorial, I saved it to my computer. :laughing: 
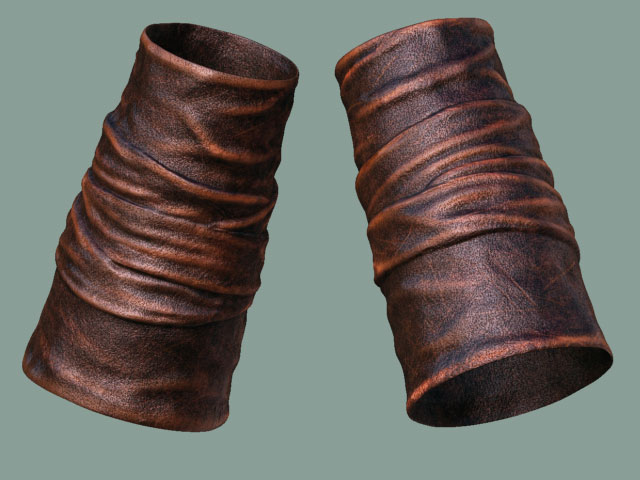
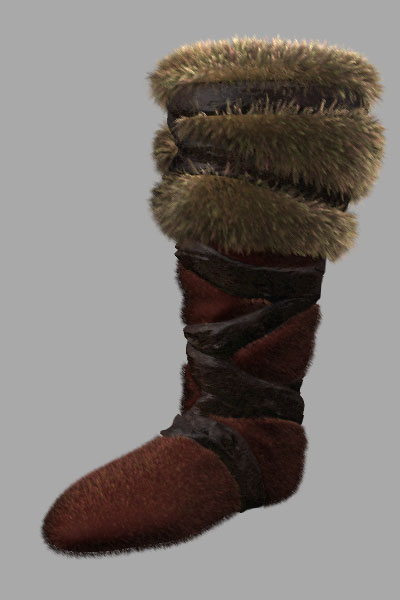
I’d recomend an HDR with a little back lighting as a possible first approach to bring the hair to life. Your Leather looks Great! Won’t it be fun to be able to grab material with ZB3!
Keep up the good work.

Finished the boots and belt. Now on to the pants, necklace and headband.

The belt buckle thingy was done in ZBrush then exported as a normal map. If I do a closeup of it or render it from a certain angle, I may need to do a displacement for it instead.

Belt.jpg

Attachments

Boot.jpg

Great stuff man,looking forward to seeing this completed!:+1:

Kraken,
Great work on the fur! The glossiness makes it look like otter, or perhaps beaver. I like the slight clumping as well. I can’t imagine why you would need more than a normal map, you’d have to be reallllly close to see any clear bumps of a displacement. Keep on doing what your doing and this should end up a seriously outrageous peice of work!

Kraken, You got my vote on this challenge. Excellent work on the props. Go man go. I’m sure the final will be GREAT!

Perfect style for the clothing, it will be great!! Are you making the head-band-thingy too?
:+1:small_orange_diamond:+1: