Carter, I would love to see a tutorial!
Really amazing, can’t wait to see tutorial.
Carver,That is great I wondered how they were made when I saw the commercial. This is another huge plus and example of zbrush capabilities as well the use of zbrush for digital 3d prints. Keep up the good work …
Almost finished. Busy day. Huge distractions, like work, family, a sick rooster…yes, I said rooster. Long story for another time.
Thanks again for the comments! Tutorial will land tomorrow, I swear.
D
Never thought I’d say this to another man…
“Them are some GREAT lookin’ balls!”
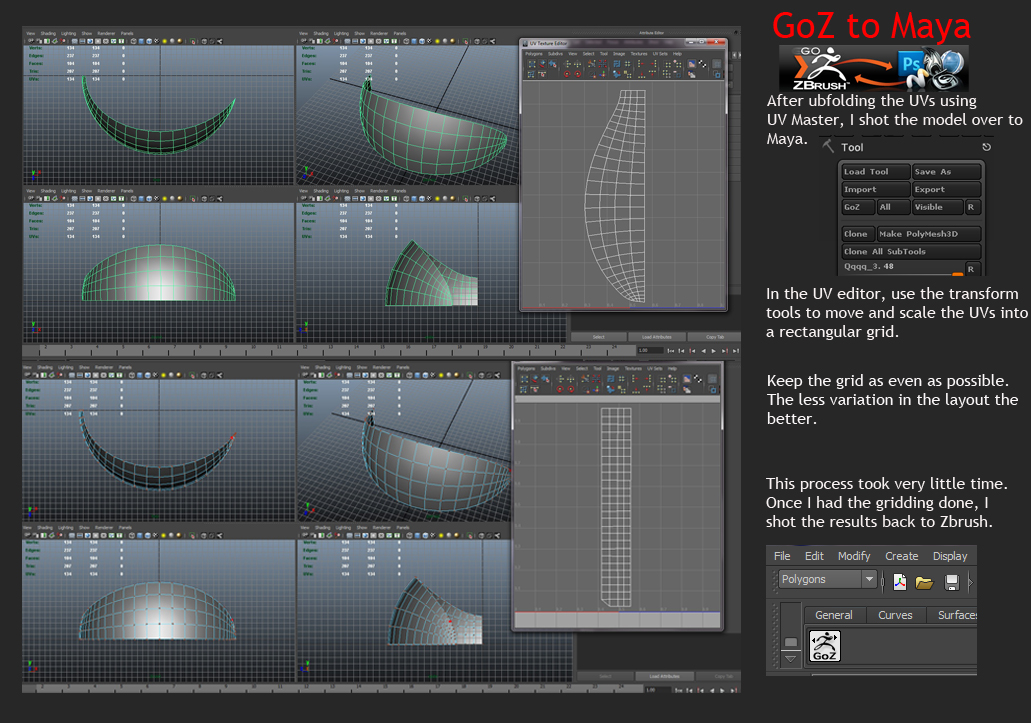
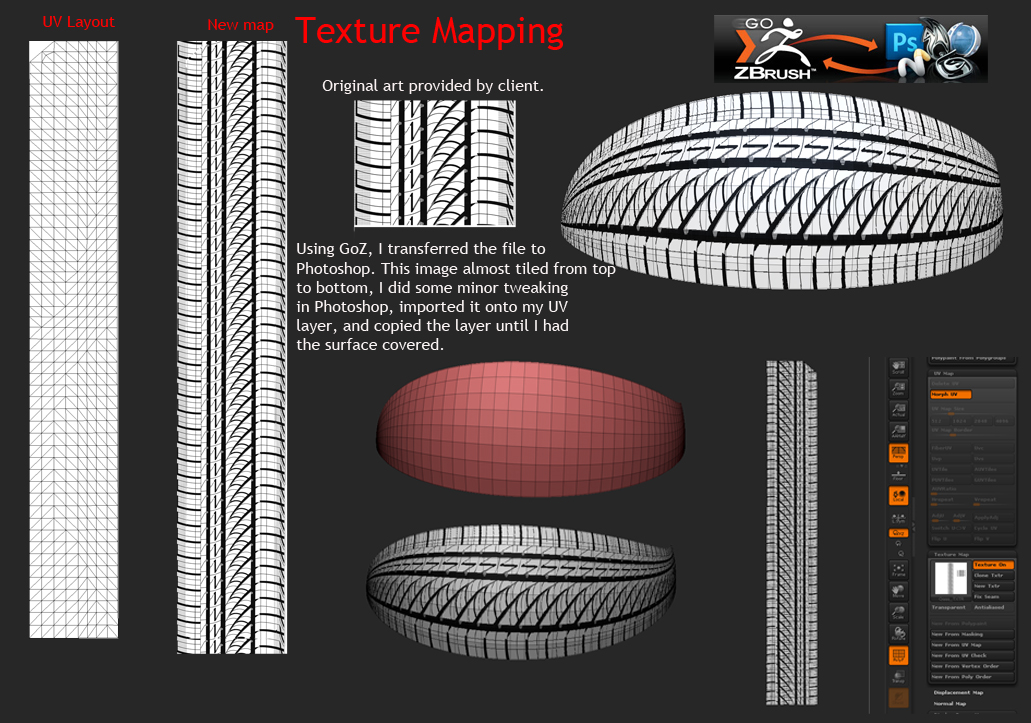
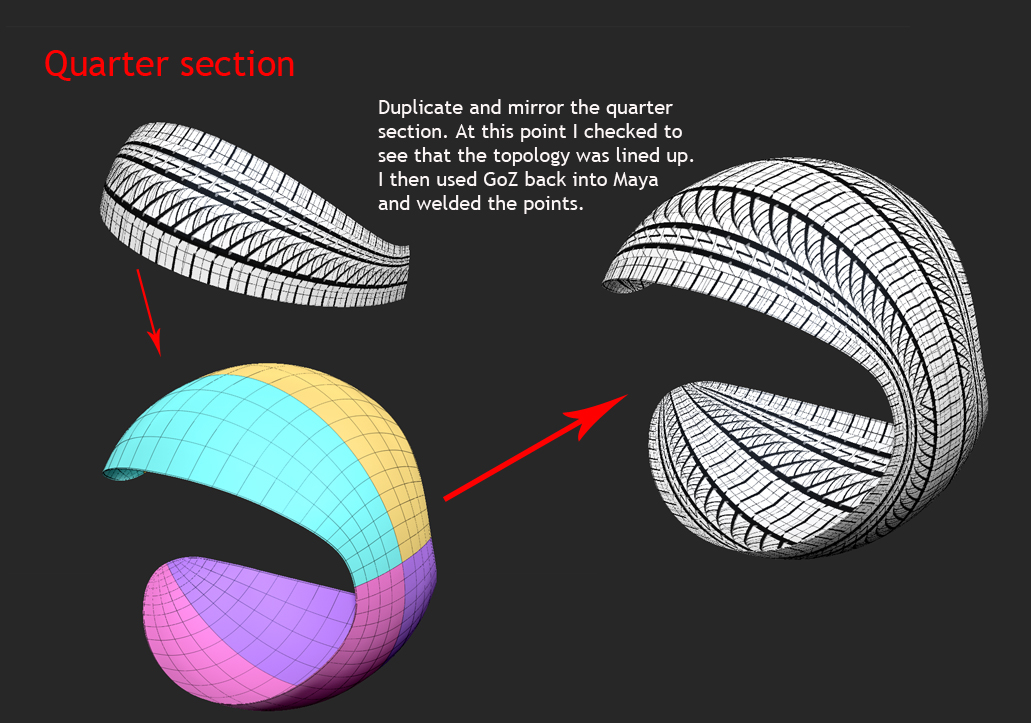
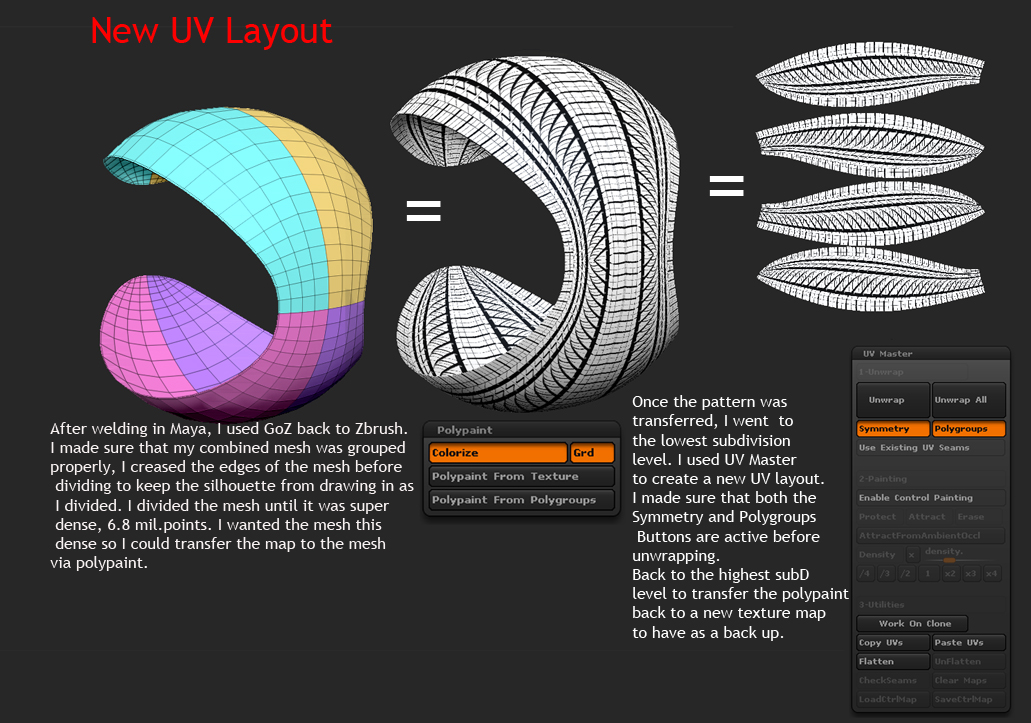
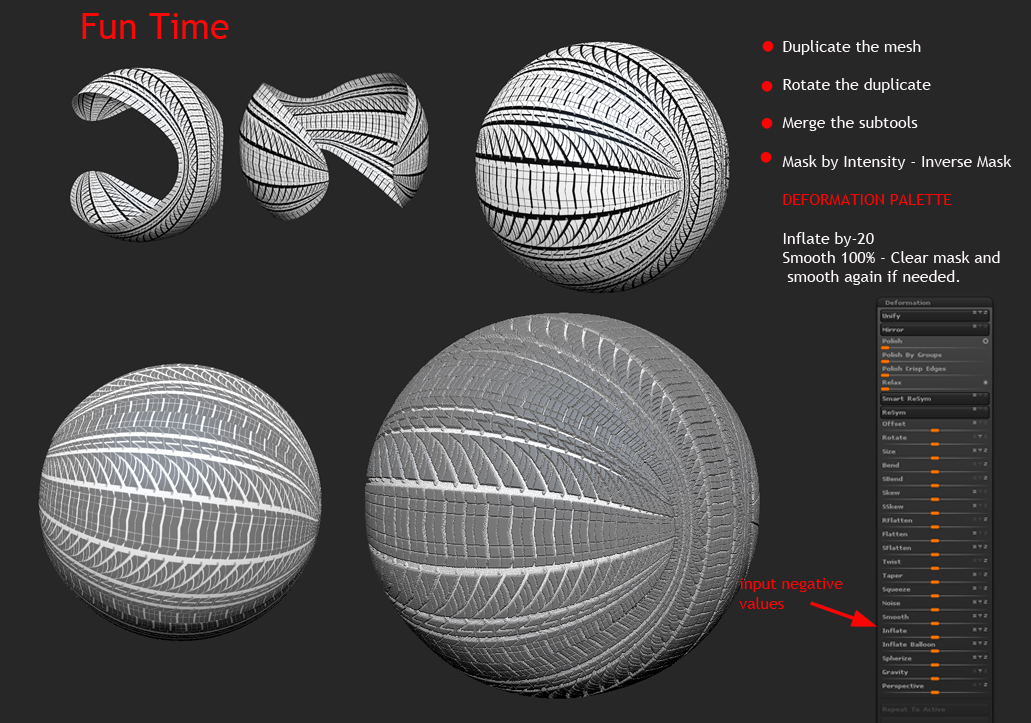
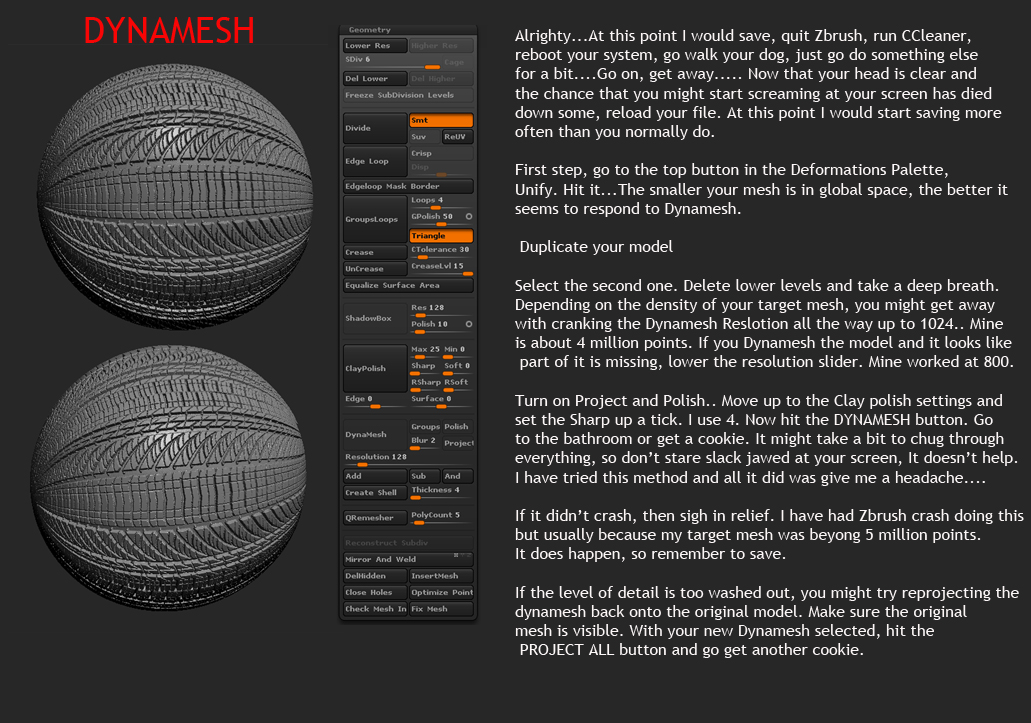
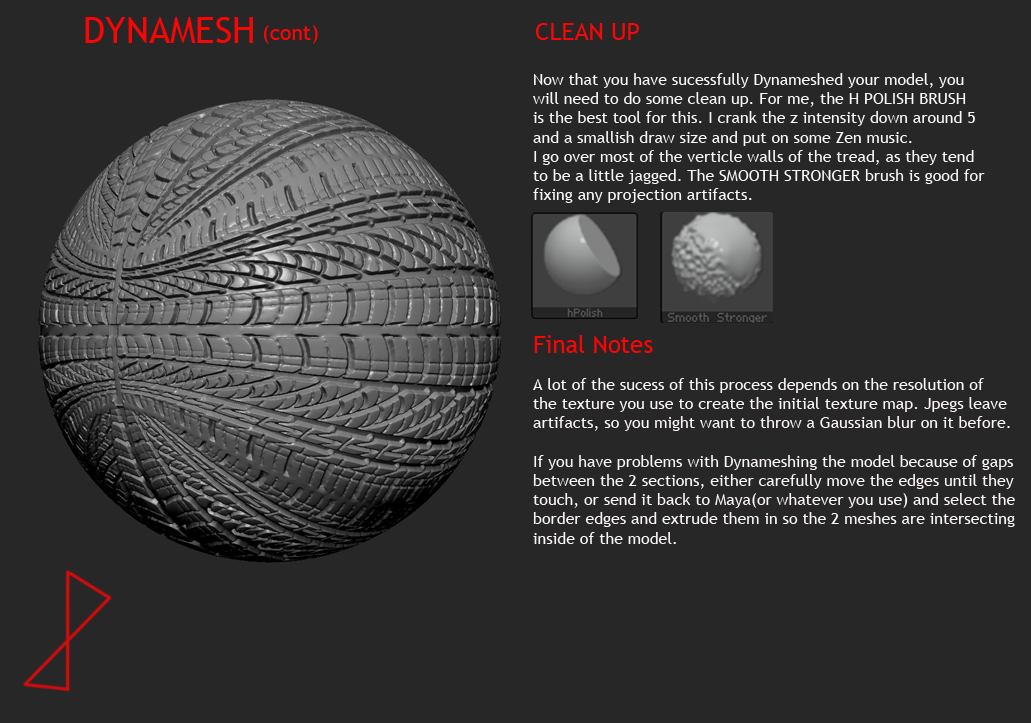
A day late, but who’s counting. The following is a brief outline of the workflow I used on this ad campaign. There are many ways to achieve the same result, and I am sure more efficient, but this method got me out from under the gun. I would also like to point out that I didn’t pull these designs out of my @SS. I was working under the guidance of award winning Production Designer Jeffrey Beecroft, and Art Director Sebastian Schneider. Sebastian produced concept art in Cinema 4D that I then had to match or surpass and beat a tight deadline. Derek Pendleton aka Carver

 If anyone would like to see how to prep a Zbrush model for printing, and the workflow I used to finish this project. Let me know and I will put something together next week. Thanks to all
Wow! Thanks a lot for the breakdown. Much appreciated. 
Hi carver, awesome work!!
I for one would love to see your workflow 3d printing prep.
I’m having a tough time at the moment with a model I’m working on, I need to export as .stl but when I do its a huge file, it needs to be under 30mb for it to be silicone printed and for it to keep its dimension.
Thank you so much for giving us a tutorial on your great work mate!
really great workflow how you did that mate! Thanks for the effort you put in!
Looking forward seeing more from you carver,
Happy sculpting,
- Kenny


Hi Carver, Sorry for the late response to your well deserved Top Row! :lol: And thanks a million for sharing your workflow! All the best, David 
I used to do a bit of product design and hard surface work a long long time ago and well I just love seeing this sort of thing pop up in ZBrush. Congrats on a successful production path as the end results are spot on. A great breakdown too, so thanks for that. Its good to see you work with different areas both organic and product. Keep up the awesome work.
Arran
danko75 - WOW! Praise from Caesar…Your work is an inspiration to us all. Thanks.
3Point14 - Yeah, we should get royalties!
jemenna - Thank you!
Scythe - Thank you, I hope like the tutorial. A bit more to come.
KC-Production - I couldn’t agree more. Zbrush is King.
SolidSnakexxx - Thank you, sir. It is nice to see Zbrush used in the traditional Bronze sculpting world. Your stuff is tops!
nj0r0g3 - There are no stupid questions. The football was rendered with the Gorilla matcap. The others were rendered with soft plastic filled with 100% black. I used a custom matcap in The STL renders, following Ryan Kingslien’s tutorial. Check it out,
http://www.youtube.com/user/rkingslien#p/u/4/nIPpD21z3d8. None of my direct files were used in a digital way, as far as I know. I did provide the VFX crew with everything I had, but have no idea what was used or where.
Likesyrup - Thank you. Zbrush is the best.
jameaterblues - Thank you! :lol:
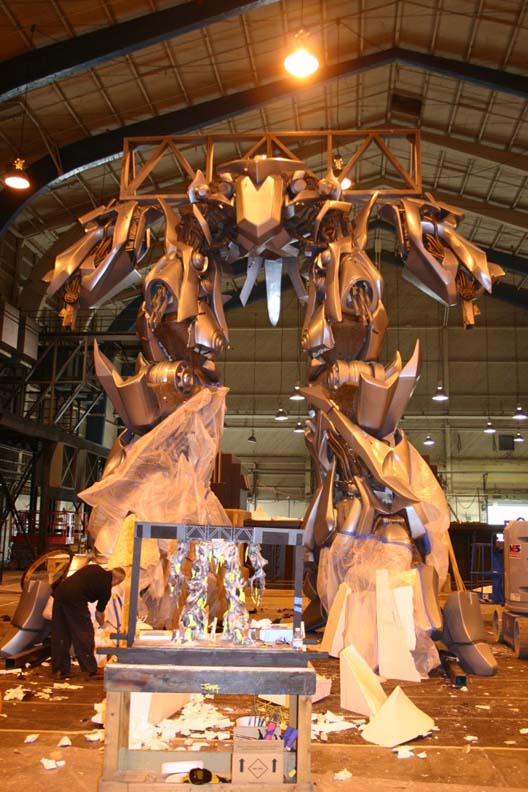
MentalFrog - Thanks. Printing items this big in elastomers for the commercial was a budget buster. It was discussed, but shot down due to cost and build platform restrictions. Woulda looked sweet though!
rudymassar - Thank you. Your work is superb.
spacemonkeydr - Thanks! It is really cool to see the designs come to life.
Ignorami - I hope you like the tutorial.
IvanKocic - Thanks!
Bigbear-Inkpen - Thanks!
Pi(x)el - I get that all the time! :lol: Thanks.
zber2 - You are welcome, sir. I hope it is helpful.
jonboywalton82 - I will get back to you soon. Busy weekend.
KC-Production - (pt 2) Thanks again!
chalkman - No worries, man. From the looks of your thread, you have your hands full keeping up with your own responses! As always, thanks for your kind words.
Arran - Thank you, and for your own guidance and spirit of sharing. The funny thing is, product design is not really my bailiwick. I am from the old " Hey, go make this, and fast!" school of sculpting and carving for the entertainment industry. Insane schedules with (usually) slim budgets…You either became adept at doing the most with the least, the fastest, or you were out on your ear. Their motto has always been, " It only has to look good to the camera, kid."
Hard surface one day,
The barnacled hull of the Fling Dutchman the next

Usually one of dozens of sculptors doing long days of back breaking work. It was a lot of fun along the way, but those days are behind me now. Thank god for Zbrush!
I think I got everyone in there. If I overlooked your comment, I apologize, and will thank you now. This community is great. I hope my contributions are as helpful as I have found from the rest of you. Keep sharing everyone!
Nice tutorial of your workflow! Id also like to see how you prepped it for printing as well!
… of your process, great work…
awesome, that’s very inspiring… i wish to move towards setting my skills and portfolio for the advertising industries as well someday.
cool lesson , thanks
I needed a palette cleanser before doing the tutorial on how I prep files for printing. I will get in it soon.
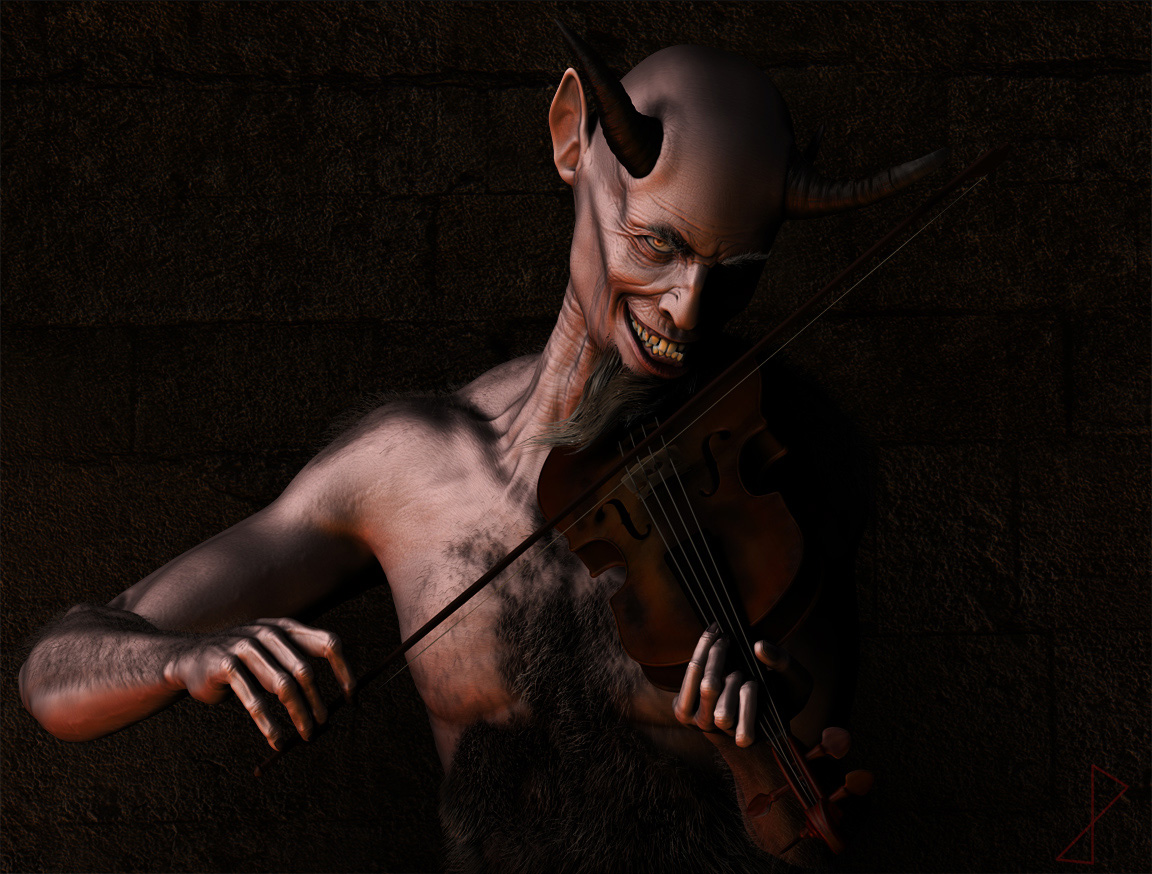 Ol’ Scratch
Attachments
Very well done! Charlie Daniels would be proud.
Hi Carver,
Another wonderful piece! I love his expression and the great use of fiber mesh! Bravo! All the best, David

Hey all,
I haven’t posted in a while. Luckily, I have been very busy. I started this Cassowary back in June when I was beta testing 4R4. I had to put her aside, only working on her here and there. I wanted to see how far I could push fibermesh assets, and after much noodling, I settled on this. Everything was created in Zbrush. Everything was rendered using BPR, and composited in Photoshop. I went OLD old school and created this as a forced perspective set. I created multiple layers of fibermesh plants and scaled each level to (hopefully) create the illusion of more depth in the background.
As usual, comments and crits are welcome.