ZBrushCentral

Bike Girl (nudity)

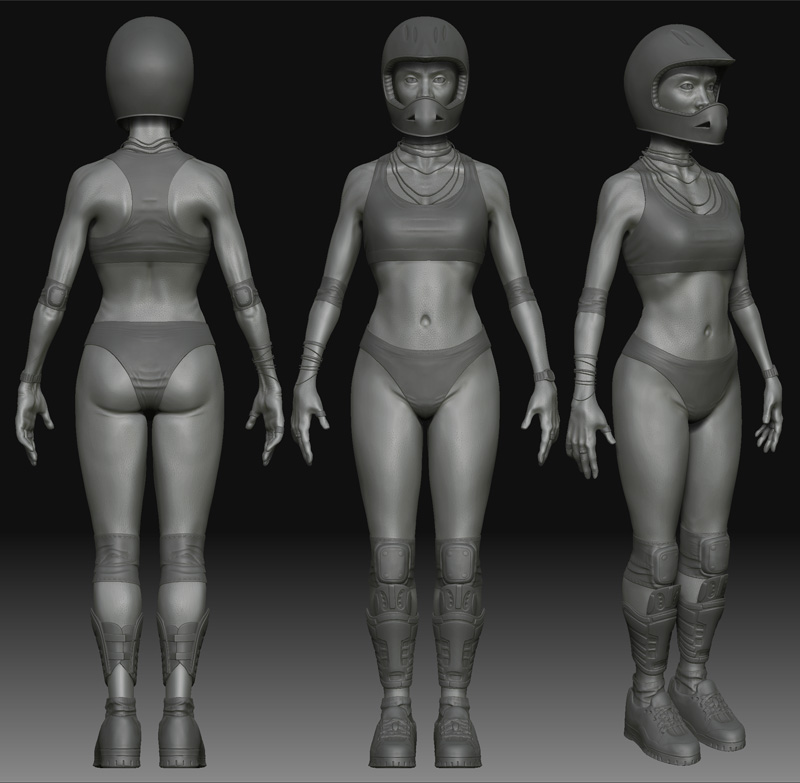
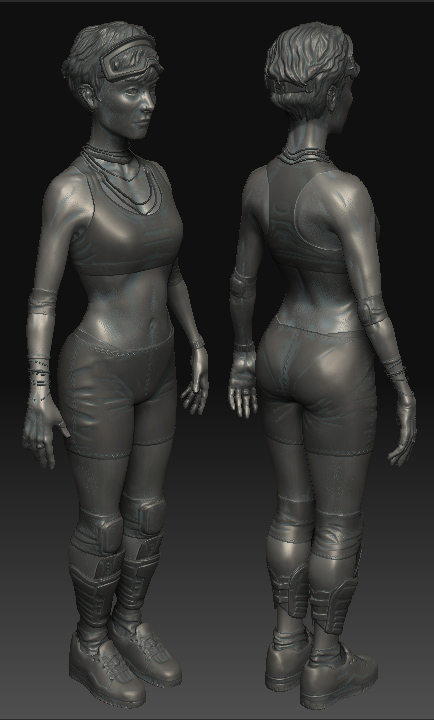
So here’s my latest piece that I’m working on, its the last piece that’s going to go in my portfolio before I finally put myself back out there to get new jobs. She’s going to be a bike racer, though I haven’t yet decided if she’s going to race BMX bikes or cross-country. Guess I should figure that out in the next day or two before I add the props and texture :slight_smile: Started from Z-spheres, the base mesh was brought into 3dsmax for some modification and adding edge loops, then back into ZBrush.

Any and all comments and critiques are welcome at this stage, I really want to get her looking nice and realistic and any small things I’ve overlooked will really help I’m sure.

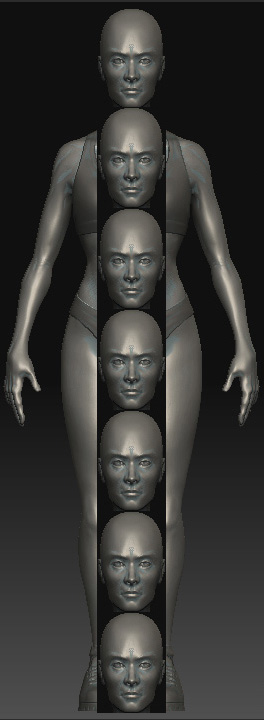
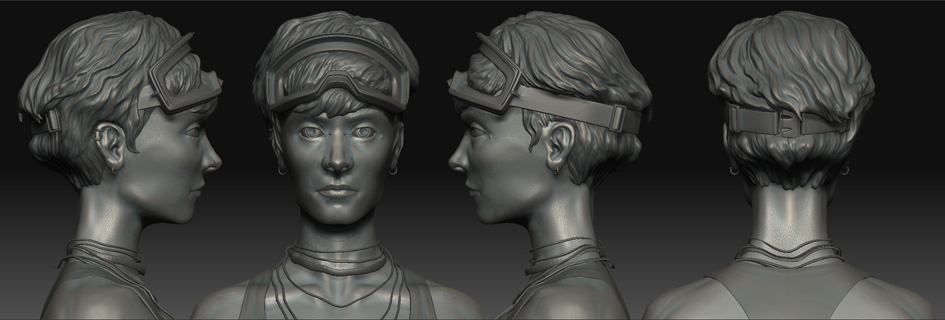
She still needs to be retopologized so that I get have a lot more detail in the face. Oh yeah and ignore the feet for now, there’s no details as they’ll be covered by sneakers :slight_smile:

[bikegirl-figure01nude.jpg]bikegirl-figure01.jpg

Hey, looking good, i would relax her shoulders up a bit… she looks a bit stiff and boxy… also with the shirt its almost falling of her shoulders. i would drop her shoulders down to lengthen the neck and collar bone and drop breats down just a tad.

Alright finally I’ve gotten a chance to get back to this girl and do some updates. Doesn’t look that different yet but really I did a lot, I retopologized her completely so I could get actual detail in the face (there was waaaay too much unnecessary details in the legs), and I’m much more satisfied now. The retop was done in 3dsmax and then the details were projected by bringing in the new mesh as a subtool, subding it, and applying “Project All”. An awesome workflow that imo is way easier than using Zspheres/rigging for retopology.

I made some adjustments to her body shape - relaxed her a bit, widened her hips, and other minor changes. Also I made some major changes to the shape of her face to make her more realistic looking and (hopefully) less generic looking. For facial reference, I’ve been looking at images of Shannyn Sossamon.

Tomorrow I’ll be adding hair, redoing her clothes, and adding props, before I start texturing.

As always, any comments and critiques are highly appreciated!

[bikegirl-retopped.jpg]

Hey,

the body is a pretty good sculpt, and the face is starting to look nice now with the detail coming in. The biggest problem I can see with your work so far is that the shoulders do not have any real musculature. That is why they look a little rubbery. Especially if she is going to be a sportswoman and therefore more fit than the average couch-based human.

Also the back of the head is a bit wrong. The widest part of the skull, where it pinches in to the neck, is positioned pretty much at the same height as the bottom of the nose. In your madel it is much lower.

But I am sure you can fix that looking at the rest of it. :slight_smile:

mick

Got some free time, so here’s another update. I gave her a bit more muscularity in her shoulders and lengthened the neck significantly, which now when looking back at the old one makes a big difference in my mind. I’ve finished up her face, added some finer details and redid the clothing. I’ve started working on some additional clothing and her props, then its onto hair, texturing, and posing! Maybe I’ll get a good amount of time this weekend to get it all done fingers crossed!!

[bikegirlbody-angles.jpg]bikegirlheadcloseup.jpg

I think you need to check your proportions. The head seems to big for the body.

Small crit really. Keep it up… it is looking good.

Well I was genuinely curious about this, as I haven’t actually looked at the proportions of her since I started the model. Check it out:

[bikegirlbody-propor.jpg]

She’s exactly 7 heads tall at the moment. You think maybe I should give her slightly less realistic and more “heroic” proportions?

Latest update:

[bikegirl-accessories-02.jpg]pants.jpg

Anyone have any idea of a way in which I can get the pants to have thickness and also retain the details from the original mesh? I might be making things harder on myself than they need to be as I can probably just redo the details but whatever, at this point I’m curious if it can be done :stuck_out_tongue:

I agree with the other poster on the head proportions, but to be more specific, it looks fine from the front, it’s the side proportions that are funny looking. The back of her head is really bulbous looking.

However, if she is going to be wearing a helmet, then it’s a moot point.

Nice work so far!

I second the back of the head being to large. Also the top of the spine should be level with the eyes or close to them. I think you could get away with the base of the head lining up with the ears. Combined with a slightly thicker neck so that she look proportionally more accurate.

Oops double posted. :eek: HOpefully this will be deleted.

Nice model! I have been tweaking out with the detail projection myself, until I re-read the tutorials finally figured out a workflow…
#1: Load up your detail model at full rez.
#2: New brush, import your low-poly retopololgized version.
#3: New Z-sphere, rig it with the full rez version.
#4: Select your low-poly topology, then press edit.
#5: At this point, DO NOT try and project your details! (exploding mesh likely)
#6: Make an adaptive skin at density 1…
#7: Save this skin as a ZTL…(this apparantly fixes the scale issue which seems to make the scary exploding mesh)
#8 Repeat steps 1-4, using your ZTL version of the low-poly version. NOW try your projection of the details…
This has been working for me, after many hours of frustration!
If you still need some thickness to it, maybe try doing an edge loop for the whole low poly version.
…Hmmm…After all that maybe a quicker way would be to just append your main model with the low-poly underwear, subdivide and use the project all function…then use the crease and edge-loop functions to get the thickness you are looking for! Hope that helps …

Hi Robodrew

For the Pants. This is a method I’ve used succesfully in the past…

[TryThis.jpg]

  1. Starting with lowest res mesh.

  2. Use DelHidden to get the mesh you want to create clothing out of.

  3. Use MorphTarget DelMT/StoreMT. Then use Deform Inflate (say 10?),
    followed by MorphTarget.CreateDiff to get a double-sided mesh.

  4. Append new tool as a subtool on original model and divide back down to
    the same subdiv level.

  5. Careful use of ‘std’ and ‘project’ brushes to conform the mesh to the
    underlying model.

Oops! I forgot a step here (3A?) You really need to crease the edges of
the difference mesh to stop them smoothing off (as has happened here).

G.

This is pretty much my final update on the model, any final thoughts?:

[[attach=84432]bikergirl-face-turnaround.jpg[/attach]]bikergirl-face-turnaround.jpg

The goggles have no glass pane simply because that will be added in last in 3dsmax during the final render.

Otherwise, onto texturing and posing!

Could you post a full body shot with the hair?

Sure thing, I should have put that in the last post :stuck_out_tongue:

[bikergirl-fullbody-turnaround.jpg]

Ooh a more petite model! Her proportions seem to work better now. Even though her head seems big, that not unrealistic. I’m working on a model of a women who has a realitively big head. It gives them a more youthful look.

Had a bit of a delay, but here’s the latest update. I set up her pose and am in the process of working on the textures now. The jewelry accessories were removed for now but will be brought back in within 3dsmax once I’ve set up the normal/displacement maps and exported out to there for final rendering.

[bikergirl-pose-turnaround02.jpg]

lookin sweet
the hair, cloth and helmet are all well done.

im not feeling the polypaint or the boots but can be easily tweaked good luck