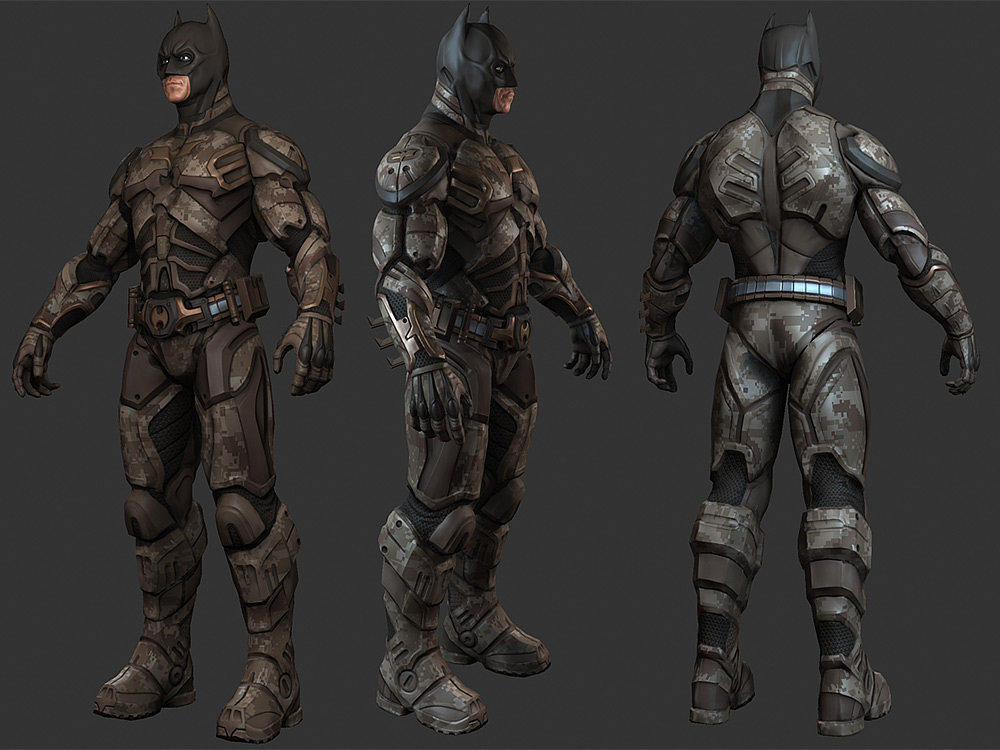
Excellent work + great texture
Oops my bad. Batman is DC.
wow !! very impressive ! great sculpt !
Great job as usual…i have been following yuor posts since your mike tyson thing…going real steady…i am noy really informed about this contest…i’ll check it out now…that it was created for the most part in Zbrush, makes it all the more outstanding!..great gunz!!!
Awesome work! Excellent design and the texturing as well. I dig it!!small_orange_diamond
first of all excellent work!
i just wanted to ask you,have u modelled the torso , head and the arms separately?
 wow - looks insane
Beautifully conceived and executed. Flawless stuff, man. Bravo.
Very,very good!!! Truly inspiring!!!
That’s killer sculpt piece. well done!
I am curious about this also, can somebody please enlighten us?
thanx a lot guys, really happy that you’all liked it.
whateverhappens: yup , all hardsurface sculpts are seperate, its easier and less demanding on the system
t00nacious,Slice:
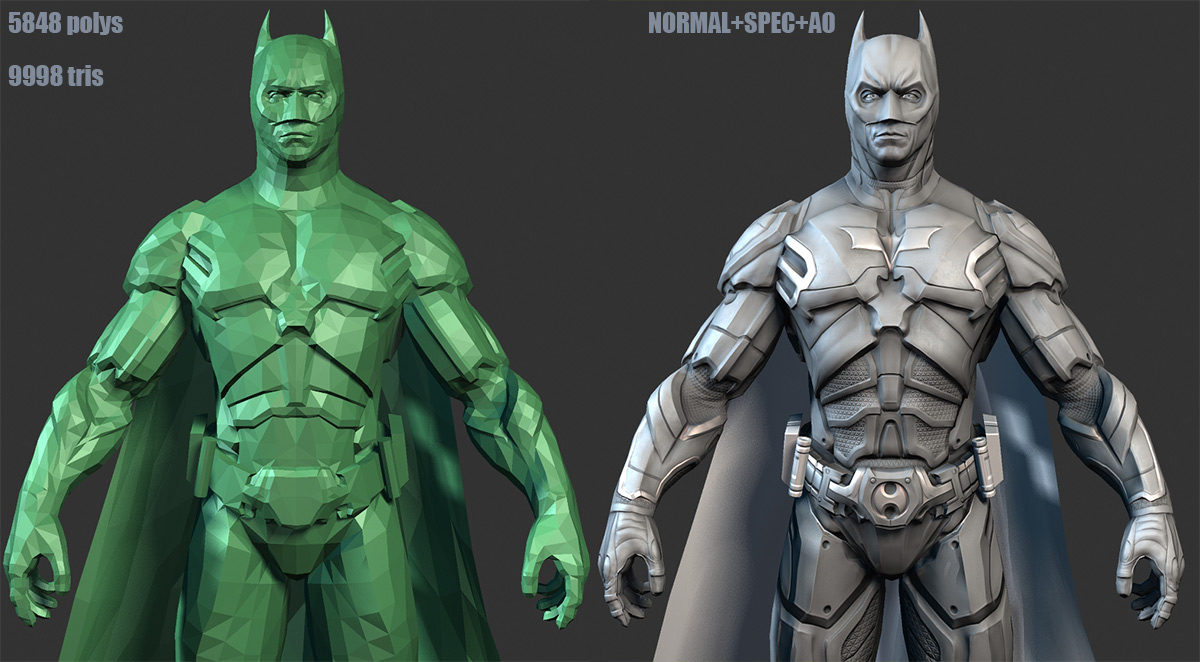
Top Left: Diffuse ( its a combination of plain color scheme and AO map,)
Top Right : Normal
Botton Left: AO Map( used in diffuse)
Bottom Middle: Specular Map
Bottom Right: diffuse and Spec for the Pedestral
Aberrant: i switch often Between Prespective and User.
regarding the Cape.
since i had a limit of 10,000 tris. and 1 2048 tex, i decided to use more polys on the cape and less texture space for it, since the cape is like always at the back, and is always deforming, going using a big uv space in the texture sheet didnt seem feaseble.
so i unwarped it , and tiled it between the head and torso uv, my main AIM was to make it functional and look good when in opens up…heres the process i used to do it.
[](javascript:zb_insimg(‘158783’,‘22.jpg’,1,0))
1.modeled the cape in max.unwraped and crammed alll the uvs in one place
2.took one part of the uv piece to zbrush ,added details and normal mapped it to the lowpoly version of it.
-
then added HSDS modifier to the lowpoly along with Cloth Fx and animated the simulation
-
took the initial and final cloth simulated meshes and morphed them. added another skin modifier and skinmorph(for better control of the cape) to the cape so that when open it moves with his arms.
im sorry for making this brief, i promised my self to do a complete tut on this, but havent found time due to work, batman made me lag a bit on my AWPFICE work!
You’ve nailed it again, man!
Even though, I ain’t a big fan of the Dark Knight’s costume design (from the movie).
Great work. Can’t wait to see your next char.
Maybe I missed something… but can you describe us how you could get the low res version in max with about 5.000 polys ?
On the image you posted it looks like the mesh is all in quad… but not completly sure… so would eb great if you would like to let us know, how you’ve got the very good looking low res mesh in max.
thx a lot
im not sure if this is what you were asking capu.but this process is called baking
after making the highpoly, we make a seperate mesh ontop , keeping in mind the volume and matching it as close as possible, on baking it we get this blue map(normal map) and a white shadowmap( AO), you can see these maps in my texture sheet. these two maps are the main one, while the AO map gives shadow and shades, the blue map calculates how the surface is suppose to look when you shine light on it, this information is taken form the highpoly.
the AO map is not actually used as a seperate map, it mainly used to add the shadow and shades to the diffuse map, witch is just flat colors without it
also the mesh is not all quads,it doesnt have to be. its needed only around the joints for animation.
im posting some early wips i did when i was working on this…
[]
[]
[]

[]

[]
whoa, bad ass!!!
would be cool to see what kind of weapons batman would use during desert storm!
OMG MAN!!!
your work, not just your batman, is amazing.
plz make a youtube video or dvd to show how you do this!!
great job
Masterpiece. Awesome. Wonderful.
Staggering work! Some of the best low poly modelling, texturing and sculpting I hace seen. Brilliant! 
i also have had the same question.
So your are saying: you did retopo it in zbrush? or in a other program…?
and how long does that take… to retopo…?
any pointers, would be so helpfull.